系统安全及应用-锁定解锁用户-控制用户密码有效期-限制特定的用户使用su命令-配置sudo权限普通用户使用root权限命令-Linux系统开关机控制-配置grub引导菜单-系统弱口令检测-nmap扫描
系统安全及应用
锁定和解锁用户
[root@centos01 ~]# tail -1 /etc/passwd
[root@centos01 ~]# usermod -s /sbin/nologin bob
再次查看账户信息
这次就是/sbin/nologin 意思为不允许登录
![]()
修改为允许登录
[root@centos01 ~]# usermod -s /bin/bash bob
使用usermod锁定用户
[root@centos01 ~]# usermod -L bob
查看用户状态
[root@centos01 ~]# passwd -S bob
锁定用户
[root@centos01 ~]# usermod -L bob
另一种方法
[root@centos01 ~]# passwd -l bob
解锁用户
[root@centos01 ~]# usermod -U bob
[root@centos01 ~]# passwd -u bob
锁定账户密码文件
[root@centos01 ~]# chattr +i /etc/passwd /etc/shadow
[root@centos01 ~]# chattr -i /etc/passwd /etc/shadow
[root@centos01 ~]# chattr +i /etc/passwd /etc/shadow
控制用户密码有效期
设置密码10天后过期
[root@centos01 ~]# chage -M 10 bob
设置用户下次登录修改密码
[root@centos01 ~]# chage -d 0 bob
设置命令历史记录
设置密令历史记录10条
[root@centos01 ~]# vim .bash_profile
增加命令
![]()
退出登录
[root@centos01 ~]# exit
重新连接
[e:\~]$ ssh 192.168.100.10
[root@centos01 ~]# vim .bash_logout
[root@centos01 ~]# vim .bash_profile
export TMOUT=600
![]()
用户切换和提权
su命令切换用户
切换到普通用户不需要输入密码,前提是当前用户为管理员
[root@centos01 ~]# su bob
普通用户切换到root,需要密码
[bob@centos01 ~]$ su -
[bob@centos01 root]$ su --login
[bob@centos01 root]$ su -l
限制特定的用户使用su命令
修改apm身份验证,允许wheel组用户使用su
[root@centos01 ~]# vim /etc/pam.d/su
#%PAM-1.0
auth            sufficient      pam_rootok.so
auth            required        pam_wheel.so use_uid
[root@centos01 ~]# vim /etc/login.defs
SU_WHEEL_ONLY yes
允许使用su命令用户添加到wheel组
[root@centos01 ~]# gpasswd -a bob wheel
[root@centos01 ~]# useradd tom
[root@centos01 ~]# passwd tom
切换至tom
[root@centos01 ~]# su tom
使用su命令
[tom@centos01 ~]$ su -
[bob@centos01 ~]$ su –
配置sudo权限普通用户使用root权限命令
配置sudo配置文件
[root@centos01 ~]# vim /etc/sudoers
切换至bob用户但是bob无法重启系统

配置sudo配置文件
[root@centos01 ~]# vim  /etc/sudoers
bob     localhost=/usr/sbin/reboot
[root@centos01 ~]# su bob
使用sudo提权执行重新启动系统命令
[bob@centos01 ~]$ sudo reboot
marry localhost=/sbin/*,!sbin/ifconfig,!/sbin/route
可以使用通配符*,和取反!
查询当前用户授权那些权限
root
[root@centos01 ~]# sudo -l
Linux系统开关机控制
禁用ctrl+alt+delete(重启)
禁用快捷键
[root@centos01 ~]# systemctl mask ctrl+alt+del.target
重新启动服务
[root@centos01 ~]# systemctl daemon-reload
首先进到bios有两种方法
1、右键选项卡

2、开机按F2,但是手速要快,在这个界面

启动引导选中hard drive 选中按“+”调整为第一个

给Bios添加密码

选择set superv isor password 【回车】
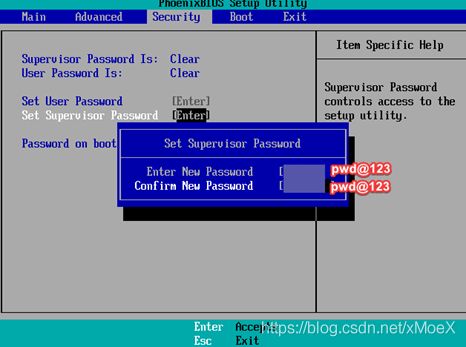
继续回车,添加密码完成 我们重新进入一下
修改之后按f10保存退出

再次进入bios

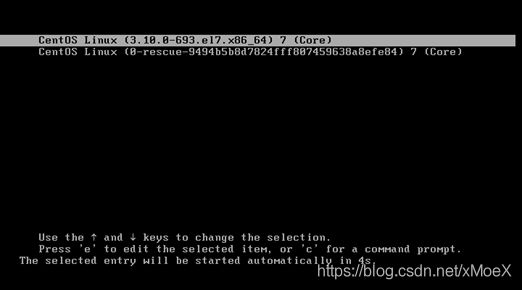
配置grub引导菜单
生成grub引导菜单密码
[root@centos01 ~]# grub2-mkpasswd-pbkdf2
[root@centos01 ~]# cp /boot/grub2/grub.cfg /boot/grub2/grub.cfg.bak
[root@centos01 ~]# cp /etc/grub.d/00_header /etc/grub.d/00_header.bak
添加grub引导菜单密码
[root@centos01 ~]# vim /etc/grub.d/00_header
cat <set superusers="root"
password_pbkdf2 root 密码算法
EOF
[root@centos01 ~]# grub2-mkconfig -o /boot/grub2/grub.cfg
重启
[root@centos01 ~]# reboot
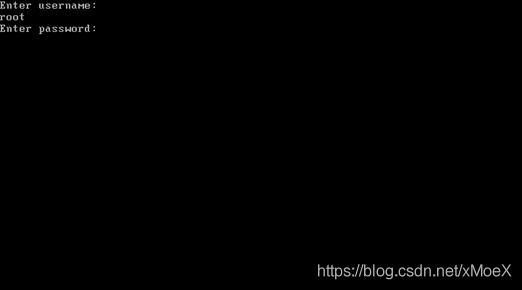
和密码
限制root只在安全终端登录
添加注释就可以,现在最多登录5台
[root@centos01 ~]# vim /etc/securetty
系统弱口令检测
[root@centos01 ~]# mount /dev/sr0 /mnt/
解压
[root@centos01 ~]# tar zxvf /mnt/john-1.8.0.tar.gz -C /usr/src/
进入/usr/src/john-1.8.0/
[root@centos01 ~]# cd /usr/src/john-1.8.0/
再进入src/
[root@centos01 john-1.8.0]# cd src/
安装
[root@centos01 src]# make clean linux-x86-64
备份密码配置文件
先创建一个用户bob 设置密码为123
[root@centos01 ~]# useradd bob
[root@centos01 ~]# passwd bob
然后复制密码配置文件到1.txt
[root@centos01 ~]# cp /etc/shadow ./1.txt
密码配置文件为/etc/shadow
进入/usr/src/john-1.8.0/run/
[root@centos01 run]# cd /usr/src/john-1.8.0/run/
JR破解密码文件
[root@centos01 run]# ./john /root/1.txt

没过多久bob的密码已经被暴力破解出来了
只要有足够的时间什么密码都可以被暴力破解出来
nmap扫描工具
一款强大的网络扫描工具
官方网站://nmap.org/
可以从Centos7.4光盘中安装nmap-6.40.el7.x86_64.rpm包
常见的扫描选项

安装namp
卸载光盘
[root@centos01 run]# umount /mnt/
切换光盘
![]()
挂载光盘
[root@centos01 run]# mount /dev/sr0 /mnt/
删除系统自带的源
[root@centos01 run]# rm -rf /etc/yum.repos.d/CentOS-*
安装namp
[root@centos01 ~]# yum -y install nmap
扫描192.168.100.10开放的端口信息
[root@centos01 ~]# nmap 192.168.100.10
[root@centos01 ~]# nmap -p 22 192.168.100.10
[root@centos01 ~]# yum -y install vsftpd
启动vsftpd服务
[root@centos01 ~]# systemctl start vsftpd
ftp的端口号是20,21
我们用nmap扫描
[root@centos01 ~]# nmap -p 20,21 192.168.100.10
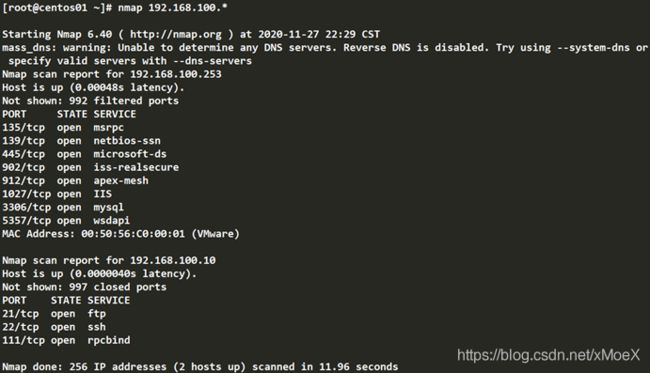
扫描192.168.100.0网络
[root@centos01 ~]# nmap 192.168.100.*


