全球人工智能技术创新大赛【热身赛一】布匹疵点智能识别:比赛全流程体验(baseline训练+Docker提交)
全球人工智能技术创新大赛【热身赛一】布匹疵点智能识别:比赛全流程体验
- 一.完成baseline的训练
- 二.镜像打包并上传到镜像仓库
-
- 2.1首先在阿里云容器服务平台创建本次比赛的镜像仓库
- 2.2准备所需的文件
- 2.3创建镜像
- 2.4往容器中安装必要的包
- 2.5保存镜像
相关链接:
天池:全球人工智能技术创新大赛【热身赛一】布匹疵点智能识别
阿里云容器镜像服务平台
datawhale学习计划以及baseline的代码下载地址
训练以及镜像构建全是在 windows10 专业版 上完成的。主要为了先完成流程,并不关心代码本身。参考着赵大佬的博客,完成了本次的比赛流程体验。于是结合着博客的主要核心内容,以及我自己遇到的坑和解决方案,完成了本篇文章。
一.完成baseline的训练
本该运行train.sh
- 当前文件目录打开git bash
- 输入
source activate virtual_name激活你的虚拟环境 - 输入
python train.sh去运行
但是由于存在一些坑点,我们不这么做,正确的步骤是:
1.首先运行convertTrainLabel.py,当前目录生成了convertor文件夹,这是解析json文件的过程。
2.接下来运行process_data_yolo.py,当前目录生成process_data文件夹,这是数据预处理过程。
注意要生成train和val数据集,因此将process_data_yolo.py中的val替换成train再运行一次。
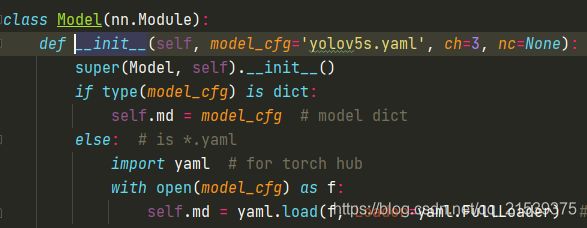
3.train.py 文件121行附近作如下修改

4.直接运行train.py,它提示你在weights中加入best.pt,我们可以下载预训练权重
YOLOV5预训练权重下载
在yolo.py文件中可以看到,默认使用的是yolov5s,所以下载yolov5s的预训练权重就行了,该名称best.pt放入到weight文件夹中

5.再次运行train.py,有可能会出现显存不够的情况
train.py 364行附近

修改默认批次,我直接修改成了1
6.运行train.py,终于通了

15分钟一轮,训练了8轮,感觉差不多了,就暂停了,毕竟先要完成流程,提高分数是后续的事情了。
二.镜像打包并上传到镜像仓库
2.1首先在阿里云容器服务平台创建本次比赛的镜像仓库
win10使用Docker以及在天池比赛上提交容器镜像文件
2.2准备所需的文件
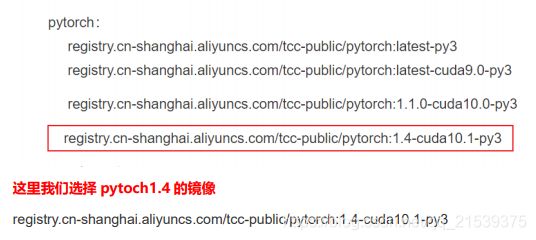
天池准备的常用基础镜像

由于pytorch1.4为老版本,不能读取pytorch1.7版本的best.pt
修改
ckpt = torch.load('best.pt', map_location=device)    # 读取best.pt权重
torch.save(ckpt, 'new.pt', _use_new_zipfile_serialization=False)    # 使用旧的方式保存
创建一个文件夹(名字自己起),把除了数据集的所有文件全部copy到该目录下。
requirements不要动
run.sh 原来里面改成(因为比赛测试文件就是存这里的)
python detect.py --source ./tcdata/guangdong1_round2_testB_20191024
创建Dockerfile(无后缀),文件内容如下
# Base Images
## 从天池基础镜像构建
FROM registry.cn-shanghai.aliyuncs.com/tcc-public/pytorch:1.4-cuda10.1-py3
## 把当前文件夹里的文件构建到镜像的根目录下
ADD . /
## 指定默认工作目录为根目录(需要把 run.sh 和生成的结果文件都放在该文件夹下,提交后才能运
行)
WORKDIR /
## 镜像启动后统一执行 sh run.sh
CMD ["sh", "run.sh"]
2.3创建镜像
在该目录用powershell打开
- 登入阿里云上自己创建的镜像仓库
- 进行docker build -t …
- 查看镜像id:docker images
- 进入容器:docker run -it 你自己的镜像 /bin/bash
2.4往容器中安装必要的包
pip用镜像源 安装这三个包
pip install -i https://pypi.tuna.tsinghua.edu.cn/simple opencv-python
pip install -i https://pypi.tuna.tsinghua.edu.cn/simple matplotlib
pip install -i https://pypi.tuna.tsinghua.edu.cn/simple scipy
进入python模式
python
>>>import cv2
如果出现报错(如果没有直接进入2.5保存镜像环节)
返回命令行模式
>>>exit()
进行下面步骤
docker 容器内没有vi/vim,只能通过这种方式修改成阿里源
cat > /etc/apt/sources.list << EOF
deb http://mirrors.aliyun.com/ubuntu/ trusty main restricted universe multiverse
deb http://mirrors.aliyun.com/ubuntu/ trusty-security main restricted universe multiverse
deb http://mirrors.aliyun.com/ubuntu/ trusty-updates main restricted universe multiverse
deb http://mirrors.aliyun.com/ubuntu/ trusty-proposed main restricted universe multiverse
deb http://mirrors.aliyun.com/ubuntu/ trusty-backports main restricted universe multiverse
deb-src http://mirrors.aliyun.com/ubuntu/ trusty main restricted universe multiverse
deb-src http://mirrors.aliyun.com/ubuntu/ trusty-security main restricted universe multiverse
deb-src http://mirrors.aliyun.com/ubuntu/ trusty-updates main restricted universe multiverse
deb-src http://mirrors.aliyun.com/ubuntu/ trusty-proposed main restricted universe multiverse
deb-src http://mirrors.aliyun.com/ubuntu/ trusty-backports main restricted universe multiverse
EOF
接下来
apt update
apt install libgl1-mesa-glx
apt-get install -y libglib2.0-0
2.5保存镜像
1.退出但不关闭容器 ctrl+p+q
2.docker ps 查看 容器的id
注意是 容器的id 不是镜像的 id
3.将容器保存为镜像
docker commit 你的容器id registry.cn……….(自己的仓库地址)……….:1.0
4.查看镜像
docker images
5.测试镜像
docker run 你的镜像id sh run.sh
因为tcdata是空的,所以报错也很正常
6.推送镜像
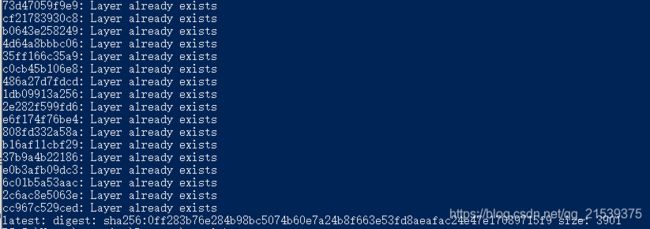
docker push registry.cn……….(自己的仓库地址)……….:1.0

