今天继续 跟着Nature Communications学画图系列第三篇。学习R语言ggplot2包画箱线图。
对应的 Nature Communications 的论文是 Fecal pollution can explain antibiotic resistance gene abundances in anthropogenically impacted environments
这篇论文数据分析和可视化的部分用到的数据和代码全部放到了github上 https://github.com/karkman/crassphage_project
非常好的R语言学习素材。
论文中的figure1是使用基础绘图函数画的,我感觉如果使用ggplot2实现起来可能会更容易。今天就先用ggplot2试着画一下箱线图。
首先是读入数据
HMP<-read.table("data/HMP.txt")
dim(HMP)
head(HMP)
数据中有缺失值,将缺失值去掉
HMP<-na.omit(HMP)
最基本的箱线图
library(ggplot2)
ggplot(HMP,aes(x=country,y=log10(rel_crAss)))+
  geom_boxplot()
填充颜色
cols <- c("#E69F00", "#56B4E9", "#009E73")
ggplot(HMP,aes(x=country,y=log10(rel_crAss)))+
  geom_boxplot(aes(fill=country))+
  scale_fill_manual(values = cols)
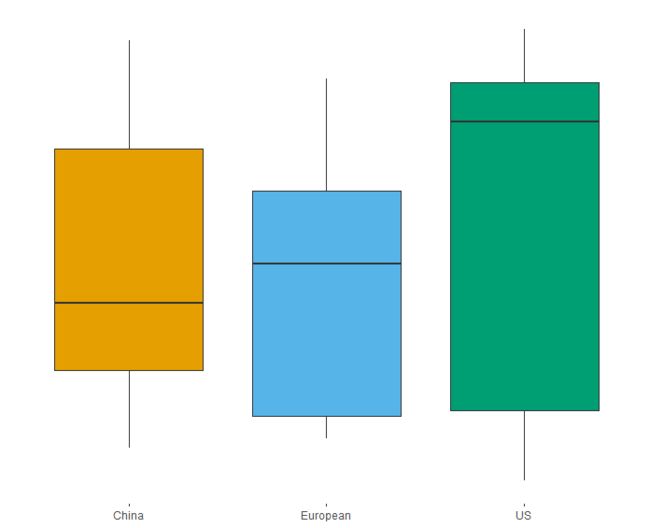
去掉图例、灰色背景等
ggplot(HMP,aes(x=country,y=log10(rel_crAss)))+
  geom_boxplot(aes(fill=country),show.legend = F)+
  scale_fill_manual(values = cols)+
  theme(panel.background = element_blank(),
        axis.title = element_blank(),
        axis.text.y = element_blank(),
        axis.ticks.y = element_blank())
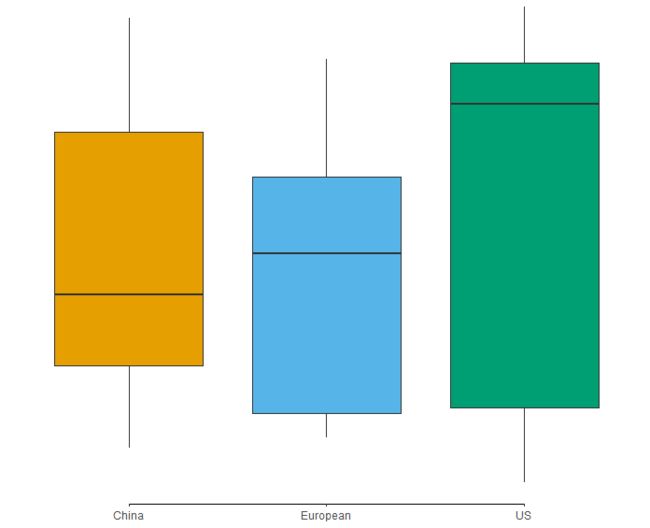
用注释的办法添加一条坐标轴
这里参考了 https://stackoverflow.com/questions/33699650/how-can-i-control-the-lengths-of-the-axis-lines-in-ggplot
ggplot(HMP,aes(x=country,y=log10(rel_crAss)))+
  geom_boxplot(aes(fill=country),show.legend = F)+
  scale_fill_manual(values = cols)+
  theme(panel.background = element_blank(),
        axis.title = element_blank(),
        axis.text.y = element_blank(),
        axis.ticks.y = element_blank())+
  annotate(geom="segment",x=1,xend=3,y=-4,yend=-4)+
  scale_y_continuous(expand = c(0,0))
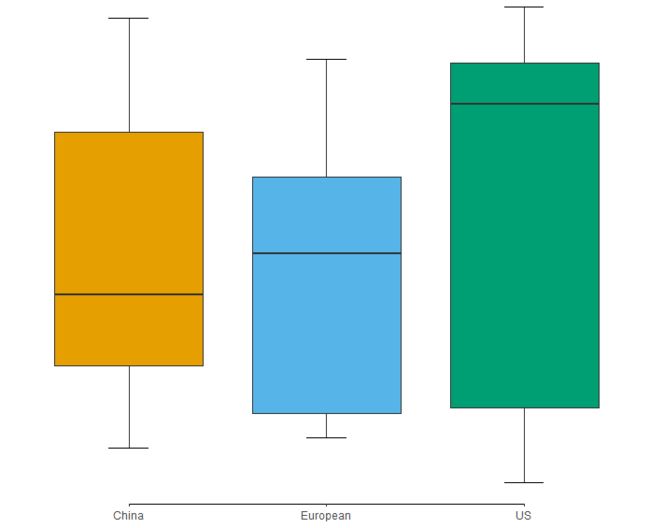
添加误差线
ggplot(HMP,aes(x=country,y=log10(rel_crAss)))+
  geom_boxplot(aes(fill=country),show.legend = F)+
  scale_fill_manual(values = cols)+
  theme(panel.background = element_blank(),
        axis.title = element_blank(),
        axis.text.y = element_blank(),
        axis.ticks.y = element_blank())+
  annotate(geom="segment",x=1,xend=3,y=-4,yend=-4)+
  scale_y_continuous(expand = c(0,0))+
  stat_boxplot(geom = "errorbar", aes(ymin = ..ymax..),width=0.2)+
  stat_boxplot(geom = "errorbar", aes(ymax = ..ymin..),width=0.2)
翻转、更改刻度的长度
ggplot(HMP,aes(x=country,y=log10(rel_crAss)))+
  geom_boxplot(aes(fill=country),show.legend = F)+
  scale_fill_manual(values = cols)+
  theme(panel.background = element_blank(),
        axis.title = element_blank(),
        axis.text.x = element_blank(),
        axis.ticks.x = element_blank(),
        axis.ticks.length.y = unit(0.3,'cm'))+
  annotate(geom="segment",x=1,xend=3,y=-4,yend=-4)+
  scale_y_continuous(expand = c(0,0))+
  stat_boxplot(geom = "errorbar", aes(ymin = ..ymax..),width=0.2)+
  stat_boxplot(geom = "errorbar", aes(ymax = ..ymin..),width=0.2)+
  coord_flip()
文末总结
要做到和原图一样的话ggplot2使用的代码偏多了。相对来说基础绘图函数代码更简单。但是使用ggplot2话后续的美化可能会更加方便。
欢迎大家关注我的公众号
小明的数据分析笔记本


