目的:
远程, 是为了队员下载
私有, 是为了只有团队内部人员可以下载
创建步骤:
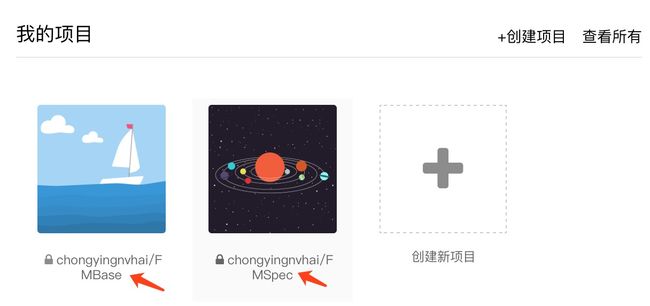
1.要在远程托管平台上创建一个远程私有库(这里我用码市作为远程代码管理工具,需要添加ssh公钥(略)).(https://git.coding.net/chongyingnvhai/FMBase.git), 把自己的三方库上传到远程私有库.
这个是官方提供的公共的索引库,所以我们的Spec的文件不能放在这里面.
查看本地仓库,发现只有一个master,所以添加一个我们自己的spec的索引库
wuxianlvzhoudeMacBook-Pro:~ Allison$ pod repo

master
- Type: git (master)
- URL:  https://github.com/CocoaPods/Specs.git
- Path: /Users/wuxianlvzhou/.cocoapods/repos/master

wuxianlvzhoudeMacBook-Pro:~ Allison$ pod repo add FMBase [email protected]:chongyingnvhai/FMSpec.git
Cloning spec repo `FMBase` from `[email protected]:chongyingnvhai/FMSpec.git`
wuxianlvzhoudeMacBook-Pro:~ Allison$
此时我们再查看,就可以看到两个了
wuxianlvzhoudeMacBook-Pro:~ Allison$ pod repo

FMBase
- Type: git (master)
- URL:  [email protected]:chongyingnvhai/FMSpec.git
- Path: /Users/wuxianlvzhou/.cocoapods/repos/FMBase

master
- Type: git (master)
- URL:  https://github.com/CocoaPods/Specs.git
- Path: /Users/wuxianlvzhou/.cocoapods/repos/master
然后我们需要在远程代码托管上再创建一个,将本地库上传至远程私有库
2.cd进入到文件夹下,使用pod lib create <私有库名字>命令, 克隆下来
注意:如果pod lib create <私有库名字>出错的话,建议这里看下终端环境,如果没有错误,请直接跳过解决方案。
allisondeMacBook-Pro:~ allison$ ruby -v
ruby 2.5.1p57 (2018-03-29 revision 63029) [x86_64-darwin17]
如果你和我一样 是ruby2.5以上的环境,下面的命令执行讲话出现错误
/Library/Ruby/Gems/2.3.0/gems/xcodeproj-1.5.8/lib/xcodeproj/project/object/helpers/build_settings_array_settings_by_object_version.rb:27:in `': undefined method `to_set' for # (NoMethodError) Did you mean? to_s
from /Library/Ruby/Gems/2.3.0/gems/xcodeproj-1.5.8/lib/xcodeproj/project/object/helpers/build_settings_array_settings_by_object_version.rb:8:in `' from /Library/Ruby/Gems/2.3.0/gems/xcodeproj-1.5.8/lib/xcodeproj/project/object/helpers/build_settings_array_settings_by_object_version.rb:4:in `'
from /Library/Ruby/Gems/2.3.0/gems/xcodeproj-1.5.8/lib/xcodeproj/project/object/helpers/build_settings_array_settings_by_object_version.rb:3:in `' from /Library/Ruby/Gems/2.3.0/gems/xcodeproj-1.5.8/lib/xcodeproj/project/object/helpers/build_settings_array_settings_by_object_version.rb:2:in `' from /Library/Ruby/Gems/2.3.0/gems/xcodeproj-1.5.8/lib/xcodeproj/project/object/helpers/build_settings_array_settings_by_object_version.rb:1:in `'
from /Library/Ruby/Site/2.3.0/rubygems/core_ext/kernel_require.rb:55:in `require' from /Library/Ruby/Site/2.3.0/rubygems/core_ext/kernel_require.rb:55:in `require' from /Library/Ruby/Gems/2.3.0/gems/xcodeproj-1.5.8/lib/xcodeproj/project/object/build_configuration.rb:194:in `' from /Library/Ruby/Site/2.3.0/rubygems/core_ext/kernel_require.rb:55:in `require'
from /Library/Ruby/Site/2.3.0/rubygems/core_ext/kernel_require.rb:55:in `require' from /Library/Ruby/Gems/2.3.0/gems/xcodeproj-1.5.8/lib/xcodeproj/project/object.rb:521:in `' from /Library/Ruby/Site/2.3.0/rubygems/core_ext/kernel_require.rb:55:in `require' from /Library/Ruby/Site/2.3.0/rubygems/core_ext/kernel_require.rb:55:in `require' from /Library/Ruby/Gems/2.3.0/gems/xcodeproj-1.5.8/lib/xcodeproj/project.rb:5:in `'
from /Library/Ruby/Site/2.3.0/rubygems/core_ext/kernel_require.rb:55:in `require' from /Library/Ruby/Site/2.3.0/rubygems/core_ext/kernel_require.rb:55:in `require' from /Users/allison/Desktop/founderSpec/setup/ProjectManipulator.rb:30:in `run' from /Users/allison/Desktop/founderSpec/setup/ConfigureiOS.rb:73:in `perform' from /Users/allison/Desktop/founderSpec/setup/ConfigureiOS.rb:7:in `perform'
from /Users/allison/Desktop/founderSpec/setup/TemplateConfigurator.rb:85:in `run' from ./configure:9:in `'
解决方案:
卸载一个已安装的ruby2.5高版本
$ rvm remove <版本号>
例:rvm remove 2.5.1
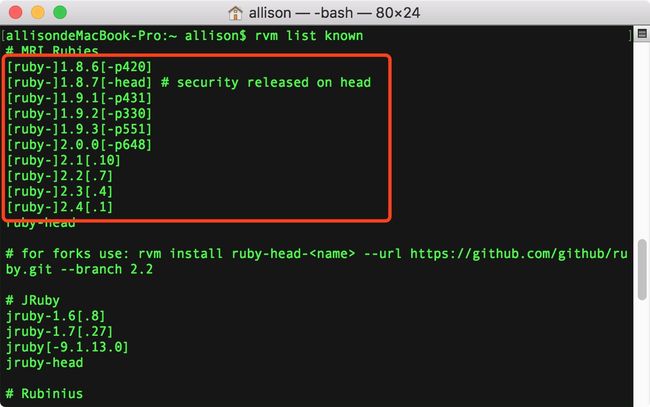
通过rvm list known 查看目前的所有ruby版本
选择低于ruby2.5的版本进行安装
$ rvm install 2.4.1
再次执行pod lib create <私有库名字>命令,克隆操作将不会出错。
wuxianlvzhoudeMacBook-Pro:~ Allison$ cd /Users/wuxianlvzhou/Desktop/remoteLib
wuxianlvzhoudeMacBook-Pro:remoteLib Allison$ pod lib create FMBase
Cloning `https://github.com/CocoaPods/pod-template.git` into `FMBase`.
Configuring FMBase template.

------------------------------

To get you started we need to ask a few questions, this should only take a minute.

If this is your first time we recommend running through with the guide:
 - http://guides.cocoapods.org/making/using-pod-lib-create.html
 ( hold cmd and double click links to open in a browser. )


What language do you want to use?? [ Swift / ObjC ]
 > Objc

Would you like to include a demo application with your library? [ Yes / No ]
 > Yes

Which testing frameworks will you use? [ Specta / Kiwi / None ]
 > None

Would you like to do view based testing? [ Yes / No ]
 > Yes

What is your class prefix?
 > AA

Running pod install on your new library.

Analyzing dependencies
Fetching podspec for `FMBase` from `../`
Downloading dependencies
Installing FBSnapshotTestCase (2.1.4)
Installing FMBase (0.1.0)
Generating Pods project
Integrating client project

[!] Please close any current Xcode sessions and use `FMBase.xcworkspace` for this project from now on.
Sending stats
Pod installation complete! There are 2 dependencies from the Podfile and 2 total pods installed.

[!] Automatically assigning platform ios with version 8.3 on target FMBase_Example because no platform was specified. Please specify a platform for this target in your Podfile. See `https://guides.cocoapods.org/syntax/podfile.html#platform`.

 Ace! you're ready to go!
 We will start you off by opening your project in Xcode
  open 'FMBase/Example/FMBase.xcworkspace'

To learn more about the template see `https://github.com/CocoaPods/pod-template.git`.
To learn more about creating a new pod, see `http://guides.cocoapods.org/making/making-a-cocoapod`.
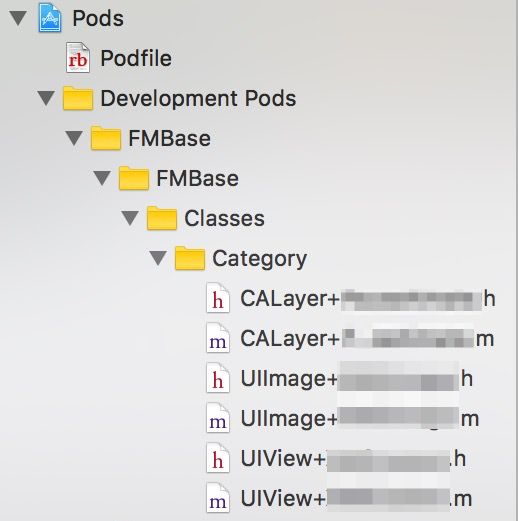
3.此时Xcode会自动打开一个工程,找到pods文件,把Pods-->Development Pods-->XMGFMBase-->XMGFMBase-->Classes-->ReplaceMe.m文件删除,将三方替换过来.再次执行pod install即可.
4.现在需要把整个FMBase文件夹提交到远程私有库,包括里面的测试工程一起提交.
wuxianlvzhoudeMacBook-Pro:Example Allison$ cd /Users/wuxianlvzhou/Desktop/1.0本地库方案/remoteLib/XMGFMBase
wuxianlvzhoudeMacBook-Pro:XMGFMBase Allison$ git status
On branch master
Changes not staged for commit:
  (use "git add/rm ..." to update what will be committed)
  (use "git checkout -- ..." to discard changes in working directory)

    deleted:    FMBase/Classes/ReplaceMe.m

Untracked files:
  (use "git add ..." to include in what will be committed)

    Example/Podfile.lock
    Example/Pods/
    Example/FMBase.xcworkspace/
    FMBase/Classes/Category/
wuxianlvzhoudeMacBook-Pro:XMGFMBase Allison$ git add .
wuxianlvzhoudeMacBook-Pro:XMGFMBase Allison$ git commit -m '**'
......
提交远程库前将FMBase.podspec文件修改
s.homepage = 'https://coding.net/u/chongyingnvhai/p/FMBase'
修改为:
s.homepage = 'https://git.coding.net/chongyingnvhai/FMBase.git'
提交前现在终端验证下本地文件有没有错误
wuxianlvzhoudeMacBook-Pro:XMGFMBase Allison$ pod lib lint

 -> XMGFMBase (0.1.0)

FMBase passed validation.
wuxianlvzhoudeMacBook-Pro:XMGFMBase Allison$
按回车,此时会自动验证当前目录下的ΧⅩΧⅩ.podspec文件,并且验证里面的字段.看见FMBase passed validation即代表验证成功.
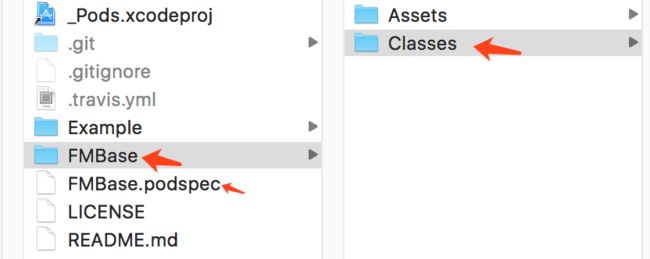
注意:这里的 s.source_files = 'FMBase/Classes/*/' 目录一定要是绝对的目录,也就是说与.podspec同级目录开始写路径.
将本地库与远程库关联,并且上传至远程库.
这里如果我们验证远程索引库的话会报如下错误,所以接下来我们需要给我们的库打tag.
wuxianlvzhoudeMacBook-Pro:FMBase Allison$ pod spec lint

 -> FMBase (0.1.0)
    - ERROR | [iOS] file patterns: The `source_files` pattern did not match any file.

Analyzed 1 podspec.

[!] The spec did not pass validation, due to 1 error.
[!] The validator for Swift projects uses Swift 3.0 by default, if you are using a different version of swift you can use a `.swift-version` file to set the version for your Pod. For example to use Swift 2.3, run:
    `echo "2.3" > .swift-version`.
5.给我们的库打tag,并推送至远程库.
wuxianlvzhoudeMacBook-Pro:XMGFMBase Allison$ git tag
wuxianlvzhoudeMacBook-Pro:XMGFMBase Allison$ git tag
0.1.0
wuxianlvzhoudeMacBook-Pro:XMGFMBase Allison$ git push --tags
Counting objects: 1, done.
Writing objects: 100% (1/1), 153 bytes | 0 bytes/s, done.
Total 1 (delta 0), reused 0 (delta 0)
To git.coding.net:chongyingnvhai/XMGFMBase.git
 * [new tag]         0.1.0 -> 0.1.0
6.验证远程仓库
wuxianlvzhoudeMacBook-Pro:FMBase Allison$ pod spec lint

 -> FMBase (0.1.0)

Analyzed 1 podspec.

FMBase.podspec passed validation.
7.远程验证通过后,将自己的索引库提交至远程 (把FMBase.podspec文件push到远程FMSpec私有库中.)
wuxianlvzhoudeMacBook-Pro:FMBase Allison$ pod repo push FMBase FMBase.podspec

Validating spec
 -> FMBase (0.1.0)

Updating the `FMBase' repo

Already up-to-date.

Adding the spec to the `FMBase' repo

 - [Add] FMBase (0.1.0)

Pushing the `FMBase' repo

To git.coding.net:chongyingnvhai/FMSpec.git
   07b51f6..7bafcc3  master -> master
自己的私有索引库
8.在终端直接检索
wuxianlvzhoudeMacBook-Pro:FMBase Allison$ pod search FMBase

-> FMBase (0.1.0)
   FMBase框架
   pod 'FMBase', '~> 0.1.0'
   - Homepage: https://coding.net/u/chongyingnvhai/p/FMBase
   - Source:   https://git.coding.net/chongyingnvhai/FMBase.git
   - Versions: 0.1.0 [FMBase repo]
至此本地的三方库已经变成私有库了,我们来使用一下.
--------------------------------- 使用步骤: ----------------------------------
1.修改Podfile文件
use_frameworks!
target 'FMBase_Example' do
pod 'FMBase', :path => '../'
end
修改为
source 'https://github.com/CocoaPods/Specs.git'
use_frameworks!
target 'FMBase_Example' do
pod 'FMBase'
end
2.在终端执行pod install
wuxianlvzhoudeMacBook-Pro:Example Allison$ pod install
Analyzing dependencies
Downloading dependencies
Installing FMBase (0.1.0)
Generating Pods project
Integrating client project
Sending stats
Pod installation complete! There is 1 dependency from the Podfile and 1 total pod installed.
此时我们的远程私有库就可以通过pod的形式导入项目来使用了.but,but,but,如果我们用的是GitHub上的开元三方呢,Podfile文件如下
source '[email protected]:chongyingnvhai/FMSpec.git'
use_frameworks!
target 'FMBase_Example' do
pod 'FMBase'
pod 'AFNetworking'
end
我们再次执行pod install的时候就会出现如下的错误
wuxianlvzhoudeMacBook-Pro:Example Allison$ pod install
Analyzing dependencies
[!] Unable to find a specification for `AFNetworking`
这是因为,我们执行pod install的时候是从我们自己的私有库里面搜索的,所以我们还需要将共有库的地址加进来.
source '[email protected]:chongyingnvhai/FMSpec.git'
source 'https://github.com/CocoaPods/Specs.git'
use_frameworks!
target 'FMBase_Example' do
pod 'FMBase'
pod 'AFNetworking'
end
这样再次执行就可以正确安装了.
wuxianlvzhoudeMacBook-Pro:Example Allison$ pod install
Analyzing dependencies
Downloading dependencies
Installing AFNetworking (3.1.0)
Using FMBase (0.1.0)
Generating Pods project
Integrating client project
Sending stats
Pod installation complete! There are 2 dependencies from the Podfile and 2 total pods installed.
远程私有库的依赖+升级
以上完成了对远程私有库的设置,假如后期我们对该库有修改,或者增加了一些其它的功能,我们需要对远程的私有库进行升级即可.一般我们都会有Subspecs子库.例如我们熟知的AFNetworking
-> AFNetworking (3.1.0)
   A delightful iOS and OS X networking framework.
   pod 'AFNetworking', '~> 3.1.0'
   - Homepage: https://github.com/AFNetworking/AFNetworking
   - Source:   https://github.com/AFNetworking/AFNetworking.git
   - Versions: 3.1.0, 3.0.4, 3.0.3, 3.0.2, 3.0.1, 3.0.0, 3.0.0-beta.3,
   3.0.0-beta.2, 3.0.0-beta.1, 2.6.3, 2.6.2, 2.6.1, 2.6.0, 2.5.4, 2.5.3, 2.5.2,
   2.5.1, 2.5.0, 2.4.1, 2.4.0, 2.3.1, 2.3.0, 2.2.4, 2.2.3, 2.2.2, 2.2.1, 2.2.0,
   2.1.0, 2.0.3, 2.0.2, 2.0.1, 2.0.0, 2.0.0-RC3, 2.0.0-RC2, 2.0.0-RC1, 1.3.4,
   1.3.3, 1.3.2, 1.3.1, 1.3.0, 1.2.1, 1.2.0, 1.1.0, 1.0.1, 1.0, 1.0RC3, 1.0RC2,
   1.0RC1, 0.10.1, 0.10.0, 0.9.2, 0.9.1, 0.9.0, 0.7.0, 0.5.1 [master repo]
   - Subspecs:
     - AFNetworking/Serialization (3.1.0)
     - AFNetworking/Security (3.1.0)
     - AFNetworking/Reachability (3.1.0)
     - AFNetworking/NSURLSession (3.1.0)
     - AFNetworking/UIKit (3.1.0)
升级远程私有库的步骤:
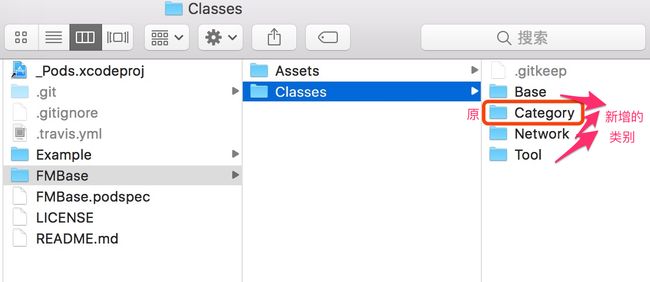
1.在工程中加入新的类别
2.在控制台执行pod install
3.修改FMBase.podspec文件里面的 s.version = '0.2.0'
3.重写打个tag 并push到远端( git push --tags )
4.此时代码已经升级完成.
5.升级pod里面的Spec版本,先验证通过
wuxianlvzhoudeMacBook-Pro:FMBase Allison$ pod spec lint

 -> FMBase (0.2.0)

Analyzed 1 podspec.

FMBase.podspec passed validation.
6.往本地私有索引库提交
在终端执行 pod repo push FMSpec FMBase.podspec
wuxianlvzhoudeMacBook-Pro:FMBase Allison$ pod repo push FMSpec FMBase.podspec

Validating spec
 -> FMBase (0.2.0)

Updating the `FMSpec' repo

Already up-to-date.

Adding the spec to the `FMSpec' repo

 - [Update] FMBase (0.2.0)

Pushing the `FMSpec' repo

To git.coding.net:chongyingnvhai/FMSpec.git
   c54796c..d3fde69  master -> master
在终端执行 pod search FMBase可以看到搜索出来的结果.
-> FMBase (0.3.0)
   FMBase框架
   pod 'FMBase', '~> 0.3.0'
   - Homepage: https://coding.net/u/chongyingnvhai/p/FMBase
   - Source:   https://git.coding.net/chongyingnvhai/FMBase.git
   - Versions: 0.3.0, 0.2.0, 0.1.0 [FMSpec repo]
   - Subspecs:
     - FMBase/Category (0.3.0)
     - FMBase/Base (0.3.0)
     - FMBase/Tool (0.3.0)
     - FMBase/Network (0.3.0)
这种对代码结构进行了归类,目录结构更加简洁明了.


