LAMP架构4-nginx服务器入门(web服务器,反向代理,负载均衡)
文章目录
- 1、nginx是什么
- 2、nginx部署
-
- 2.1 准备
- 2.2 源码编译nginx
- 2.3 优化编译后的nginx大小
- 2.4 编写环境变量
- 2.5 启动nginx服务
- 3、nginx并发优化
-
- 3.1 nginx做http服务器
-
- 3.1.1 nginx配置文件修改
- 3.1.2 结合压测工具ab测试nginx的高并发处理能力
- 3.1.3 修改用户(nginx)打开文件数量的限额
- 3.2 nginx反向代理机制
-
- 3.2.1 nginx配置文件修改
- 3.2.2 负载均衡实验
-
- 3.2.2.1 首先打开server2和server3的apache服务,并且写好默认发布文件index.html
- 3.2.2.2 修改配置文件
- 3.2.2.3 测试
- 3.2.3 对负载均衡的补充(添加ip_hash,sticky cookie算法)
- 4、nginx的平滑升级与回退(热更新热回退)
-
- 4.1 版本热升级
- 4.2 版本热回退
- 5、nginx限流
-
- 5.1 控制单IP并发连接数
- 5.2 设置单位时间内的请求数目,以及请求数量
- 5.3 限制带宽(下载速度)
- 6、nginx其他配置管理
-
- 6.1 自动索引
- 6.2 Nginx expire缓存配置: 缓存可以降低网站带宽,加速用户访问
- 6.3 日志轮询
- 6.4 禁用没用的日志
- 6.5 访问文件的限制
- 6.6 中文乱码
- 6.7 限制IP
- 7、nginx重定向
-
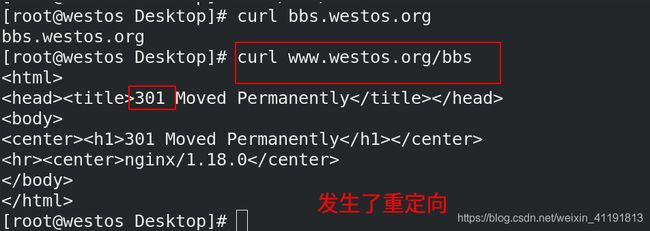
- 7.1 防止域名恶意解析到服务器IP
- 7.2 重定向
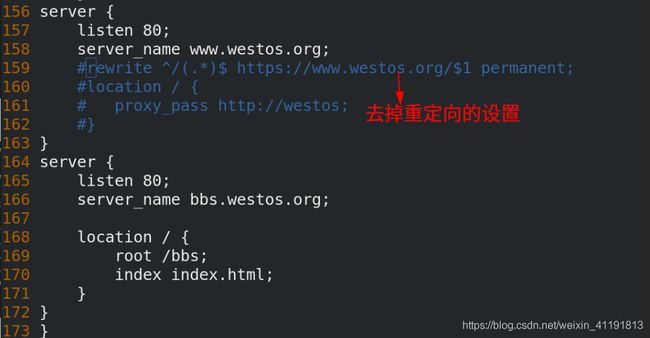
- 7.3 http(80)重定向https(443)
- 7.4 www.westos.org/bbs 重定向bbs.westos.org
- 7.5 bbs.haojin.com 重定向www.haojin.com/bbs
- 8、防盗链
-
- 8.1 修改nginx配置文件(server1)
- 8.2 配置server2上的http服务
- 8.3 利用真机测试访问(此时是盗链状态,可以正常访问到页面)
- 8.4 设置防盗链
1、nginx是什么
Nginx是俄罗斯人Igor Sysoev编写的轻量级Web服务器,它的发音为 [ˈendʒɪnks] ,它不仅是一个高性能的HTTP和反向代理服务器,同时也是一个IMAP/POP3/SMTP 代理服务器。
截至2019年12月,差不多世界上每3个网站中就有1个使用Nginx。且比例还在增长。

Nginx以事件驱动的方式编写,所以有非常好的性能,同时也是一个非常高效的反向代理、负载平衡服务器。在性能上,Nginx占用很少的系统资源,能支持更多的并发连接,达到更高的访问效率;在功能上,Nginx是优秀的代理服务器和负载均衡服务器;在安装配置上,Nginx安装简单、配置灵活。
Nginx支持热部署,启动速度特别快,还可以在不间断服务的情况下对软件版本或配置进行升级,即使运行数月也无需重新启动。
在微服务的体系之下,Nginx正在被越来越多的项目采用作为网关来使用,配合Lua做限流、熔断等控制。

对于Nginx的初学者可能不太容易理解web服务器究竟能做什么,特别是之前用过Apache服务器的,以为Nginx可以直接处理php、java,实际上并不能。对于大多数使用者来说,Nginx只是一个静态文件服务器或者http请求转发器,它可以把静态文件的请求直接返回静态文件资源,把动态文件的请求转发给后台的处理程序,例如php-fpm、apache、tomcat、jetty等,这些后台服务,即使没有nginx的情况下也是可以直接访问的(有些时候这些服务器是放在防火墙的面,不是直接对外暴露,通过nginx做了转换)。
2、nginx部署
nginx官网社区版下载
nginx商用版地址
nginx官方学习手册
2.1 准备
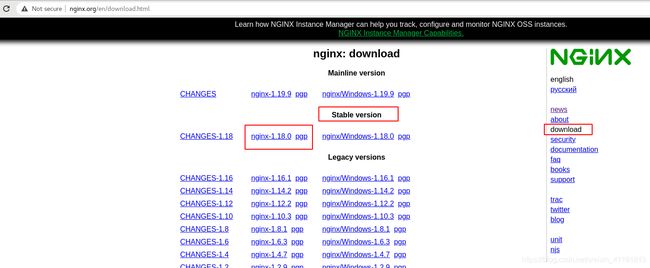
虚拟机server1(内存2g),安装gcc,在nginx官网下载社区稳定版(1.18.0)
[root@server1 nginx-1.18.0]# yum install gcc -y  ##安装gcc

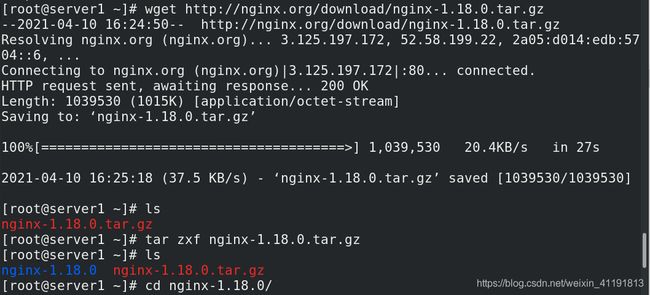
[root@server1 ~]# wget http://nginx.org/download/nginx-1.18.0.tar.gz ##下载nginx源码包
[root@server1 ~]# tar zxf nginx-1.18.0.tar.gz             ## 解包
[root@server1 ~]# cd nginx-1.18.0/
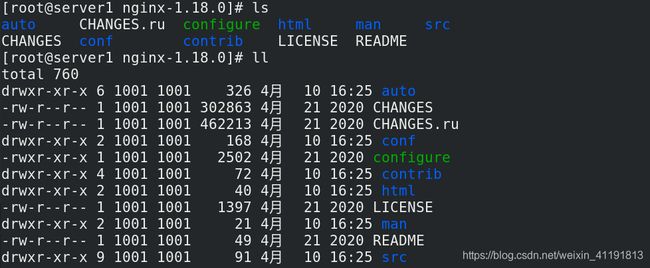
[root@server1 nginx-1.18.0]# ls                           ## 查看nginx源码包目录结构
auto     CHANGES.ru  configure  html     man     src
CHANGES  conf        contrib    LICENSE  README
2.2 源码编译nginx
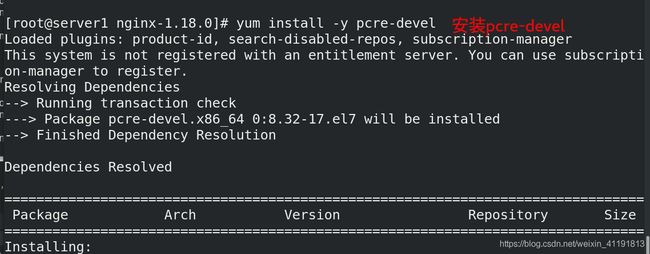
nginx源码是c开发的,编译需要Makefile文件以及gcc编译器
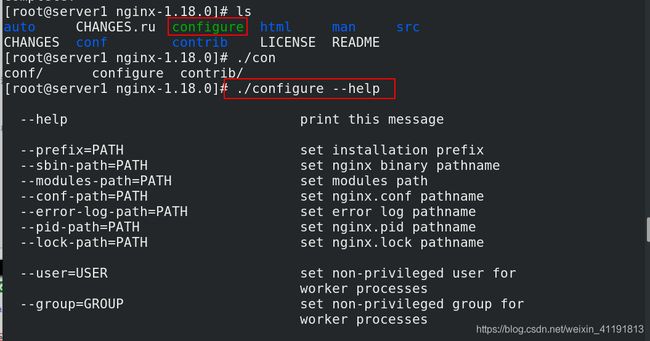
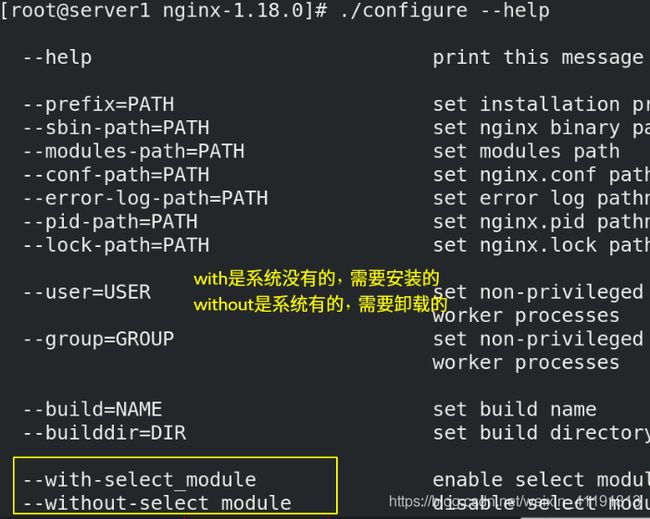
[root@server1 nginx-1.18.0]# ./configure --help  ## 查看编译帮助,选择相应自定义模块
  --help                             print this message

  --prefix=PATH                      set installation prefix


  --with-threads                     enable thread pool support

  --with-file-aio                    enable file AIO support

  --with-http_ssl_module             enable ngx_http_ssl_module
  --with-http_v2_module              enable ngx_http_v2_module
  --with-http_realip_module          enable ngx_http_realip_module
  --with-http_addition_module        enable ngx_http_addition_module
  --with-http_xslt_module            enable ngx_http_xslt_module
  --with-http_xslt_module=dynamic    enable dynamic ngx_http_xslt_module
  --with-http_image_filter_module    enable ngx_http_image_filter_module
  --with-http_image_filter_module=dynamic
                                     enable dynamic ngx_http_image_filter_module

  --with-http_stub_status_module     enable ngx_http_stub_status_module

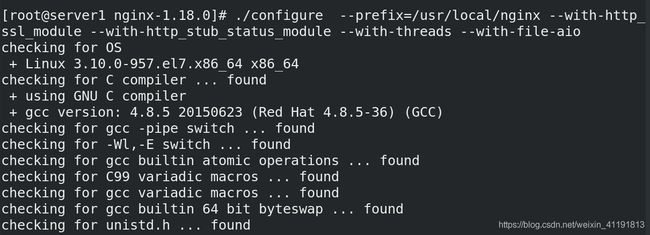
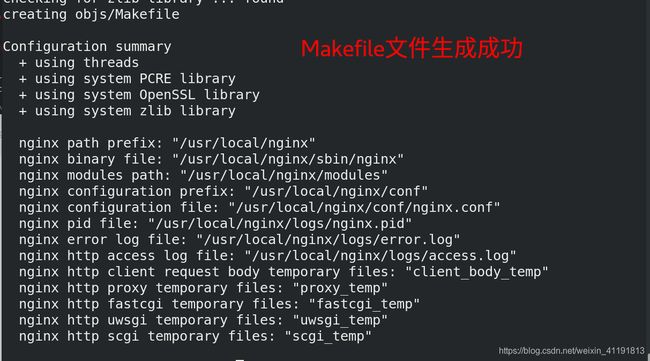
选择相应模块生成Makefile文件
[root@server1 nginx-1.18.0]# ./configure  --prefix=/usr/local/nginx --with-http_ssl_module  --with-http_stub_status_module --with-threads --with-file-aio
  选择的模块含义:
  --prefix=/usr/local/nginx         ## 指定安装路径
  --with-http_ssl_module            ## 支持https模块
  --with-http_stub_status_module    ## 监控模块
  --with-threads                    ## 支持线程池
  --with-file-aio                   ## 支持AIO文件

编译和安装
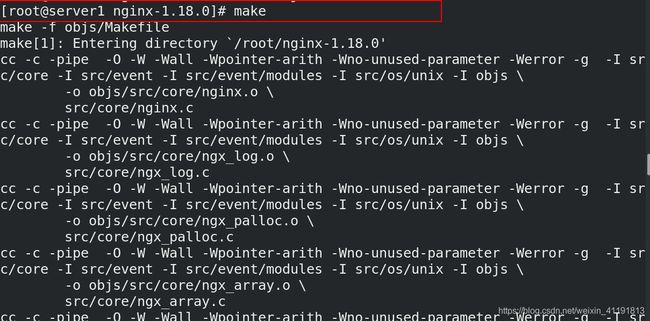
[root@server1 nginx-1.18.0]# make  ##要再Makefile所在路径
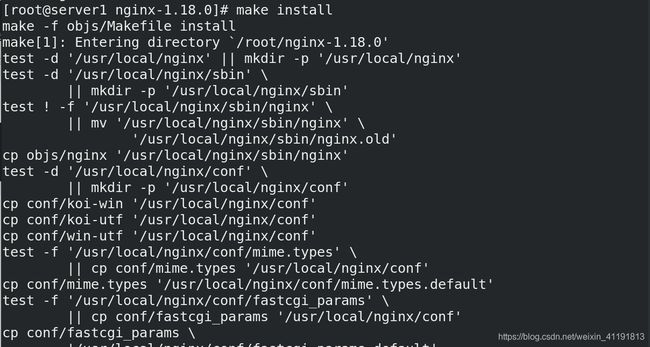
[root@server1 nginx-1.18.0]# make install
2.3 优化编译后的nginx大小
正常编译下是6M,重新关闭调试后为1000k
[root@server1 nginx-1.18.0]# cd /usr/local/nginx/
[root@server1 nginx]# du -sh
6.9M	.
[root@server1 nginx]# cd ..
[root@server1 local]# rm -fr nginx/

[root@server1 nginx-1.18.0]# make clean  ##清理之前编译的makefile
rm -rf Makefile objs
[root@server1 nginx-1.18.0]# ls
auto     CHANGES.ru  configure  html     man     src
CHANGES  conf        contrib    LICENSE  README

[root@server1 nginx-1.18.0]# vim auto/cc/gcc   ## 关闭debug调试项

[root@server1 nginx-1.18.0]# ./configure  --prefix=/usr/local/nginx --with-http_ssl_module --with-http_stub_status_module --with-threads --with-file-aio
[root@server1 nginx-1.18.0]# make
[root@server1 nginx-1.18.0]# make install

[root@server1 nginx-1.18.0]# cd /usr/local/nginx/
[root@server1 nginx]# du -sh
1000K	.
2.4 编写环境变量
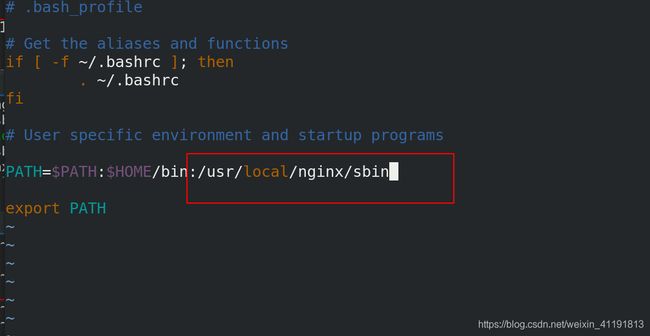
[root@server1 ~]# vim .bash_profile
[root@server1 ~]# source .bash_profile
[root@server1 ~]# which nginx
/usr/local/nginx/sbin/nginx
2.5 启动nginx服务
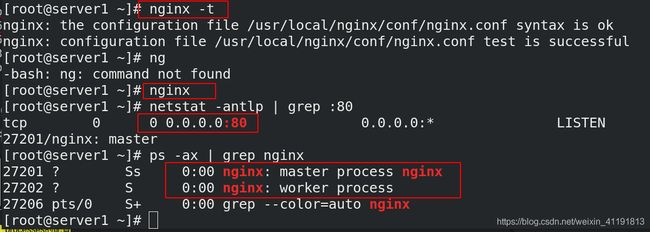
[root@server1 ~]# nginx -t  ## 检查语法,没有问题即可启动nginx
nginx: the configuration file /usr/local/nginx/conf/nginx.conf syntax is ok
nginx: configuration file /usr/local/nginx/conf/nginx.conf test is successful

[root@server1 ~]# nginx     ## 启动nginx

[root@server1 ~]# netstat -antlp | grep :80
tcp        0      0 0.0.0.0:80              0.0.0.0:*               LISTEN      27201/nginx: master

[root@server1 ~]# ps -ax | grep nginx
27201 ?        Ss     0:00 nginx: master process nginx
27202 ?        S      0:00 nginx: worker process
27206 pts/0    S+     0:00 grep --color=auto nginx

[root@server1 nginx-1.18.0]# nginx -s stop  ##停止nginx
[root@server1 nginx-1.18.0]# nginx -s reload ## 服务重载,刷新配置文件的
3、nginx并发优化
nginx作为http服务器时:
max_clients = worker_processes * worker_connections

nginx作为反向代理服务器时:
max_clients = worker_processes * worker_connections / 2
##这里除以2的原因是nginx做反向代理时既连接客户端也连接后台服务器,消耗两倍的连接量。
3.1 nginx做http服务器
3.1.1 nginx配置文件修改
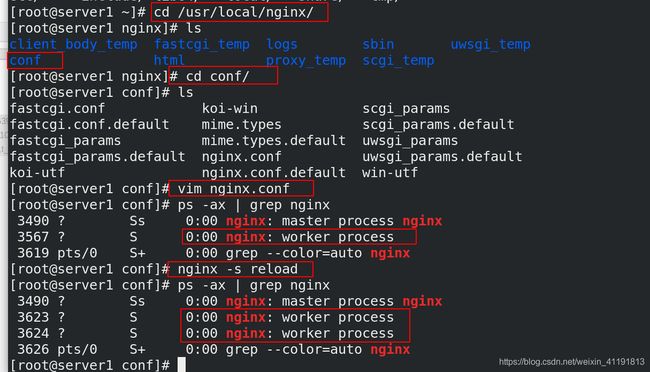
nginx安装之后就不要在源码目录,直接到安装目录/usr/local/nginx/下进行配置
修改配置文件后刷新即可,不需要重启服务
[root@server1 ~]# cd /usr/local/nginx/conf
[root@server1 conf]# vim nginx.conf            ## 修改配置文件
[root@server1 conf]# nginx -s reload           ## 刷新服务
[root@server1 conf]# ps -ax | grep nginx       ## 查看进程
 3490 ?        Ss     0:00 nginx: master process nginx
 3623 ?        S      0:00 nginx: worker process
 3624 ?        S      0:00 nginx: worker process
 3626 pts/0    S+     0:00 grep --color=auto nginx
3.1.2 结合压测工具ab测试nginx的高并发处理能力
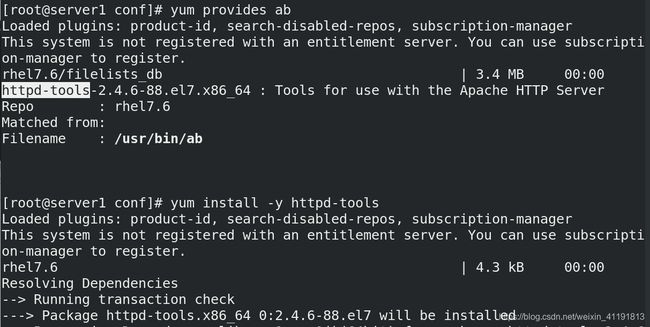
ab( apache bench )是apache下的一个工具,主要 用于对web站点做压力测试
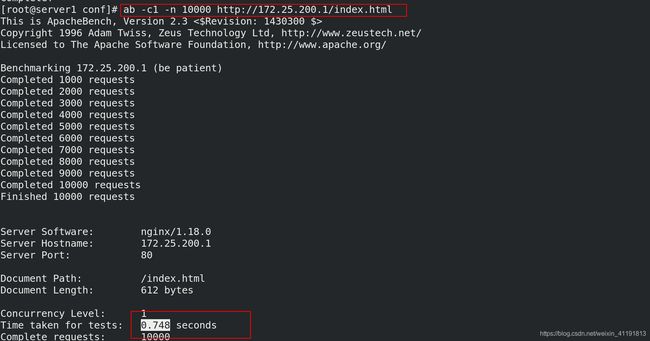
基础用法:
其中-c选项为一次发送的请求数量,即并发量。
-n选项为请求次数。
[root@server1 conf]# ab -c1 -n 10000 http://172.25.200.1/index.html
[root@server1 conf]# ab -c1 -n 50000 http://172.25.200.1/index.html
[root@server1 conf]# ab -c1 -n 100000 http://172.25.200.1/index.html
[root@server1 conf]# ab -c10 -n 10000 http://172.25.200.1/index.html
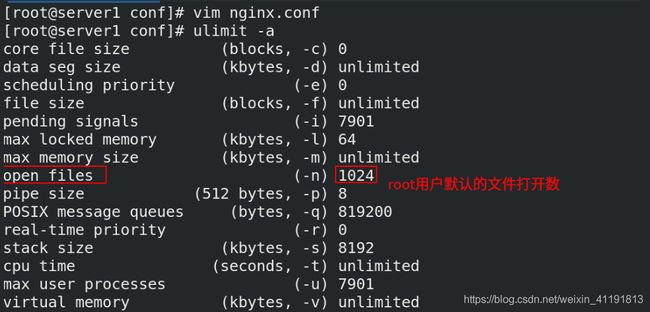
3.1.3 修改用户(nginx)打开文件数量的限额
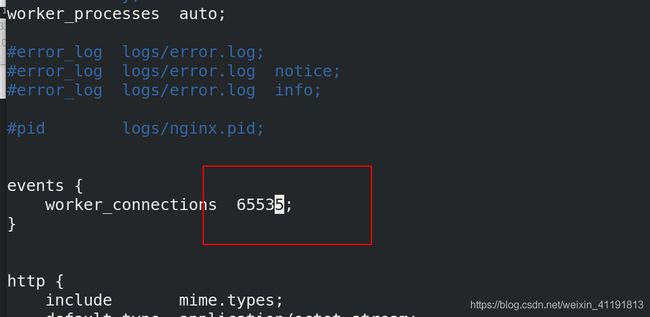
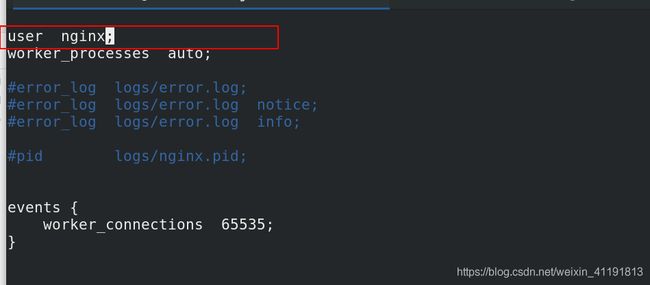
1、修改nginx配置文件
[root@server1 ~]# cd /usr/local/nginx/conf
[root@server1 conf]# vim nginx.conf
   user  nginx;

 	events {

	   worker_connections  65535;  ##设置工作的连接数
 	}

2、设置用户打开文件的数量限制
[root@server1 conf]# sysctl -a | grep file     ##查看系统支持打开文件数量限制
fs.file-max = 200079
fs.file-nr = 1056	0	200079
fs.xfs.filestream_centisecs = 3000
sysctl: reading key "net.ipv6.conf.all.stable_secret"
sysctl: reading key "net.ipv6.conf.default.stable_secret"
sysctl: reading key "net.ipv6.conf.eth0.stable_secret"
sysctl: reading key "net.ipv6.conf.lo.stable_secret"
[root@server1 conf]# vim /etc/security/limits.conf   ## 设置用户打开文件的数量限制,大于等于上边设置的工作连接数
  # End of file

  nginx           -       nofile          65536

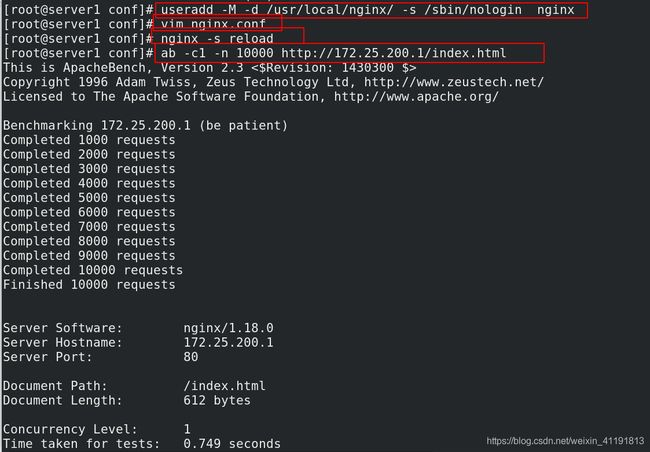
3、创建nginx用户
[root@server1 conf]# useradd -M -d /usr/local/nginx/ -s /sbin/nologin  nginx
##创建nginx用户, -M不要自动建立用户的登入目录,-d指定用户家目录  -s指定用户登入后所使用的shell ,这里nginx设置为不能登陆的用户
[root@server1 conf]# id nginx
uid=1000(nginx) gid=1000(nginx) groups=1000(nginx)


[root@server1 conf]# nginx -s reload    ## 刷新服务

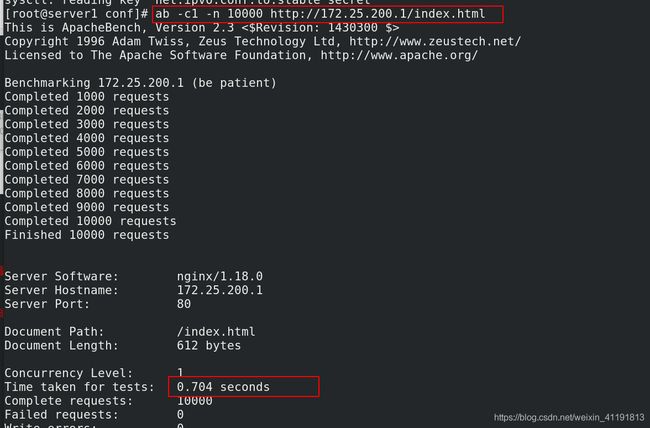
4、测试
[root@server1 conf]# ab -c1 -n 10000 http://172.25.200.1/index.html
3.2 nginx反向代理机制
nginx官方反向代理使用手册
3.2.1 nginx配置文件修改
[root@server1 conf]# pwd
/usr/local/nginx/conf
[root@server1 conf]# vim nginx.conf
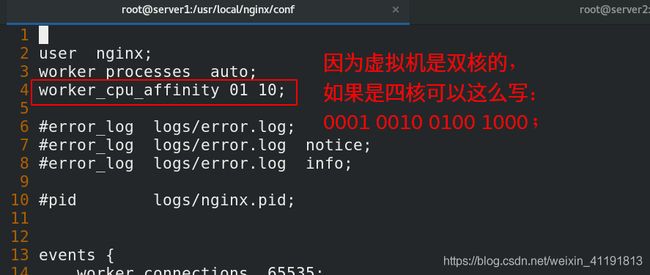
- worker_cpu_affinity 01 10;	##1代表内核开启,0代表内核关闭;cpu亲和(绑定)
- multi_accept on; 	##告诉nginx收到一个新连接通知后接受尽可能多的连接   默认打开
- use epoll; 		##使用epoll模型  默认就是使用epoll模型
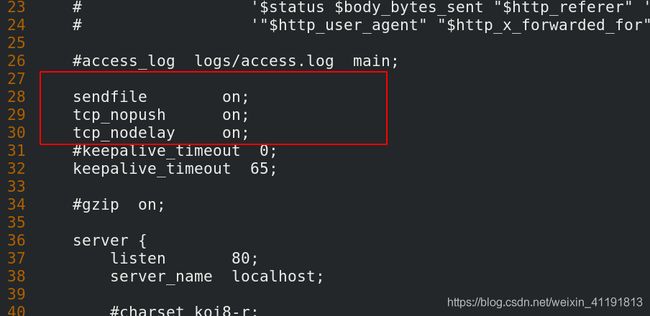
- 开启文件高效传输模式,同时设置tcp_nopush 和tcp_nodelay 为on,可以防止网路和磁盘IO阻塞。
	sendfile on;
	tcp_nopush on;
	tcp_nodelay on;

[root@server1 conf]# nginx -t   ##检查语法
nginx: the configuration file /usr/local/nginx/conf/nginx.conf syntax is ok
nginx: configuration file /usr/local/nginx/conf/nginx.conf test is successful

[root@server1 conf]# nginx -s reload  ## 刷新服务
3.2.2 负载均衡实验
3.2.2.1 首先打开server2和server3的apache服务,并且写好默认发布文件index.html
[root@server2 ~]# yum install -y httpd
[root@server2 ~]# systemctl start httpd.service
[root@server2 ~]# echo server2 > /var/www/html/index.html
[root@server2 ~]# curl localhost
server2

[root@server3 ~]# yum install -y httpd
[root@server3 ~]# systemctl start httpd.service
[root@server3 ~]# echo server3 > /var/www/html/index.html
[root@server3 ~]# curl localhost
server3
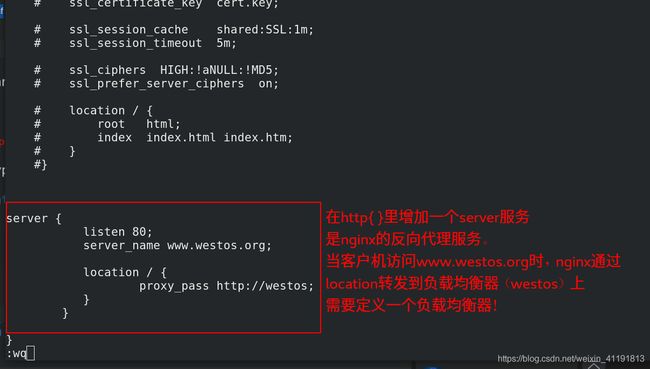
3.2.2.2 修改配置文件
[root@server1 conf]# vim nginx.conf
[root@server1 conf]# nginx -t
nginx: the configuration file /usr/local/nginx/conf/nginx.conf syntax is ok
nginx: configuration file /usr/local/nginx/conf/nginx.conf test is successful
[root@server1 conf]# nginx -s reload
3.2.2.3 测试
3.2.3 对负载均衡的补充(添加ip_hash,sticky cookie算法)
ip_hash算法
源地址不变,则后端调度不变,同一个ip过来的请求会发往同一个后端,不会改变。
[root@server1 conf]# vim nginx.conf
 21     ip_hash;
[root@server1 conf]# nginx -t
nginx: the configuration file /usr/local/nginx/conf/nginx.conf syntax is ok
nginx: configuration file /usr/local/nginx/conf/nginx.conf test is successful
[root@server1 conf]# nginx -s reload

在真机上测试
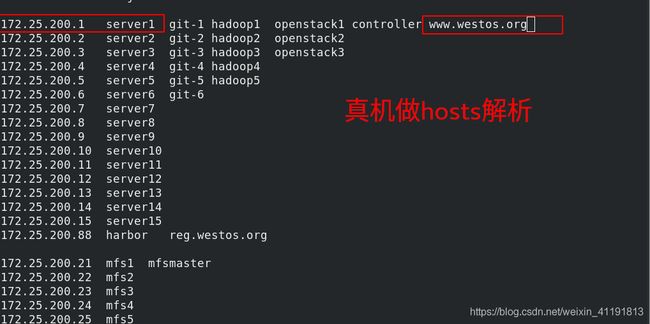
[root@haojin ~]# for i in {1..6};do curl www.westos.org;done
server2
server2
server2
server2
server2
server2

注意:添加ip_hash时要注释掉backup选项,因为backup不支持ip_hash算法,同时开启会报错。


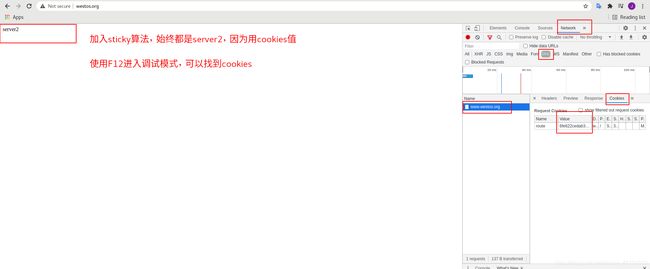
sticky cookie 算法(针对浏览器访问的优化)
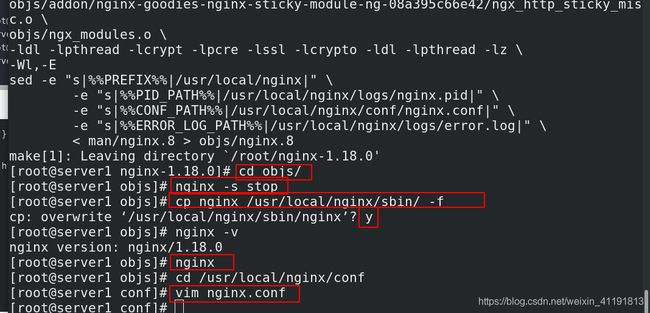
专业版才可以使用的,但是还是有办法实现社区版使用的
所缺的组件在pub/docs/lamp/下
[root@server1 ~]# unzip nginx-goodies-nginx-sticky-module-ng-08a395c66e42.zip
[root@server1 ~]# cd nginx-1.18.0/
[root@server1 nginx-1.18.0]# make clean
rm -rf Makefile objs

[root@server1 nginx-1.18.0]# ./configure --prefix=/usr/local/nginx --with-http_ssl_module --with-http_stub_status_module --add-module=/root/nginx-goodies-nginx-sticky-module-ng-08a395c66e42  ##添加相关模块重新编译
[root@server1 nginx-1.18.0]# make
[root@server1 nginx-1.18.0]# cd objs/
[root@server1 objs]# nginx -s stop
[root@server1 objs]# cp nginx /usr/local/nginx/sbin/ -f
cp: overwrite ‘/usr/local/nginx/sbin/nginx’? y ##复制重新编译好的nginx到相关目录下
[root@server1 objs]# nginx -v
nginx version: nginx/1.18.0
[root@server1 objs]# nginx
[root@server1 objs]# cd /usr/local/nginx/conf
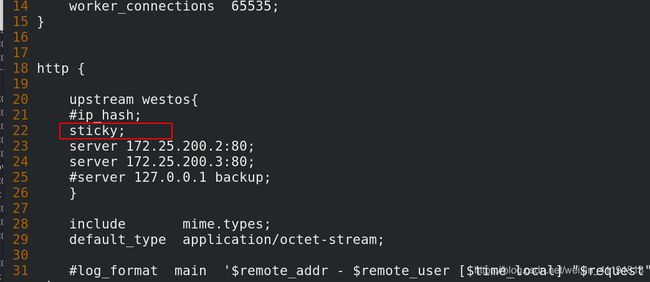
[root@server1 conf]# vim nginx.conf  ##编辑配置文件
 22     sticky;
[root@server1 conf]# nginx -t
nginx: the configuration file /usr/local/nginx/conf/nginx.conf syntax is ok
nginx: configuration file /usr/local/nginx/conf/nginx.conf test is successful
[root@server1 conf]# nginx -s reload

[root@foundation ~]# curl www.westos.org
 server2
[root@foundation ~]# curl www.westos.org
 server3
4、nginx的平滑升级与回退(热更新热回退)
4.1 版本热升级
1. 下载nginx新版本软件,正常执行./configure 和make 但不要执行make install
[root@server1 nginx-1.19.1]# cd nginx-1.19.1/
[root@server1 nginx-1.19.1]# vim auto/cc/gcc      ##关闭debug功能
[root@server1 nginx-1.19.1]# ./configure --prefix=/usr/local/nginx --with-http_ssl_module --with-http_stub_status_module --add-module=/root/nginx-goodies-nginx-sticky-module-ng-08a395c66e42
[root@server1 nginx-1.19.1]# make

2. 备份原程序:
	cd /usr/local/nginx/sbin
	cp nginx nginx.old

3. 拷贝新程序:
	cd nginx-1.19.1/objs
	\cp -f nginx /usr/local/nginx/sbin     ## \可以去除询问,直接执行

4. 获取当前nginx主进程pid:
[root@server1 objs]# ps ax|grep nginx
 6244 ?        Ss     0:00 nginx: master process nginx
 6250 ?        S      0:00 nginx: worker process
 6251 ?        S      0:00 nginx: worker process
 9019 pts/0    R+     0:00 grep --color=auto nginx

5. 升级新程序:
[root@server1 objs]# kill -USR2 6244
[root@server1 objs]# ps ax|grep nginx
 6244 ?        Ss     0:00 nginx: master process nginx
 6250 ?        S      0:00 nginx: worker process
 6251 ?        S      0:00 nginx: worker process
 9020 ?        S      0:00 nginx: master process nginx
 9021 ?        S      0:00 nginx: worker process
 9022 ?        S      0:00 nginx: worker process
 9024 pts/0    S+     0:00 grep --color=auto nginx

[root@server1 objs]# nginx -v
nginx version: nginx/1.19.1


6.关闭原worker进程但保留主进程:为了可以回退
[root@server1 objs]# kill -WINCH 6244
[root@server1 objs]# ps ax|grep nginx
 6244 ?        Ss     0:00 nginx: master process nginx
 9020 ?        S      0:00 nginx: master process nginx
 9021 ?        S      0:00 nginx: worker process
 9022 ?        S      0:00 nginx: worker process
 9027 pts/0    R+     0:00 grep --color=auto nginx
![]()
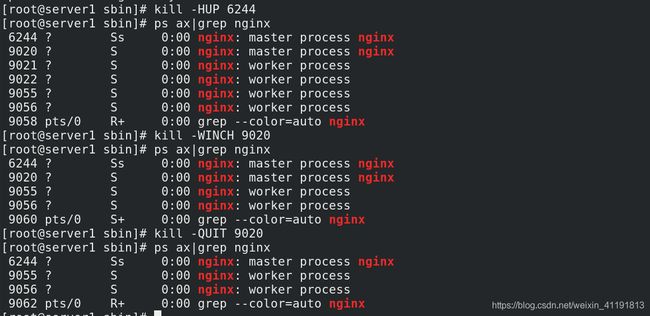
4.2 版本热回退
1.还原nginx程序:
[root@server1 objs]# cd /usr/local/nginx/sbin
[root@server1 sbin]# cp nginx.old  nginx

2.唤醒原进程: kill -HUP 6244
[root@server1 sbin]# kill -HUP 6244
[root@server1 sbin]# ps ax|grep nginx
 6244 ?        Ss     0:00 nginx: master process nginx
 9020 ?        S      0:00 nginx: master process nginx
 9021 ?        S      0:00 nginx: worker process
 9022 ?        S      0:00 nginx: worker process
 9055 ?        S      0:00 nginx: worker process
 9056 ?        S      0:00 nginx: worker process
 9058 pts/0    R+     0:00 grep --color=auto nginx


3.回收新版本的worker进程: kill -WINCH 9020
[root@server1 sbin]# kill -WINCH 9020
[root@server1 sbin]# ps ax|grep nginx
 6244 ?        Ss     0:00 nginx: master process nginx
 9020 ?        S      0:00 nginx: master process nginx
 9055 ?        S      0:00 nginx: worker process
 9056 ?        S      0:00 nginx: worker process
 9060 pts/0    S+     0:00 grep --color=auto nginx

4.关闭新版本主进程: kill -QUIT 9020
[root@server1 sbin]# kill -QUIT 9020
[root@server1 sbin]# ps ax|grep nginx
 6244 ?        Ss     0:00 nginx: master process nginx
 9055 ?        S      0:00 nginx: worker process
 9056 ?        S      0:00 nginx: worker process
 9062 pts/0    R+     0:00 grep --color=auto nginx

[root@server1 sbin]# nginx -v
nginx version: nginx/1.18.0
5、nginx限流
官方参考手册
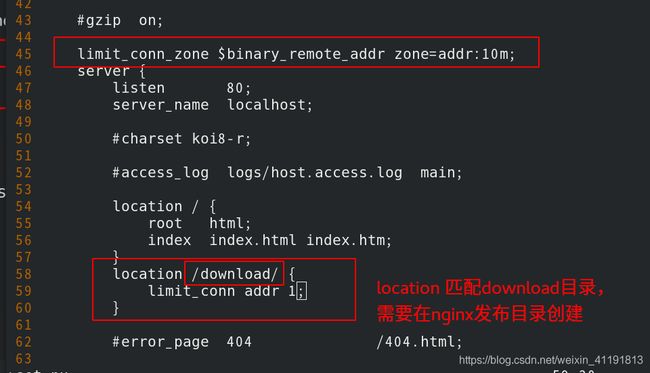
控制单IP并发连接数:
	http {

	limit_conn_zone $binary_remote_addr zone=addr:10m;
	#$binary_remote_addr 表示通过remote_addr这个标识来做限制
	#zone=addr:10m 表示生成一个大小为10M,名字为addr的内存区域
	...
	server {

	location /download/ {

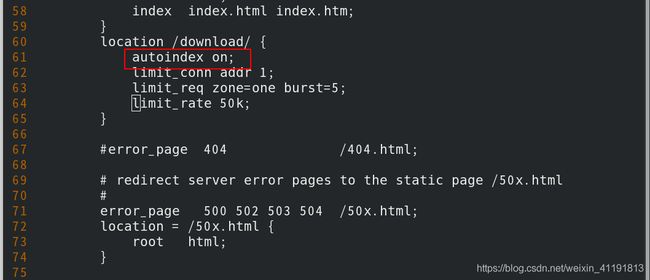
	    limit_conn addr 1;		#限制并发数
	    limit_rate 50k;			#限制带宽
	   }
	}

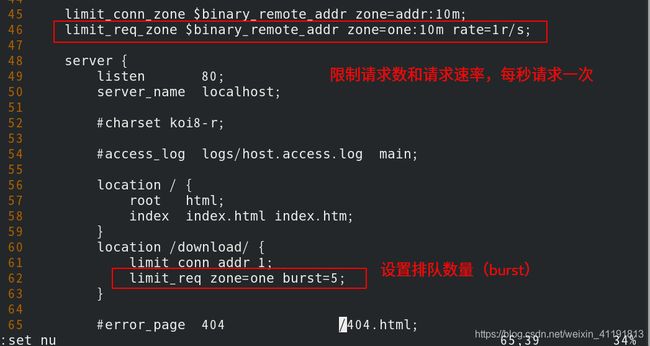
限制单位时间内的请求数目,以及速度限制:
	http {

	limit_req_zone $binary_remote_addr zone=one:10m rate=1r/s;
	#rate=1r/s表示允许相同标识的客户端的访问频次,这里限制的是每秒1次
	...
	server {

	location / {

	       limit_req zone=one;               ##限制请求数目为1
	#	 limit_req zone=one burst=5          ##5个人排队
	#	 limit_req zone=one burst=5 nodelay; ##没有延时
	}
	}
5.1 控制单IP并发连接数
检查nginx服务启动
[root@server1 conf]# pwd
/usr/local/nginx/conf
[root@server1 conf]# ps -ax | grep nginx
 3520 ?        Ss     0:00 nginx: master process nginx
 3521 ?        S      0:00 nginx: worker process
 3522 ?        S      0:00 nginx: worker process
 3524 pts/0    S+     0:00 grep --color=auto nginx

创建download发布目录,并放几张图进去
[root@server1 conf]# cd /usr/local/nginx/html/
[root@server1 html]# ls
50x.html  index.html
[root@server1 html]# mkdir download       ##如果不能访问记得给文件权限
[root@server1 html]# ls
50x.html  download  index.html

[root@haojin docs]# scp vim.jpg iso7.gif server1:/usr/local/nginx/html/download
root@server1's password:
vim.jpg                                       100%  443KB  56.8MB/s   00:00
iso7.gif                                      100%  220KB  76.6MB/s   00:00

修改nginx配置文件
[root@server1 conf]# vim nginx.conf
[root@server1 conf]# nginx -t
nginx: the configuration file /usr/local/nginx/conf/nginx.conf syntax is ok
nginx: configuration file /usr/local/nginx/conf/nginx.conf test is successful
[root@server1 conf]# nginx -s reload

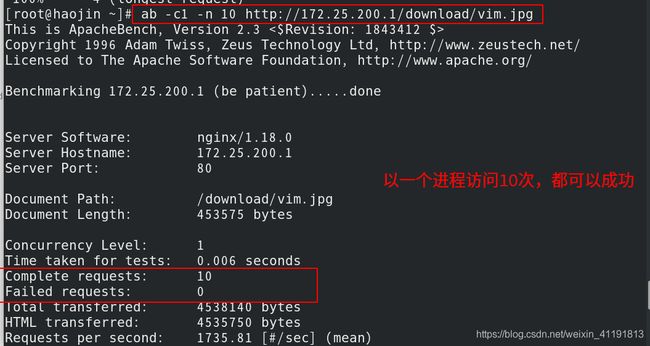
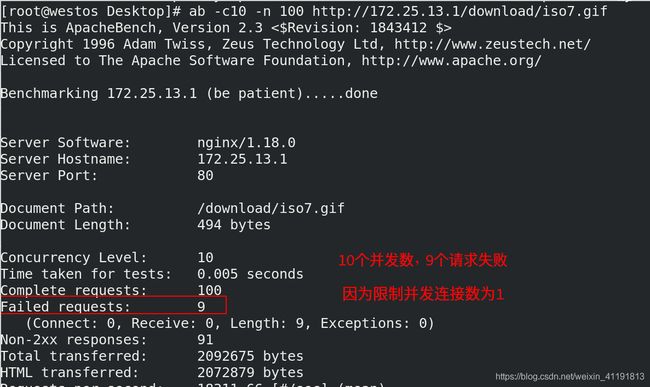
测试
ab -c10 -n 10 http://172.25.200.1/download/vim.jpg
ab -c1 -n 10 http://172.25.200.1/download/vim.jpg
5.2 设置单位时间内的请求数目,以及请求数量
修改文件
[root@server1 conf]# vim nginx.conf
[root@server1 conf]# nginx -t
nginx: the configuration file /usr/local/nginx/conf/nginx.conf syntax is ok
nginx: configuration file /usr/local/nginx/conf/nginx.conf test is successful
[root@server1 conf]# nginx -s reload

测试
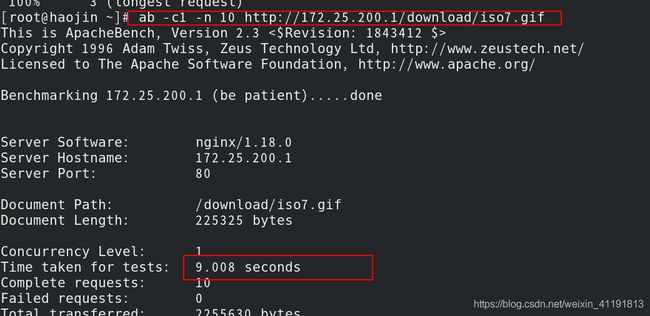
[root@haojin ~]# ab -c1 -n 10 http://172.25.200.1/download/iso7.gif
5.3 限制带宽(下载速度)
6、nginx其他配置管理
- 自动索引:查询方便
	location / {

	    autoindex on;
	}

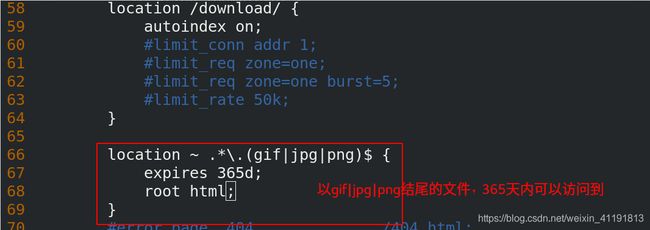
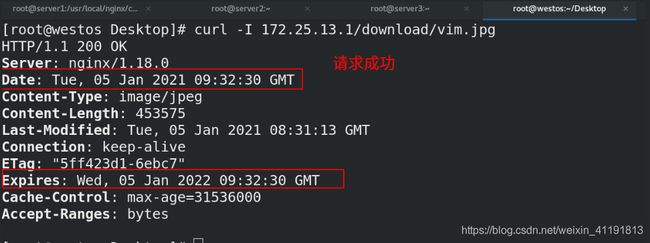
- Nginx expire缓存配置: 缓存可以降低网站带宽,加速用户访问
	location ~ .*\.(gif|jpg|png)$ {

	    expires 365d;
	    root /www;
	}
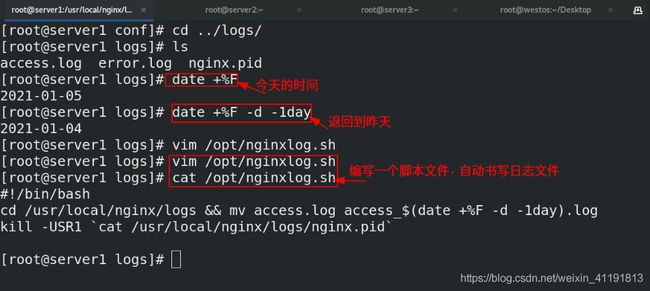
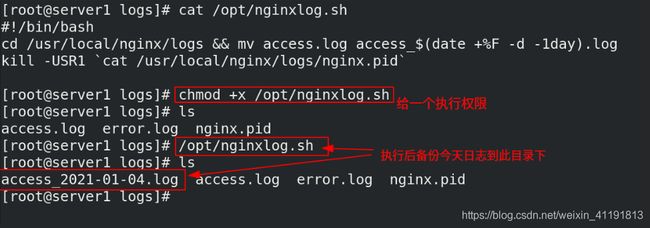
- 日志轮询:
	- 	# cat nginxlog.sh
		#!/bin/bash
		cd /usr/local/nginx/logs && mv access.log access_$(date +%F -d -1day).log
		kill -USR1 `cat /usr/local/nginx/logs/nginx.pid`

	-	再加入crontab定时任务
		00 00 * * * /opt/scripts/nginxlog.sh &> /dev/null
		为了安全,日志目录不需要给你nginx用户访问权限
		# chmod -R 700 /usr/local/nginx/logs

- 禁用不必要的日志记录,以节省磁盘IO的消耗
	location ~ .*\.(js|jpg|jpeg|png|css|bmp|gif)$ {

		access_log off;
	}
- 站点目录和文件的限制
	location ~ ^/images/.*\.(sh|php)$ {

	                deny all;
	        }
- 中文乱码
	charset utf-8;
6.1 自动索引
6.2 Nginx expire缓存配置: 缓存可以降低网站带宽,加速用户访问
6.3 日志轮询
6.4 禁用没用的日志
6.5 访问文件的限制
6.6 中文乱码
6.7 限制IP
7、nginx重定向
防止与真实域名www.westos.org冲突,从这里开始,虚拟主机域名改为www.haojin.com
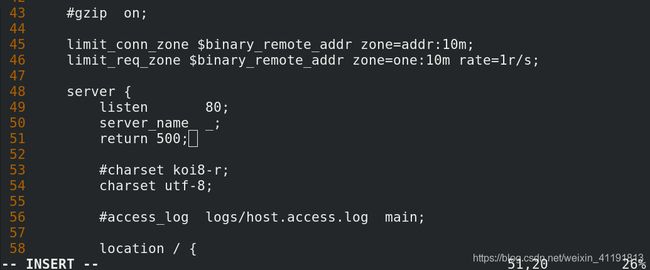
1.防止域名恶意解析到服务器IP:
	server {

	listen 80;
	server_name   _;
	return 500;
	}
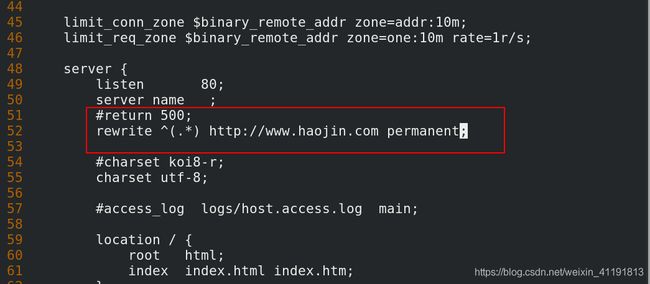
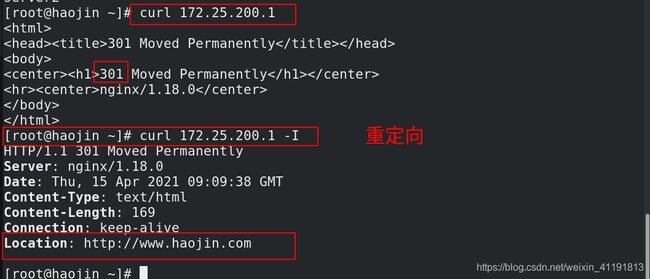
2.也可以重定向:
	server {

	listen 80;
	server_name   _;
	rewrite ^(.*) http://www.baidu.com permanent;
	}
3.80重定向443:
	server {

		listen 80;
		server_name www.haojin.com;
		rewrite ^/(.*)$ https://www.haojin.com/$1 permanent;
	}
4.www.haojin.com/bbs 重定向bbs.haojin.com:
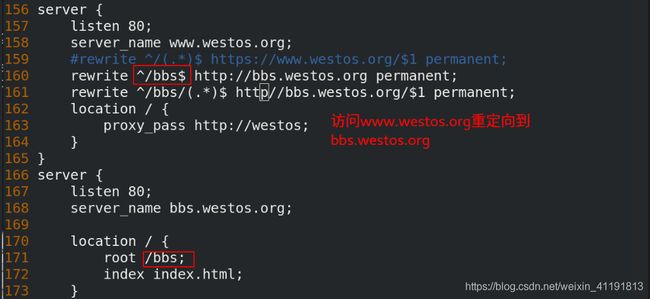
	rewrite ^/bbs$ http://bbs.haojin.com permanent;
	rewrite ^/bbs/(.*)$ http://bbs.haojin.com/$1 permanent;
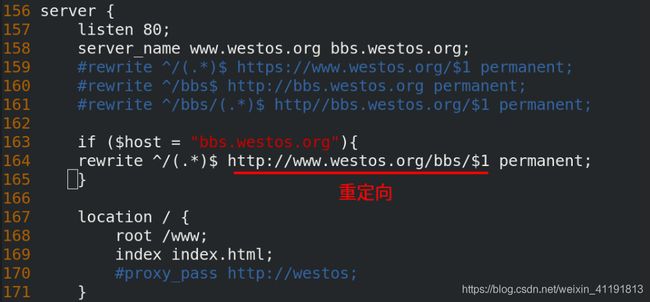
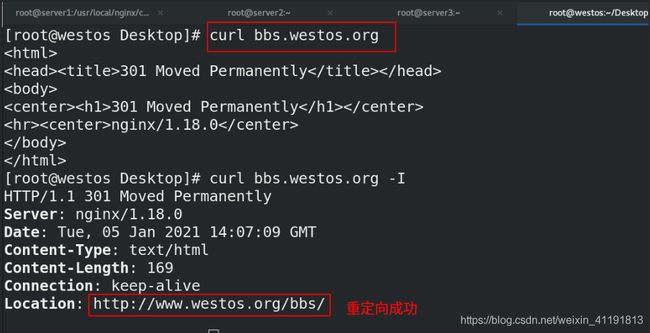
5.bbs.haojin.com 重定向www.haojin.com/bbs:
	if ($host = "bbs.haojin.com"){

		rewrite ^/(.*)$ http://www.haojin.com/bbs/$1 permanent;
	}
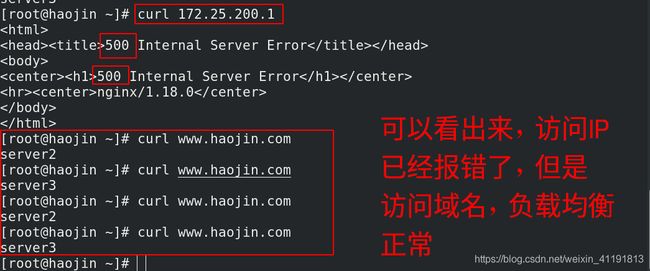
7.1 防止域名恶意解析到服务器IP
当域名恶意解析到服务器IP,会暴露IP地址,这样会对服务器不安全,所以要防止恶意解析。
[root@server1 conf]# vim nginx.conf
[root@server1 conf]# nginx -s reload
7.2 重定向
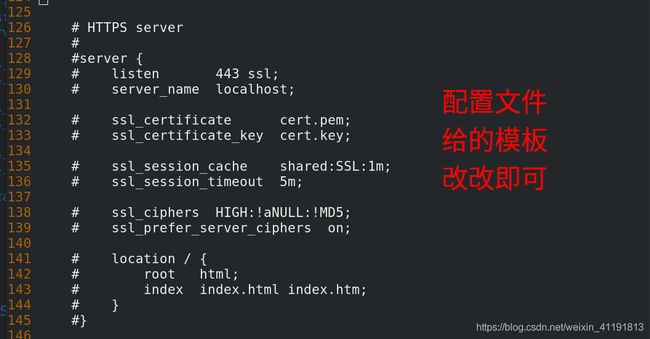
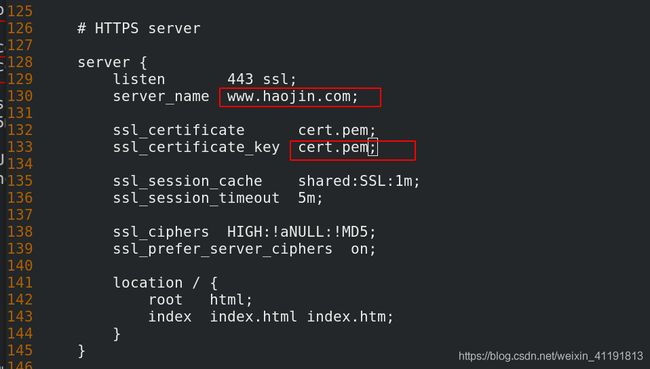
7.3 http(80)重定向https(443)
[root@server1 conf]# cd /etc/pki/tls/certs/
[root@server1 certs]# ls
ca-bundle.crt  ca-bundle.trust.crt  make-dummy-cert  Makefile  renew-dummy-cert
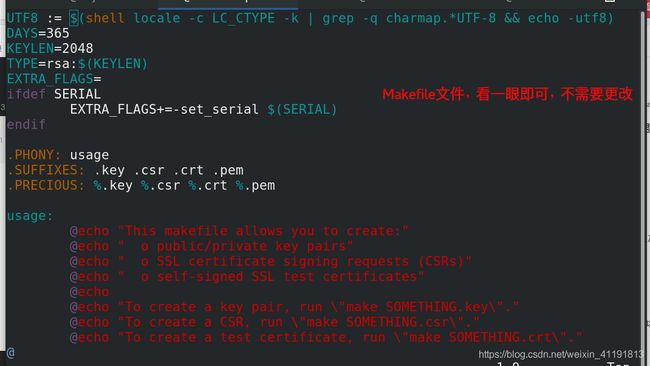
[root@server1 certs]# vim Makefile   ##Makefile中有生成密钥的方式,所以阿要到这个目录下生成
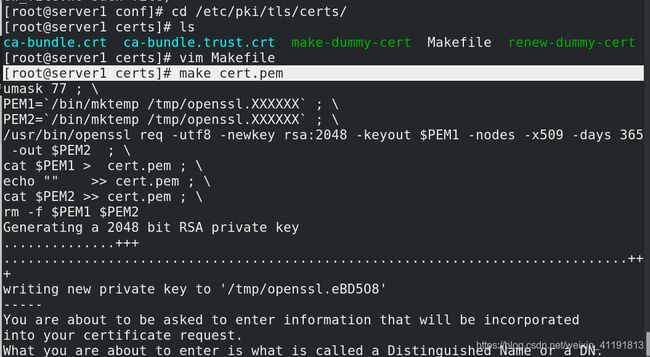
[root@server1 certs]# make cert.pem

[root@server1 certs]# mv cert.pem /usr/local/nginx/conf/   ##将认证文件移到对应的目录
[root@server1 certs]# nginx -t
nginx: the configuration file /usr/local/nginx/conf/nginx.conf syntax is ok
nginx: configuration file /usr/local/nginx/conf/nginx.conf test is successful
[root@server1 certs]# nginx -s reload

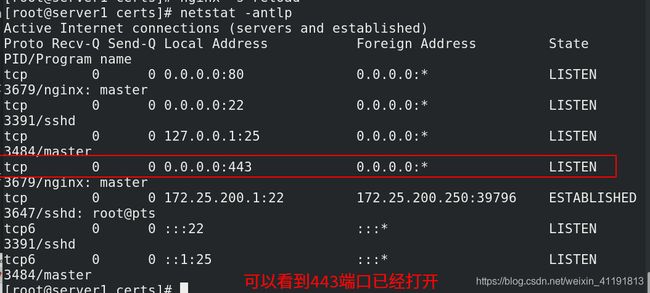
[root@server1 certs]# netstat -antlp    ## 查看443端口是否打开
上面已经完成了https加密访问,但还需要手动输入https,下面打开http转https,用户直接通过https加密访问服务器
![]()
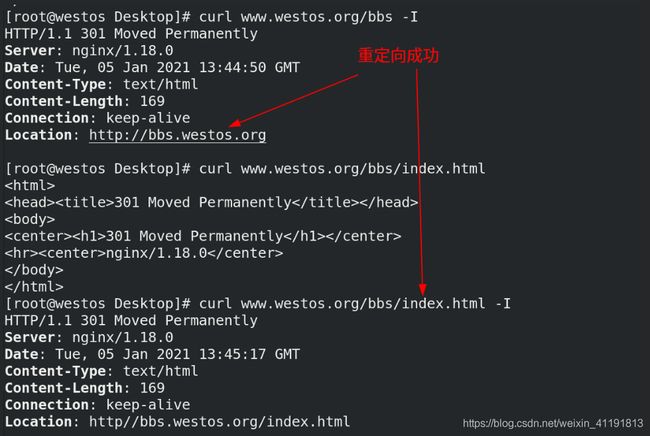
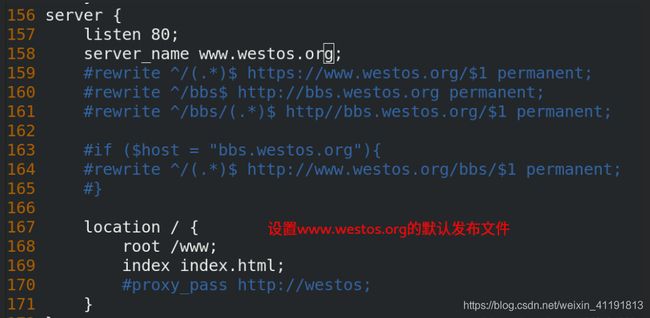
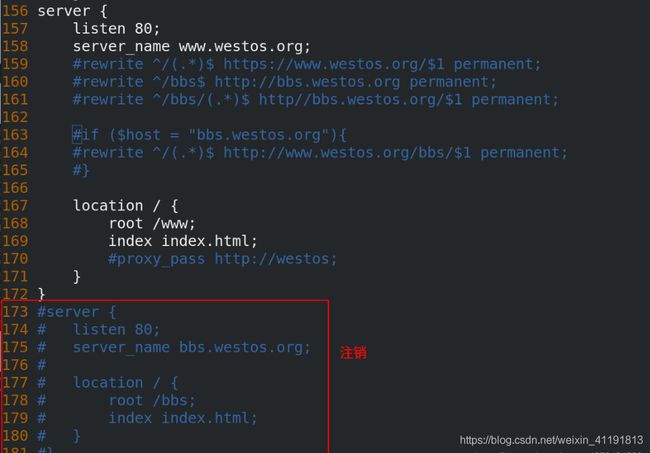
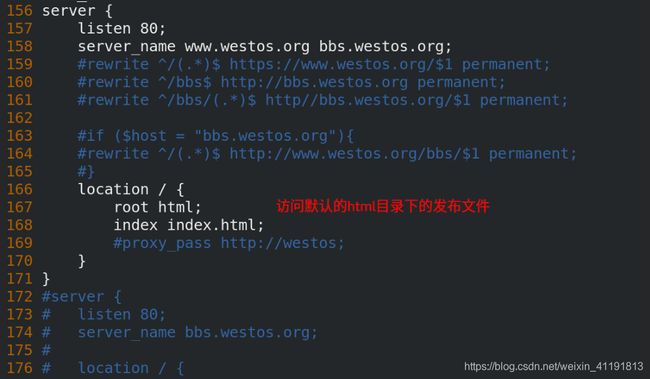
7.4 www.westos.org/bbs 重定向bbs.westos.org
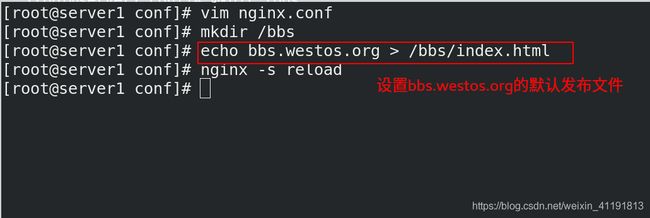
定义一个虚拟主机服务,访问域名是bbs.haojin.com ,默认发布目录是/bbs,以下图片供参考,只是域名变化
7.5 bbs.haojin.com 重定向www.haojin.com/bbs
8、防盗链
- location ~ \.(jpg|png)$ {

            valid_referers none blocked www.haojin.com;
            if ($invalid_referer) {

                    return 403;
                    #rewrite ^/ http://www2.westos.org/daolian.jpg; ##或者直接重定向
            }
    }
8.1 修改nginx配置文件(server1)
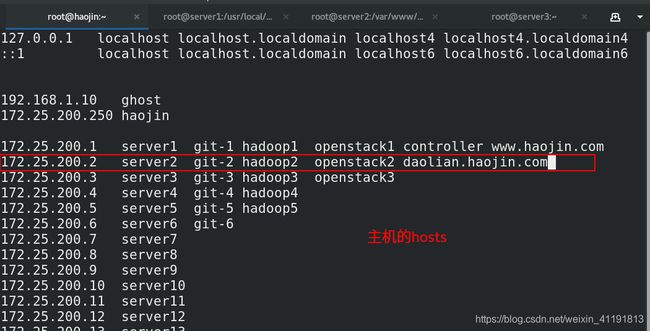
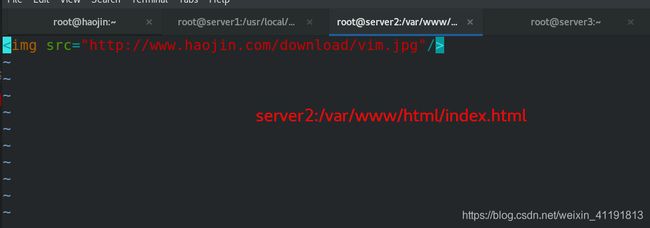
8.2 配置server2上的http服务
当访问server2上的http发布文件时,盗链server1(nginx服务)的内容

8.3 利用真机测试访问(此时是盗链状态,可以正常访问到页面)
利用真机浏览器访问,访问的时server2的http服务,实质时盗链server1服务的发布文件,是盗链的过程

8.4 设置防盗链
[root@server1 conf]# vim nginx.conf
[root@server1 conf]# nginx -t
nginx: the configuration file /usr/local/nginx/conf/nginx.conf syntax is ok
nginx: configuration file /usr/local/nginx/conf/nginx.conf test is successful
[root@server1 conf]# nginx -s reload
