
1 操作文档
http://python-packaging.readthedocs.io/en/latest/minimal.html
2 账号操作
- 注册账号
- 邮箱验证
3 环境准备
打包代码成对应格式(source, .egg .whl等),需要对应的环境准备。包括:
注意:安装环境(Python2.x或Python3.x)问题
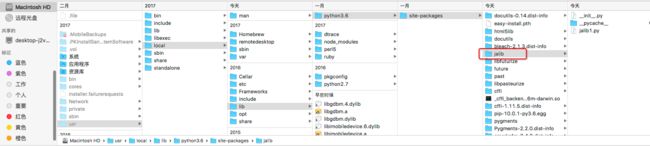
安装路径:/usr/local/lib/python3.6/site-packages
3.1 setuptools 安装
- 下载 setuptools 源码
- 解压后,通过终端切换到setup.py 所在目录
cd xxx - 执行命令
python setup.py install或python3 setup.py install
3.2 pip 安装
- 借助 setuptools 工具提供的 easy_install 安装 pip
- 执行命令
easy_install pip或easy_install-3.6 pip
3.3 wheel 安装
- 执行命令
pip install wheel或python3 -m pip install wheel
3.4 twine 安装
- 执行命令
pip install twine或python3 -m pip install twine
4 发布前准备
4.1 创建项目
-
包项目目录机构
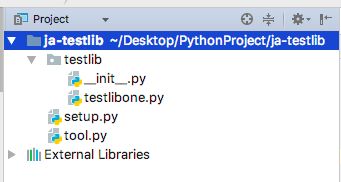
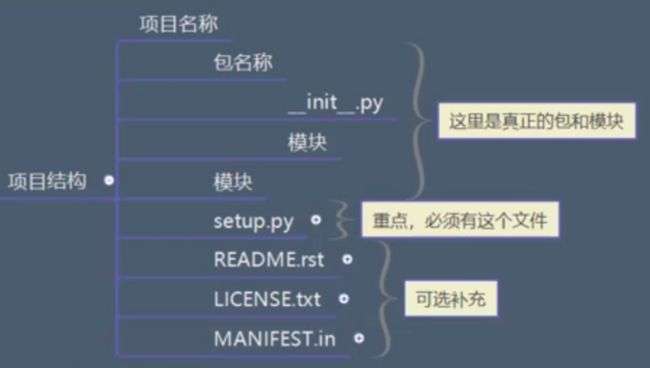
必须文件
setup.py
作用:
项目信息的配置文件
这个里面最重要的就是执行一个 setup 函数,通过这个函数来指明信息示例:
from distutils.core import setup
setup(形参1=实参1, 形参2 = 实参2)
推荐使用一下方式:
from setuptools import setup
setup(形参1=实参1, 形参2 = 实参2)
- 参数说明
必须参数:
name = “test-lib”
version = “1.0.0”
description = “nubility lib”
packages = ["alib"] #需要打包到目标文件的包列表名
py_modules = ["single_module"] #需要打包到目标文件的单文件模块列表名
非必须
author = “ja”
author_email = "[email protected]"
long_description = "这里的字符串可以通过 readme.rst 文件中读取进来的" # 会显示在 pypi 的项目介绍中
install_requires = [”requests > 2.18“] #依赖的其他包
python_requires = ">=3" Python 版本限制
url = "项目主页地址"
license = “MIT” #协议
- 具体 setup.py 脚本文档
- https://docs.python.org/3.6/distutils/setupscript.html
- https://packaging.python.org/tutorials/packaging-projects/
具体执行步骤:
1 编写 setup.py 文件
from setuptools import setup

setup(name="ja-testlib", version="1.0.0", description="just a test lib", packages=["testlib"], py_modules=["tool"], author="jacob", author_email="[email protected]", long_description="just a long description here, is a greate lib", url="https://github.com")
2 然后切换到setup.py 目录下,执行命令python3 setup.py sdist (sdist 为 source distribution 源码分发)
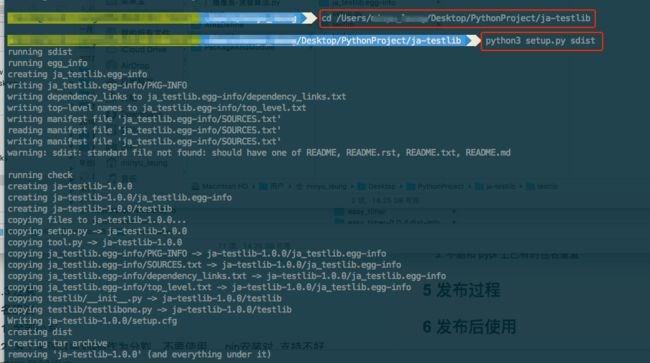
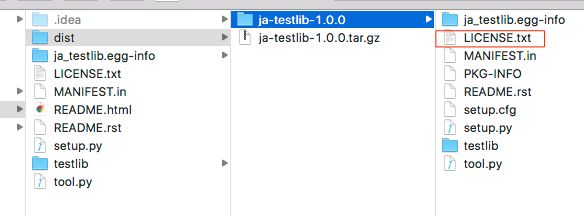
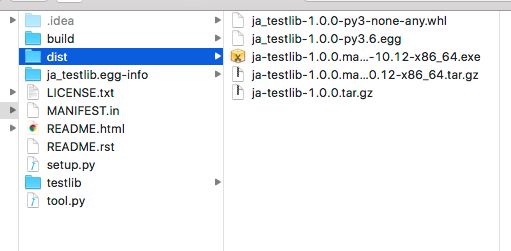
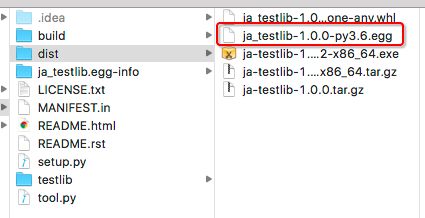
3 查看生成结果
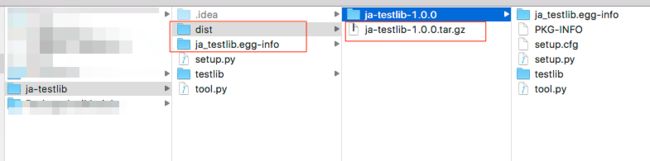
- 执行上述命令
python3 setup.py sdist后,会生成 dist 和 ja_testlib.egg-info 文件夹,其中dist文件夹内还会生成一个ja_testlib-1.0.0.tar.gz 的压缩包 - 解压后可以查看到内部具有项目中的目标文件
补充文件:
README.rst
概念
rst:reStructuredText,重新构建的文本作用
- 可以使用特定的字符,来描述文本格式
- Pypi平台能够自动识别 long_description 字段中所写的这种格式的字符串
- 但是,如果把字符串都写在 setup函数的参数中,会显得混乱,所以,一般把内容写在一个单独的README.rst文件中;然后在 setup.py 文件中,读取这个文件的内容,并赋值给 long_description参数即可
- 文件内内容编写
- 语法说明 http://zh-sphinx-doc.readthedocs.io/en/latest/contents.html
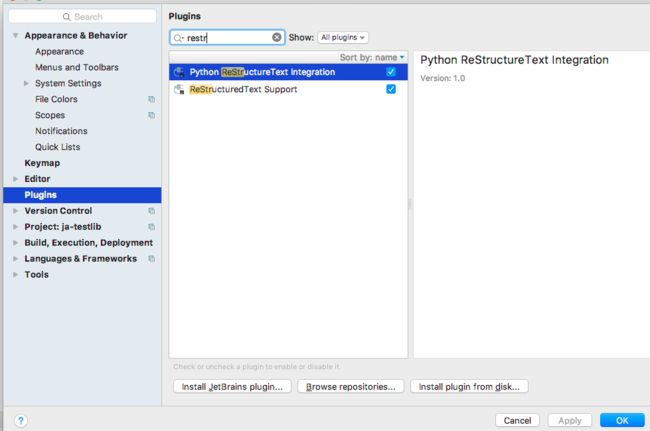
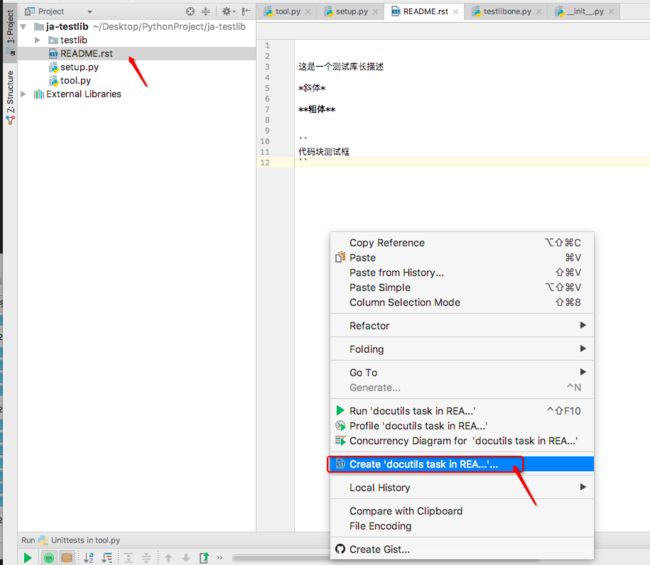
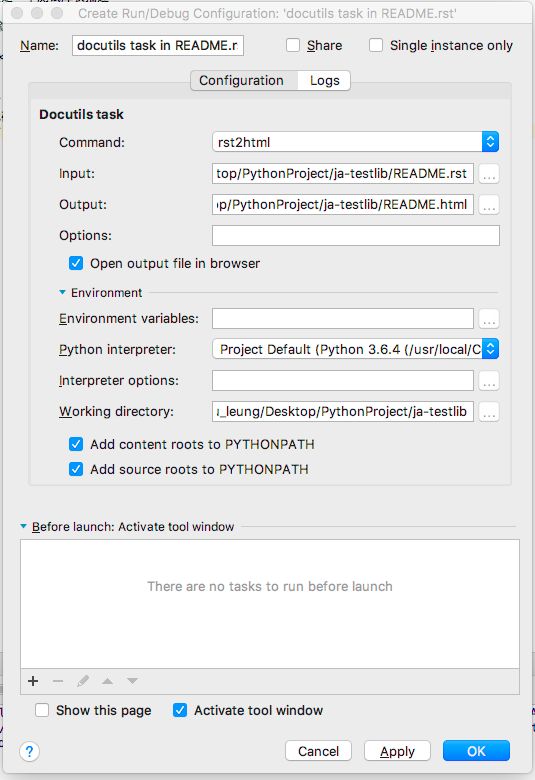
rst 使用 - 建议使用 pycharm 编辑,pycharm 中安装一个支持 rst 的插件
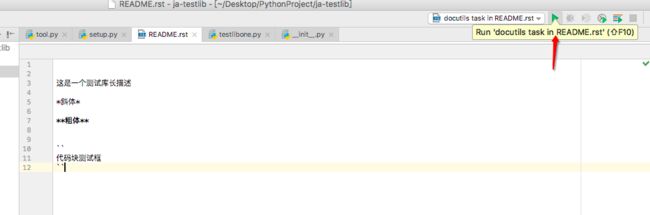
文件编写
README.rst

这是一个测试库长描述

*斜体*

**粗体**


``代码块测试框``
通过读取.rst 文件传入 long_description 参数中
setup.py

from setuptools import setup

def readme_file():
    with open("README.rst", encoding="utf-8") as rf:
        return rf.read()

setup(name="ja-testlib",
      version="1.0.0",
      description="just a test lib",
      packages=["testlib"],
      py_modules=["tool"],
      author="jacob",
      author_email="[email protected]",
      long_description=readme_file(),
      url="https://github.com")
- 语法检测
问题:
如果,写的 rst 文件,无法在 Pypi 平台正常显示。原因:
Pypi 上对于 rst 的解析器问题,并不是 sphinx 导致部分语法有一些差异解决:
先从本地对 long_description 进行验证
验证通过后,再上传步骤:
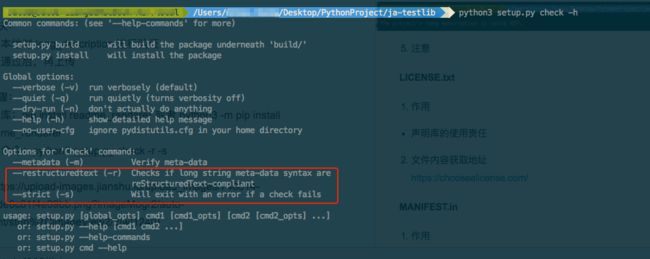
安装库:pip install readme_renderer 或者 python3 -m pip install readme_renderer
执行命令:python3 setup.py check -r -s
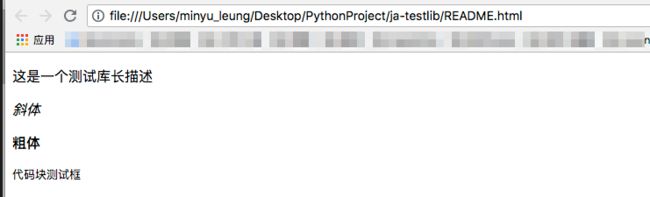
使用参考
通过 html 形式查看 rst 文件内容格式
LICENSE.txt
- 作用
- 声明库的使用责任
- 文件内容获取地址
https://choosealicense.com/
MANIFEST.in
- 作用
让项目在打包过程中主动包含指定的文件
include LICENSE.txt
include README.rst
注意:
setup.py 中如果通过 from distutils.core import setup的话,是不会默认将文件 README.rst打包进入的。
官方使用文档:
https://docs.python.org/3/distutils/sourcedist.html#specifying-the-files-to-distribute
包含:include *.txt
递归包含:recursive-include examples *.txt *.py
屏蔽:prune examples/sample?/build
4.2 编译生成发布包
- 进入 setup.py 同级目录
cd xxx - 执行下述命令
python3 setup.py sdist --formats = zip,tar

生成源码的压缩包
包含 setup.py,模块源文件,数据文件等
可以使用在任何平台上重新编译所有内容
--formats = zip,tar (zip,gztar,bztar,xztar,ztar,tar 等)
python3 setup.py bdist

生成二进制发行包
不包括 setup.py
是某个特定平台和 Python 版本的一个存档
python3 setup.py bdist_egg
python3 setup.py bdist_wheel
python3 setup.py bdist_wininst
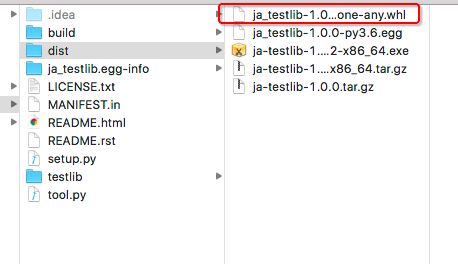
执行上述命令后:
更多命令查看:python3 setup.py --help-commands
$ python3 setup.py --help-commands

Standard commands:
  build             build everything needed to install
  build_py          "build" pure Python modules (copy to build directory)
  build_ext         build C/C++ extensions (compile/link to build directory)
  build_clib        build C/C++ libraries used by Python extensions
  build_scripts     "build" scripts (copy and fixup #! line)
  clean             clean up temporary files from 'build' command
  install           install everything from build directory
  install_lib       install all Python modules (extensions and pure Python)
  install_headers   install C/C++ header files
  install_scripts   install scripts (Python or otherwise)
  install_data      install data files
  sdist             create a source distribution (tarball, zip file, etc.)
  register          register the distribution with the Python package index
  bdist             create a built (binary) distribution
  bdist_dumb        create a "dumb" built distribution
  bdist_rpm         create an RPM distribution
  bdist_wininst     create an executable installer for MS Windows
  check             perform some checks on the package
  upload            upload binary package to PyPI

Extra commands:
  bdist_wheel       create a wheel distribution
  alias             define a shortcut to invoke one or more commands
  bdist_egg         create an "egg" distribution
  develop           install package in 'development mode'
  easy_install      Find/get/install Python packages
  egg_info          create a distribution's .egg-info directory
  install_egg_info  Install an .egg-info directory for the package
  rotate            delete older distributions, keeping N newest files
  saveopts          save supplied options to setup.cfg or other config file
  setopt            set an option in setup.cfg or another config file
  test              run unit tests after in-place build
  upload_docs       Upload documentation to PyPI

usage: setup.py [global_opts] cmd1 [cmd1_opts] [cmd2 [cmd2_opts] ...]
   or: setup.py --help [cmd1 cmd2 ...]
   or: setup.py --help-commands
   or: setup.py cmd --help
4.3 注意
命名建议
1. 全部小写
2. 多个单词以中划线-作为分割,不要使用,pip安装对支持不好
3. 不能和 pypi 上已有的包名重复以上生成的发布包,已经可以进行本地安装
-
安装方式
带 setup.py 源码压缩包
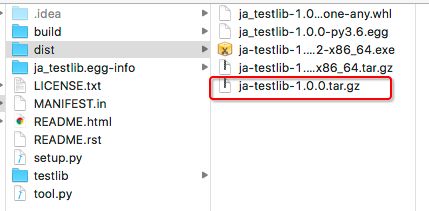
方式一
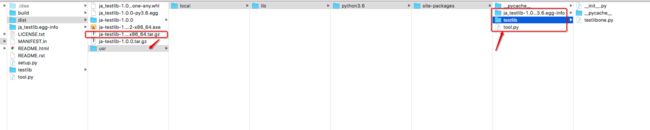
解压,进入同级目录
执行 python3 setup.py install
方式二
pip install 压缩包
方式三
easy_install 压缩包
二进制发行包
可以通过解压直接拷贝到指定目录
windows 下的安装文件
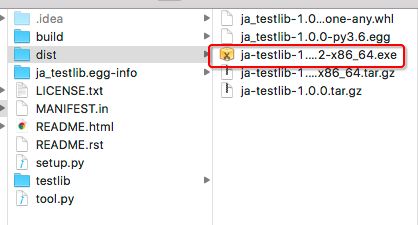
双击运行
.egg 格式
easy_install xxx.egg
.whl 格式
easy_install xxx.whl
或
pip install xxx.whl
5 发布过程
- 进入到刚才生成的发布包文件夹内
- 执行以下命令,分别上传对应格式发布包文件
twine upload xxx.zip


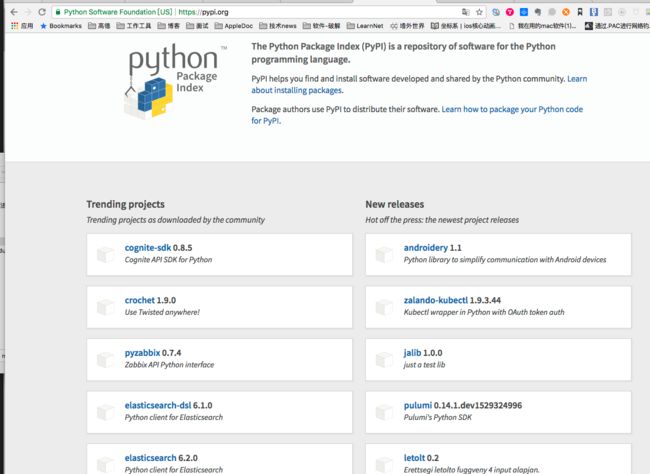
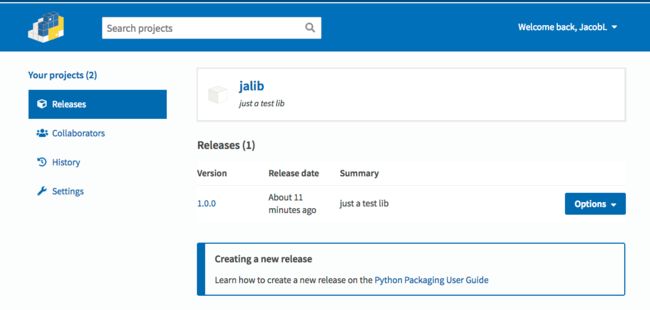
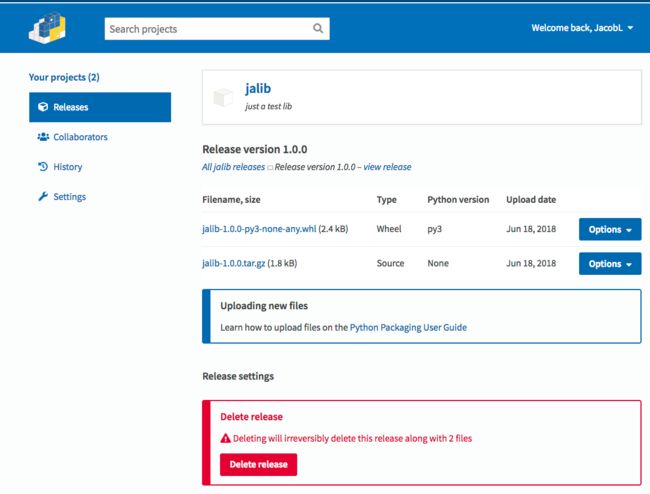
点击查看
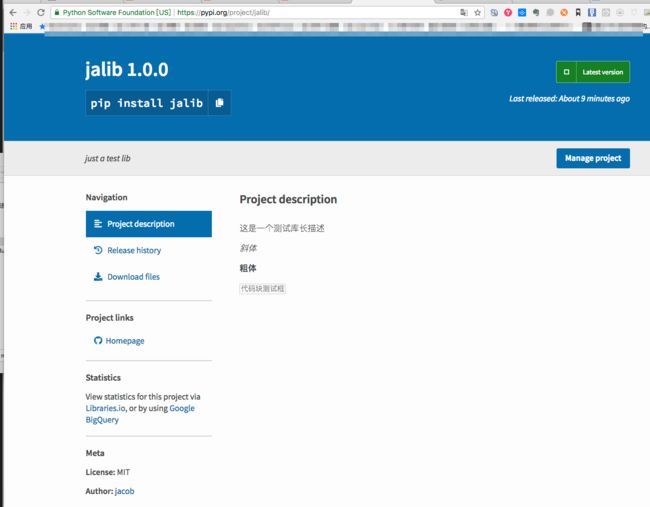
- 到自己账号下查看工程:https://pypi.org/manage/projects/
注意:
只更改 setup.py 内的内容,不修改版本号,再次打包后上传时会报错的。所以,变更内容时,需要将对应版本号也进行递增。
6 发布后使用
与前面安装其他包一样的操作
pip install jalib
源更新问题:
问题情况1
- 刚可以上传包到 Pypi,同时可以看到最新更新,及自己工程管理项目上表明包已发布成功
- 但是通过 pip search jalib 无法搜索到对应的库,即使在 pypi官网上搜索也一样
- 好,既然搜索不了,直接安装看看呗,毕竟都说了发布成功了啊,所以执行 pip install jalib,结果报如下错误
$ pip install jalib
Looking in indexes: https://mirrors.aliyun.com/pypi/simple
Collecting jalib
  Could not find a version that satisfies the requirement jalib (from versions: )
No matching distribution found for jalib
解决方法
- 尝试更改源(http://pypi.douban.com/simple/)测试,结果成功了咕(≧▽≦)/啦啦啦
$ pip install jalib -i http://pypi.douban.com/simple/ --trusted-host pypi.douban.com
Looking in indexes: http://pypi.douban.com/simple/
Collecting jalib
  Downloading http://pypi.doubanio.com/packages/22/01/2635aeb8c79beedd0fe768994a23463d59d5a3012ea9d178eaa6f6ab30eb/jalib-1.0.0-py3-none-any.whl
Installing collected packages: jalib
Successfully installed jalib-1.0.0
问题情况2
- 源不定时更新,有可能导致通过 pip install jalib 安装的是之前的旧版本,而不是最新发布的版本
此时可以通过临时修改源地址安装最新版本
pip install "jalib == 1.0.1" -i http://pypi.douban.com/simple/ --trusted-host pypi.douban.com

或者切换成官网源

pip install "jalib == 1.0.1" -i https://pypi.python.org/simple/
因为是 http 所以需要添加 --trusted-host pypi.douban.com