vue开发项目(移动端)
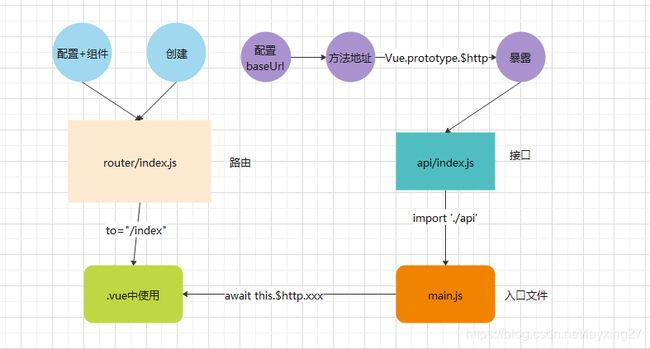
- webpack打包
- vant 插件
- vue-cli脚手架
文章目录
- 创建vue项目
-
- 执行命令
- 启动项目
-
-
- 启动
- 成功
-
- 开发
-
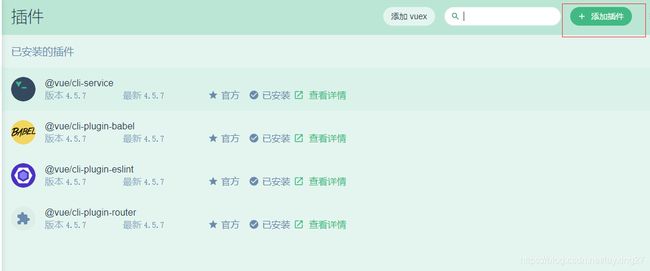
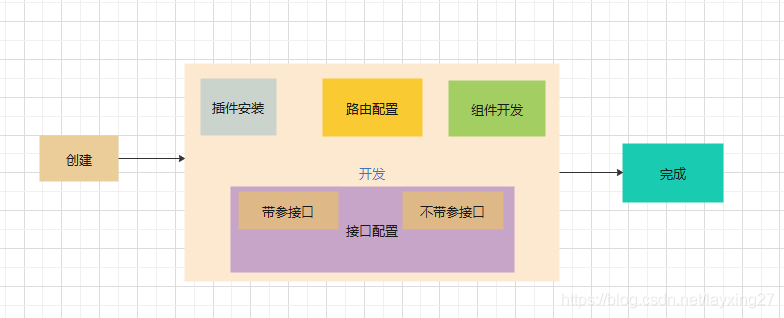
- 插件安装
-
-
- 点击插件
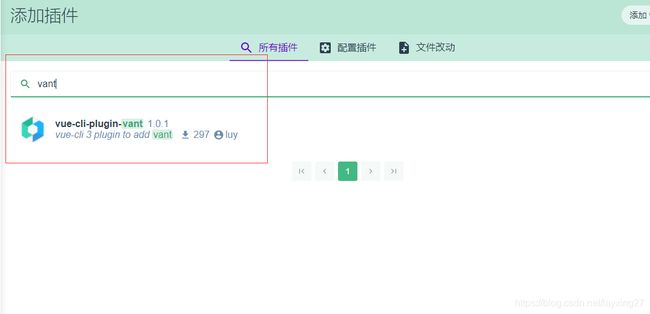
- 添加插件
- 搜索插件
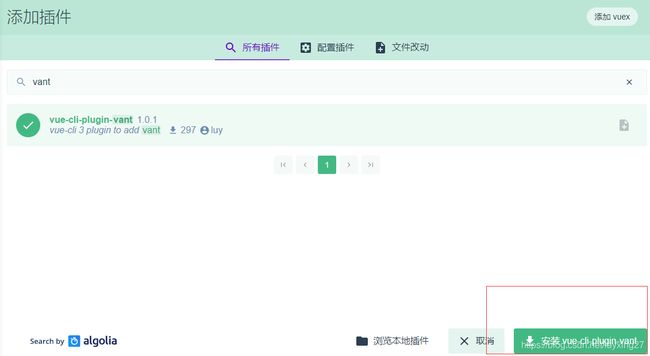
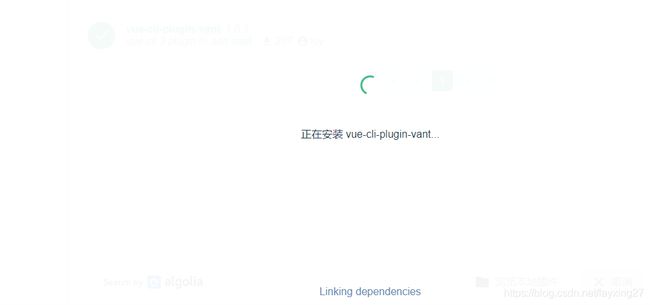
- 安装插件
- 配置插件
- 完成安装
- 查看安装
-
- 项目开发
- index页面
-
-
- 注册需要的组件
- vant.js文件
- 使用组件
-
-
- 使用
- 预览
-
-
- 配置路由
-
-
- 编写路由配置文件
- 配置路由
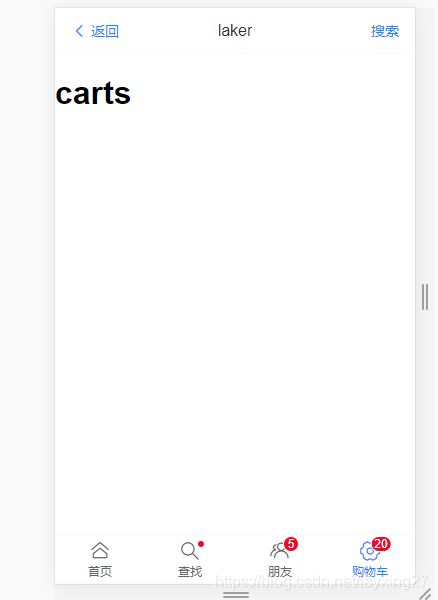
- 显示路由
-
- 配置接口
-
-
- 安装axios 插件
- 编写接口文件
- 挂载接口
-
- 渲染页面
-
-
- 轮播编写
-
-
- 注册组件
- 使用组件
- less插件下载
- 调用接口
- 渲染页面
- 预览
-
- 九宫格编写
-
-
- 代码
- 预览
-
-
- 九宫格点击(传参路由)
-
-
- 第一步:编写路由
- 第二步:编写接口
- 第三步:绑定点击事件(调用路由)
- 第四步:获取实参id
- 第五步:调用接口
- 第六步:渲染组件
-
- 评论功能开发
-
-
- 配置接口
-
-
- 配置接口
- 使用接口
-
- 创建组件
- 引入组件
- 添加评论
-
-
- 使用
-
-
- 总结
创建vue项目
可参考该链接
vue脚手架开发篇(六)
- 执行命令
- 启动
执行命令
- 执行以下命令
vue ui
启动项目
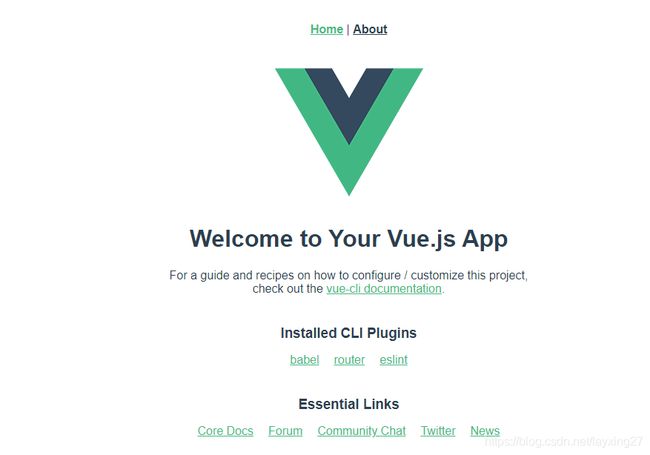
- 启动成功后 点击链接
- 进入页面
启动
$ npm run serve

> [email protected] serve E:\learn\vue\test
> vue-cli-service serve

 INFO  Starting development server...
98% after emitting CopyPlugin

 DONE  Compiled successfully in 7381ms                                                                                                              1:55:49 ├F10: PM┤

  App running at:
  - Local:   http://localhost:8081/
  - Network: http://10.41.152.51:8081/
成功
开发
插件安装
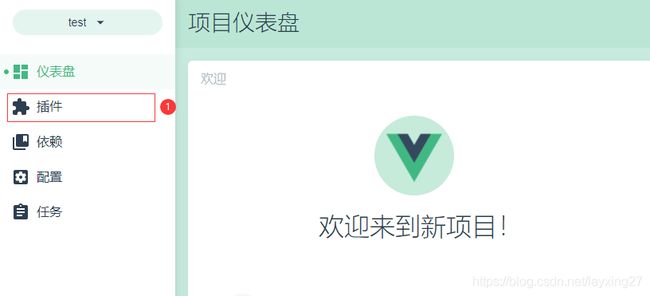
- 点击插件
- 添加插件
- 搜索插件
- 安装插件
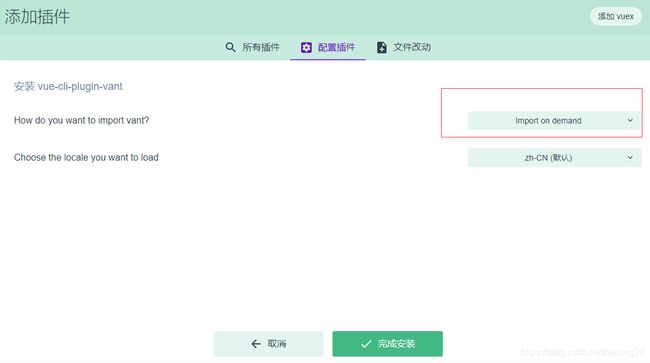
- 配置插件
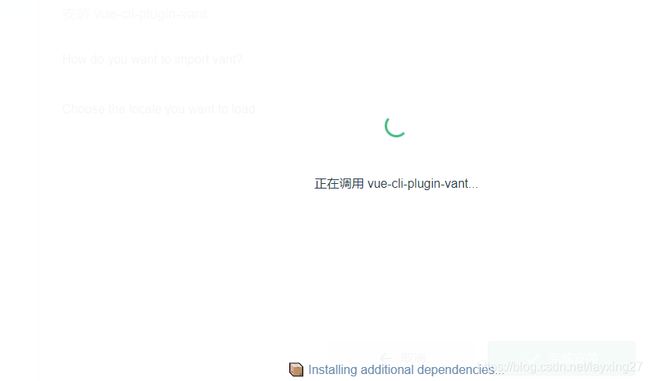
- 完成安装
点击插件
添加插件
搜索插件
安装插件
配置插件
完成安装
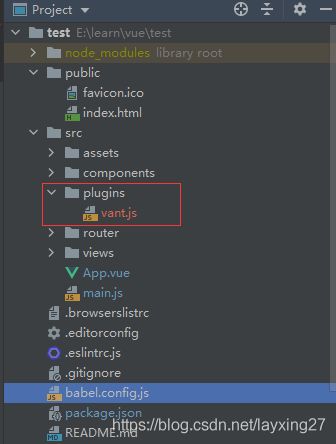
查看安装
项目开发
index页面
- vant.js 注册需要的组件
- App.vue中使用
- 出现无样式的时候(重启或重装vant)
注册需要的组件
- 用到该组件就注册
vant.js文件
import Vue from 'vue'
import {
      NavBar, Tabbar, TabbarItem } from 'vant'

Vue.use(NavBar)
  .use(Tabbar)
  .use(TabbarItem)
使用组件
- App.vue中使用
使用
<template>
 <div id="app">
   <van-nav-bar
     title="标题"
     left-text="返回"
     right-text="按钮"
     left-arrow
     @click-left="onClickLeft"
   />
   <van-tabbar v-model="active">
     <van-tabbar-item icon="home-o">标签van-tabbar-item>
     <van-tabbar-item icon="search" dot>标签van-tabbar-item>
     <van-tabbar-item icon="friends-o" badge="5">标签van-tabbar-item>
     <van-tabbar-item icon="setting-o" badge="20">标签van-tabbar-item>
   van-tabbar>
 div>
template>

<script>
export default {

  data: () => {

    return {

      active: 0
    }
  },
  methods: {

    onClickLeft () {
      }
  }
}
script>
<style>
style>
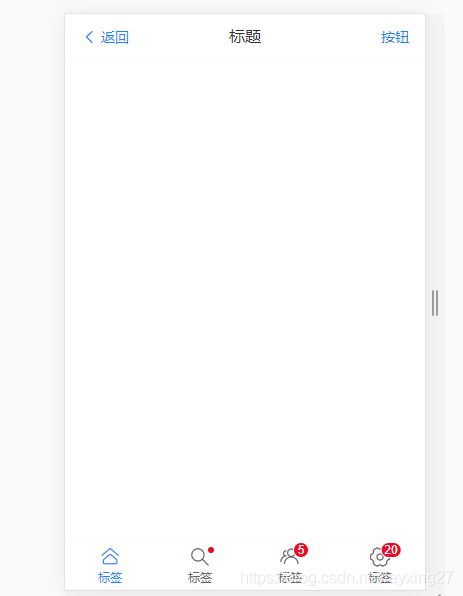
预览
配置路由
- 路由实现跳转
- 编写路由配置文件
- 配置路由
- 显示路由****** router-view
编写路由配置文件
- router/index.js
- 默认路由
import Vue from 'vue'
import VueRouter from 'vue-router'
Vue.use(VueRouter)

const routes = [
 {

    path: '/',
    redirect: '/index'
  },
  {

    path: '/index',
    component: () => import('../views/Index')
  },
  {

    path: '/search',
    component: () => import('../views/Search')
  },
  {

    path: '/carts',
    component: () => import('../views/Carts')
  },
  {

    path: '/friends',
    component: () => import('../views/Friends')
  }
]

const router = new VueRouter({

  routes
})

export default router
配置路由
- app.vue
 <van-tabbar v-model="active">
     <van-tabbar-item icon="home-o" to="/index">首页van-tabbar-item>
     <van-tabbar-item icon="search" dot  to="/search">查找van-tabbar-item>
     <van-tabbar-item icon="friends-o" badge="5" to="/friends">朋友van-tabbar-item>
     <van-tabbar-item icon="setting-o" badge="20" to="/carts">购物车van-tabbar-item>
   van-tabbar>
显示路由
- App.vue中添加
<router-view>router-view>
配置接口
- axios 请求
- 创建文件夹进行接口配置 src/api/index.js
- 在入口文件上挂载main.js
安装axios 插件
>cnpm i axios -S
√ Installed 1 packages
√ Linked 1 latest versions
√ Run 0 scripts
√ All packages installed (2 packages installed from npm registry, used 459ms(network 453ms), speed 20.09kB/s, json 2(9.1kB), tarball 0B)
编写接口文件
- api/index.js
import Vue from 'vue'
import axios from 'axios'
axios.defaults.baseURL = 'http://127.0.0.1:8888'

// 获取轮播数据
const getLunbo = params => {

  return axios.get('/api/getlunbo')
}
// 获取九宫格
const getGrids = params => {

  return axios.get('/api/girds')
}

// 暴露接口
Vue.prototype.$http = {

  getLunbo,
  getGrids
}
挂载接口
- main.js
import './api'
渲染页面
- 轮播编写
- 九宫格编写
轮播编写
- Index/index.vue
- vant.js 注册组件
- 样式使用less
- 需要下载less插件
- 调用接口
注册组件
import Vue from 'vue'
import {
      NavBar, Tabbar, TabbarItem, Swipe, SwipeItem } from 'vant'

Vue.use(NavBar)
  .use(Tabbar)
  .use(TabbarItem)
  .use(Swipe)
  .use(SwipeItem)
使用组件
 <van-swipe class="my-swipe" :autoplay="3000" indicator-color="white">
    <van-swipe-item>1van-swipe-item>
    <van-swipe-item>2van-swipe-item>
    <van-swipe-item>3van-swipe-item>
    <van-swipe-item>4van-swipe-item>
  van-swipe>
less插件下载
>cnpm i less less-loader -S
√ Installed 2 packages
√ Linked 26 latest versions
√ Run 0 scripts
Recently updated (since 2020-10-06): 3 packages (detail see file E:\learn\vue\test\node_modules\.recently_updates.txt)
√ All packages installed (28 packages installed from npm registry, used 5s(network 4s), speed 227.92kB/s, json 28(91.9kB), tarball 932.59kB)
调用接口
export default {

  data: () => {

    return {

      lunboList: []
    }
  },
  created () {

    this.getlunbo()
  },
  methods: {

    async getlunbo () {

      const {
      data: {
      message } } = await this.$http.getLunbo()
      this.lunboList = message
    }
  }

}
渲染页面
<van-swipe class="my-swipe" :autoplay="3000" indicator-color="white">
    <van-swipe-item v-for="el in lunboList" :key="el.id"><img :src="el.img" alt="">van-swipe-item>
  van-swipe>
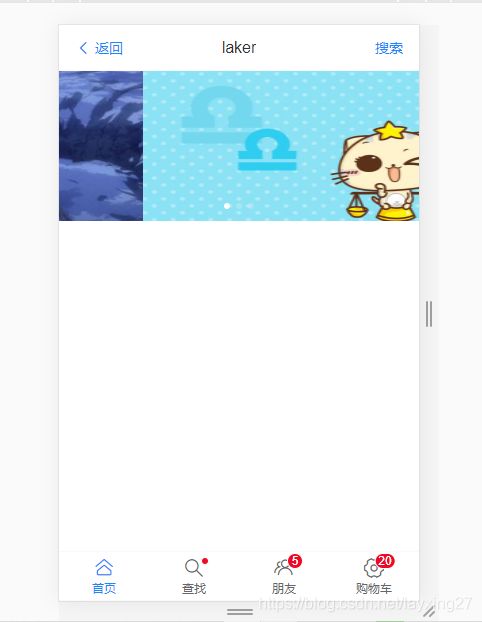
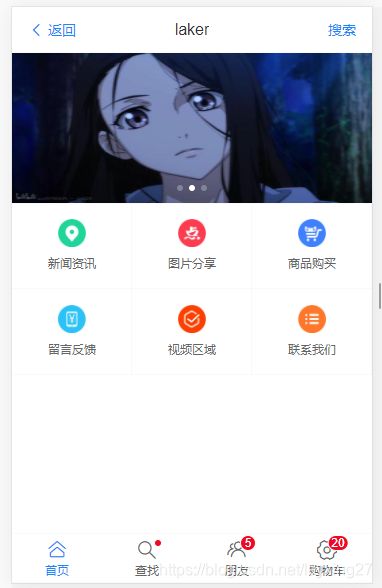
预览
九宫格编写
- 编写接口
- 调用接口
- 渲染页面
- 注册vant组件
- 使用vant组件
代码
<template>
 <div>
   <van-swipe class="my-swipe" :autoplay="3000" indicator-color="white">
     <van-swipe-item v-for="el in lunboList" :key="el.id"><img :src="el.img" alt=""></van-swipe-item>
   </van-swipe>
   <van-grid :column-num="3">
     <van-grid-item v-for="value in grids" :key="value.id" :icon="value.src" :text="value.title" />
   </van-grid>
 </div>
</template>

<script>
export default {

  data: () => {

    return {

      lunboList: [],
      grids: []
    }
  },
  created () {

    this.getlunbo()
    this.getGrids()
  },
  methods: {

    async getlunbo () {

      const {
      data: {
      message } } = await this.$http.getLunbo()
      this.lunboList = message
    },
    async getGrids () {

      const {
      data: {
      message } } = await this.$http.getGrids()
      this.grids = message
    }
  }

}
</script>

<style lang="less" scoped>
.my-swipe .van-swipe-item {

  color: #fff;
  font-size: 20px;
  height: 150px;
  text-align: center;
  background-color: #39a9ed;
}
img{

  height: 100%;
  width: 100%;
}
</style>
预览
九宫格点击(传参路由)
- 路由+组件实现
- 第一步:编写路由
- 第二步:编写接口
- 第三步:绑定点击事件(调用路由)
- 第四步:获取实参id
- 第五步:调用接口
- 第六步:渲染组件
第一步:编写路由
{

    path: '/home/newslist/:id',
    component: () => import('../views/Index/News/NewsInfo')
  }
第二步:编写接口
// 通过id获取信息的详细
const getNewsInfoById = params => {

  return axios.get('/api/getnew/' + params)
}
第三步:绑定点击事件(调用路由)
 async getDetails (id) {

      this.$router.push('/home/newslist/' + id)
    }
第四步:获取实参id
this.newsId = this.$route.params.id
第五步:调用接口
 async getNewsByIds () {

      const {
      data: {
      message } } = await this.$http.getNewsInfoById(this.newsId)
      this.data = message
    }
第六步:渲染组件
<div class="newsInfo">
  <header class="header">
    <h1 class="title">{
    {data.title}}h1>
    <div class="btn-group">
      <span>{
    {data.add_time}}span>
      <span>点击{
    {data.click}}次span>
    div>
    <hr>
  header>
  <div class="content" v-text="data.content">div>
  <Comment :id="newsId">Comment>
div>
评论功能开发
- 配置接口
- 创建组件
- 引入组件
配置接口
- 配置接口
- 使用接口
配置接口
// 获取评论的接口
const getComments = ({
      artid, page, pageSize = 3 }) => {

  return axios.get(`/api/getcomments/${
       artid}?pageindex=${
       page}&limit=${
       pageSize}`)
}
// 添加评论的接口
const postComments = ({
      id, content }) => {

  return axios.post('/api/postcomment/' + id, {
      content })
}
使用接口
async getComment () {

      if (this.flag === true) return
      this.page++
      try {

        const {
      data: {
      message, count } } = await this.$http.getComments({
      artid: this.id, page: this.page, pageSize: this.pageSize })
        this.comments = this.comments.concat(message)
        this.flag = this.page * this.pageSize > count
      } catch (error) {

        this.$Toast(error.message)
      }
    },
创建组件
- components/Comment/index.vue
引入组件
import Comment from '@/components/Comment'
添加评论
- post请求
使用
    async postComment () {

      try {

        const {
      data: message } = await this.$http.postComments({
      id: this.id, content: this.content })
        this.comments.unshift(
          {

            user_name: '匿名用户',
            add_time: new Date().getTime(),
            content: this.content
          })
        console.log(message)
      } catch (error) {

        console.log(error.message)
      }
    }
总结
- 第一步:配置路由
- 在入口文件中挂载
- 路由
- 参数路由
- 无参路由
- 获取路由
- this.$route.params.id
- 返回上层 this.$router.go(-1)
- 第二步:配置接口
- 在入口文件中挂载
- 接口
- 传参一般为对象
- 调用时一般async+await
- 第三步:配置组件
- 独立的模块配置在组件下面
- 传值
- props接收父组件传值
- 分页说明
- 加载更多:页数++
- 判断数据是否显示完毕 判断 page*pageSize>count
- 显示完毕return
- 需要重新渲染页面
- 添加说明
- 添加后清空 this.content=""
- 添加后页面显示
- 传值为一个对象并且为post请求
