利用Spring_Boot WebSocKet实现一个推送的小Demo
简介:
文章共分为两个模块,包括全局推送功能的实现,和点对点的推送功能实现,源代码在文末给出连接
模块一:全局推送
1. 新建项目,利用引导创建
新建时采用引导的方式,下面给出的是几张重点截图,其他的过程截图省略,
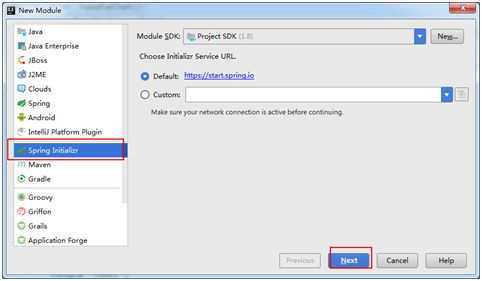
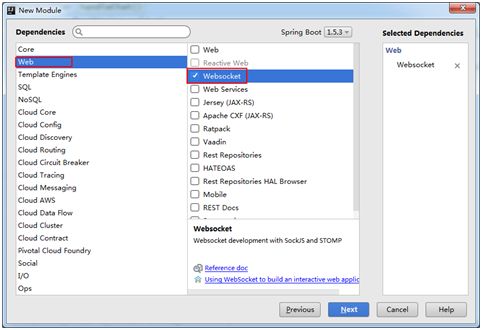
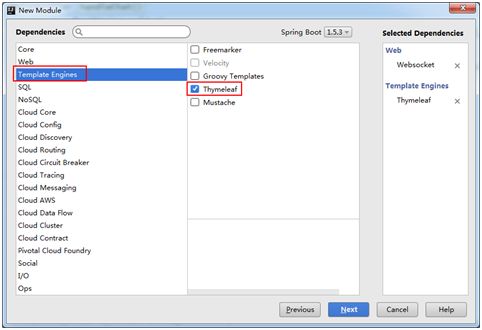
以上是根据引导来创建Spring_Boot WebSocket项目过程中的几个主要界面,其余界面较为普遍,不加以介绍,详细的pom.xml文件内容此处不提供,在点对点模块有整体的pom.xml文件。
2. 配置WebSocketConfig
具体内容看代码注释,
注:测试全局推送的时候可将代码中的“/socket”节点相关信息注释掉,也可去一对一模块寻找对应的拦截器代码
//WebSocketConfig配置文件
@Configuration
@EnableWebSocketMessageBroker  //开启使用STOMP协议来传输基于代理的消息
public class WebSocketConfig extends AbstractWebSocketMessageBrokerConfigurer {
    //注册STOMP协议的节点,并指定映射的URL
    @Override
    public void registerStompEndpoints(StompEndpointRegistry stompEndpointRegistry) {
        /**
         * 注册STOMP协议节点,同时指定使用SockJS协议,在前端界面中会使用该处的节点进行SocKet连接
         * 根据需要注册即可,这里因为只是测试,注册了3个节点
         * 另外,在第三个节点中,可以看到比前两个节点多了一些内容,制定了一个拦截器及其他信息
         * 这个根据需要来扩展,拦截器是定义的一个class文件,该拦截器在demo中主要用在点对点模块,因本人也是初次接触这部分内容,不太了解。
         */
        stompEndpointRegistry.addEndpoint("/endpointSang").withSockJS();
        stompEndpointRegistry.addEndpoint("/endpointChat").withSockJS();
        stompEndpointRegistry.addEndpoint("/socket").withSockJS()
                .setInterceptors( new ChatHandlerShareInterceptor())
                .setStreamBytesLimit(512 * 1024)
                .setHttpMessageCacheSize(1000)
                .setDisconnectDelay(30 * 1000);
    }
    //配置消息代理
    @Override
    public void configureMessageBroker(MessageBrokerRegistry registry) {
        /**
         * 配置消息代理,前端通过这个代理来进行消息订阅,
         * 消息代理可以有一个,也可以有多个,用 “,” 号分隔
         * 这里配置了两个,"/topic"用作全局推送,"/queue"用做点对点使用
         */
        registry.enableSimpleBroker("/queue","/topic");
        /**
         * 配置接收前端信息的消息代理,前端通过这个代理来向后台传递消息
         * 简单来说,前端通过这个消息代理访问对应controller中的MessageMapping(value)
         */
        registry.setApplicationDestinationPrefixes("/app");
        //registry.setPathMatcher(new AntPathMatcher("."));
    }

    @Override
    public void configureWebSocketTransport(final WebSocketTransportRegistration registration) {
        registration.addDecoratorFactory(new WebSocketHandlerDecoratorFactory() {
            @Override
            public WebSocketHandler decorate(final WebSocketHandler handler) {
                return new WebSocketHandlerDecorator(handler) {
                    @Override
                    public void afterConnectionEstablished(final WebSocketSession session) throws Exception {
                        // 客户端与服务器端建立连接后,此处记录谁上线了
                        String username = session.getPrincipal().getName();
                        //log.info("online: " + username);
                        System.out.println("online: " + username);
                        super.afterConnectionEstablished(session);
                    }

                    @Override
                    public void afterConnectionClosed(WebSocketSession session, CloseStatus closeStatus) throws Exception {
                        // 客户端与服务器端断开连接后,此处记录谁下线了
                        String username = session.getPrincipal().getName();
                       // log.info("offline: " + username);
                        System.out.println("offline: " + username);
                        super.afterConnectionClosed(session, closeStatus);
                    }
                };
            }
        });
        super.configureWebSocketTransport(registration);
    }
}
3. 建立实体类
分别建立两个实体类,一个用于封装向浏览器发送的消息,一个用于封装接受来自浏览器的消息
/**
 * 接收来自浏览器的消息
 */
public class  RequestMessage {
    private String name;
    public String getName() {
        return name;
    }
}
/**
 * 保存服务器发给浏览器的信息
 */
public class ResponseMessage {
    private String responseMessage;
    public ResponseMessage(String responseMessage) {
        this.responseMessage = responseMessage;
    }
    public String getResponseMessage() {
        return responseMessage;
    }
}
4. Controller代码
控制器,用来控制页面的跳转和推送服务的使用
/**
 * 控制器
 */
@Controller
public class WsController {

    @Autowired
    private SimpMessagingTemplate messagingTemplate;   //实现向浏览器发送信息的功能

    //转到ws.html界面,ws是一个测试界面,既可以发布消息也可以接受推送
@RequestMapping(value = "/ws")
    public String tows(){
        return "/ws";
    }

    /**
     * 进行公告推送,此处只用注解,不使用注解请参考点对点中的@MessageMapping("/chat1")对应具体方法
     * @MessageMapping("/welcome") 对应ws.html中的stompClient.send("/app/welcome")
     * 多出来的“/app"是WebSocKetConfig中定义的,如不定义,则HTML中对应改为stompClient.send("/welcome")
     * @SendTo("/topic/getResponse") 指定订阅路径,对应HTML中的stompClient.subscribe('/topic/getResponse', ……)
     * 意味将信息推送给所有订阅了"/topic/getResponse"的用户
     */
    @MessageMapping("/welcome")
    @SendTo("/topic/getResponse")       //指明发布路径
    public ResponseMessage say(RequestMessage message) {
        System.out.println(message.getName());
        return new ResponseMessage("welcome," + message.getName() + " !");
    }
}
5. 前端ws.html
前提:添加脚本,将stomp.js、sockjs.min.js 以及jqury.js 脚本放在src/main/resources/static下。可在这里下载。
代码:
广播式WebSocket
6. 启动入口DemoApplication.Java
自动生成的入口代码。不做更改
@SpringBootApplication
public class DemoApplication {

   public static void main(String[] args) {
      SpringApplication.run(DemoApplication.class, args);
   }
}
7. 结果测试
启动该工程,在浏览器中访问 http://localhost:8080/ws 打开两个或多个,连接后在其中一个界面输入内容,点击“发送”后可在所有的界面看到相关信息,证明全局推送成功。
效果图如下:

模块二:点对点推送
在进行点对点推送的开发时,考虑到点对点里面的每个“点”都需要有一个唯一的标识符,所以在项目中引入了pring-boot –security,用来对每个“点”进行唯一的标识。
1. pom.xml
本项目采用maven的构建方式,下面是项目的pom.xml文件内容
   4.0.0

   cn.tourage
   demo
   0.0.1-SNAPSHOT
   jar

   demo
   Demo project for Spring Boot


      org.springframework.boot
      spring-boot-starter-parent
      1.5.3.RELEASE


      UTF-8
      UTF-8
      1.8


         org.springframework.boot
         spring-boot-starter-thymeleaf


         org.springframework.boot
         spring-boot-starter-websocket


         org.springframework.boot
         spring-boot-starter-test
         test


         org.springframework.boot
         spring-boot-starter-security


            org.springframework.boot
            spring-boot-maven-plugin
2.创建WebSecurityConfig
配置WebSecurityConfig.java,设置拦截规则,初始化用户及其角色
@Configuration
@EnableWebSecurity
public class WebSecurityConfig extends WebSecurityConfigurerAdapter {
    @Override
    protected void configure(HttpSecurity http) throws Exception {
        http.authorizeRequests()
                //设置拦截规则
                .antMatchers("/","/login")   ////1根路径和/login路径不拦截
                .permitAll()
                .anyRequest()
                .authenticated()
                .and()
                //开启默认登录页面
                .formLogin()
                //默认登录页面
                .loginPage("/login")
                //默认登录成功跳转页面
                .defaultSuccessUrl("/chat")
                .permitAll()
                .and()
                //设置注销
                .logout()
                .permitAll();
    }
    //设置用户
    @Override
    protected void configure(AuthenticationManagerBuilder auth) throws Exception {
        auth.inMemoryAuthentication()
                .withUser("111").password("111").roles("USER")
                .and()
                .withUser("222").password("222").roles("USER")
                .and()
                .withUser("333").password("333").roles("USER")
                .and()
                .withUser("444").password("444").roles("USER");
    }

    @Override
    public void configure(WebSecurity web) throws Exception {
        //设置不拦截规则
        web.ignoring().antMatchers("/resources/static/**");
    }
}
3. 创建WebSocketConfig
该类与上一模块相同,其中,在设置STOMP节点时引入了一个拦截器功能,具体见“/socket”节点及相关注释信息
@Configuration
@EnableWebSocketMessageBroker  //开启使用STOMP协议来传输基于代理的消息
public class WebSocketConfig extends AbstractWebSocketMessageBrokerConfigurer {

    //注册STOMP协议的节点,并指定映射的URL
    @Override
    public void registerStompEndpoints(StompEndpointRegistry stompEndpointRegistry) {
        /**
         * 注册STOMP协议节点,同时指定使用SockJS协议,在前端界面中会使用该处的节点进行SocKet连接
         * 根据需要注册即可,这里因为只是测试,注册了3个节点
         * 另外,在第三个节点中,可以看到比前两个节点多了一些内容,制定了一个拦截器及其他信息,该拦截器在demo中主要用在点对点模块
         * 这个根据需要来扩展,拦截器是定义的一个class文件,因本人也是初次接触这部分内容,不太了解。
         */
        stompEndpointRegistry.addEndpoint("/endpointSang").withSockJS();
        stompEndpointRegistry.addEndpoint("/endpointChat").withSockJS();
        stompEndpointRegistry.addEndpoint("/socket").withSockJS()
                .setInterceptors( new ChatHandlerShareInterceptor())
                .setStreamBytesLimit(512 * 1024)
                .setHttpMessageCacheSize(1000)
                .setDisconnectDelay(30 * 1000);
    }

    //配置消息代理
    @Override
    public void configureMessageBroker(MessageBrokerRegistry registry) {
        /**
         * 配置消息代理,前端通过这个代理来进行消息订阅,
         * 消息代理可以有一个,也可以有多个,用 “,” 号分隔
         * 这里配置了两个,"/topic"用作全局推送,"/queue"用做点对点使用
         */
        registry.enableSimpleBroker("/queue","/topic");
        /**
         * 配置接收前端信息的消息代理,前端通过这个代理来向后台传递消息
         * 简单来说,前端通过这个消息代理访问对应controller中的MessageMapping(value)
         */
        registry.setApplicationDestinationPrefixes("/app");
        //registry.setPathMatcher(new AntPathMatcher("."));
    }

    @Override
    public void configureWebSocketTransport(final WebSocketTransportRegistration registration) {
        registration.addDecoratorFactory(new WebSocketHandlerDecoratorFactory() {
            @Override
            public WebSocketHandler decorate(final WebSocketHandler handler) {
                return new WebSocketHandlerDecorator(handler) {
                    @Override
                    public void afterConnectionEstablished(final WebSocketSession session) throws Exception {
                        // 客户端与服务器端建立连接后,此处记录谁上线了
                        String username = session.getPrincipal().getName();
                        //log.info("online: " + username);
                        System.out.println("online: " + username);
                        super.afterConnectionEstablished(session);
                    }

                    @Override
                    public void afterConnectionClosed(WebSocketSession session, CloseStatus closeStatus) throws Exception {
                        // 客户端与服务器端断开连接后,此处记录谁下线了
                        String username = session.getPrincipal().getName();
                       // log.info("offline: " + username);
                        System.out.println("offline: " + username);
                        super.afterConnectionClosed(session, closeStatus);
                    }
                };
            }
        });
        super.configureWebSocketTransport(registration);
    }
}
4.配置拦截器
拦截器功能可通过自己定义来实现具体的功能,此处的拦截器并未在测试项目中有太多价值的用法,增加该功能只是为了在具体使用“点对点推送”功能时进行扩展。
/**
 * websocket拦截器配置,读取session.
 */
public class ChatHandlerShareInterceptor extends HttpSessionHandshakeInterceptor {

    private static Logger logger = LoggerFactory.getLogger(ChatHandlerShareInterceptor.class);

    @Override
    public void afterHandshake(ServerHttpRequest request, ServerHttpResponse response, WebSocketHandler wsHandler,
                               Exception ex) {
        // TODO Auto-generated method stub
        super.afterHandshake(request, response, wsHandler, ex);
    }

    @Override
    public boolean beforeHandshake(ServerHttpRequest arg0, ServerHttpResponse arg1, WebSocketHandler arg2,
                                   Map arg3) throws Exception {

        if(arg0 instanceof ServletServerHttpRequest){
            ServletServerHttpRequest servletRequest = (ServletServerHttpRequest) arg0;
            HttpSession session = servletRequest.getServletRequest().getSession(false);
            if (session != null) {
                //使用userName区分WebSocketHandler,以便定向发送消息
                String httpSessionId = session.getId();
                logger.info(httpSessionId);
                arg3.put("HTTP_SESSION_ID",httpSessionId);
            }else{
            }
        }
        return true;
    }
}
5. Controller控制器
/**
 * 控制器
 */
@Controller
public class WsController {

    @Autowired
    private SimpMessagingTemplate messagingTemplate;   //实现向浏览器发送信息的功能

    //  转到相关的HTML界面
    @RequestMapping(value = "/login")
    public String toLogin() {
        return "/login";
    }

@RequestMapping(value = "/chat")
public String toChat() {
    return "/chat";
}

    /**
     * 转到消息推送,对应前端chat.html中的stomp.send("/chat1",{},text)
     * 此处未使用注解,而是使用代码编程来完成推送,目的是为了方便对批量(可理解为分组)推送进行扩展
     * 编程实现消息推送,点对点使用convertAndSendToUser,广播使用convertAndSendTo
     * 使用注解可参考全局推送里面的具体实现,注:点对点用SendToUser()来代替SendTo()
     */
    @MessageMapping("/chat1")
//    可以直接在参数中获取Principal,Principal中包含有当前用户的用户名。
    public void handleChat(Principal principal, String msg) {
        List list = new ArrayList();
        list.add("222");
        list.add("333");
        list.add("444");
        if (principal.getName().equals("111")) {
            for (String s : list)
            /**
             * 第一个参数:用户名;第二个参数:订阅路径;第三个参数:要推送的消息文本
             * 注:全局推送对应方法有两个参数,第一个参数:订阅路径;第二个参数:要推送的消息文本
             */
                messagingTemplate.convertAndSendToUser(s, "/queue/notifications", principal.getName() + "给您发来了消息:" + msg);
        } else {
            messagingTemplate.convertAndSendToUser("111", "/queue/notifications", principal.getName() + "给您发来了消息:" + msg);
        }
    }
}
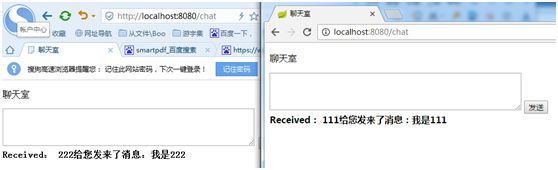
6. 前端界面
这部分使用两个前端界面,一个简单的登录界面login.html,还有一个聊天界面chat.html,在chat.html中同时可以使用发布信息和接受推送的功能,可按照实际需求进行自我定制
注:在前端编写的时候一定要记得添加相关的js文件,下载地址:(http://pan.baidu.com/s/1gfKJCAJ)
Login.html
登陆页面
无效的账号和密码
你已注销
Chat.html
聊天室
聊天室
7. 启动入口:
略,项目默认的启动界面
8. 结果测试
采用两个浏览器分别登入两个用户,输入测试可看到如下结果
注意:一定要使用两个浏览器登录,不然会默认为同一个Session
项目地址:
https://github.com/AnRic/WebSocket_demo
GitHub新人,求关注
写在最后
本文是我在参考网上资源并亲身实践后编写的一篇小文章,做一个简单的学习记录,也希望能帮助到大家。在其中可能也会有一些的不足之处,请包容。如有疑问,请发送私信联系我,谢谢。