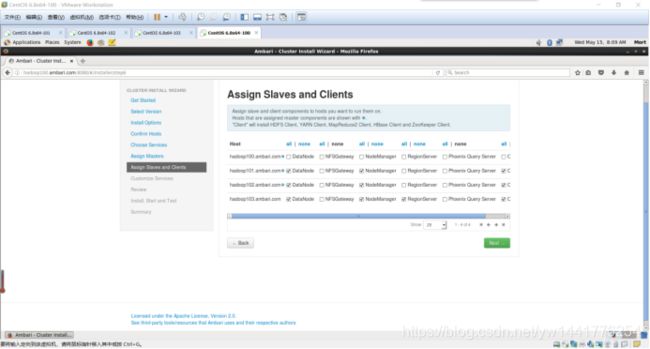
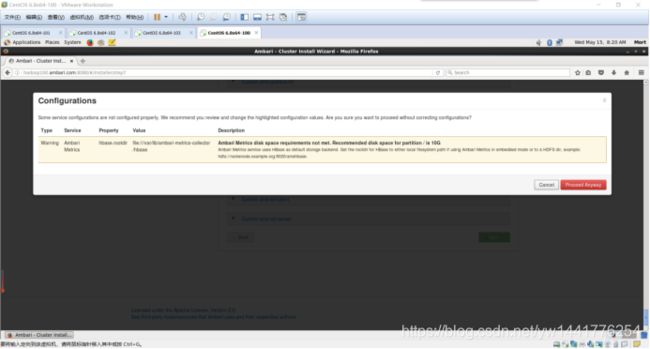
记录在阿里云下使用Ambari搭建部署Hadoop集群
用的是CentOS7
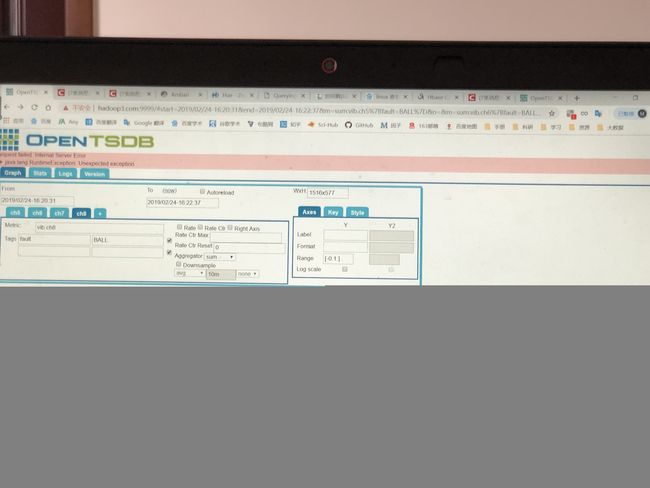
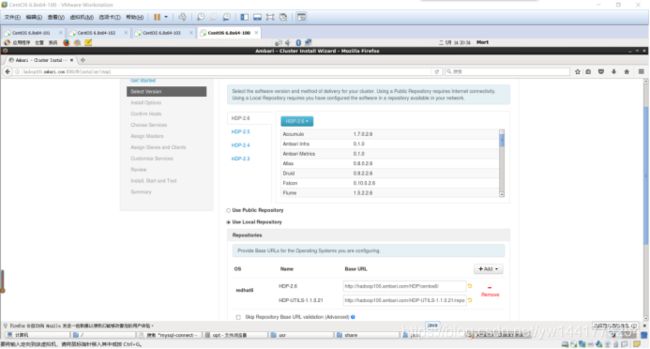
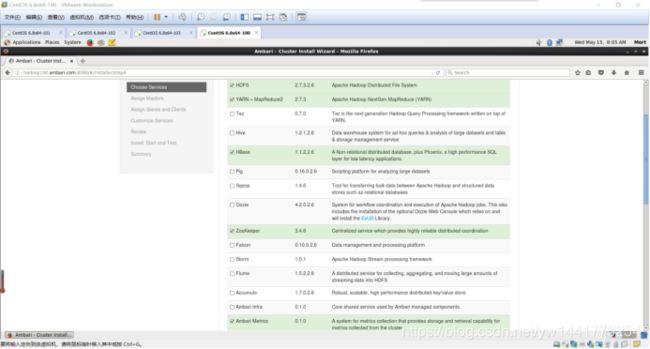
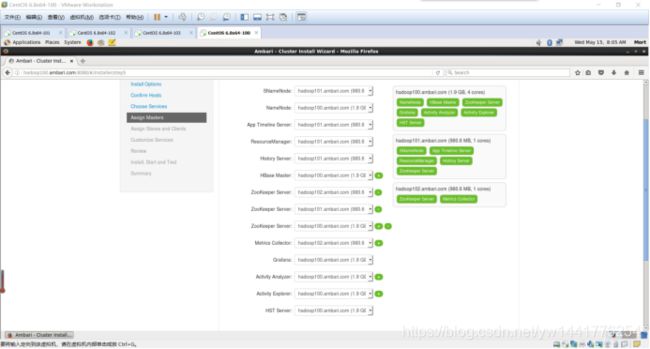
效果图
具体步骤和参考链接以及遇到的问题:
1.阿里云服务器三台CentOS 7 64位
Server:172.19.209.*
Slave:172.19.240.* 172.19.96.*
网络:NAT模式
2.设置FQDN
在各个节点上操作:
vi /etc/hosts
172.19.209.*  hadoop1.com hadoop1
172.19.240.*   hadoop2.com hadoop2
172.19.96.*   hadoop3.com hadoop3

vim /etc/sysconfig/network
NETWORKING=yes
HOSTNAME=hadoop1.com
验证fqdn设置是否正确(注:以server节点为例):
hostname -f
hadoop1.com
3.设置SSH免密登录
https://www.cnblogs.com/ivan0626/p/4144277.html?tdsourcetag=s_pcqq_aiomsg
4.禁用selinux
vi /etc/selinux/config
修改 SELINUX=disabled
5.禁用防火墙
firewall-cmd --state
systemctl stop firewalld.service
systemctl disable firewalld.service
6.安装jdk
vi /etc/profile
export JAVA_HOME=/opt/module/jdk1.8.0_112
export CLASSPATH=.:$JAVA_HOME/lib/dt.jar:$JAVA_HOME/lib/tools.jar
PATH=$PATH:$HOME/bin:$JAVA_HOME/bin
source /etc/profile
7.安装ntp时间同步
利用ambari安装大数据集群时候,要求各个节点之间的时间同步
https://blog.csdn.net/hellboy0621/article/details/81903091
https://blog.csdn.net/yuanfang_way/article/details/53959591
查看服务器是否安装ntp
rpm -qa | grep ntp
yum install ntp
timedatectl set-timezone Asia/Shanghai
systemctl start ntpd
systemctl enable ntpd
timedatectl set-time HH:MM:SS
systemctl restart ntpd
在server节点上设置其ntp服务器为其自身,同时设置可以接受连接服务的客户端,是通过更改/etc/ntp.conf文件来实现的,其中server设置127.127.1.0为其自身,新增加一个restrict段为可以接受服务的网段
systemctl restart ntpd
在client节点上同步server的时间
ntpdate 10.107.18.35
ntpdate hadoop1.com
client节点启动ntpd服务
systemctl start ntpd
systemctl enable ntpd
所有节点启动时间同步
timedatectl set-ntp yes
8.关闭Linux的THP服务
https://www.jb51.net/article/98191.htm?tdsourcetag=s_pcqq_aiomsg
如果不关闭transparent_hugepage,HDFS会因为这个性能严重受影响。
 vim /etc/rc.d/rc.local
if test -f /sys/kernel/mm/transparent_hugepage/enabled; then
echo never > /sys/kernel/mm/transparent_hugepage/enabled
fi
if test -f /sys/kernel/mm/transparent_hugepage/defrag; then
echo never > /sys/kernel/mm/transparent_hugepage/defrag
fi

 chmod +x /etc/rc.d/rc.local
cat /sys/kernel/mm/transparent_hugepage/enabled
cat /sys/kernel/mm/transparent_hugepage/defrag
9.配置UMASK
设定用户所创建目录的初始权限
umask 0022
10.禁止离线更新
vi /etc/yum/pluginconf.d/refresh-packagekit.conf
添加:enabled=0
11.搭建本地源(仅Server节点)
① 安装httpd
检查一下安装了没有:yum list httpd(d代表demo,代表常驻后台运行的)
如果没有安装:sudo yum install httpd
② 配置HTTP 服务
配置HTTP 服务到系统层使其随系统自动启动
chkconfig httpd on
service httpd start
③ 安装创建本地源的工具
yum install yum-utils createrepo yum-plugin-priorities
vi /etc/yum/pluginconf.d/priorities.conf
添加gpgcheck=0
④ 创建本地源
CentOS 7:
http://public-repo-1.hortonworks.com/ambari/centos7/2.x/updates/2.5.2.0/ambari-2.5.2.0-centos7.tar.gz
http://public-repo-1.hortonworks.com/HDP/centos7/2.x/updates/2.6.2.0/HDP-2.6.2.0-centos7-rpm.tar.gz
http://public-repo-1.hortonworks.com/HDP-UTILS-1.1.0.20/repos/centos7/HDP-UTILS-1.1.0.20-centos7.tar.gz
将下载的3个tar包FileZilla传输到/var/www/html目录下:
mkdir -p /var/www/html/hdp #创建hdp目录
mkdir  -p /var/www/html/HDP-UTILS-1.1.0.21 #创建HDP-UTILS-1.1.0.21目录
tar zxvf /opt/ambari-2.5.2.0-centos7.tar.gz -C /var/www/html
tar zxvf /opt/HDP-2.6.2.0-centos7-rpm.tar.gz -C /var/www/html/hdp
tar zxvf /opt/HDP-UTILS-1.1.0.21-centos7.tar.gz -C /var/www/html/HDP-UTILS-1.1.0.21
创建本地源
cd /var/www/html/
createrepo  ./
下载ambari.repo、hdp.repo
wget -nv http://public-repo-1.hortonworks.com/ambari/centos7/2.x/updates/2.
5.2.0/ambari.repo -O /etc/yum.repos.d/ambari.repo

wget -nv http://public-repo-1.hortonworks.com/HDP/centos7/2.x/
updates/2.6.2.0/hdp.repo -O /etc/yum.repos.d/hdp.repo
修改ambari.repo,配置为本地源
vi /etc/yum.repos.d/ambari.repo

#VERSION_NUMBER=2.5.2.0-298
[ambari-2.5.2.0]
name=ambari Version - ambari-2.5.2.0
baseurl=http://hadoop1.com/ambari/centos7
gpgcheck=0
gpgkey=http://hadoop1.com/ambari/centos7/RPM-GPG-KEY/RPM-GPG-KEY-Jenkins
enabled=1
priority=1

vi /etc/yum.repos.d/hdp.repo

#VERSION_NUMBER=2.6.2.0-205
[HDP-2.6.2.0]
name=HDP Version - HDP-2.6.2.0
baseurl=http://hadoop1.com/hdp/HDP/centos7/
gpgcheck=0
gpgkey=http://hadoop1.com/hdp/HDP/centos7/RPM-GPG-KEY/RPM-GPG-KEY-Jenkins
enabled=1
priority=1

[HDP-UTILS-1.1.0.21]
name=HDP-UTILS Version - HDP-UTILS-1.1.0.21
baseurl=http://hadoop1.com/HDP-UTILS-1.1.0.21/
gpgcheck=0
gpgkey=http://hadoop1.com/HDP-UTILS-1.1.0.21/RPM-GPG-KEY/RPM-GPG-KEY-Jenkins
enabled=1
priority=1

yum clean all
yum makecache
yum repolist 查看Ambari 与 HDP 资源的资源库。
也可以打开浏览器查看一下:http://hadoop1.com/ambari/centos7/
12.安装MySQL
Ambari使用的默认数据库是PostgreSQL,用于存储安装元数据,可以使用自己安装MySQL数据库作为Ambari元数据库。
yum install -y mysql-server
chkconfig mysqld on
service mysqld start
13.安装Ambari
yum install ambari-server
将mysql-connector-java.jar复制到/usr/share/java目录下
https://dev.mysql.com/downloads/connector/j/
mkdir /usr/share/java
cp /opt/mysql-connector-java-5.1.40.jar /usr/share/java/mysql-connector-java.jar
将mysql-connector-java.jar复制到/var/lib/ambari-server/resources目录下
cp /usr/share/java/mysql-connector-java.jar /var/lib/ambari-server/resources/mysql-jdbc-driver.jar
在mysql中分别创建数据库ambari,hive,oozie和其相应用户,创建相应的表:
启动:mysql -u root -p
CREATE DATABASE ambari;
use ambari;
CREATE USER 'ambari'@'%' IDENTIFIED BY 'bigdata';
GRANT ALL PRIVILEGES ON *.* TO 'ambari'@'%';
CREATE USER 'ambari'@'localhost' IDENTIFIED BY 'bigdata';
GRANT ALL PRIVILEGES ON *.* TO 'ambari'@'localhost';
CREATE USER 'ambari'@'hdp131.cancer.com' IDENTIFIED BY 'bigdata';
GRANT ALL PRIVILEGES ON *.* TO 'ambari'@'hdp131.cancer.com';
FLUSH PRIVILEGES;

source /var/lib/ambari-server/resources/Ambari-DDL-MySQL-CREATE.sql
show tables;
use mysql;
select Host,User,Password from user where mysql.user='ambari';
CREATE DATABASE hive;
use hive;
CREATE USER 'hive'@'%' IDENTIFIED BY 'hive';
GRANT ALL PRIVILEGES ON *.* TO 'hive'@'%';
CREATE USER 'hive'@'localhost' IDENTIFIED BY 'hive';
GRANT ALL PRIVILEGES ON *.* TO 'hive'@'localhost';
CREATE USER 'hive'@'hdp131.cancer.com' IDENTIFIED BY 'hive';
GRANT ALL PRIVILEGES ON *.* TO 'hive'@'hdp131.cancer.com';
FLUSH PRIVILEGES;
CREATE DATABASE oozie;
use oozie;
CREATE USER 'oozie'@'%' IDENTIFIED BY 'oozie';
GRANT ALL PRIVILEGES ON *.* TO 'oozie'@'%';
CREATE USER 'oozie'@'localhost' IDENTIFIED BY 'oozie';
GRANT ALL PRIVILEGES ON *.* TO 'oozie'@'localhost';
CREATE USER 'oozie'@'hdp131.cancer.com' IDENTIFIED BY 'oozie';
GRANT ALL PRIVILEGES ON *.* TO 'oozie'@'hdp131.cancer.com';
FLUSH PRIVILEGES;
注:在配置Ambari前先在mysql中建库建表,可以避免执行ambari-server setup时的中断。
14.配置Ambari
https://blog.csdn.net/sunggff/article/details/78933632
https://blog.csdn.net/cwx714/article/details/72652542?tdsourcetag=s_pcqq_aiomsg
网页登入:
http://hadoop1.com:8080/
hadoop1.com
hadoop2.com
hadoop3.com
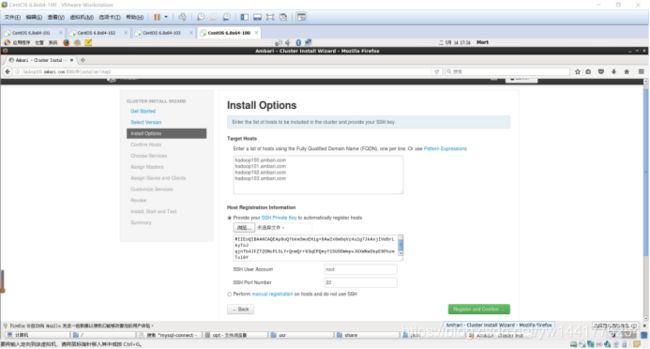
Host Confirm出现错误后,查看/var/log/ambari-server/ambari-server.log
Cluster Name : MCloud
Total Hosts : 4 (4 new)
Repositories:
redhat6 (HDP-2.6):
http://hadoop100.ambari.com/HDP/centos6/

redhat6 (HDP-UTILS-1.1.0.21):
http://hadoop100.ambari.com/HDP-UTILS-1.1.0.21/repos/centos6/
Services:
HDFS
    DataNode : 3 hosts
    NameNode : hadoop100.ambari.com
    NFSGateway : 0 host
    SNameNode : hadoop101.ambari.com
YARN + MapReduce2
    App Timeline Server : hadoop101.ambari.com
    NodeManager : 3 hosts
    ResourceManager : hadoop101.ambari.com
HBase
    Master : hadoop100.ambari.com
    RegionServer : 1 host
    Phoenix Query Server : 0 host
ZooKeeper
    Server : 3 hosts
Ambari Metrics
    Metrics Collector : hadoop100.ambari.com
    Grafana : hadoop100.ambari.com
SmartSense
    Activity Analyzer : hadoop100.ambari.com
    Activity Explorer : hadoop100.ambari.com
    HST Server : hadoop100.ambari.com
解决方法:这个也是源的问题,解决方法如下:
yum clean all
yum update
问题1:
ERROR [main] DBAccessorImpl:117
https://community.hortonworks.com/questions/89446/ambari-server-fails-to-start-after-installing-jce.html?tdsourcetag=s_pcqq_aiomsg
问题2:
There is insufficient memory for the Java Runtime Environment to continue.
https://blog.csdn.net/liema2000/article/details/37808209
经过查证,再在/etc/security/下一看。centos6多出来一个limits.d目录,下面有个文件: 90-nproc.config
此文件内容:
#Default limit for number of user's processes to prevent
#accidental fork bombs.
#See rhbz #432903 for reasoning.
*          soft    nproc     1024
root       soft    nproc     unlimited
这里限制了1024呀,果断注释。
问题3:
重启集群之后,ambari与主机失去心跳无法恢复
https://blog.csdn.net/qq_41919284/article/details/83998077?tdsourcetag=s_pcqq_aiomsg
解决办法:vim /etc/ambari-agent/conf/ambari-agent.ini
在[security] 新增如下一行
[security] 的节点下,加入:
force_https_protocol=PROTOCOL_TLSv1_2
重启ambari-agent,# ambari-agent restart ============== 解决问题
问题4:
ECS Linux服务器安装VNC远程桌面访问
https://help.aliyun.com/knowledge_detail/41181.html
问题5:
三台同地域,不同账号的阿里云服务器内网Ping不通
解决方法:
通过云企业网实现不同VPC专有网络内网互通:
https://help.aliyun.com/document_detail/65901.html?spm=5176.11065259.1996646101.searchclickresult.348cebbeliRVnc
Traceback (most recent call last):
  File "/var/lib/ambari-agent/cache/common-services/HDFS/2.1.0.2.0/package/scripts/nfsgateway.py", line 89, in
    NFSGateway().execute()
  File "/usr/lib/python2.6/site-packages/resource_management/libraries/script/script.py", line 329, in execute
    method(env)
  File "/var/lib/ambari-agent/cache/common-services/HDFS/2.1.0.2.0/package/scripts/nfsgateway.py", line 58, in start
    nfsgateway(action="start")
  File "/var/lib/ambari-agent/cache/common-services/HDFS/2.1.0.2.0/package/scripts/hdfs_nfsgateway.py", line 61, in nfsgateway
    prepare_rpcbind()
  File "/var/lib/ambari-agent/cache/common-services/HDFS/2.1.0.2.0/package/scripts/hdfs_nfsgateway.py", line 52, in prepare_rpcbind
    raise Fail("Failed to start rpcbind or portmap")
resource_management.core.exceptions.Fail: Failed to start rpcbind or portmap
https://community.hortonworks.com/questions/72592/nfs-gateway-not-starting.html
.systemctl enable rpcbind
.systemctl start rpcbind
问题7:

①https://community.hortonworks.com/questions/48107/ambari-metrics-collector.html
Please clear the contents of /var/lib/ambari-metrics-collector/hbase-tmp/zookeeper/* and restart Ambari metrics collector. Let me know if that works!
Clearing the contents of /var/lib/ambari-metrics-collector/hbase-tmp/* and restarting the Ambari metrics collector totally fixed our problem on HDInsight Hadoop 3.6.1 (HDP 2.6.5).
②Ntp同步
https://blog.csdn.net/yuanfang_way/article/details/53959591
问题8:

设置ntp时间同步
问题9:
Hbase启动不了!
报错:Error occured during stack advisor command invocation: Cannot create /var/run/ambari-server/stack-recommendations
https://blog.csdn.net/wszhtc/article/details/79538003
https://blog.csdn.net/qq_19968255/article/details/72881989
Ambari出现Consistency Check Failed错误,并且配置NameNode HA时出现500 status code错误。
这里是因为权限问题,修改一下权限就行了:
chown -R ambari /var/run/ambari-server
这里的ambari换成配置ambari-server时的用户名
问题10:
Hbase启动报警告:Python script has been killed due to timeout after waiting 300 secs
https://www.cnblogs.com/zlslch/p/6629249.html
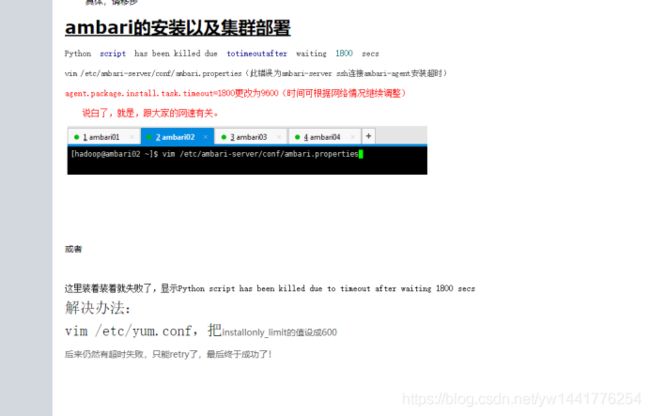
https://community.hortonworks.com/articles/90925/error-python-script-has-been-killed-due-to-timeout.html
问题11:
Ambari部署时问题之Ambari Metrics无法启动
Ambari里如何删除某指定的服务
Ambari安装之部署 (Metrics Collector和 Metrics Monitor) Install Pending …问题
http://www.cnblogs.com/zlslch/p/6653379.html
问题12:
(1)Hue报错connection[111]。
Hue安装参考:
https://blog.csdn.net/zhouyuanlinli/article/details/83374416
https://blog.csdn.net/m0_37739193/article/details/77963240?tdsourcetag=s_pcqq_aiomsg
https://www.cnblogs.com/chenzhan1992/p/7940418.html
官方的:http://gethue.com/hadoop-hue-3-on-hdp-installation-tutorial/
配置各种集群:https://blog.csdn.net/nsrainbow/article/details/43677077
解决方法: 一定要看日志!!!
①ntp同步
②chown -R hue:hue /var/log/hue
③在主节点上启动hue:usr/local/hue/build/env/bin/supervisor
(2)hue无法访问hbase报错:HBase Thrift 1 server cannot be contacted: Could not connect to hadoop1:9090
解决方法:
如果要启用HBase,启动hue之前,先要启动 hbase thrift service,ambari HDP 默认没有启动hbase thrift,需要自己手动启动。在HBase Master节点上执行:
/usr/hdp/current/hbase-client/bin/hbase-daemon.sh start thrift
问题13:
打开Ambari看到hdfs报警[alert]: Total Blocks:[], Missing Blocks:[]
https://www.jianshu.com/p/f61582f729e3
https://blog.csdn.net/devalone/article/details/80826036
https://blog.csdn.net/slx_2011/article/details/19634473
问题14:
SmartSense ID问题解决:
https://github.com/seanorama/masterclass/blob/master/operations/lab-notes.txt
Enter the following values for the smartsense account
Account Name: HortonWorks Test
SmartSense ID:  A-00000000-C-00000000
Notification EMail: individual valid email address
VERIFY YOU HAVE THE RIGHT ENTRIES IN THE RIGHT SECTIONS BEFORE CONTINUING…
问题15:
Import方式OpenTSDB数据导入:
cd /root/opentsdb/
./build/tsdb import --auto-metric --config=/root/opentsdb/src/opentsdb.conf /opt/data/R1_A1_01.txt
问题16:
Opentadb导入数据报异常:
2019-06-05 14:26:33,641 WARN  [AsyncHBase I/O Boss #1] HBaseClient: Couldn't connect to the RegionServer @ 172.19.96.162:16020
2019-06-05 14:26:33,641 INFO  [AsyncHBase I/O Boss #1] HBaseClient: Lost connection with the .META. region
2019-06-05 14:26:33,642 ERROR [AsyncHBase I/O Boss #1] RegionClient: Unexpected exception from downstream on [id: 0x47118221]
java.net.ConnectException: Connection refused: /172.19.96.162:16020
