【二】jupyter lab插件相关问题
文章目录
- 一、前言
- 二、插件介绍
-
- 2.1 jupyterlab-kite
- 2.2 debugger
- 2.3 geojson-extension
- 2.4 jupyterlab-toc
- 2.5 jupyter-matplotlib
- 2.6 jupyterlab-drawio
- 2.7 jupyterlab-plotly
- 2.8 jupyterlab-spreadsheet
- 2.9 jupyterlab-system-monitor
- 2.10 jupyterlab-execute-time
- 2.11 jupyterlab-variableInspector
- 三、参考链接
一、前言
上一篇博文博主介绍了关于jupyter lab的插件准备的一些工作。本博主的目的是介绍一些常见的好用插件。
二、插件介绍
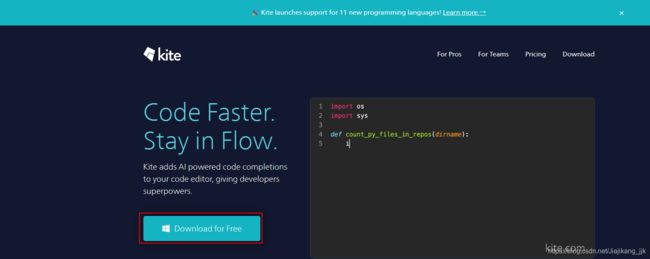
首先,我们需要介绍的插件是kite,这也是我们为何安装jupyter lab发行版的主要原因。kite是帮助我们建立代码补全神器kite与jupyter lab之间的通道,帮助我们在jupyter lab使用kite代码补全服务。
2.1 jupyterlab-kite
废话不多说,需要使用kite插件的必备条件:
1、jupyter lab版本大于等于2.2.0
2、安装kite应用程序
pip install jupyter-kite
jupyter labextension install @kiteco/jupyterlab-kite
命令1: pip install jupyter-kite


命令2: jupyter labextension install @kiteco/jupyterlab-kite
2.2 debugger
之前,师兄问我jupyterlab中能debug吗?我说不知道,这不,它来了。
在jupyter notebook或jupyter lab中debug是多让人无语呀。但随着jupyter lab官方插件debugger的如晴天霹雳版的横空出世,这又给多少单身狗无限的乐趣呀。
- 说明:
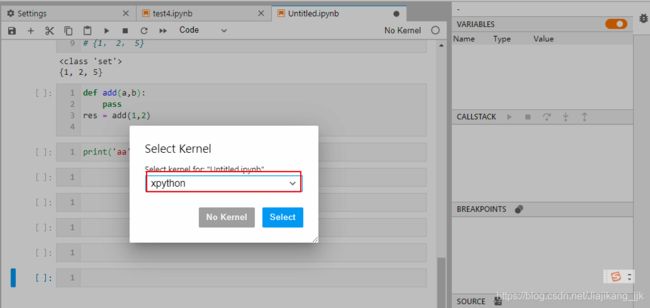
要注意当前的debugger插件基于xeus内核,这是与我们平常使用的ipykernel内核不太一样,所以要想在jupyter lab中使用debugger插件,需要先安装xeus内核再进行debugger的安装,安装过程命令如下:
conda install xeus-python=0.8.0 -c conda-forge
jupyter labextension install @jupyterlab/debugger
-
官方文档
官方文档:https://github.com/jupyterlab/debugger -
安装过程
命令1: conda install xeus-python=0.8.0 -c conda-forge


命令2: jupyter labextension install @jupyterlab/debugger


-
结果展示

具体详情配置,可通过官网链接查看:https://github.com/jupyterlab/debugger
2.3 geojson-extension
jupyter lab中的geojson-extension插件可以帮助我们在jupyter lab界面中以地图可视化的方式打开查看geojson文件,安装命令:
jupyter labextension install @jupyterlab/geojson-extension
2.4 jupyterlab-toc
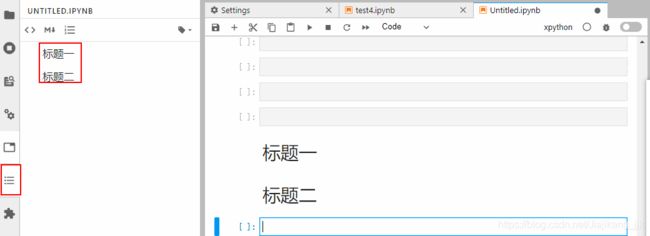
简而言之,在jupyterlab中创建了markdown语法之后,jupyterlab-toc是可以帮助我们更好的导航到指定位置。
jupyter labextension install @jupyterlab/toc
2.5 jupyter-matplotlib
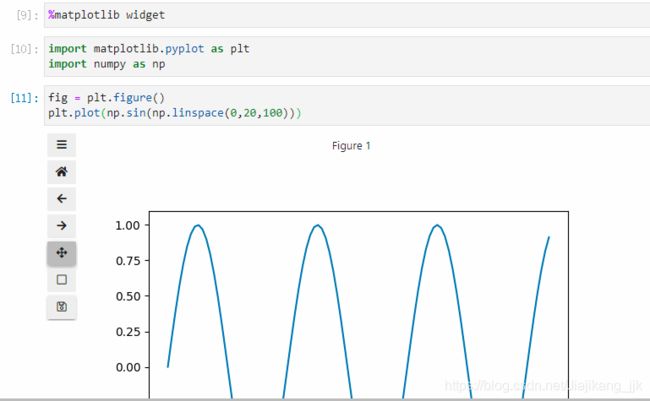
jupyter-matplotlib帮助我们在notebook界面配合matplotlib实现交互式的作图,只需要在绘图之前执行魔法命令%matplotlib widget,之后绘制的所有matplotlib图表即可自动转换为交互式的。
pip install ipympl
jupyter labextension install @jupyter-widgets/jupyterlab-manager jupyter-matplotlib
2.6 jupyterlab-drawio
jupyterlab-drawio是一个让我们可以在jupyter lab界面内基于drawio绘制流程图、思维导图等示意图的插件:
jupyter labextension install jupyterlab-drawio
2.7 jupyterlab-plotly
jupyterlab-plotly是一款帮助plotly图像在jupyter lab中正常渲染的插件:
jupyter labextension install @jupyter-widgets/jupyterlab-manager plotlywidget@4.9.0
2.8 jupyterlab-spreadsheet
简而言之,有了jupyterlab-spreadsheet插件,我们可以在jupyter lab中查看excel表格文件。
jupyter labextension install jupyterlab-spreadsheet
2.9 jupyterlab-system-monitor
jupyterlab-system-monitor通过在jupyter lab界面中添加资源监视器部件,能帮助我们在工作过程中方便的看到CPU、内存的实时占用情况:
pip install nbresuse
jupyter labextension install jupyterlab-topbar-extension jupyterlab-system-monitor
官网链接:https://github.com/jtpio/jupyterlab-system-monitor
需要通过官网链接中的提示,进行设置一下奥。
2.10 jupyterlab-execute-time
jupyterlab-execute-time插件帮助我们在jupyter lab中记录每个单元cell的执行开始以及运行耗时:
jupyter labextension install jupyterlab-execute-time
2.11 jupyterlab-variableInspector
jupyterlab-variableInspector帮助我们在jupyter lab中查看当前环境中存在的变量相关信息,以美观的界面形式对多种类型的对象予以呈现:
jupyter labextension install @lckr/jupyterlab_variableinspector

最后,你有没有发现在jupyter lab中没有代码折叠,不要急,设置如下:codeFolding:true,即可见代码折叠奥。


三、参考链接
1、https://mp.weixin.qq.com/s/UhzCSMSUBjM_bYKjvmmMww
2、https://mp.weixin.qq.com/s/x7LUBYRYB4ZvbovSkNEmbA


