RazzleDazzle 的开发商是著名的 IFTTT。
使用 AuthLayout 配合 RazzleDazzle 可以很方便地实现控件的动画效果,特别适合实现 app 介绍界面。
今天啃了一下午的 demo,基本搞清楚如何使用 RazzleDazzle,写个文章记录一下,也希望对其他同学有所帮助。
先看一下官方 demo 的运行效果。
怎么玩
- ViewController 继承
AnimatedPagingScrollViewController - 重载
numberOfPages方法,告诉 RazzleDazzle 有几个页面 - 添加组件到
contentView - 配置各组件的动画
怎么配置动画规则
怎么讲都是生硬的,先上几个例子
背景颜色
private func configureScrollView() {
    // Let's change the background color of the scroll view from dark gray to light gray to blue
    let backgroundColorAnimation = BackgroundColorAnimation(view: scrollView)
    backgroundColorAnimation[0] = UIColor(red: 0.4, green: 0.4, blue: 0.4, alpha: 1)
    backgroundColorAnimation[0.5] = UIColor(red: 0.2, green: 0.2, blue: 0.2, alpha: 1)
    backgroundColorAnimation[0.99] = UIColor(red: 0.2, green: 0.2, blue: 0.2, alpha: 1)
    backgroundColorAnimation[1] = UIColor(red: 0.14, green: 0.8, blue: 1, alpha: 1)
    animator.addAnimation(backgroundColorAnimation)
}
下标0, 0.5, 0.99, 1是什么意思呢?
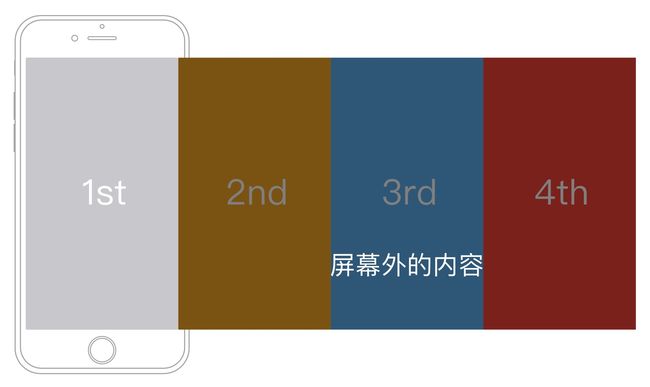
我们可以简单地把下标当成时间轴,以 demo 为例,demo 共四屏,我们可以理解为这是一个共4秒的动画,一秒即一屏,0.5 即是当内容滑动到第一屏一半的时候。所以上面的代码可以理解为:0 ~ 0.5 屏,背景为深灰;0.5 ~ 0.99 屏,背景为浅灰;从第一屏结束之后,背景为蓝色。
动画
private func configureStar() {
    // Center the star on the page, and keep it centered on pages 0 and 1
    let width = NSLayoutConstraint(item: star, attribute: .width, relatedBy: .lessThanOrEqual, toItem: scrollView, attribute: .width, multiplier: 1.3, constant: 0)
    let height = NSLayoutConstraint(item: star, attribute: .height, relatedBy: .lessThanOrEqual, toItem: scrollView, attribute: .height, multiplier: 1, constant: 0)
    let top = NSLayoutConstraint(item: star, attribute: .top, relatedBy: .greaterThanOrEqual, toItem: scrollView, attribute: .top, multiplier: 1, constant: 30)
    let aspect = NSLayoutConstraint(item: star, attribute: .height, relatedBy: .equal, toItem: star, attribute: .width, multiplier: 1, constant: 0)
    let centerY = NSLayoutConstraint(item: star, attribute: .centerY, relatedBy: .equal, toItem: scrollView, attribute: .centerY, multiplier: 1, constant: 0)
    NSLayoutConstraint.activate([width, height, top, aspect, centerY])
    keepView(star, onPages: [0,1])

    // Scale up the star to 10 times its original size between pages 0 and 1, with a quadratic Ease In easing function
    let starScaleAnimation = ScaleAnimation(view: star)
    starScaleAnimation.addKeyframe(0, value: 1, easing: EasingFunctionEaseInQuad)
    starScaleAnimation[1] = 10
    animator.addAnimation(starScaleAnimation)

    // Hide the star when we get to page 1
    let starHideAnimation = HideAnimation(view: star, hideAt: 1)
    animator.addAnimation(starHideAnimation)
}
NSLayoutConstraint 可能大家都很熟悉了,不过我还是哆嗦一下,逐行说明一下
- star.width <= scrollView.width * 1.3
- star.height <= scrollView.height
- star.top >= scrollView.top + 30
- star.width = star.height
- star.centerY = scrollView.centerY (垂直居中)
这样星星的布局基本完成了,但是还差一个水平居中,为什么没有呢?看一下下面的 keepView
keepView
keepView 是用来指定某一组件要在哪些时间轴上显示。keepView(star, onPages: [0,1]) 用人话讲就是 “这个星星要在第0屏开始到第1屏结束时显示”。
另外 keepView 还有一个隐藏的设置,即将组件设置为水平居中。那么如果我想左对齐,右对齐怎么办?不着急,先把这屏说完,下面会提到。
ScaleAnimation
// Scale up the star to 10 times its original size between pages 0 and 1, with a quadratic Ease In easing function
let starScaleAnimation = ScaleAnimation(view: star)
starScaleAnimation.addKeyframe(0, value: 1, easing: EasingFunctionEaseInQuad)
starScaleAnimation[1] = 10
animator.addAnimation(starScaleAnimation)
使用 ScaleAnimation 可以设置组件的缩放效果
可以调用 addKeyframe 方法来指定某一帧(屏)的缩放值
也可以直接操作下标(subscript)来指定缩放值
所以上面的代码用人话可以这样讲“刚开始不缩放,到第1屏(第二页)结束时,缩放到10倍,缩放速度是EasingFunctionEaseInQuad”
HideAnimation
// Hide the star when we get to page 1
let starHideAnimation = HideAnimation(view: star, hideAt: 1)
animator.addAnimation(starHideAnimation)
还是用人话讲 “在第1屏(第二页)结束时,隐藏掉这个星星”
大家可以拉到最上面去那看个 gif 动画来回顾一下这几个动画效果
ConstraintConstantAnimation
// Create the vertical position constraints for Razzle and Dazzle
let razzleVerticalConstraint = NSLayoutConstraint(item: razzle, attribute: .centerY, relatedBy: .equal, toItem: star, attribute: .centerY, multiplier: 1, constant: 0)
let dazzleVerticalConstraint = NSLayoutConstraint(item: dazzle, attribute: .centerY, relatedBy: .equal, toItem: star, attribute: .centerY, multiplier: 1, constant: 0)
NSLayoutConstraint.activate([razzleVerticalConstraint, dazzleVerticalConstraint])

// Animate the vertical position of Razzle to go from 30 pixels above the center of the view to 200 pixels above, between pages 0 and 1
let razzleVerticalAnimation = ConstraintConstantAnimation(superview: scrollView, constraint: razzleVerticalConstraint)
razzleVerticalAnimation[0] = -30
razzleVerticalAnimation[1] = -200
animator.addAnimation(razzleVerticalAnimation)

// Animate the vertical position of Razzle to go from 80 pixels below the center of the view to 260 pixels below, between pages 0 and 1
let dazzleVerticalAnimation = ConstraintConstantAnimation(superview: scrollView, constraint: dazzleVerticalConstraint)
dazzleVerticalAnimation[0] = 80
dazzleVerticalAnimation[1] = 260
animator.addAnimation(dazzleVerticalAnimation)
在这段代码中,先对两个文本图片添加了垂直居中的约束,再使用 ConstraintConstantAnimation 来动态改变 constant
razzleVerticalAnimation[0] = -30
razzleVerticalAnimation[1] = -200
人话:“第0帧(初始时)constant 是-30(上移30),到第1帧(第2页结束时)constant 修改到 -200”
RotationAnimation
// Rotate Razzle 100 degrees counter-clockwise between pages 0 and 1
let razzleRotationAnimation = RotationAnimation(view: razzle)
razzleRotationAnimation[0] = 0
razzleRotationAnimation[1] = 100
animator.addAnimation(razzleRotationAnimation)

// Rotate Dazzle 100 degrees counter-clockwise between pages 0 and 1
let dazzleRotationAnimation = RotationAnimation(view: dazzle)
dazzleRotationAnimation[0] = 0
dazzleRotationAnimation[1] = 100
animator.addAnimation(dazzleRotationAnimation)
这个和 ConstraintConstantAnimation 差不多,不用讲了,100即是100度
keepView 右对齐、居中对齐
// Lay out the music notes
let notesWidth = NSLayoutConstraint(item: musicNotes, attribute: .width, relatedBy: .equal, toItem: musicStand, attribute: .width, multiplier: 1, constant: 0)
let notesHeight = NSLayoutConstraint(item: musicNotes, attribute: .height, relatedBy: .equal, toItem: musicStand, attribute: .height, multiplier: 1, constant: 0)
let notesCenterY = NSLayoutConstraint(item: musicNotes, attribute: .centerY, relatedBy: .equal, toItem: musicStand, attribute: .centerY, multiplier: 1, constant: 0)
NSLayoutConstraint.activate([notesWidth, notesHeight, notesCenterY])

// Move the music notes in quickly from the right when we change from page 0.5 to 1, and keep them centered on pages 1 and 2
keepView(musicNotes, onPages: [2, 1, 2], atTimes: [0.5, 1, 2], withAttribute: .right)
现在我们来看乐谱这屏,这屏上的两个组件:乐谱和音符都是靠右对齐的,所以在使用 keepView 的时候要带上参数 withAttribute
keepView(musicNotes, onPages: [2, 1, 2], atTimes: [0.5, 1, 2], withAttribute: .right)
另外上面这行代码,当初我在看的时候理解的时间比较长,所以拿出来讲一下
人话:“当在0.5帧的时候,音符出现在第二页(即音符后的那页,此时看不见),到第1帧的时候,音符完全出现,到第2帧结束时,音符也退场了”
再来个粟子,我们来看看有云的这屏
// Lay out the big cloud
let bigCloudVerticalConstraint = NSLayoutConstraint(item: bigCloud, attribute: .centerY, relatedBy: .equal, toItem: scrollView, attribute: .top, multiplier: 1, constant: 0)
let bigCloudWidth = NSLayoutConstraint(item: bigCloud, attribute: .width, relatedBy: .lessThanOrEqual, toItem: scrollView, attribute: .width, multiplier: 0.78, constant: 0)
let bigCloudHeight = NSLayoutConstraint(item: bigCloud, attribute: .height, relatedBy: .lessThanOrEqual, toItem: scrollView, attribute: .height, multiplier: 0.2, constant: 0)
let bigCloudAspect = NSLayoutConstraint(item: bigCloud, attribute: .height, relatedBy: .equal, toItem: bigCloud, attribute: .width, multiplier: 0.45, constant: 0)
NSLayoutConstraint.activate([bigCloudVerticalConstraint, bigCloudWidth, bigCloudHeight, bigCloudAspect])

// Keep the big cloud slightly to the right on pages 1 and 2, and zoom it out to the left between pages 2 and 3
keepView(bigCloud, onPages: [1.35, 2.35, 1.8], atTimes: [1, 2, 3])

// Move the big cloud from above the view down to near the top of the view between pages 1 and 2
let bigCloudVerticalAnimation = ConstraintMultiplierAnimation(superview: scrollView, constraint: bigCloudVerticalConstraint, attribute: .height, referenceView: scrollView)
bigCloudVerticalAnimation[1] = -0.2
bigCloudVerticalAnimation[2] = 0.2
animator.addAnimation(bigCloudVerticalAnimation)
bigCloudVerticalConstraint 即大云的垂直中心点与 scrollView 顶部对齐
再看看这个 keepView(bigCloud, onPages: [1.35, 2.35, 1.8], atTimes: [1, 2, 3])
开始讲人话,这段话比较长:
- 在第一帧(乐谱那屏),大白在水平居中靠右(没有指定
withAttribute即水平居中)0.35的位置。而在乐谱页面看不到大白的原因是bigCloudVerticalAnimation[1] = -0.2大白此时在scrollView顶部向上scrollView.height * 0.2的位置,即屏幕外了 - 从第一帧到第二帧,大白的 x 轴位置从 1.35 过渡到 2.35,所以大白 x 轴的位置是不变的。这里有个弯,大家自己理解一下。同时大白的 y 轴位置从 -0.2 到 0.2。所以表现出来的现象是大白从屏幕外到屏幕内,从上到下垂直地落下
- 从第二帧到第二帧,大白的 x 轴位置从 2.35 过渡到 1.8,所以大白从白云屏过渡到最后一屏的时候,从右向左退出
大家可以按这样的思路去理解最后一屏太阳的动画
PathPositionAnimation
高潮来了!在我写这文章的时候,Google 开发者中国平台 来了!Yeah
好了,继续写,但好像没什么可写的,因为思路都是一样的,大家自己理解吧,我要去逛 Google 了
对了,如果双12之前,兄弟点赞超过100的话,我就写一篇 RazzleDazzle 的源码赏析。大兄弟们加油了!(我知道100个赞是不可能的)

