上一节传送门:http://www.jianshu.com/p/14dd440a8bc3
本节实现了:
- 歌曲切换
- 图标转动
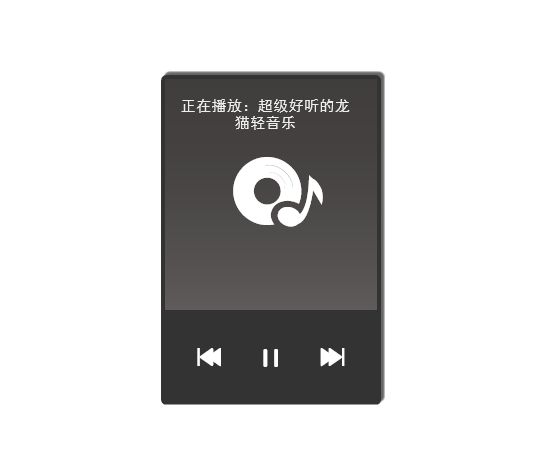
- 显示歌曲信息
下一节计划:
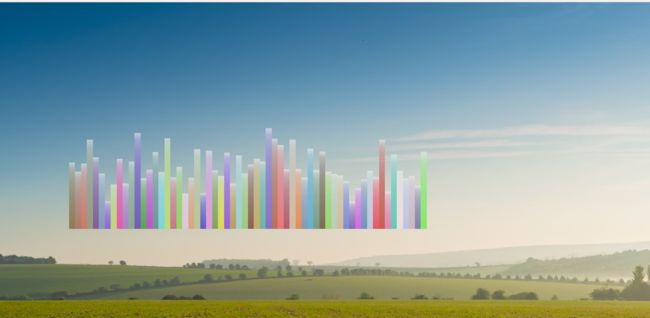
- 添加音轨
- 进度条
小demo已经写好,不用担心跳票啥的。
继续上一节的内容,我们在绘制好播放器的雏形之后,就可以考虑将一些工具性质的方法封装起来了,比如,我们多次用到dom和_center方法,不如将它们归为一类,做为一个工具包来调用。
上代码:
var utils = {
    _center : function(dom){
        dom.style.position = 'absolute';
        dom.style.top = '50%';
        dom.style.left = '50%';
        dom.style['margin-top'] = - dom.offsetHeight / 2 + 'px';
        dom.style['margin-left'] = - dom.offsetWidth / 2 + 'px';
    },

    dom : function(id){
        if(id.toString().indexOf('#') != -1) {
            id = id.replace('#','');
        }
        return document.getElementById(id);
    },
}
然后我们就可以这样调用了:
var musicDom = utils.dom('#music');
var musicIcon = utils.dom('#music-icon');
utils._center(musicDom);
utils._center(musicIcon);
util是工具的意思,这样是不是清晰多了呢?
然后进行js打包:
引入:
用闭包的形式将util包裹起来,再挂在window对象下面,以防止命名重复。一个简单的工具包就这样做好啦!
;(function(win){
    var utils = {
        _center : function(dom){
            dom.style.position = 'absolute';
            dom.style.top = '50%';
            dom.style.left = '50%';
            dom.style['margin-top'] = - dom.offsetHeight / 2 + 'px';
            dom.style['margin-left'] = - dom.offsetWidth / 2 + 'px';
        },

        dom : function(id){
            if(id.toString().indexOf('#') != -1) {
                id = id.replace('#','');
            }
            return document.getElementById(id);
        },
    }

    win.utils = utils;
})(window);
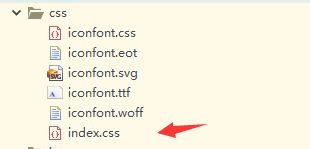
同时,我们把css也单独整出去,不要放在页面里,那样会显得页面特别庞大,页面应该整洁和精简。当一个模子画出来之后,我一般都会将css整出去。
.music {
    width: 200px;
    height:300px;
    background:#333;
    border-radius: 5px;
    box-shadow: 3px -3px 1px #666;
    position: relative; /*center方法已经将position设置为absolute了,这一行不起作用*/
}
.music .screen {
    height:70%;
    width:96%;
    background: linear-gradient(#403d3d,65%,#5f5b5b);
    margin-left:2%;
    margin-top: 2%;
    position: relative;

}

.music .screen i {
    color:#fff;
    font-size: 88px;
}

.music .buttons i {
    color:#fff;
    font-size: 24px;
    margin-left: 28px;
    position: relative;
    top:25px;
}

.music .buttons i:hover {
    cursor: pointer;
}


.music .buttons {
    height:25%;
    width:96%;
    margin-left:2%;
    margin-top: 2%;
}
这样一来,页面就简洁多了!
接下来,让我们愉快地开发功能吧!
1. 开始和暂停按钮之间的切换
/* 获取开始按钮 */
var playDom = utils.dom('#play');
然后,给它绑定一个点击事件
playDom.onclick = function(){
    alert('play');
}
这说明绑定事件成功了。
将暂停按钮加上去,默认是隐藏的。
上一节中出现了图标编码格式冲突的问题,因此我把iconfont的引入改成了下面的方式:
按钮切换的逻辑代码:
/* 获取开始按钮 */
var playDom =  utils.dom('#play');
/* 获取暂停按钮 */
var pauseDom = utils.dom('#pause');

playDom.onclick = function(){
    this.style.display = 'none';
    pauseDom.style.display = 'inline';
}

pauseDom.onclick = function(){
    this.style.display = 'none';
    playDom.style.display = 'inline';
}
效果(截屏效果一般,渐变色没显示,大伙先将就着看吧):
2. 音乐播放和暂停
还记得上一节封装的musicBox对象吗?
播放和暂停的核心方法是这样的:
play : function(index){
    this.musicDom.src = this.songs[index];
    this.musicDom.play();
},

//暂停音乐
stop : function(){
    this.musicDom.pause();
},
3. 代码重构和歌曲切换的实现
今天,我对musicBox进行了一次简单的重构,代码如下:
var musicBox= {

    musicDom : null, //播放器对象
    songs : [],      //歌曲目录,用数组来存储
    index : 0,       //当前播放的歌曲索引

    //初始化音乐盒
    init : function(themeIndex){
        this.musicDom = document.createElement('audio');
        document.body.appendChild(this.musicDom);
    },

    //添加一首音乐
    add : function(src){
        this.songs.push(src);
    },

    //根据数组下标决定播放哪一首歌
    play : function(){
        this.musicDom.src = this.songs[this.index];
        this.musicDom.play();

    },

    //暂停音乐
    stop : function(){
        this.musicDom.pause();
    },

    //下一首
    next : function(){
        var len = this.songs.length;
        //判断是否是有效的索引
        if((this.index + 1) >= 0 && this.index < len){
            this.index ++;
            //如果已经是最后一首,就跳到第一首
            if(this.index == len){
                this.index = 0;
            }
            this.play();
        }
    },

    //上一首
    prev : function(){
        var len = this.songs.length;
        //判断是否是有效的索引
        if((this.index + 1) >= 0 && this.index  < len){
            //如果已经是第一首,就跳到最后一首
            if(this.index == 0){
                this.index = len;
            }
            this.index --;
            this.play();
        }
    }

}
不同点如下:
1.添加音乐索引index,取消了play方法的参数。
2.实现了上一首和下一首的逻辑代码
3.默认音乐为第一首
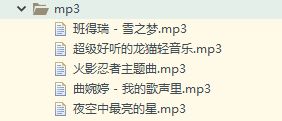
顺便添加了几首音乐。
现在我们就来调用看看吧,当点击播放按钮的时候,就播放指定的歌曲。点击暂停按钮就停止播放。
4. 测试
var musicDom = utils.dom('#music');
var musicIcon = utils.dom('#music-icon');
utils._center(musicDom);
utils._center(musicIcon);


musicBox.init(); //初始化
musicBox.add('mp3/火影忍者主题曲.mp3');
musicBox.add('mp3/曲婉婷 - 我的歌声里.mp3');
musicBox.add('mp3/夜空中最亮的星.mp3');
musicBox.add('mp3/班得瑞 - 雪之梦.mp3');
musicBox.add('mp3/超级好听的龙猫轻音乐.mp3');
/* 获取开始按钮 */
var playDom =  utils.dom('#play');
/* 获取暂停按钮 */
var pauseDom = utils.dom('#pause');
/* 获取下一首按钮 */
var nextDom = utils.dom('#next');
/* 获取上一首按钮 */
var prevDom = utils.dom('#prev');

//播放按钮
playDom.onclick = function(){
    this.style.display = 'none';
    pauseDom.style.display = 'inline';
    //播放音乐
    musicBox.play();
}

//暂停按钮
pauseDom.onclick = function(){
    this.style.display = 'none';
    playDom.style.display = 'inline';
    musicBox.stop();
}

//下一首
nextDom.onclick = function(){
    musicBox.next();
    //当直接点击下一首的时候,同时改变播放按钮为暂停的样式
    playDom.style.display = 'none';
    pauseDom.style.display = 'inline';
}

//上一首
prevDom.onclick = function(){
    musicBox.prev();
    //当直接点击下一首的时候,同时改变播放按钮为暂停的样式
    playDom.style.display = 'none';
    pauseDom.style.display = 'inline';
}
成功运行起来了,虽然有声音,但是还看不出屏幕的变化,所以,接下来,我们做一点有趣的事情。
5. 随着歌曲的播放,让音乐图标转动起来
关于这个,就需要用到css3的一个知识点了,就是关键帧。因为不是专门开贴讲解css3,所以这边我就简单说明一下了。
像这样:
@keyframes move{
    0% {transform: rotate(0deg)}
    100% {transform: rotate(360deg)}
}
.r {
    animation: move 1s linear infinite;
}
简单来说,就是我们定义了一个名字叫r的class,动画效果采用名字叫move的关键帧。transform是转换的意思,因为英文词根trans就有从一个状态变到另一个状态的涵义,这是比较好理解的,而deg是角度的意思。
@keyframes move{
    0% {transform: rotate(0deg)}
    100% {transform: rotate(360deg)}
}
用以上这段代码,我们制作了一个关键帧动画,名字叫move,它将一个元素的位置从0度变化到360度,就是转了一圈。
.r {
    animation: move 1s linear infinite;
}
- liner表示线性,这个属性会让拥有该class的dom元素连续地旋转。
- infinite表示不停止、无限,不然的话转一圈就结束了。
现在,我们给音乐图标加上转动样式:
在这里我去掉了该元素的定位方法,而继续采用css的方式来居中。
.music .screen i {
    color:#fff;
    font-size: 88px;
    position: absolute;
    left: 50%;
    top : 50%;
    margin-left: -40px;
    margin-top: -48px;
}
截图原因,效果看起来不咋地,其实它的转动是非常平滑的,我也不清楚为啥截图后变成了这个样子。
终于转起来了,核心的操作就是给图标添加一个css类而已。
现在,我们希望在点击开始按钮的时候,就转动图标。点击暂停就移除转动的css类。
先给util工具包扩展下面这几个方法:
/*判断dom元素是否拥有某个class类*/
hasClass : function(obj, cls) {
    return obj.className.match(new RegExp('(\\s|^)' + cls + '(\\s|$)'));
        },

/*给dom元素增加某个class类*/
addClass : function(obj, cls) {
     if (!this.hasClass(obj, cls)) obj.className += " " + cls;
},

/*移除dom元素中的某个class类*/
removeClass : function(obj, cls) {
    if (this.hasClass(obj, cls)) {
        var reg = new RegExp('(\\s|^)' + cls + '(\\s|$)');
        obj.className = obj.className.replace(reg, ' ');
    }
},

/*该方法检查每个元素中指定的类。如果不存在则添加类,如果已设置则删除之。这就是所谓的切换效果。*/
toggleClass : function(obj,cls){
    if(hasClass(obj,cls)){
        removeClass(obj, cls);
    }else{
        addClass(obj, cls);
    }
}
6. 重写后的按钮事件
//播放按钮
playDom.onclick = function(){
    this.style.display = 'none';
    pauseDom.style.display = 'inline';
    utils.addClass(musicIcon,'r');
    //播放音乐
    musicBox.play();
}

//暂停按钮
pauseDom.onclick = function(){
    this.style.display = 'none';
    playDom.style.display = 'inline';
    utils.removeClass(musicIcon,'r');
    musicBox.stop();
}

//下一首
nextDom.onclick = function(){
    musicBox.next();
    //当直接点击下一首的时候,同时改变播放按钮为暂停的样式
    playDom.style.display = 'none';
    pauseDom.style.display = 'inline';
    utils.addClass(musicIcon,'r');
}

//上一首
prevDom.onclick = function(){
    musicBox.prev();
    //当直接点击下一首的时候,同时改变播放按钮为暂停的样式
    playDom.style.display = 'none';
    pauseDom.style.display = 'inline';
    utils.addClass(musicIcon,'r');
}
效果:
7. 显示正在播放的音乐
.music .info {
    position: absolute;
    display: inline-block;
    width: 80%;
    height: 30px;
    left: 15px;
    top: 20px;
    text-align: center;
    color: #eee;
    font-family:黑体;
    font-size: 14px;
}
然后在musicBox对象中添加一个获取歌曲信息的方法:
/*获取当前歌曲的信息*/
getCurrentSong : function(){
    var info = this.songs[this.index];
    info = info.split('/')[1];
    info = info.split('.')[0];
    return '正在播放:' + info;
}
然后,在按钮的点击事件中,只需要加上下面的代码,即可获取实时的歌曲信息啦!
先获取信息栏:
/* 获取歌曲的信息栏 */
var infoDom = utils.dom('#info');
改写按钮点击的事件:
infoDom.innerHTML = ''; //先清空上一次的信息
infoDom.innerHTML = musicBox.getCurrentSong();//显示当前的歌曲信息
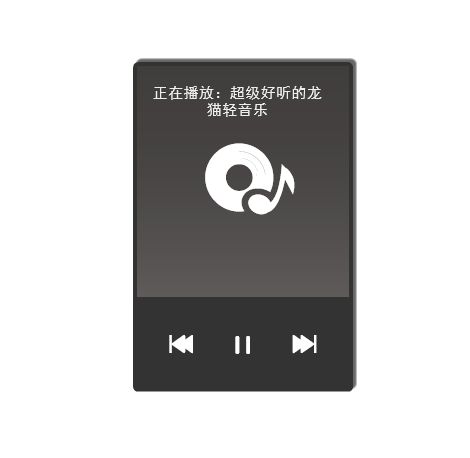
效果:
这一节到此告一段落了,下一节,我们来做音轨。
悠闲的午后,品着刚泡好的茶
听着美妙的音乐,也是一种享受吧。
享受编程的乐趣,怀着感恩的心去体会每一天生活中的细节。
本章结束 ...
剽悍一小兔,电气自动化毕业。
参加工作后对计算机感兴趣,深知初学编程之艰辛。
希望将自己所学记录下来,给初学者一点帮助。
免责声明: 博客中所有的图片素材均来自百度搜索,仅供学习交流,如有问题请联系我,侵立删,谢谢。
