官方案例进行目标检测_SSD
下载官方案例
下载对应源码: https://github.com/tensorflow/models
![]()
建立工程目录
复制models-master\research\object_detection到工程之中

下载模型
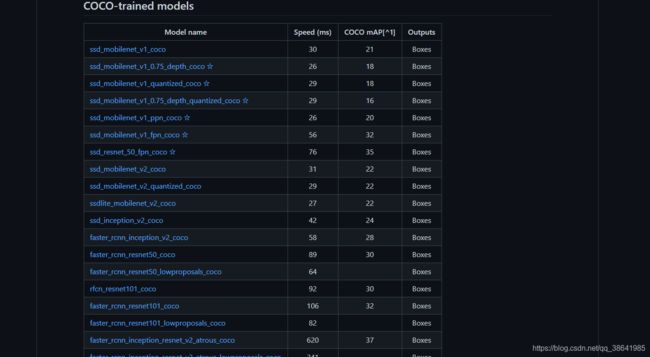
下载对应模型:https://github.com/tensorflow/models/blob/master/research/object_detection/g3doc/tf1_detection_zoo.md

这里用的是第一个
建立相应目录
models放入解压后的模型目录
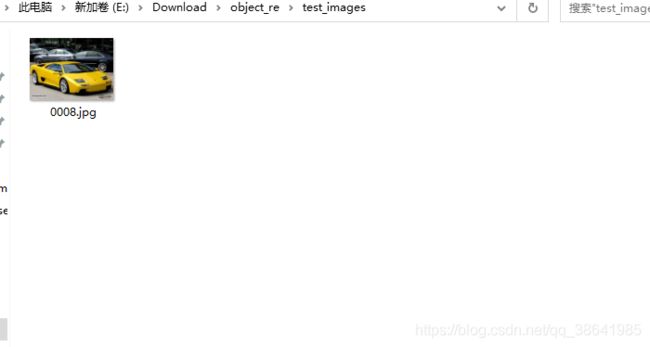
test_images放入测试图片
目标检测代码
# -*- coding: utf-8 -*-
import os
import tensorflow as tf
from PIL import Image
import numpy as np
from object_detection.utils import label_map_util
from object_detection.utils import  visualization_utils as vis_util
import matplotlib
matplotlib.use('TkAgg')
import matplotlib.pyplot as plt

# 把图片数据变成3维的数据,定义数据类型为uint8
def load_image_into_numpy_array(image):
    (im_width, im_height) = image.size
    return np.array(image.getdata()).reshape((im_height, im_width, 3)).astype(np.uint8)

def run_inference_for_single_image(image, graph):
    with graph.as_default():
        with tf.Session() as sess:
            # 获得图中所有op
            ops = tf.get_default_graph().get_operations()
            # 获得输出op的名字
            all_tensor_names = {output.name for op in ops for output in op.outputs}
            tensor_dict = {}
            for key in [
              'num_detections', 'detection_boxes', 'detection_scores',
              'detection_classes', 'detection_masks'
            ]:
                tensor_name = key + ':0'
                # 如果tensor_name在all_tensor_names中
                if tensor_name in all_tensor_names:
                    # 则获取到该tensor
                    tensor_dict[key] = tf.get_default_graph().get_tensor_by_name(
                      tensor_name)

            if 'detection_masks' in tensor_dict:
                # 获得检测框数据
                detection_boxes = tf.squeeze(tensor_dict['detection_boxes'], [0])
                # 获得mask数据
                detection_masks = tf.squeeze(tensor_dict['detection_masks'], [0])
                # 检测框数量
                real_num_detection = tf.cast(tensor_dict['num_detections'][0], tf.int32)
                # detection_boxes数据维度为(100,4),部分数据有值,部分数据值为0
                # detection_masks数据维度为(num_mask,image_h,image_w)
                # 比如detection_boxes和detection_masks中都有10个有效数据,
                # 但是real_num_detection的数量可能会少于10,所以需要根据real_num_detection的数量取数据
                detection_boxes = tf.slice(detection_boxes, [0, 0], [real_num_detection, -1])
                detection_masks = tf.slice(detection_masks, [0, 0, 0], [real_num_detection, -1, -1])
                # 获得跟原图片大小相同的各分类分割结果
                detection_masks_reframed = utils_ops.reframe_box_masks_to_image_masks(
                    detection_masks, detection_boxes, image.shape[1], image.shape[2])
                # 阈值设置为0.5,大于0.5则为True->1.0,小于0.5则为Fasle->0
                detection_masks_reframed = tf.cast(tf.greater(detection_masks_reframed, 0.5), tf.uint8)
                # 增加一个维度
                tensor_dict['detection_masks'] = tf.expand_dims(
                    detection_masks_reframed, 0)


            # 图片输入的tensor
            image_tensor = tf.get_default_graph().get_tensor_by_name('image_tensor:0')

            # 传入图片运行模型获得结果
            output_dict = sess.run(tensor_dict,
                             feed_dict={image_tensor: image})

            # 所有的结果都是float32类型的,有些数据需要做数据格式转换
            # 检测到目标的数量
            output_dict['num_detections'] = int(output_dict['num_detections'][0])
            # 目标的类型
            output_dict['detection_classes'] = output_dict[
              'detection_classes'][0].astype(np.uint8)
            # 预测框坐标
            output_dict['detection_boxes'] = output_dict['detection_boxes'][0]
            # 预测框置信度
            output_dict['detection_scores'] = output_dict['detection_scores'][0]
            # 分割结果
            if 'detection_masks' in output_dict:
                output_dict['detection_masks'] = output_dict['detection_masks'][0]
    return output_dict


def main():
  # pb模型存放位置
  PATH_TO_FROZEN_GRAPH = 'models/ssd_mobilenet_v1_coco_2018_01_28/frozen_inference_graph.pb'

  # coco数据集的label映射文件
  PATH_TO_LABELS = 'object_detection/data/mscoco_label_map.pbtxt'

  # 载入训练好的pd模型
  detection_graph = tf.Graph()
  with detection_graph.as_default():
      od_graph_def = tf.GraphDef()
      with tf.gfile.GFile(PATH_TO_FROZEN_GRAPH, 'rb') as fid:
          serialized_graph = fid.read()
          od_graph_def.ParseFromString(serialized_graph)
          tf.import_graph_def(od_graph_def, name='')

  # 得到一个保存编号和类别描述映射关系的列表
  category_index = label_map_util.create_category_index_from_labelmap(PATH_TO_LABELS, use_display_name=True)


  image = Image.open("test_images/0008.jpg")
        # 把图片数据变成3维的数据,定义数据类型为uint8
  image_np = load_image_into_numpy_array(image)
        # 增加一个维度,数据变成: [1, None, None, 3]
  image_np_expanded = np.expand_dims(image_np, axis=0)
        # 目标检测
  output_dict = run_inference_for_single_image(image_np_expanded, detection_graph)

  #print(output_dict['detection_boxes'])

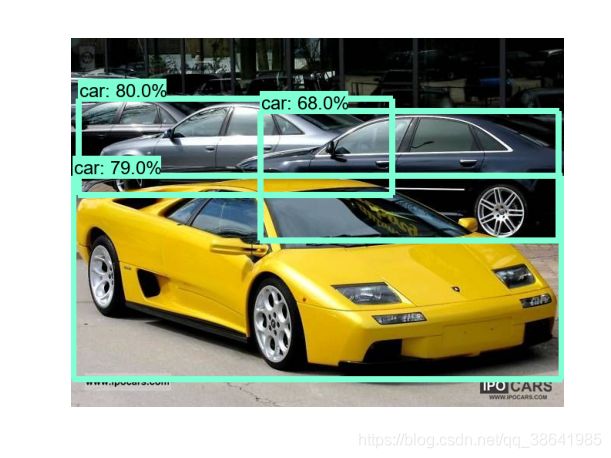
  # 给原图加上预测框,置信度和类别信息
  vis_util.visualize_boxes_and_labels_on_image_array(
          image_np,
          output_dict['detection_boxes'],
          output_dict['detection_classes'],
          output_dict['detection_scores'],
          category_index,
          instance_masks=output_dict.get('detection_masks'),
          use_normalized_coordinates=True,
          line_thickness=8)
        # 画图
  pic, ax2 = plt.subplots()
  plt.imshow(image_np)
  plt.axis('off')
  plt.show()
  pic.savefig("output.jpg")


main()


