一、安装前准备虚拟环境(已经准备好centos7服务器的此步骤-跳过)
创建虚拟机:在VirtualBox安装centos7
二、Centos7系统环境设置
# 升级系统组件到最新的版本
[root@zabbix ~]# yum -y update
# 临时关闭selinux
[root@zabbix ~]# setenforce 0
# 永久关闭selinux
[root@zabbix ~]# vi /etc/selinux/config
#将SELINUX=enforcing改为SELINUX=disabled
# 以上的更改需要重启后生效
[root@zabbix ~]# reboot
# 查看selinux是否关闭,Disabled 为关闭
[root@zabbix ~]# getenforce
Disabled
# 临时关闭防火墙
[root@zabbix ~]# systemctl stop firewalld.service
# 查看防火墙是否关闭
[root@zabbix ~]# firewall-cmd --state
not running
# 禁止firewall开机启动
[root@zabbix ~]# systemctl disable firewalld.service
Removed symlink /etc/systemd/system/multi-user.target.wants/firewalld.service.
Removed symlink /etc/systemd/system/dbus-org.fedoraproject.FirewallD1.service.
三、搭建LAMP环境
# 安装所需所有软体仓库
# Zabbix是建立在LAMP或者LNMP环境之上,在此为了方便就使用yum安装LAMP环境。
[root@zabbix ~]# yum install -y httpd mariadb-server mariadb php php-mysql php-gd libjpeg* php-ldap php-odbc php-pear php-xml php-xmlrpc php-mhash
# 安装完成后检查应用版本
[root@zabbix ~]# rpm -qa httpd php mariadb
php-5.4.16-46.1.el7_7.x86_64
mariadb-5.5.64-1.el7.x86_64
httpd-2.4.6-90.el7.centos.x86_64
[root@zabbix ~]# vi /etc/httpd/conf/httpd.conf
ServerName www.zabbila.com      #修改为主机名
DirectoryIndex index.html index.php   # 添加首页支持格式

# 编辑httpd
vi /etc/httpd/conf/httpd.conf
ServerName www.zabbixla.com      #修改为主机名
DirectoryIndex index.html index.php   # 添加首页支持格式
# 编辑配置php,配置中国时区
[root@zabbix ~]# vi /etc/php.ini
date.timezone = PRC
# 启动httpd
[root@zabbix ~]# systemctl start httpd
# 加入开机自启动httpd
[root@zabbix ~]# systemctl enable httpd
Created symlink from /etc/systemd/system/multi-user.target.wants/httpd.service to /usr/lib/systemd/system/httpd.service.
# 启动mysqld
[root@zabbix ~]# systemctl start mariadb
# 加入开机自启动mysqld
[root@zabbix ~]# systemctl enable mariadb
Created symlink from /etc/systemd/system/multi-user.target.wants/mariadb.service to /usr/lib/systemd/system/mariadb.service.
# 查看httpd启动情况,80端口监控表示httpd已启动
[root@zabbix ~]# ss -anplt | grep httpd
LISTEN     0      128       [::]:80                    [::]:*                   users:(("httpd",pid=1752,fd=4),("httpd",pid=1751,fd=4),("httpd",pid=1750,fd=4),("httpd",pid=1749,fd=4),("httpd",pid=1748,fd=4),("httpd",pid=1746,fd=4))
#查看mysqld启动情况,3306端口监控表示mysqld已启动
[root@zabbix ~]# ss -naplt | grep mysqld
LISTEN     0      50           *:3306                     *:*                   users:(("mysqld",pid=2043,fd=14))

# 创建一个测试页,测试LAMP是否搭建成功
# 创建一个测试页index.php
[root@zabbix ~]# vi /var/www/html/index.php
# 加入以下内容

# 查看确认里面的内容
[root@zabbix ~]# cat /var/www/html/index.php

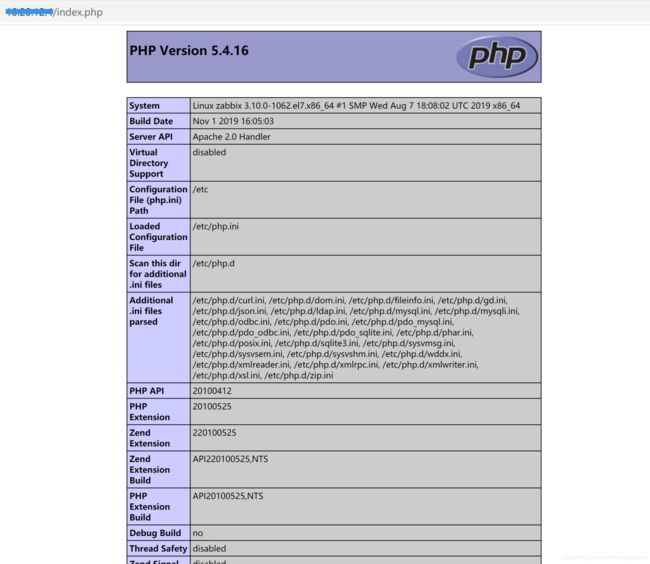
# 浏览器测试
# 本地测试
[root@zabbix ~]# curl http://127.0.0.1 -I
HTTP/1.1 200 OK
Date: Thu, 23 Jan 2020 15:46:28 GMT
Server: Apache/2.4.6 (CentOS) PHP/5.4.16
X-Powered-By: PHP/5.4.16
Content-Type: text/html; charset=UTF-8

# 初始化mysql数据库,并配置root用户密码
[root@zabbix ~]# mysqladmin -u root password zabbix
# root用户登陆数据库
[root@zabbix ~]# mysql -u root -p
Enter password:
Welcome to the MariaDB monitor.  Commands end with ; or \g.
Your MariaDB connection id is 3
Server version: 5.5.64-MariaDB MariaDB Server

Copyright (c) 2000, 2018, Oracle, MariaDB Corporation Ab and others.

Type 'help;' or '\h' for help. Type '\c' to clear the current input statement.

MariaDB [(none)]> CREATE DATABASE zabbix character set utf8 collate utf8_bin;  # 创建zabbix数据库(中文编码格式)
Query OK, 1 row affected (0.00 sec)

MariaDB [(none)]> GRANT all ON zabbix.* TO 'zabbix'@'%' IDENTIFIED BY 'zabbix'; # 授予zabbix用户zabbix数据库的所有权限,密码zabbix
Query OK, 0 rows affected (0.00 sec)

MariaDB [(none)]> flush privileges;  #刷新权限
Query OK, 0 rows affected (0.00 sec)

MariaDB [(none)]> quit # 退出数据库
# 为保证zabbix用户也可以登录数据库,防止出现本地无法登录情况,进行以下【删除空用户名称】操作
MariaDB [(none)]> select user,host from mysql.user; # 查看所有的用户,检查是否有空用户
+--------+-----------+
| user   | host      |
+--------+-----------+
| zabbix | %         |
| root   | 127.0.0.1 |
| root   | ::1       |
|        | localhost |
| root   | localhost |
|        | zabbix    |
| root   | zabbix    |
+--------+-----------+
7 rows in set (0.00 sec)

MariaDB [(none)]> drop user ''@localhost; # 删除空用户名称
Query OK, 0 rows affected (0.00 sec)

MariaDB [(none)]> select user,host from mysql.user;
+--------+-----------+
| user   | host      |
+--------+-----------+
| zabbix | %         |
| root   | 127.0.0.1 |
| root   | ::1       |
| root   | localhost |
|        | zabbix    |
| root   | zabbix    |
+--------+-----------+
6 rows in set (0.00 sec)

MariaDB [(none)]> drop user ''@zabbix; # 删除空用户名称
Query OK, 0 rows affected (0.00 sec)

MariaDB [(none)]> select user,host from mysql.user; # 确认空用户名称是否删除
+--------+-----------+
| user   | host      |
+--------+-----------+
| zabbix | %         |
| root   | 127.0.0.1 |
| root   | ::1       |
| root   | localhost |
| root   | zabbix    |
+--------+-----------+
5 rows in set (0.00 sec)

MariaDB [(none)]> quit # 退出数据库
Bye
# 修改index.php测试页内容,测试zabbix用户是否能够登陆数据库
[root@zabbix ~]# vi /var/www/html/index.php
# 修改成:
Success!!";   #显示Success表示连接数据库成功
 else echo "Fail!!";
mysql_close();
?>
# 出现下图表示PHP连通数据库完成
四、安装配置zabbix
# 安装zabbix依赖包+组件
[root@zabbix ~]# yum -y install net-snmp net-snmp-devel curl curl-devel libxml2 libxml2-devel libevent-devel.x86_64 javacc.noarch  javacc-javadoc.noarch javacc-maven-plugin.noarch javacc*
# 安装php支持zabbix组件
[root@zabbix ~]# yum install php-bcmath php-mbstring -y
# 安装zabbix4.0的rpm包
[root@zabbix ~]# rpm -ivh http://repo.zabbix.com/zabbix/4.0/rhel/7/x86_64/zabbix-release-4.0-1.el7.noarch.rpm
#安装zabbix组件: Zabbix server,Web前端,zabbix-agent
[root@zabbix ~]# yum install zabbix-server-mysql zabbix-web-mysql
# 导入数据到数据库zabbix中(最后一个zabbix是数据库zabbix),且因为用户zabbix是%(任意主机),所以登录时需要加上当前主机ip(-h xx.xx.xx.xx),密码是用户zabbix登陆密码zabbix
[root@zabbix ~]# zcat /usr/share/doc/zabbix-server-mysql-4.0.16/create.sql.gz | mysql -uzabbix -p -h xx.xx.xx.xx zabbix
Enter password:
# 配置数据库用户及密码
[root@zabbix ~]# vi  /etc/zabbix/zabbix_server.conf
将# DBPassword= 修改为DBPassword=zabbix
# 确认数据库用户及密码
[root@zabbix ~]# grep -n '^'[a-Z] /etc/zabbix/zabbix_server.conf
38:LogFile=/var/log/zabbix/zabbix_server.log
49:LogFileSize=0
72:PidFile=/var/run/zabbix/zabbix_server.pid
82:SocketDir=/var/run/zabbix
100:DBName=zabbix
116:DBUser=zabbix
124:DBPassword=zabbix
356:SNMPTrapperFile=/var/log/snmptrap/snmptrap.log
473:Timeout=4
516:AlertScriptsPath=/usr/lib/zabbix/alertscripts
527:ExternalScripts=/usr/lib/zabbix/externalscripts
563:LogSlowQueries=3000

# 配置时区
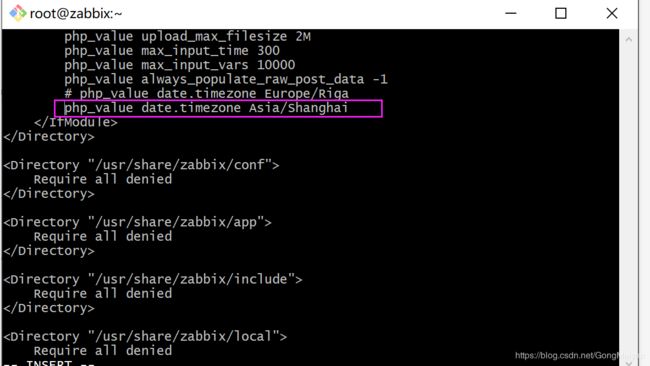
[root@zabbix ~]# vi /etc/httpd/conf.d/zabbix.conf
将# php_value date.timezone Europe/Riga 变更成php_value date.timezone Asia/Shanghai
# 设置开机自启动zabbix-server
[root@zabbix ~]# systemctl enable zabbix-server
Created symlink from /etc/systemd/system/multi-user.target.wants/zabbix-server.service to /usr/lib/systemd/system/zabbix-server.service.
# 启动zabbix-server
[root@zabbix ~]# systemctl start zabbix-server
# 为了能使用netstat命令,需要先安装net-tools
[root@zabbix ~]# yum install net-tools
# 监听在10051端口上,如果没监听成功,可重启zabbix-server服务试试
[root@zabbix ~]# netstat -anpt | grep zabbix
tcp        0      0 0.0.0.0:10051           0.0.0.0:*               LISTEN      8996/zabbix_server
tcp6       0      0 :::10051                :::*                    LISTEN      8996/zabbix_server
# 重启系统,再继续
[root@zabbix ~]# reboot
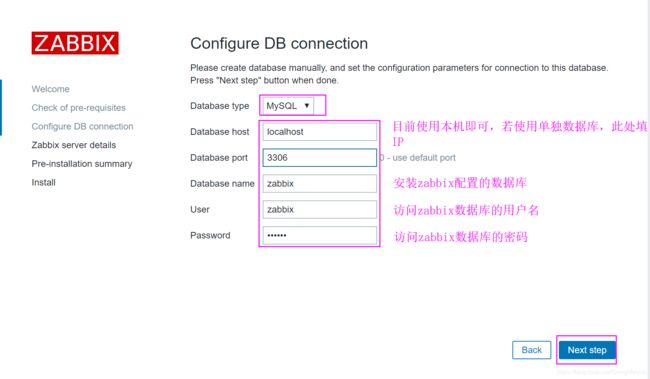
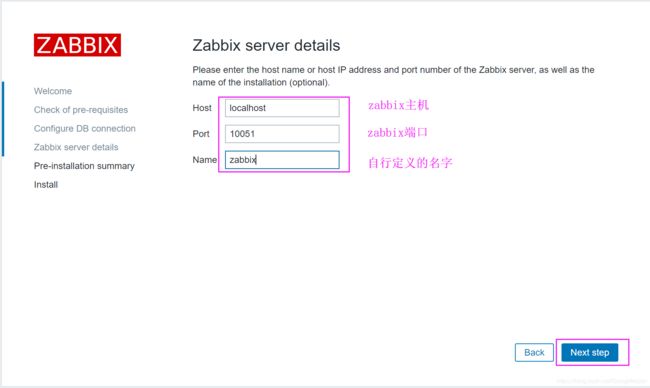
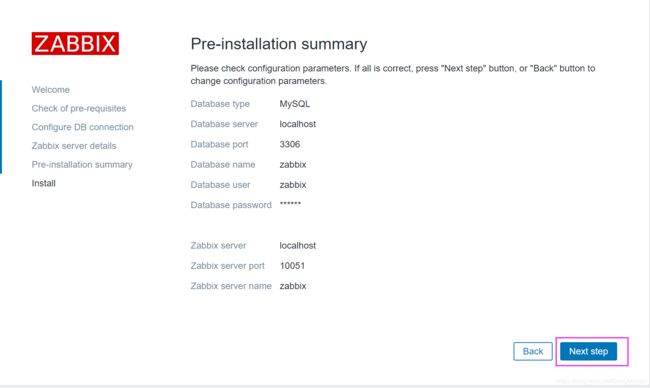
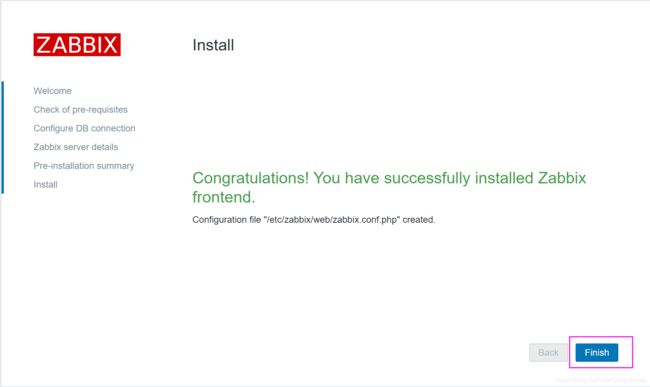
# 配置zabbix 前端Web界面
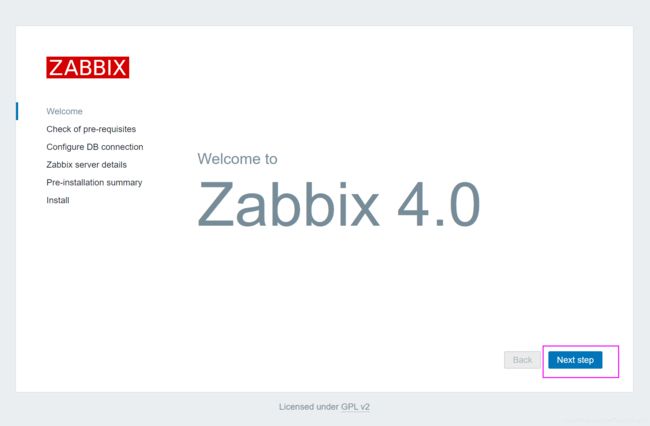
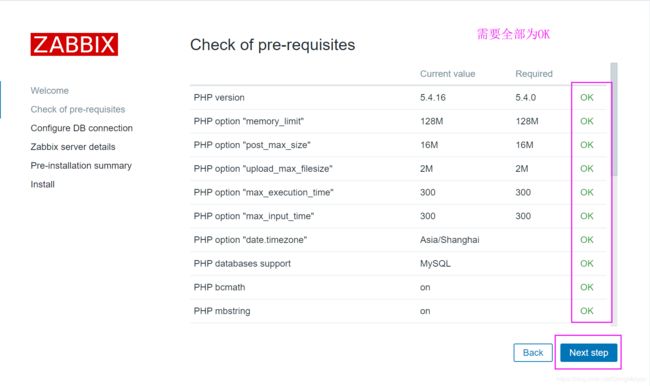
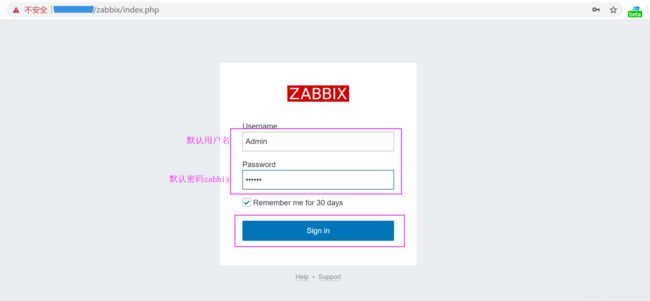
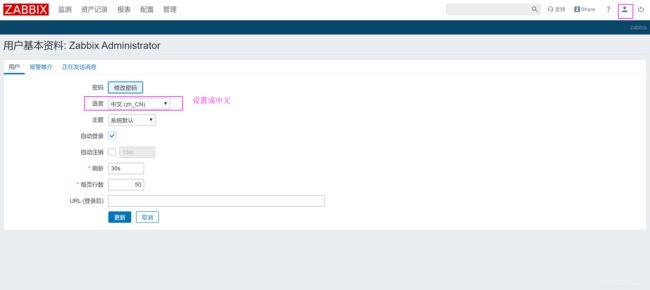
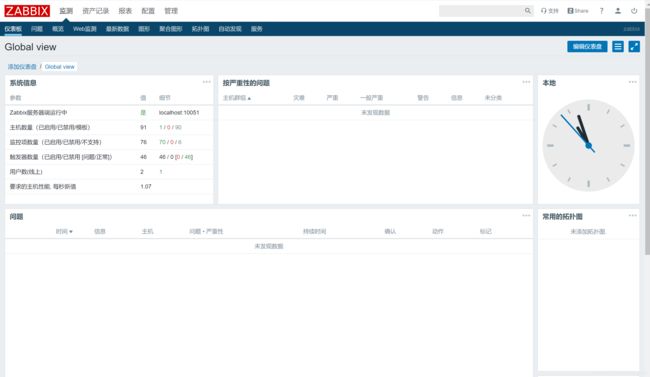
登录URL:http://xx.xx.xx.xx/zabbix
安装过程中有可能出现的报错
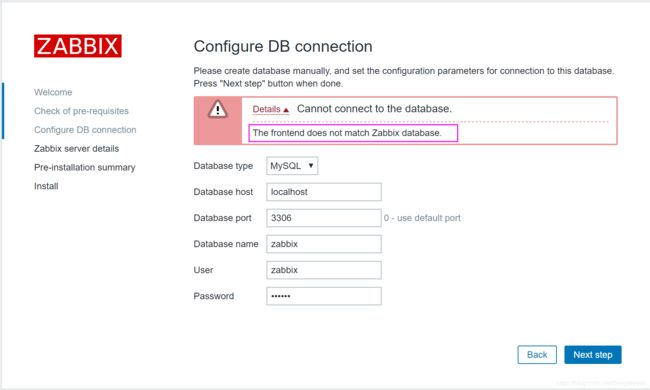
报错1:The frontend does not match Zabbix database.
出现此错误为导入数据到数据库zabbix时,对应的mysql版本号与当前不相符,相关代码为:zcat /usr/share/doc/zabbix-server-mysql-4.0.0/create.sql.gz | mysql -uzabbix -p -h xx.xx.xx.xx zabbix
解决办法在SSH下输入cd /usr/share/doc/回车,再输入ls回车就会显示出doc文件夹下面所有文件名信息,这时可以看到zabbix-server-mysql-4.0.16),所以要修改一下导入数据库这行代码的4.0.0改成4.0.16版本。
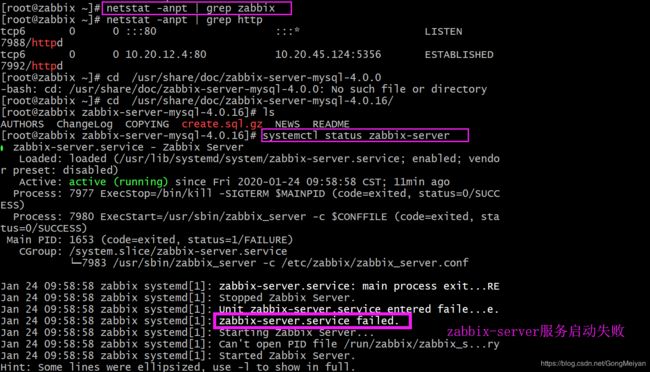
报错2
Jan 24 09:58:58 zabbix systemd[1]: zabbix-server.service failed.
Jan 24 09:58:58 zabbix systemd[1]: Starting Zabbix Server...
Jan 24 09:58:58 zabbix systemd[1]: Can't open PID file /run/zabbix/zabbix_server.pid (yet?) after start: No such file or directory
报错截图
# 查看日志文件中有以下报错:
/var/log/zabbix/zabbix_server.log
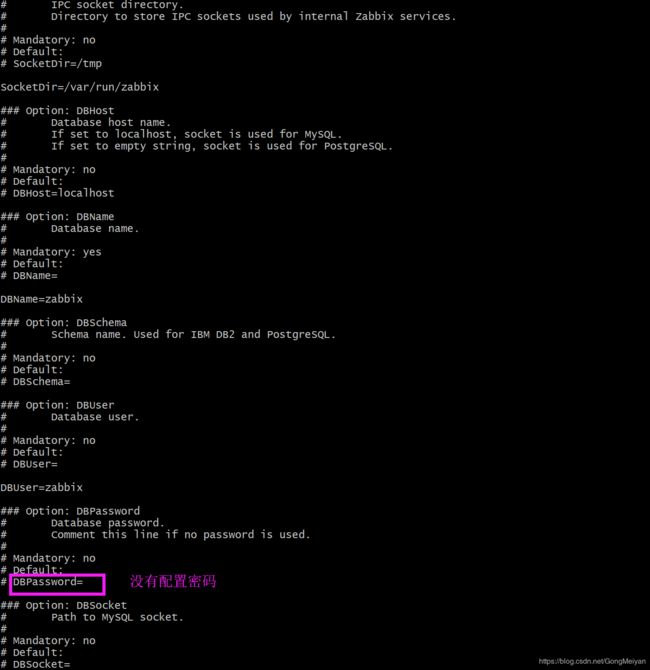
connection to database 'zabbix' failed: [1045] Access denied for user 'zabbix'@'localhost' (using password: NO)
原因
解决方法
# 配置密码
vi /etc/zabbix/zabbix_server.conf
# 确认密码是否配置好
# 重启zabbix-server
[root@zabbix zabbix-server-mysql-4.0.16]# systemctl restart zabbix-server
# 查看是否重启成功,监听在10051端口上
[root@zabbix zabbix-server-mysql-4.0.16]# netstat -atnlp | grep zabbix
tcp        0      0 0.0.0.0:10051           0.0.0.0:*               LISTEN      8996/zabbix_server
tcp6       0      0 :::10051                :::*                    LISTEN      8996/zabbix_server


