LNMP架构搭建-----源码编译(MYSQL,PHP,nginx)
LNMP代表的就是:Linux系统下Nginx+MySQL+PHP这种网站服务器架构。
(1) Linux是一类Unix计算机操作系统的统称,是目前最流行的免费操作系统。代表版本有:debian、centos、ubuntu、fedora、gentoo等。
(2)Nginx是一个高性能的HTTP和反向代理服务器,也是一个IMAP/POP3/SMTP代理服务器。
(3)Mysql是一个小型关系型数据库管理系统。 PHP是一种在服务器端执行的嵌入HTML文档的脚本语言。
(4)这四种软件均为免费开源软件,组合到一起,成为一个免费、高效、扩展性强的网站服务系统。
一.MYSQL数据库的源码编译
(一)编译源码
1.得到mysql数据库的源码包(建议一般去官网下载)并进行解压

[root@server1 ~]# mkdir /usr/local/lnmp 建立该目录指定mysql的安装位置2.安装源码编译工具cmake(支持编译C++语言)
cmake跨平台工具是用来预编译mysql源码的,用于设置mysql的编译参数。如:安装目录、数据存放目录、字符编码、排序规则等

3.创建预编译环境,可以定制即加上自己所需的安装条件(比如安装位置等等)
cmake -DCMAKE_INSTALL_PREFIX=/usr/local/lnmp/mysql   \指定mysql的安装位置
          -DMYSQL_DATADIR=/usr/local/lnmp/mysql/data   \数据库中数据存放的目录
          -DMYSQL_UNIX_ADDR=/usr/local/lnmp/mysql/data/mysql.sock  \链接数据库的SOCKET文件
          -DWITH_MYISAM_STORAGE_ENGINE=1   \ 安装MYISAM存储引擎
          -DWITH_INNOBASE_STORAGE_ENGINE=1 \ 安装 innodb 存储引擎
          -DENABLED_LOCAL_INFILE=1   \ 允许从本地导入数据
          -DWITH_PARTITION_STORAGE_ENGINE=1   \ 安装分区存储引擎
          -DWITH_SSL=yes   \ 支持SSL加密
          -DDEFAULT_CHARSET=utf8   \  使用UTF-8字符编码
          -DDEFAULT_COLLATION=utf8_general_ci   \  校验字符
          -DEXTRA_CHARSETS=all   \ 安装所有扩展字符集
          -DMYSQL_TCP_PORT=3306   \ MYSQL监听端口
[root@server1 mysql-5.7.17]#cmake -DCMAKE_INSTALL_PREFIX=/usr/local/lnmp/mysql
-DMYSQL_DATADIR=/usr/local/lnmp/mysql/data
-DMYSQL_UNIX_ADDR=/usr/local/lnmp/mysql/data/mysql.sock
-DWITH_MYISAM_STORAGE_ENGINE=1
-DWITH_INNOBASE_STORAGE_ENGINE=1
-DDEFAULT_CHARSET=utf8
-DDEFAULT_COLLATION=utf8_general_ci
-DEXTRA_CHARSETS=all
-DWITH_BOOST=boost/boost_1_59_04.在初次编译后,我们会发现有许多依赖性未安装,一个一个解决依赖项,预编译环境配置完成
yum install gcc -y
yum install gcc-c++ -y
yum install bison -y
yum install ncurses-devel -y
rm -fr CMakeCache.txt
# 一次编译完成后,会提示我们删除所在目录下的CMakeCache.txt文件,才能清除上次编译的缓存,从而开始新的编译
yum install openssl-devel -y
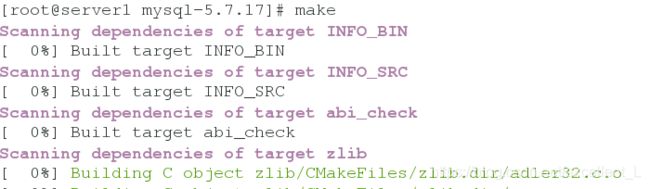
5.编译汇编
ot@server1 ~]# cd mysql-5.7.17/
[root@server1 mysql-5.7.17]# make
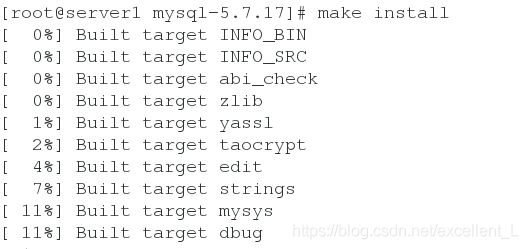
[root@server1 mysql-5.7.17]# make install
make & make install
(二)配置MYSQL
1.进入源码编译目录,再进入mysql安装的位置,将编译完成的默认配置文件放在/etc下
root@server1 mysql-5.7.17]# cd
[root@server1 ~]# cd /usr/local/
[root@server1 local]# cd lnmp/
[root@server1 lnmp]# ls
mysql
[root@server1 lnmp]# cd mysql/
[root@server1 mysql]# ls
bin  COPYING  docs  include  lib  man  mysql-test  README  share  support-files

[root@server1 ~]# cd mysql-5.7.17/
[root@server1 mysql-5.7.17]# cd support-files/
[root@server1 support-files]# yum remove mysql -y
[root@server1 support-files]# cp mysql.server /etc/init.d/mysqld
2.配置mysql服务
[root@server1 support-files]# cd /etc/init.d/
[root@server1 init.d]# chmod +x mysqld    给执行权限
[root@server1 init.d]# cd ..
[root@server1 etc]# ls my.cnf
my.cnf
[root@server1 etc]# cp my.cnf my.cnf.bak
[root@server1 etc]# cd
[root@server1 ~]# cd mysql-5.7.17/
[root@server1 mysql-5.7.17]# cd support-files/
[root@server1 support-files]# vim my-default.cnf
[root@server1 support-files]# cp my-default.cnf /etc/my.cnf
cp: overwrite `/etc/my.cnf'? y
[root@server1 support-files]# vim /etc/my.cnf
basedir = /usr/local/lnmp/mysql         # mysql的安装目录
datadir = /usr/local/lnmp/mysql/data     # mysql数据存放位置
socket = /usr/local/lnmp/mysql/data/mysql.sock   # mysql与外界联系的套接字文件位置
3.对mysql服务进行限制(利用mysql用户),将mysql服务的工作空间局限在mysql用户的家目录中,创建mysql组和mysql用户
由于系统之前存在mysql用户和组所以进行删除之前的用户和组
[root@server1 support-files]# groupadd -g 27 mysql
groupadd: group 'mysql' already exists
[root@server1 support-files]# vim /etc/passwd
[root@server1 support-files]# cd
[root@server1 ~]# userdel -r mysql    删除
[root@server1 ~]# vim /etc/passwd     查看是否还存在mysql用户和组
[root@server1 ~]# groupadd -g 27 mysql
[root@server1 ~]# useradd -u 27 -g 27 mysql
[root@server1 ~]# id mysql
uid=27(mysql) gid=27(mysql) groups=27(mysql)
4.将mysql目录下的data目录的所属组修改为mysql,因为mysql服务将要往这个目录中写数据,保证其有执行权限
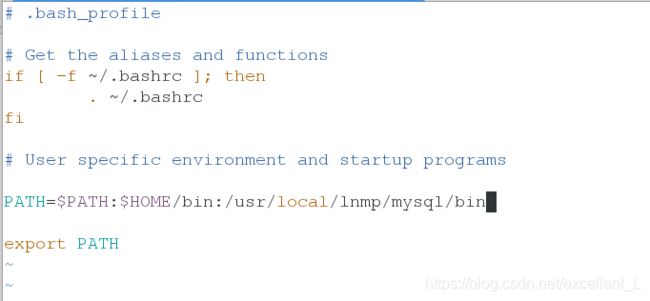
5.将编译生成的mysql二进制命令放进系统的环境变量文件中,保证可以直接调用该二进制命令
[root@server1 ~]# cd /usr/local/lnmp/mysql/
[root@server1 mysql]# cd ..
[root@server1 lnmp]# ll
total 4
drwxr-xr-x 10 root root 4096 Feb 16 15:28 mysql
[root@server1 lnmp]# chown mysql.mysql /usr/local/lnmp/mysql -R
[root@server1 lnmp]# ll
total 4
drwxr-xr-x 10 mysql mysql 4096 Feb 16 15:28 mysql
[root@server1 lnmp]# vim ~/.bash_profile
PATH=$PATH:$HOME/bin:/usr/local/lnmp/mysql/bin

[root@server1 mysql]# source ~/.bash_profile
[root@server1 mysql]# mkdir data
[root@server1 mysql]# chown mysql.mysql data
[root@server1 mysql]# cd
[root@server1 ~]# cd /usr/local/lnmp/mysql/data/
[root@server1 data]# pwd
/usr/local/lnmp/mysql/data
[root@server1 data]# ls
[root@server1 data]# cd ..
[root@server1 mysql]# chown root /usr/local/lnmp/mysql/ -R
[root@server1 mysql]# chown mysql data -R
[root@server1 mysql]# /etc/init.d/mysqld start
Starting MySQL.Logging to '/usr/local/lnmp/mysql/data/server1.err'.
. SUCCESS!
6.执行mysql的配置初始化文件
mysqld --initialize --user=mysql
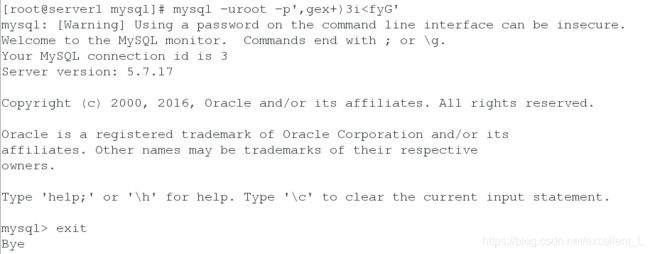
# 注意生成的初始化密码在最底下(注意不要冒号后边的空格)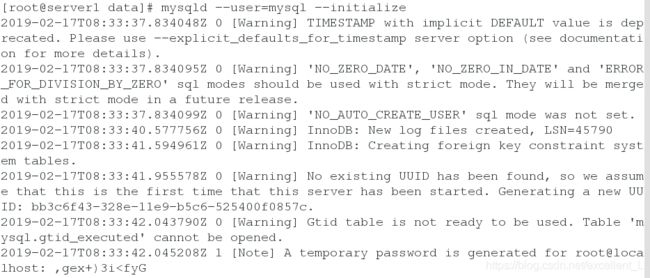
初始root密码 ,gex+)3i
用户登录成功
(三).mysql的安全初始化
1.打开mysql服务
2.执行安全初始化脚本mysql_secure_installation
[root@server1 mysql]# mysql_secure_installation    安全初始化

Securing the MySQL server deployment.

Enter password for user root:       输入超级用户密码,执行脚本生成的

The existing password for the user account root has expired. Please set a new password.

New password:      输入新密码

Re-enter new password:    重复

VALIDATE PASSWORD PLUGIN can be used to test passwords
and improve security. It checks the strength of password
and allows the users to set only those passwords which are
secure enough. Would you like to setup VALIDATE PASSWORD plugin?  开启密码强度校验

Press y|Y for Yes, any other key for No:   回车
Using existing password for root.
Change the password for root ? ((Press y|Y for Yes, any other key for No) :

 ... skipping.
By default, a MySQL installation has an anonymous user,
allowing anyone to log into MySQL without having to have
a user account created for them. This is intended only for
testing, and to make the installation go a bit smoother.
You should remove them before moving into a production
environment.

Remove anonymous users? (Press y|Y for Yes, any other key for No) :
移除匿名用户
 ... skipping.


Normally, root should only be allowed to connect from
'localhost'. This ensures that someone cannot guess at
the root password from the network.

Disallow root login remotely? (Press y|Y for Yes, any other key for No) :
不允许root用户远程登录
 ... skipping.
By default, MySQL comes with a database named 'test' that
anyone can access. This is also intended only for testing,
and should be removed before moving into a production
environment.


Remove test database and access to it? (Press y|Y for Yes, any other key for No) :
移除test数据库
 ... skipping.
Reloading the privilege tables will ensure that all changes
made so far will take effect immediately.

Reload privilege tables now? (Press y|Y for Yes, any other key for No) :
重新加载数据库
 ... skipping.
All done!
3.登陆mysql数据库测试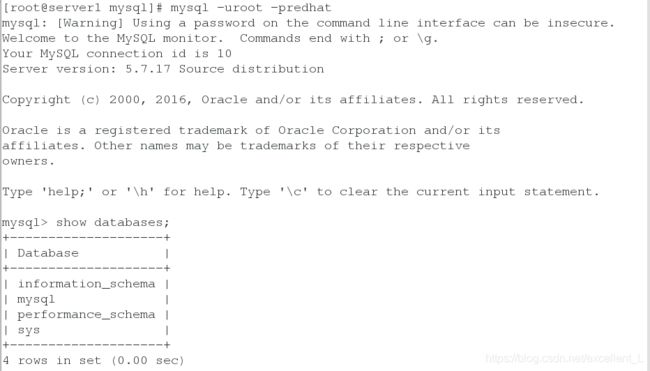
这样,LNMP架构中的MYSQL数据库源码编译完成….
二.PHP源码编译
1.得到PHP的源码包并解压
[root@server1 ~]# ls
cmake-2.8.12.2-4.el6.x86_64.rpm         mysql-5.7.17
libmcrypt-2.5.8-9.el6.x86_64.rpm        mysql-boost-5.7.17.tar.gz
libmcrypt-devel-2.5.8-9.el6.x86_64.rpm  php-5.6.35.tar.bz2
[root@server1 ~]# tar jxf php-5.6.35.tar.bz2
2进入解压目录创造预编译环境
.cd php-5.6.35
./configure --prefix=/usr/local/lnmp/php   # php安装的位置
--with-config-file-path=/usr/local/lnmp/php/etc    # php配置文件所在的位置
--with-mysql=mysqlnd
--enable-mysqlnd
--with-mysqli=mysqlnd
--with-pdo-mysql=mysqlnd    # 支持与mysql数据库之间建立联系
--with-openssl     # 支持openssl加密
--with-snmp
--with-gd
--with-zlib
--with-curl
--with-libxml-dir      #支持 libxml 函数
--with-png-dir --with-jpeg-dir --with-freetype-dir   # php处理图片的格式
 --with-pear -
--with-gmp
--enable-inline-optimization
--enable-soap
--enable-ftp
--enable-sockets
--enable-mbstring
--enable-fpm              # 开启fpm模式(nginx等服务用的)
--with-fpm-user=nginx     # 对PHP服务的限制通过nginx用户来实现
--with-fpm-group=nginx    # PHP以nginx用户组身份运行
--with-mcrypt             # 提供了对多种块算法的支持 主要用来实现加密等算法
--with-mhash              # 加密算法
./configure --prefix=/usr/local/lnmp/php --with-config-file-path=/usr/local/lnmp/php/etc --with-openssl --with-snmp --with-gd --with-zlib --with-curl --with-libxml-dir --with-png-dir --with-jpeg-dir --with-freetype-dir --with-gmp --with-gettext --with-pear --enable-mysqlnd --with-mysql=mysqlnd --with-mysqli=mysqlnd --with-pdo-mysql=mysqlnd --enable-inline-optimization --enable-soap --enable-ftp --enable-sockets --enable-mbstring --enable-fpm --with-fpm-user=nginx --with-fpm-group=nginx --with-mcrypt --with-mhash3.解决依赖性
[root@server1 php-5.6.35]# yum install net-snmp-devel curl-devel libxml2-devel libpng-devel libjpeg-devel freetype-devel gmp-devel openldap-devel -y
[root@server1 php-5.6.35]# yum install libxml2-devel  libcurl-devel openssl-devel libmcrypt  libmcrypt-devel re2c net-snmp net-snmp-devel -y
[root@server1 ~]# ls
cmake-2.8.12.2-4.el6.x86_64.rpm         mysql-5.7.17               php-5.6.35.tar.bz2
libmcrypt-2.5.8-9.el6.x86_64.rpm        mysql-boost-5.7.17.tar.gz
libmcrypt-devel-2.5.8-9.el6.x86_64.rpm  php-5.6.35
[root@server1 ~]# yum  install -y libmcrypt-*
4.编译和安装
make && make install 配置php
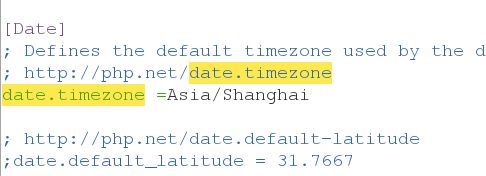
1.做php服务的简单配置(配置pid和时区)
[root@server1 ~]# useradd nginx
[root@server1 ~]# id nginx
uid=500(nginx) gid=500(nginx) groups=500(nginx)
[root@server1 php-5.6.35]# cd /usr/local/lnmp/php/etc/
[root@server1 etc]# ls
pear.conf php-fpm.conf.default
[root@server1 etc]# cp php-fpm.conf.default php-fpm.conf
[root@server1 etc]# ls
pear.conf php-fpm.conf php-fpm.conf.default
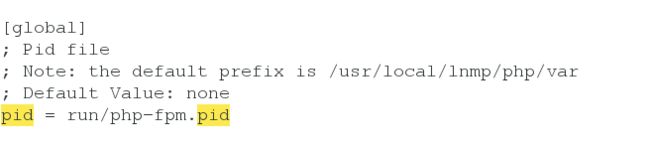
[root@server1 etc]# vim php-fpm.conf
打开端口pid = run/php-fpm.pid

2.将php启动的脚本复制到系统启动脚本的默认目录下,并测试php是否可以启动
[root@server1 etc]# cd
[root@server1 ~]# cd php-5.6.35
[root@server1 php-5.6.35]# cd sapi/
[root@server1 sapi]# cd fpm/
[root@server1 fpm]# ls
[root@server1 fpm]# vim init.d.php-fpm
[root@server1 fpm]# cp init.d.php-fpm /etc/init.d/php-fpm
[root@server1 fpm]# ll /etc/init.d/php-fpm
-rw-r--r-- 1 root root 2359 Feb 18 09:34 /etc/init.d/php-fpm
[root@server1 fpm]# chmod +x /etc/init.d/php-fpm 给权限
[root@server1 fpm]# ll
total 34492
-rw-r--r-- 1 1000 1000    17693 Mar 29  2018 config.m4
-rw-r--r-- 1 1000 1000       82 Mar 29  2018 CREDITS
drwxr-xr-x 4 1000 1000     4096 Feb 16 17:46 fpm
-rw-r--r-- 1 root root     2359 Feb 18 09:33 init.d.php-fpm
-rw-r--r-- 1 1000 1000     2343 Mar 29  2018 init.d.php-fpm.in
-rw-r--r-- 1 1000 1000     1282 Mar 29  2018 LICENSE
-rw-r--r-- 1 1000 1000     1129 Mar 29  2018 Makefile.frag
-rwxr-xr-x 1 root root 35143211 Feb 16 17:46 php-fpm
-rw-r--r-- 1 root root     5341 Feb 16 17:38 php-fpm.8
-rw-r--r-- 1 1000 1000     5339 Mar 29  2018 php-fpm.8.in
-rw-r--r-- 1 root root    23089 Feb 16 17:38 php-fpm.conf
-rw-r--r-- 1 1000 1000    23082 Mar 29  2018 php-fpm.conf.in
-rw-r--r-- 1 root root      314 Feb 16 17:38 php-fpm.service
-rw-r--r-- 1 1000 1000      316 Mar 29  2018 php-fpm.service.in
-rw-r--r-- 1 root root    14378 Feb 16 17:38 status.html
-rw-r--r-- 1 1000 1000    14378 Mar 29  2018 status.html.in
drwxr-xr-x 2 1000 1000     4096 Mar 29  2018 tests
-rw-r--r-- 1 1000 1000    18542 Mar 29  2018 www.conf.in
[root@server1 fpm]# /etc/init.d/php-fpm start  开启php
Starting php-fpm  done
[root@server1 fpm]# netstat -nlpt 查看端口  php-fpm 9000
三.nginx的源码编译
1.得到nginx的源码包并解压
[root@server1 ~]# ls
cmake-2.8.12.2-4.el6.x86_64.rpm         mysql-boost-5.7.17.tar.gz
libmcrypt-2.5.8-9.el6.x86_64.rpm        nginx-1.14.0.tar.gz
libmcrypt-devel-2.5.8-9.el6.x86_64.rpm  php-5.6.35
mysql-5.7.17                            php-5.6.35.tar.bz2
[root@server1 ~]# tar zxf nginx-1.14.0.tar.gz
2.去掉nginx的版本号
[root@server1 ~]# cd nginx-1.14.0
[root@server1 nginx-1.14.0]# vim src/core/nginx.h
#define NGINX_VER          "nginx/"  去掉版本
3.注释debug
[root@server1 nginx-1.14.0]# vim auto/cc/gcc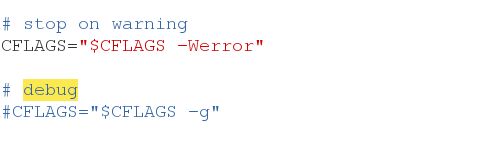
4.创造预编译环境
./configure --prefix=/usr/local/lnmp/nginx    # nginx的安装路径
--with-http_ssl_module                        # 支持https
--with-http_stub_status_module
--with-threads    # 支持线程并发
--user=nginx
--group=nginx     # 运行在nginx用户和nginx组
--with-file-aio
[root@server1 nginx-1.14.0]# ./configure --prefix=/usr/local/lnmp/nginx --with-http_ssl_module --with-http_stub_status_module --with-threads --with-file-aio --user=nginx --group=nginx5.解决源编译中的依赖性问题
yum install pcre-devel -y6.编译汇编
[root@server1 nginx-1.14.0]# make && make install配置nginx
1.配置nginx服务
[root@server1 nginx-1.14.0]# cd /usr/local/lnmp/
[root@server1 lnmp]# ll
total 12
drwxr-xr-x 11 root mysql 4096 Feb 17 16:32 mysql
drwxr-xr-x 6 root root 4096 Feb 18 19:42 nginx
drwxr-xr-x 9 root root 4096 Feb 18 19:13 php
[root@server1 lnmp]# cd nginx/
[root@server1 nginx]# cd conf/
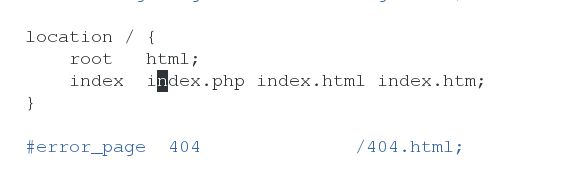
[root@server1 conf]# vim nginx.conf
location / {
root html;
index index.php index.html index.htm;
}
打开
location ~ \.php$ {
root html;
fastcgi_pass 127.0.0.1:9000;
fastcgi_index index.php;
# fastcgi_param SCRIPT_FILENAME /scripts$fastcgi_script_name;
include fastcgi.conf;
}

2.对nginx作软连接
[root@server1 conf]# cd ..
[root@server1 nginx]# ls
conf  html  logs  sbin
[root@server1 nginx]# cd sbin/
[root@server1 sbin]# ls
nginx
[root@server1 sbin]# pwd
/usr/local/lnmp/nginx/sbin
[root@server1 sbin]# ln -s /usr/local/lnmp/nginx/sbin/nginx /usr/local/sbin/
3.检测nginx服务是否可用并打开nginx服务并查看端口
[root@server1 sbin]# nginx -t
nginx: the configuration file /usr/local/lnmp/nginx/conf/nginx.conf syntax is ok
nginx: configuration file /usr/local/lnmp/nginx/conf/nginx.conf test is successful
[root@server1 sbin]# nginx
[root@server1 sbin]# netstat -nlpt
Active Internet connections (only servers)
Proto Recv-Q Send-Q Local Address               Foreign Address             State       PID/Program name
tcp        0      0 0.0.0.0:111                 0.0.0.0:*                   LISTEN      896/rpcbind
tcp        0      0 0.0.0.0:80                  0.0.0.0:*                   LISTEN      18657/nginx
tcp        0      0 0.0.0.0:22                  0.0.0.0:*                   LISTEN      1021/sshd
tcp        0      0 127.0.0.1:25                0.0.0.0:*                   LISTEN      1098/master
tcp        0      0 0.0.0.0:54818               0.0.0.0:*                   LISTEN      914/rpc.statd
tcp        0      0 127.0.0.1:9000              0.0.0.0:*                   LISTEN      15955/php-fpm
tcp        0      0 :::111                      :::*                        LISTEN      896/rpcbind
tcp        0      0 :::22                       :::*                        LISTEN      1021/sshd
tcp        0      0 ::1:25                      :::*                        LISTEN      1098/master
tcp        0      0 :::3306                     :::*                        LISTEN      1334/mysqld
tcp        0      0 :::45386                    :::*                        LISTEN      914/rpc.statd
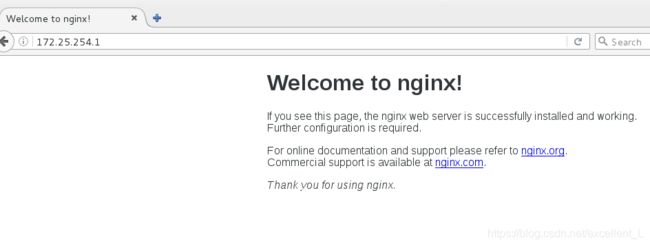
4.打开网页测试输入172.25.254.1查看到nginx页面
5.访问测试
[root@server1 ~]# cd /usr/local/lnmp/nginx/html/
[root@server1 html]# vim index.php  写入php模块

在浏览器处输入nginx和php所在主机ip/地址:172.25.254.1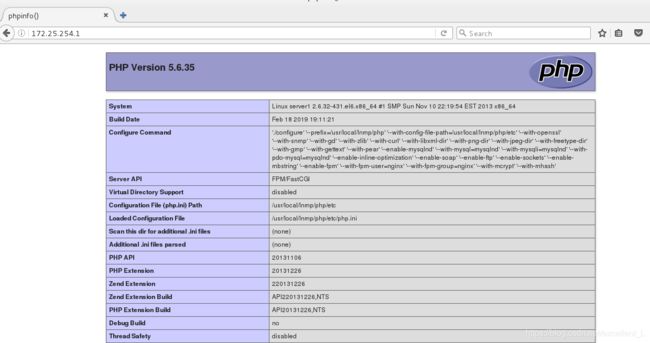
nginx的源码编译结束…..