protobuf学习(3):编译.proto文件生成Java代码,以及序列化和反序列化message
概述
在protobuf学习(2):.proto文件的定义学习了.proto文件的定义之后,本章来介绍一下怎么通过protoc(protobuf编译器)来生成Java代码。
protoc的下载与安装
在protobuf官网Basics:java中,找到Compiling Your Protocol Buffers,根据指引下载对应的protoc包,我是windows,下载如下:
注意:protoc的包名是没有语言的——protoc-3.13.0-win64.zip。
protobuf-java-3.13.0.zip也下载一下,之后使用过程中有用。
解压protoc-3.13.0-win64.zip得到如下目录:
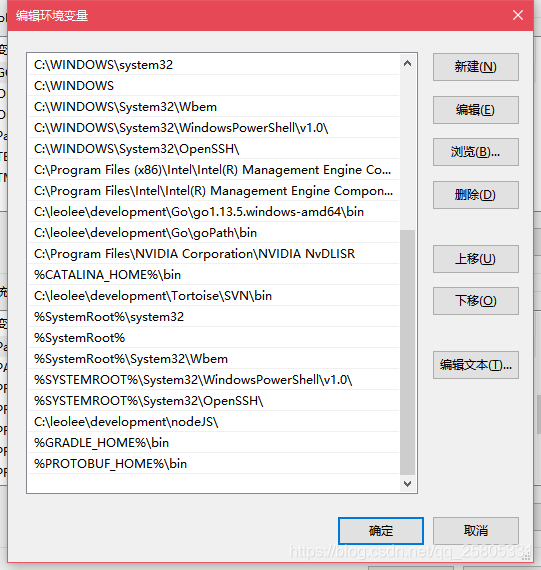
配置环境变量:
Path:
验证安装:
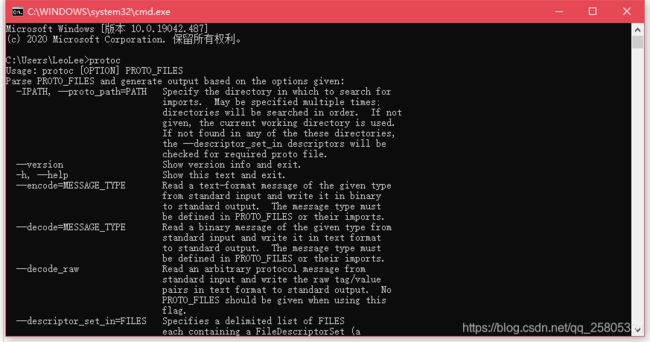
直接输入protoc,回车:
有命令帮助代表配置成功。
.proto文件定义
在工程任意位置创建.proto,我的目录结构如下:
虽然proto目录可以任意位置创建,但是.proto文件的路径是是会影响之后命令参数的,同时为了项目结构的合理性,建议还是像我这样创建。
编写.proto文件Student.proto
syntax = "proto2";

package com.leolee.protobuf;

option optimize_for = SPEED;//Can be set to SPEED, CODE_SIZE, or LITE_RUNTIME,This affects the C++ and Java code generators (and possibly third-party generators) in the following ways
option java_package = "com.leolee.protobuf";
option java_outer_classname = "DataInfo";

message Student {

  required string name = 1;

  optional int32 age = 2;

  optional string address = 3;
}
//生成java code 命令:protoc --java_out=src/main/java/ src/protobuf/Student.proto
注意这里的(java_package = "com.leolee.protobuf";)和(java_outer_classname = "DataInfo";)的定义值,之后生成的Java code会在项目的com.leolee.protobuf的目录下生成DataInfo.java类。
使用protoc生成Java code
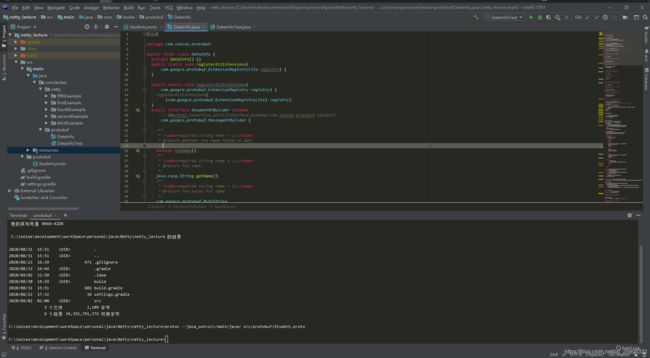
在命令窗口输入:
protoc --java_out=src/main/java/ src/protobuf/Student.proto很快就会在对应的java包中生成DataInfo.java类。
测试message的序列化和反序列化:
编写测试类:
package com.leolee.protobuf;

import com.google.protobuf.InvalidProtocolBufferException;

/**
 * @ClassName DataInfoTest
 * @Description: TODO
 * @Author LeoLee
 * @Date 2020/9/2
 * @Version V1.0
 **/
public class DataInfoTest {

    public static void main(String[] args) throws InvalidProtocolBufferException {

        //构造对象
        DataInfo.Student student = DataInfo.Student.newBuilder()
                .setName("LeoLee")
                .setAge(25)
                .setAddress("上海")
                .build();

        byte[] student2ByteArray = student.toByteArray();
        DataInfo.Student student2 = DataInfo.Student.parseFrom(student2ByteArray);

        System.out.println(student2);
        System.out.println(student2.getName());
        System.out.println(student2.getAge());
        System.out.println(student2.getAddress());
    }
}
执行结果如下:
name: "LeoLee"
age: 25
address: "\344\270\212\346\265\267"

LeoLee
25
上海
分析
标准的message方法
至此protoc的通过.proto文件生成Java code已经完成,注意到测试类对于传输对象的构建是使用了Java的构建这模式,每个构建器都返回一个构建器,通过流式的set方法最终由build()构建完成。
每个message和构建器类还包含许多其他方法,让您检查或操作整个消息,包括:
- isInitialized():检查是否设置了所有必需的字段。
- toString():返回人类可读的消息表示,这对于调试特别有用。
- merge gefrom (Message other):(仅构建器)将other的内容合并到此消息中,覆盖单个标量字段,合并复合字段,并连接重复字段。
- clear():(仅用于构建器)将所有字段清除回空状态。
这些方法实现message和message.builder的接口,由所有Java message和构建器共享,有关更多信息,请参阅完整的Message API DOC。
解析和序列化
demo中我们通过student.toByteArray()序列化了student message,通过DataInfo.Student.parseFrom(student2ByteArray)解析了序列化的数据(反序列化)。
官网解释如下:
每一个protobuf类都包含了使用protobuf二进制格式化 读/写 你所定义的message类型
- byte[] toByteArray():序列化message并返回包含原始字节的字节数组
- static Student parseFrom(byte[] data):解析(反序列化)指定的字节数组
- void writeTo(OutputStream output):序列化消息并将其写入一个OutputStream
- static Person parseFrom(InputStream input):从InputStream读取并解析消息
这只是为解析和序列化提供的几个选项。同样,请参阅messageAPI文档以获得完整列表
官方警告
我就不翻译了
Protocol Buffers and O-O Design Protocol buffer classes are basically dumb data holders (like structs in C); they don't make good first class citizens in an object model. If you want to add richer behaviour to a generated class, the best way to do this is to wrap the generated protocol buffer class in an application-specific class. Wrapping protocol buffers is also a good idea if you don't have control over the design of the .proto file (if, say, you're reusing one from another project). In that case, you can use the wrapper class to craft an interface better suited to the unique environment of your application: hiding some data and methods, exposing convenience functions, etc. You should never add behaviour to the generated classes by inheriting from them. This will break internal mechanisms and is not good object-oriented practice anyway.
总结
这个demo看上去好像和Netty并没有什么直接的关系,要知道,demo中序列化和解析的过程在Netty当中就相当于客户端和服务端之间传递的过程,将结构数据序列化之后通过socket传递给接收者,接收者反序列化二进制数据为可读数据。Netty对于protobuf是有很好的支持的,加油学习!
需要代码的来这里拿嗷:demo项目地址


