一、下载anaconda3
https://www.anaconda.com/products/individual#Downloads
或复制以下链接到迅雷直接下载:https://repo.anaconda.com/archive/Anaconda3-2020.11-Windows-x86_64.exe
一直“next”,选择“All User”,“Path”配置环境变量都勾上,直到“Finsh”
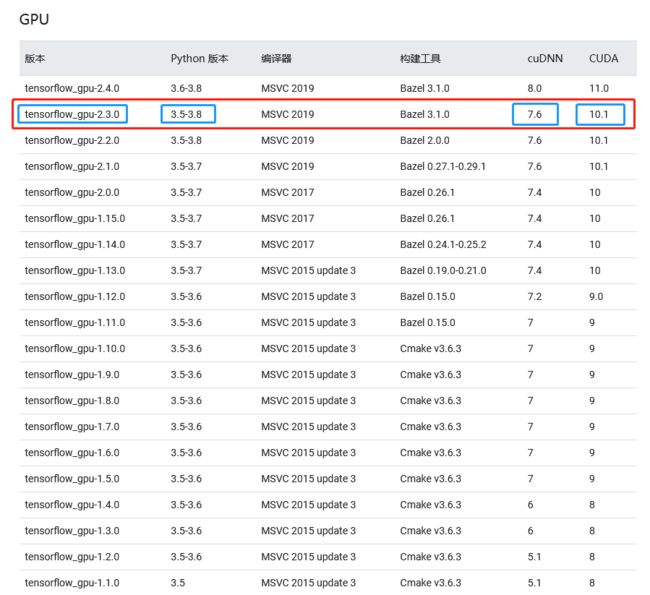
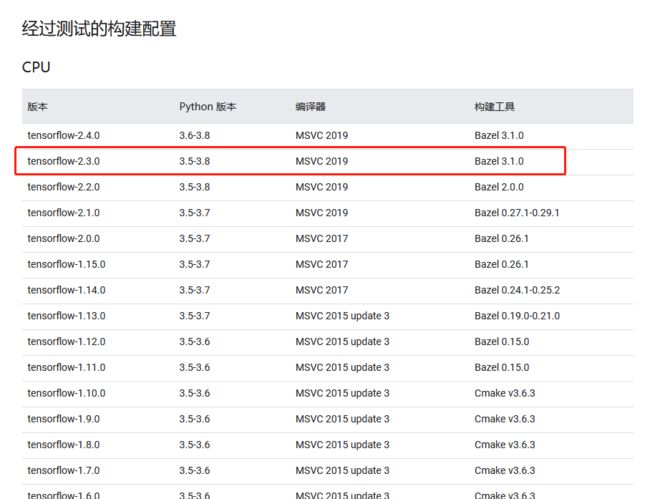
二、根据tensorflow官网指示的版本,确定python\cuda\cudnn的版本
官网:https://www.tensorflow.org/install/source_windows【需要连外网vpn才能访问】
没有vpn可看下图:
确定接下来装tf1环境:python3.6.9+CUDA10.0+cudnn7.4+tensorflow-gpu1.14.0+tensorflow1.14.0
确定接下来装tf2环境:python3.6.9+CUDA10.1+cudnn7.6+tensorflow-gpu2.3.0+tensorflow2.3.0
三、配置conda、pip镜像源
为了接下来conda install 和pip install 速度更快,我们要配置conda、pip镜像源
conda:
Windows 用户无法直接创建名为.condarc的文件,可先执行conda config --set show_channel_urls yes生成该文件。生成的文件在C:\Users\bifthan\.condarc
若要对其进行修改,可以编辑用户目录下的.condarc文件,其路径为C:\Users\bifthan\.condarc
这里推荐使用清华镜像源,若要使用其他源可以善用搜索
将下列配置覆盖到该文件中,即可使用清华镜像源进行快速下载
···
channels:
- defaults
show_channel_urls: true
channel_alias: https://mirrors.tuna.tsinghua.edu.cn/anaconda
default_channels:
- https://mirrors.tuna.tsinghua.edu.cn/anaconda/pkgs/main
- https://mirrors.tuna.tsinghua.edu.cn/anaconda/pkgs/free
- https://mirrors.tuna.tsinghua.edu.cn/anaconda/pkgs/r
- https://mirrors.tuna.tsinghua.edu.cn/anaconda/pkgs/pro
- https://mirrors.tuna.tsinghua.edu.cn/anaconda/pkgs/msys2
custom_channels:
conda-forge: https://mirrors.tuna.tsinghua.edu.cn/anaconda/cloud
msys2: https://mirrors.tuna.tsinghua.edu.cn/anaconda/cloud
bioconda: https://mirrors.tuna.tsinghua.edu.cn/anaconda/cloud
menpo: https://mirrors.tuna.tsinghua.edu.cn/anaconda/cloud
pytorch: https://mirrors.tuna.tsinghua.edu.cn/anaconda/cloud
simpleitk: https://mirrors.tuna.tsinghua.edu.cn/anaconda/cloud
···
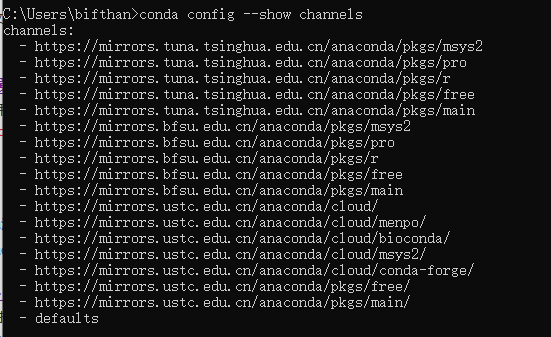
conda config --show channels可以查看全部源
pip:在C:\Users\bifthan\pip 下面新建pip.ini文件,把下面复制到文件中,保存
···
[global]
trusted-host=pypi.doubanio.com
index-url=https://pypi.doubanio.com/simple/
···
下面这3个pip源速度都不错,可以任选
···
https://pypi.doubanio.com/ 豆瓣
http://mirrors.aliyun.com/pypi/ 阿里
http://pypi.mirrors.ustc.edu.cn/ 中国科学技术大学
···
四、创建一个名为“tf1keras”的虚拟环境
conda remove -n tf1keras--all
conda create -n tf1keraspython=3.6.9# 创建一个python3的环境,名为tf1keras
conda activate tf1keras# 激活tf1keras环境
conda install jupyter notebook# 安装ipykernel模块
python -m ipykernel install --user --name tf1keras --display-name "tf1keras" # 进行配置
jupyter kernelspec list#查看jupyter notebook里的kernel
若想删除 jupyter kernelspec remove music#删除名叫icsharpkernel的kernel
五、创建一个名为“tf2keras”的虚拟环境
conda remove -n tf2keras --all
conda create -n tf2keras python=3.6.9# 创建一个python3的环境,名为tf2keras
conda activate tf2keras # 激活tf2keras环境
conda install jupyter notebook# 安装ipykernel模块
python -m ipykernel install --user --name tf2keras --display-name "tf2keras" # 进行配置
jupyter kernelspec list#查看jupyter notebook里的kernel
若想删除 jupyter kernelspec remove music#删除名叫icsharpkernel的kernel
六、安装CUDA10.1+cudnn7.6
安装cuda10.1:
官网:https://developer.nvidia.com/cuda-toolkit-archive
https://developer.nvidia.com/compute/cuda/10.1/Prod/local_installers/cuda_10.1.168_425.25_win10.exe
复制链接到迅雷下载
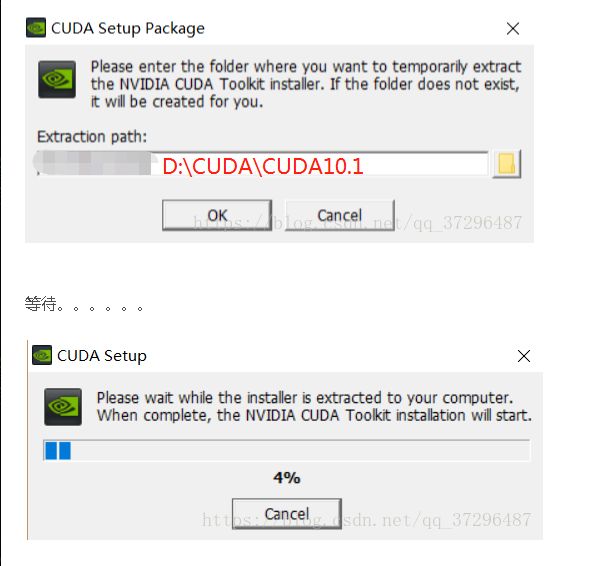
一直下一步,直到结束。
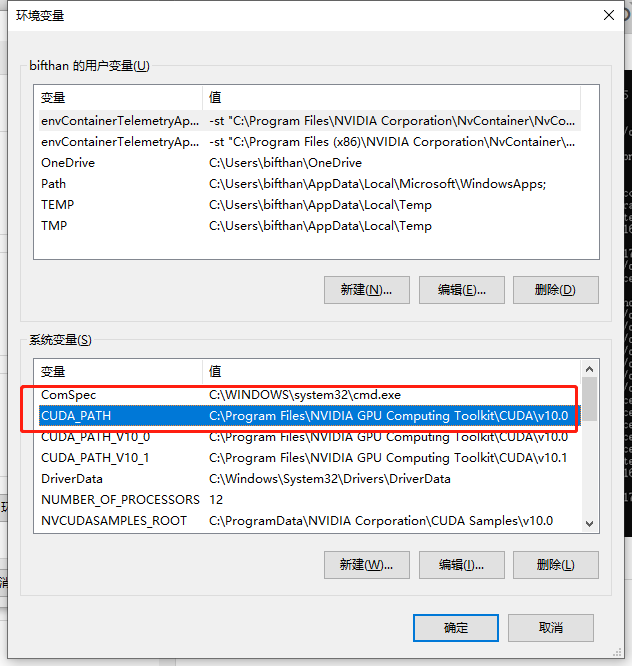
配置系统变量-电脑-属性-下面框里----Path--C:\Program Files\NVIDIA GPU Computing Toolkit\CUDA\v10.1\bin
再检查下面的框里是否有
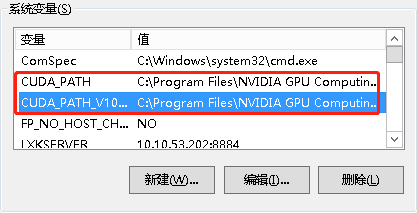
CUDA_PATH C:\Program Files\NVIDIA GPU Computing Toolkit\CUDA\v10.1
CUDA_PATH_V10_1 C:\Program Files\NVIDIA GPU Computing Toolkit\CUDA\v10.1
nvcc -V验证一下是否已经装好。
安装cudnn7.6
cudnn:https://developer.nvidia.com/rdp/cudnn-download
login:需要注册账号密码登录
或者复制https://developer.nvidia.com/compute/machine-learning/cudnn/secure/7.6.5.32/Production/10.1_20191031/cudnn-10.1-windows10-x64-v7.6.5.32.zip迅雷下载
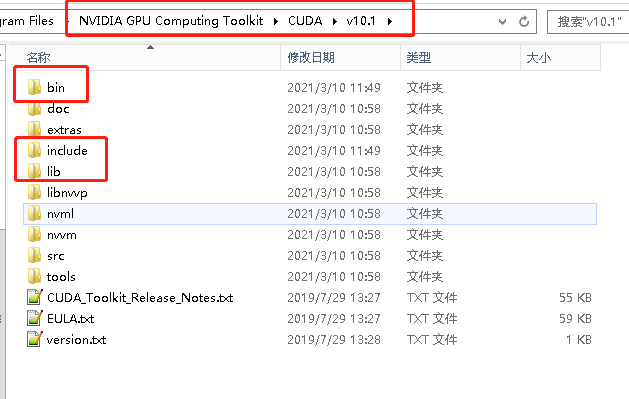
解压缩之后,把cudnn下面的三个文件夹中的文件
一一对应复制到CUDA 的路径下
然后再系统环境变量的Path中,加以下路径
C:\Program Files\NVIDIA GPU Computing Toolkit\CUDA\v10.1\lib\x64
七、安装CUDA10.0+cudnn7.4
同上
CUDA10.0:https://developer.nvidia.com/compute/cuda/10.0/Prod/local_installers/cuda_10.0.130_411.31_win10
复制到迅雷下载
cudnn7.4:https://developer.nvidia.com/rdp/cudnn-download
八、安装tensorflow1.14到“tf1keras”环境里
pip install tensorflow==1.14.0
如果上述方法装不上
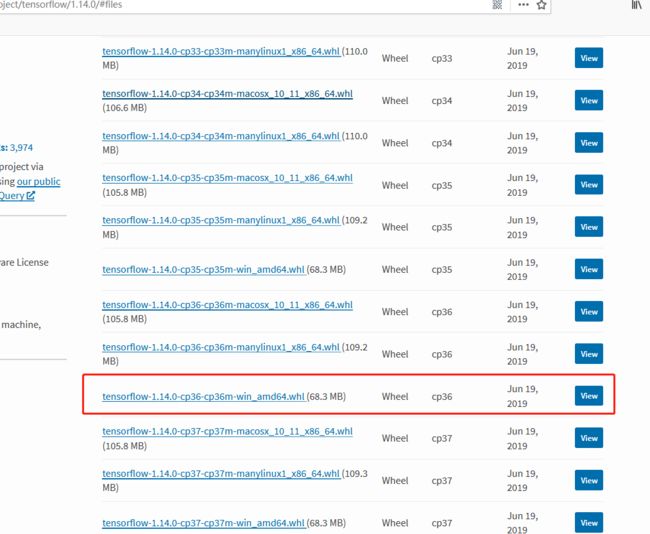
还有一种方法:把tensorflow1.14.0下载到本地,
https://pypi.org/project/tensorflow/1.14.0/#files
选择py36-windows版本
然后在路径下进入虚拟环境tf2keras,再打开cmd,输入pip install 文件名
安装成功。
九、安装tensorflow2.3到“tf2keras”环境里
pip install tensorflow==2.3.0
如果上述方法装不上
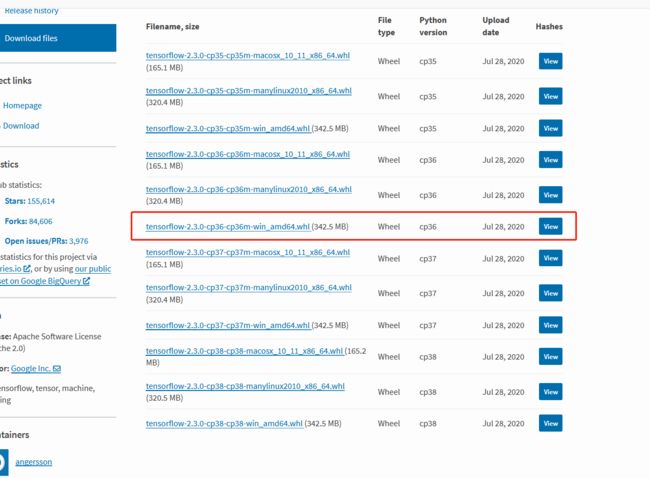
还有一种方法:把tensorflow2.3.0下载到本地,
https://pypi.org/project/tensorflow/2.3.0/#files
选择py36-windows版本然后在路径下进入虚拟环境tf2keras,再打开cmd,输入pip install 文件名,安装成功。
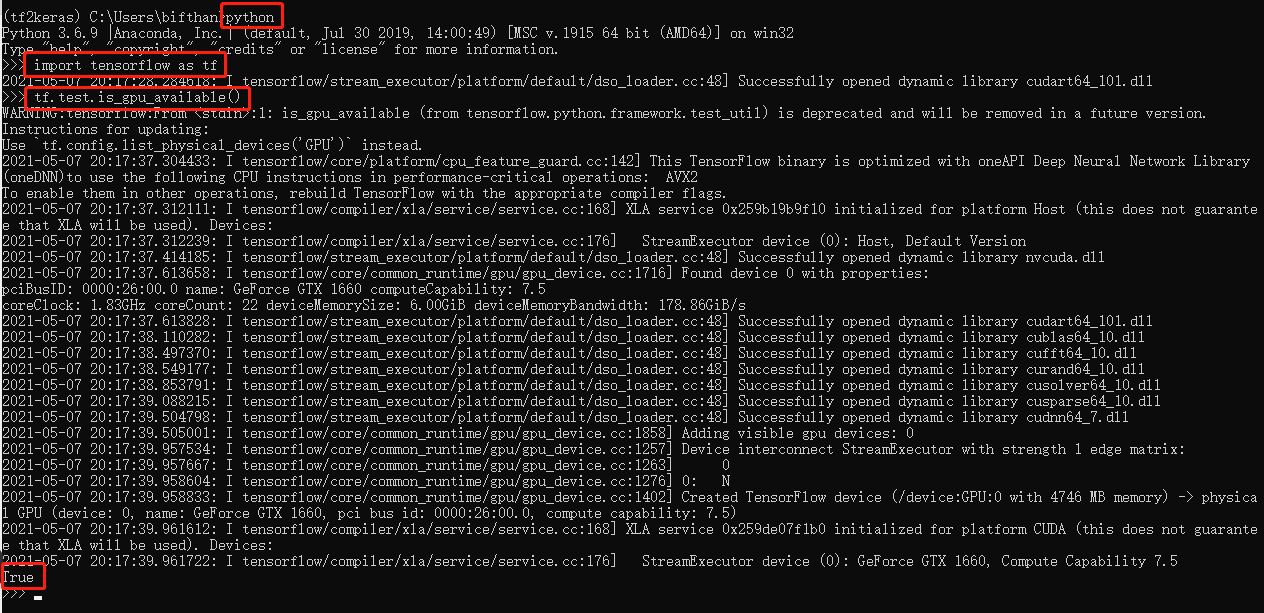
十、验证tf2环境下的gpu是否能用
进到tf2keras环境--
>python
>import tensorflow as tf
>tf.test.is_gpu_available()
没有报错,就代表全部都配置好了。
十一、切换tf1和tf2环境
要更改系统环境变量,CUDA_PATH的v10.0/v10.1即可

