首先用IDEA新建一个SpringBoot项目,或者直接在https://start.spring.io/ 下载一个项目,引入相关的依赖,依赖配置如下:
    4.0.0

    com.example
    security
    0.0.1-SNAPSHOT
    jar

    security
    Demo project for Spring Boot


        org.springframework.boot
        spring-boot-starter-parent
        2.0.4.RELEASE


        UTF-8
        UTF-8
        1.8


            org.springframework.boot
            spring-boot-starter-web


            org.springframework.boot
            spring-boot-starter-test
            test


            org.springframework.boot
            spring-boot-starter-thymeleaf


            org.springframework.security
            spring-security-test


                org.springframework.boot
                spring-boot-maven-plugin


            spring-releases
            Spring Releases
            https://repo.spring.io/libs-release


            spring-releases
            Spring Releases
            https://repo.spring.io/libs-release
创建一个不受保护的web应用
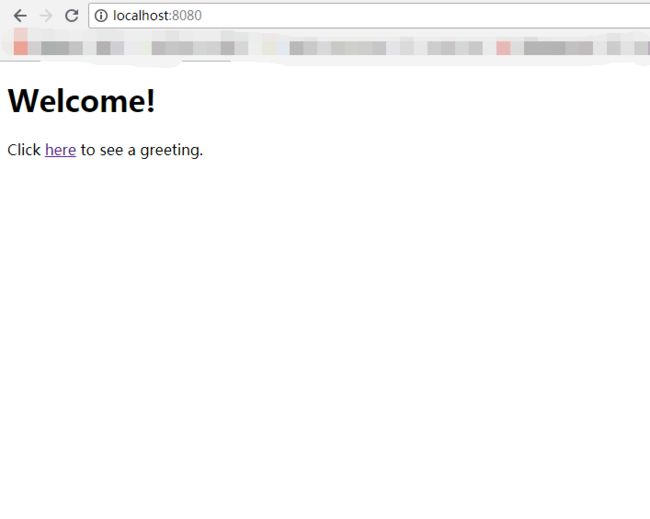
程序包括两个简单的视图:home和hello页面。页面如下:
src/main/resources/templates/home.html
        Spring Security Example


        Welcome!

        Click here to see a greeting.
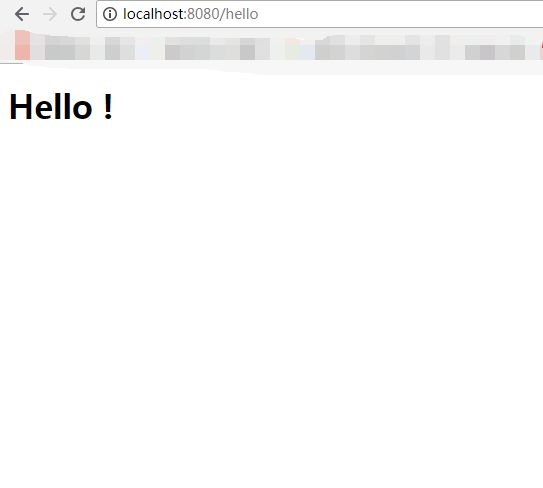
我们可以看到, 在这个简单的视图中包含了一个链接: “/hello”. 链接到了如下的页面,Thymeleaf模板如下:
src/main/resources/templates/hello.html
        Hello World!


        Hello world!
然后你需要配置SpringMVC设置视图控制器:
package com.example.security;

import org.springframework.context.annotation.Configuration;
import org.springframework.web.servlet.config.annotation.ViewControllerRegistry;
import org.springframework.web.servlet.config.annotation.WebMvcConfigurationSupport;

@Configuration
public class WebMvcConfig extends WebMvcConfigurationSupport {

    @Override
    protected void addViewControllers(ViewControllerRegistry registry) {
        registry.addViewController("/home").setViewName("home");
        registry.addViewController("/").setViewName("home");
        registry.addViewController("/hello").setViewName("hello");
        registry.addViewController("/login").setViewName("login");
    }
}
运行SpringBoot项目,进入home页面,点击here此时可以看到是不需要权限就可以访问。
添加 Spring Security
在pom文件中加入Spring Security依赖
    org.springframework.boot
    spring-boot-starter-security
然后配置Spring Security,新建一个配置类:WebSecurityConfig.java
package com.example.security;

import org.springframework.beans.factory.annotation.Autowired;
import org.springframework.context.annotation.Configuration;
import org.springframework.security.config.annotation.authentication.builders.AuthenticationManagerBuilder;
import org.springframework.security.config.annotation.web.builders.HttpSecurity;
import org.springframework.security.config.annotation.web.configuration.EnableWebSecurity;
import org.springframework.security.config.annotation.web.configuration.WebSecurityConfigurerAdapter;
import org.springframework.security.crypto.bcrypt.BCryptPasswordEncoder;

@Configuration
@EnableWebSecurity
public class WebSecurityConfig extends WebSecurityConfigurerAdapter {

    private final static BCryptPasswordEncoder ENCODER = new BCryptPasswordEncoder();

    @Override
    protected void configure(HttpSecurity http) throws Exception {
        http.authorizeRequests()//允许基于HttpServletRequest使用限制访问
                .antMatchers("/", "/home").permitAll()//不需要身份认证
                .anyRequest().authenticated()//其他路径必须验证身份
                .and()
                .formLogin().loginPage("/login")//自定义登录界面
                .permitAll()
                .and()
                .logout().permitAll();
    }

    @Autowired
    public void configureGlobal(AuthenticationManagerBuilder auth) throws Exception {
        auth.inMemoryAuthentication()
                .passwordEncoder(ENCODER)
                .withUser("user")
                .password(ENCODER.encode("123456"))
                .roles("USER");
    }

}
configure(HttpSecurity)方法定义了哪些URL路径应该被保护,哪些不应该。具体来说,“/”和“/ home”路径被配置为不需要任何身份验证。所有其他路径必须经过身份验证。
当用户成功登录时,它们将被重定向到先前请求的需要身份认证的页面。有一个由 loginPage()指定的自定义“/登录”页面,每个人都可以查看它。
对于configureGlobal(AuthenticationManagerBuilder) 方法,它将单个用户设置在内存中。该用户的用户名为“user”,密码为“password”,角色为“USER”。
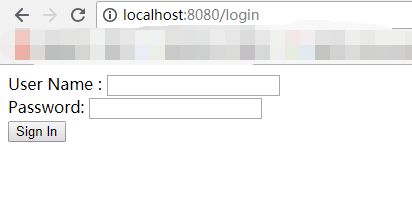
现在我们需要创建登录页面。前面我们已经配置了“login”的视图控制器,因此现在只需要创建登录页面即可:
src/main/resources/templates/login.html
Spring Security Example
Invalid username and password.
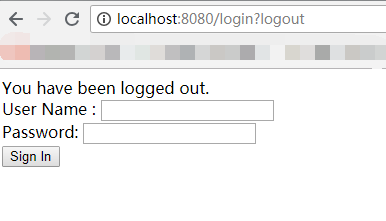
You have been logged out.
你可以看到,这个Thymeleaf模板只是提供一个表单来获取用户名和密码,并将它们提交到“/ login”。 根据配置,Spring Security提供了一个拦截该请求并验证用户的过滤器。 如果用户未通过认证,该页面将重定向到“/ login?error”,并在页面显示相应的错误消息。 注销成功后,我们的应用程序将发送到“/ login?logout”,我们的页面显示相应的登出成功消息。
最后,我们需要向用户提供一个显示当前用户名和登出的方法。 更新hello.html 向当前用户打印一句hello,并包含一个“注销”表单,如下所示:
src/main/resources/templates/hello.html
    Hello World!


Hello [[${#httpServletRequest.remoteUser}]]!
重新启动SpringBoot应用,再次访问localhost:8080,然后点击here,跳转login身份验证
点击Sign Out,注销登录,重新定位到login界面,并显示一条消息,提示你已注销