Java实现PC微信扫码支付
做一个电商网站支付功能必不可少,那我们今天就来盘一盘微信支付。
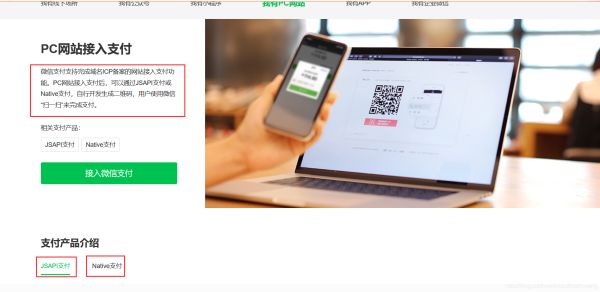
微信支付官方网站
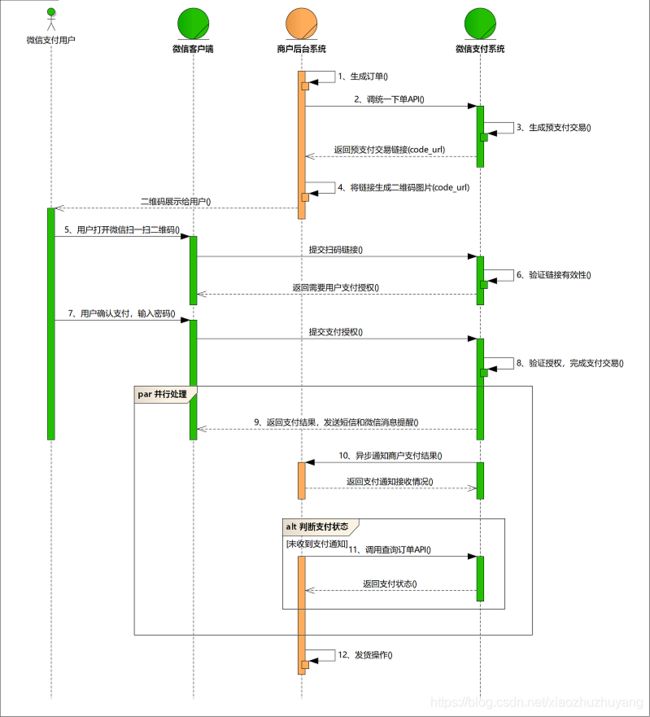
业务流程:
开发指引文档
支付服务开发前提准备:
1.SDK下载:SDK
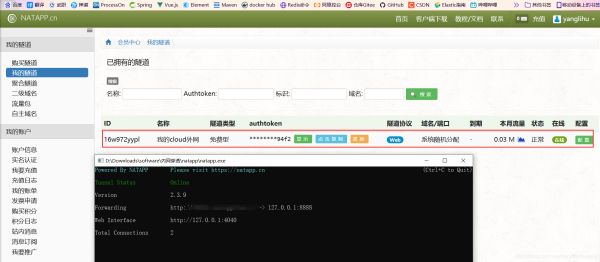
2.利用外网穿透,获得一个外网域名:natapp
3.APPID,商户ID,密钥
注:上面三个参数需要自己申请
开发阶段:
导入依赖:
            org.springframework.cloud
            spring-cloud-starter-netflix-eureka-client


            org.springframework.boot
            spring-boot-starter-web


            org.springframework.boot
            spring-boot-starter-thymeleaf


            org.apache.httpcomponents
            httpclient
            4.5.3


            com.google.zxing
            core
            3.3.3


            com.google.zxing
            javase
            3.3.3


            org.springframework.boot
            spring-boot-starter-websocket
微信支付配置类
/**
 * 微信支付配置
 */
public class MyWXConfig extends WXPayConfig {
    //账户的APPID
    @Override
    public String getAppID() {
        return "wx307113892f15a42e";
    }
    //商户ID
    @Override
    public String getMchID() {
        return "1508236581";
    }
    //秘钥
    @Override
    public String getKey() {
        return "HJd7sHGHd6djgdgFG5778GFfhghghgfg";
    }
    @Override
    public InputStream getCertStream() {
        return null;
    }
    @Override
    public IWXPayDomain getWXPayDomain() {
        return new WXPayDomain();
    }
    class WXPayDomain implements IWXPayDomain{
        @Override
        public void report(String domain, long elapsedTimeMillis, Exception ex) {
        }
        @Override
        public DomainInfo getDomain(WXPayConfig config) {
            return new DomainInfo("api.mch.weixin.qq.com",true);
        }
    }
}
websocket配置类:
package com.cloud.config;

import org.springframework.context.annotation.Bean;
import org.springframework.context.annotation.Configuration;
import org.springframework.web.socket.server.standard.ServerEndpointExporter;

@Configuration
public class WebSocketConfig {

    @Bean
    public ServerEndpointExporter serverEndpointExporter(){
        return new ServerEndpointExporter();
    }
}
wensocket工具类:
package com.cloud.config;

import org.springframework.stereotype.Component;

import javax.websocket.OnClose;
import javax.websocket.OnMessage;
import javax.websocket.OnOpen;
import javax.websocket.Session;
import javax.websocket.server.ServerEndpoint;
import java.io.IOException;

/**
 * WebSocket工具类
 * ServerEndpoint配置websocket的名称,和前台页面对应
 */
@ServerEndpoint(value = "/eshop")
@Component
public class WebSocketUtils {

    //WebSocket的对话对象
    private static Session session = null;

    //建立和前台页面连接后的回调方法
    @OnOpen
    public void onOpen(Session session){
        System.out.println("建立连接"+session);
        //给连接赋值
        WebSocketUtils.session = session;
    }

    @OnMessage
    public void onMessage(String message, Session session){
        System.out.println("收到前台消息:" + message);
    }

    @OnClose
    public void onClose(Session session) throws IOException {
        System.out.println("连接关闭");
        session.close();
    }

    /**
     * 向前台发消息
     * @param message
     * @throws IOException
     */
    public static void sendMessage(String message) throws IOException {
        System.out.println("发送消息:" + message);
        if( WebSocketUtils.session != null) {
            WebSocketUtils.session.getBasicRemote().sendText(message);
        }
    }
}
service:
package com.cloud.service;
import com.cloud.utils.MyWXConfig;
import com.cloud.utils.WXPay;
import com.cloud.utils.WXPayUtil;
import com.google.zxing.BarcodeFormat;
import com.google.zxing.EncodeHintType;
import com.google.zxing.MultiFormatWriter;
import com.google.zxing.client.j2se.MatrixToImageWriter;
import com.google.zxing.common.BitMatrix;
import com.google.zxing.qrcode.decoder.ErrorCorrectionLevel;
import org.springframework.stereotype.Service;
import javax.servlet.http.HttpServletResponse;
import java.util.HashMap;
import java.util.Map;
import java.util.UUID;
/**
* 微信支付Service
*/
@Service
public class PayService {
/**
* 下单
* @param goodsId 商品id
* @param price 价格
* @return 二维码的URL
*/
public Map makeOrder(String goodsId, Long price) throws Exception {
//创建支付对象
MyWXConfig config = new MyWXConfig();
WXPay wxPay = new WXPay(config);
Map map = new HashMap<>();
map.put("appid",config.getAppID());
map.put("mch_id",config.getMchID());
map.put("device_info","WEB");
map.put("nonce_str", UUID.randomUUID().toString().replace("-",""));
map.put("body","商城购物");
String tradeNo = UUID.randomUUID().toString().replace("-", "");
map.put("out_trade_no", tradeNo);
map.put("fee_type","CNY");
map.put("total_fee",String.valueOf(price));
map.put("notify_url","http://68dhbz.natappfree.cc/pay/rollback"); //微信对商户后台的回调接口
map.put("trade_type","NATIVE");
map.put("product_id",goodsId);
//执行统一下单
Map result = wxPay.unifiedOrder(map);
System.out.println("result:"+result);
//保存订单号
result.put("trade_no",tradeNo);
return result;
}
/**
* 生成二维码
* @param url
* @param response
*/
public void makeQRCode(String url, HttpServletResponse response){
//通过支付链接生成二维码
HashMap hints = new HashMap<>();
hints.put(EncodeHintType.CHARACTER_SET, "UTF-8");
hints.put(EncodeHintType.ERROR_CORRECTION, ErrorCorrectionLevel.M);
hints.put(EncodeHintType.MARGIN, 2);
try {
BitMatrix bitMatrix = new MultiFormatWriter().encode(url, BarcodeFormat.QR_CODE, 200, 200, hints);
MatrixToImageWriter.writeToStream(bitMatrix, "PNG", response.getOutputStream());
System.out.println("创建二维码完成");
} catch (Exception e) {
e.printStackTrace();
}
}
/**
* 检查订单状态
* @param tradeNo
* @return
* @throws Exception
*/
public String checkOrder(String tradeNo) throws Exception {
MyWXConfig config = new MyWXConfig();
String str =
""+
""+config.getAppID()+" "+
""+config.getMchID()+" "+
""+UUID.randomUUID().toString().replace("-","")+" "+
""+tradeNo+" "+
"5E00F9F72173C9449F802411E36208734B8138870ED3F66D8E2821D55B317078 "+
" ";
WXPay pay = new WXPay(config);
Map map = WXPayUtil.xmlToMap(str);
Map map2 = pay.orderQuery(map);
String state = map2.get("trade_state");
System.out.println("订单"+tradeNo+",状态"+state);
return state;
}
}
controller:
package com.cloud.controller;
import com.cloud.config.WebSocketUtils;
import com.cloud.service.PayService;
import com.cloud.utils.WXPayUtil;
import org.apache.tomcat.util.http.fileupload.util.Streams;
import org.springframework.beans.factory.annotation.Autowired;
import org.springframework.util.StringUtils;
import org.springframework.web.bind.annotation.*;
import javax.servlet.http.HttpServletRequest;
import javax.servlet.http.HttpServletResponse;
import java.util.Map;
/**
* @author yanglihu
*/
@RestController
@RequestMapping("/pay")
public class PayController {
@Autowired
private PayService payService;
private String tradeNo;
/**
* 二维码生成
*/
@GetMapping("/code")
public void qrcode(@RequestParam("goodsId")String goodsId,
@RequestParam("price")Long price,
HttpServletResponse response){
try {
Map map = payService.makeOrder(goodsId, price);
payService.makeQRCode(map.get("code_url"),response);
System.out.println("生成订单号:" + map.get("trade_no"));
tradeNo = map.get("trade_no");
} catch (Exception e) {
e.printStackTrace();
}
}
/**
* 支付后通知
*/
@PostMapping("/rollback")
public void notify(HttpServletRequest request, HttpServletResponse response) throws Exception {
//获得微信传来的xml字符串
String str = Streams.asString(request.getInputStream());
//将字符串xml转换为Map
Map map = WXPayUtil.xmlToMap(str);
//读取订单号
String no = map.get("out_trade_no");
//模拟修改商户后台数据库订单状态
System.out.println("更新订单状态:"+no);
//给微信发送消息
response.getWriter().println("\n" +
" ");
WebSocketUtils.sendMessage("ok");
}
/**
* 检查订单状态
*/
@PostMapping("checkOrder")
public String checkOrder() throws Exception {
System.out.println("trade_no:" + tradeNo);
if(StringUtils.isEmpty(tradeNo)){
return null;
}
String success = payService.checkOrder(tradeNo);
System.out.println("check:" + success);
return success;
}
}
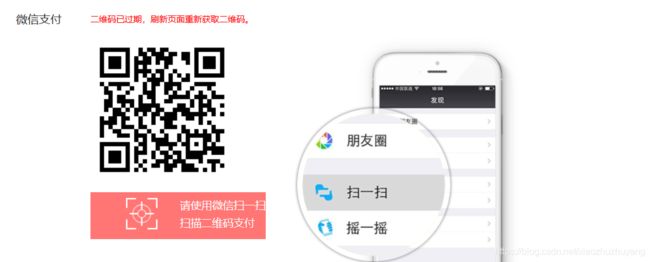
支付页面:
乐优商城--微信支付页


