Web服务器群集——LVS-DR+Keepalived 高可用集群
LVS-DR+Keepalived 高可用集群
- Keepalived介绍
-
- Keepalived实现原理
- LVS-DR-Keepalived部署
-
- 搭建lvs-dr模式集群
-
- 配置lvs服务器
- 配置真实服务器
- 安装和配置Keepalived
-
- 配置主机的keepalived
- 配置从机的keepalived
- 高可用测试
Keepalived介绍
前言
在企业应用中,单台服务器承担应用存在单点故障的危险,在企业应用集群中,存在了至少两处单点故障危险,单点故障一旦发生,企业服务将发生中断,造成极大的危害
Keepalived是专为LVS和HA设计的一款健康检查工具
- 支持故障自动切换(Failover)
- 支持节点健康状态检查(Health Checking)
- 官方网站:http://www.keepalived.org/
Keepalived实现原理
- Keepalived采用VRRP热备份协议实现Linux服务器的多机热备功能
- VRRP ,虚拟路由冗余协议,是针对路由器的一种备份解决方案
- 由多台路由器组成一个热备组,通过共用的虚拟IP地址对外提供服务
- 每个热备组内同一时刻只有一台主路由器提供服务,其他路由器处于冗余状态
- 若当前在线的路由器失效,则其他路由器会根据设置的优先级自动接替虚拟IP地址,继续提供服务
漂移地址:就是路由器组共用的虚拟ip地址,当主路由器死了,剩下的路由会选举出一个主路由出来 ,然后选举出来的路由会承担漂移地址的使用权
- Keepalived可实现多机热备,每个热备组可有多台服务器,最常用的就是双机热备
- 双机热备的故障切换是由虚拟IP地址的漂移来实现,适用于各种应用服务器
LVS-DR-Keepalived部署

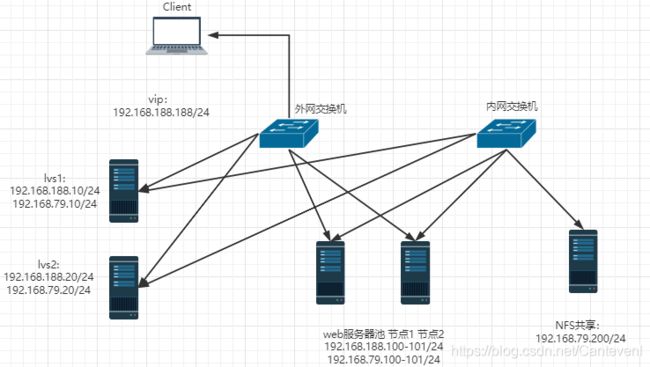
我还是继续使用这个架构图
只不过两台lvs现在相当于在同一个组里 使用同一个虚拟ip
搭建lvs-dr模式集群
配置lvs服务器
四台服务器都关闭网卡的守护进程
systemctl stop NetworkManager

添加一张网卡当作VIP(虚拟ip)使用
cd /etc/sysconfig/network-scripts/
cp -a ifcfg-ens33 ifcfg-ens33:0

vim ifcfg-ens33:0
只需要修改以下四条
NAME=ens33:0
DEVICE=ens33:0
IPADDR=192.168.188.188
NETMASK=255.255.255.0

开启新网卡
ifup ens33:0

查看网卡信息
ifconfig
ens33:0: flags=4163<UP,BROADCAST,RUNNING,MULTICAST>  mtu 1500
        inet 192.168.188.188  netmask 255.255.255.0  broadcast 192.168.188.255
        ether 00:0c:29:0e:28:0d  txqueuelen 1000  (Ethernet)

安装ipvsadm
yum -y install ipvsadm

关闭网卡的广播功能 防止ip进行冲突
vim /etc/sysctl.conf

net.ipv4.conf.all.send_redirects = 0
net.ipv4.conf.default.send_redirects = 0
net.ipv4.conf.ens33.send_redirects = 0

重载sysctl
sysctl -p

net.ipv4.conf.all.send_redirects = 0
net.ipv4.conf.default.send_redirects = 0
net.ipv4.conf.ens33.send_redirects = 0

配置负载分配策略
首先清除原有策略
ipvsadm -C

添加虚拟服务器
ipvsadm -A -t 192.168.188.188:80 -s rr

添加真实服务器 工作模式为DR
ipvsadm -a -t 192.168.188.188:80 -r 192.168.188.100:80 -g
ipvsadm -a -t 192.168.188.188:80 -r 192.168.188.101:80 -g

保存
ipvsadm-save > /etc/sysconfig/ipvsadm

查看
ipvsadm -Ln
IP Virtual Server version 1.2.1 (size=4096)
Prot LocalAddress:Port Scheduler Flags
  -> RemoteAddress:Port           Forward Weight ActiveConn InActConn
TCP  192.168.188.188:80 rr
  -> 192.168.188.100:80           Route   1      0          0
  -> 192.168.188.101:80           Route   1      0          0
配置真实服务器
两台真实服务器同时操作!!!
开启httpd
systemctl start httpd

写一个网页测试
echo 'server 1' >> /var/www/html/index.html
curl localhost
server 1

添加真实服务器的接口
cp -a ifcfg-lo ifcfg-lo:0

vim ifcfg-lo:0
修改内核参数 关闭arp通讯行为
vim /etc/sysctl.conf

net.ipv4.conf.all.arp_ignore = 1
net.ipv4.conf.all.arp_announce = 2
net.ipv4.conf.default.arp_ignore = 1
net.ipv4.conf.default.arp_announce = 2
net.ipv4.conf.lo.arp_ignore = 1
net.ipv4.conf.lo.arp_announce = 2

使其生效
sysctl -p
net.ipv4.conf.all.arp_ignore = 1
net.ipv4.conf.all.arp_announce = 2
net.ipv4.conf.default.arp_ignore = 1
net.ipv4.conf.default.arp_announce = 2
net.ipv4.conf.lo.arp_ignore = 1
net.ipv4.conf.lo.arp_announce = 2

启动网卡
ifup lo:0

添加对应的路由记录
route add -host 192.168.188.188 dev lo:0

查看路有记录
route -n

Kernel IP routing table
Destination     Gateway         Genmask         Flags Metric Ref    Use Iface
0.0.0.0         192.168.188.2   0.0.0.0         UG    100    0        0 ens33
192.168.79.0    0.0.0.0         255.255.255.0   U     101    0        0 ens37
192.168.188.0   0.0.0.0         255.255.255.0   U     100    0        0 ens33
192.168.188.188 0.0.0.0         255.255.255.255 UH    0      0        0 lo

设置开机自启动
echo 'route add -host 192.168.188.188 dev lo:0' >> /etc/rc.local
还可以通过ipvsadm查看
ipvsadm -ln

IP Virtual Server version 1.2.1 (size=4096)
Prot LocalAddress:Port Scheduler Flags
  -> RemoteAddress:Port           Forward Weight ActiveConn InActConn
TCP  192.168.188.188:80 rr
  -> 192.168.188.100:80           Route   1      0          2
  -> 192.168.188.101:80           Route   1      0          1


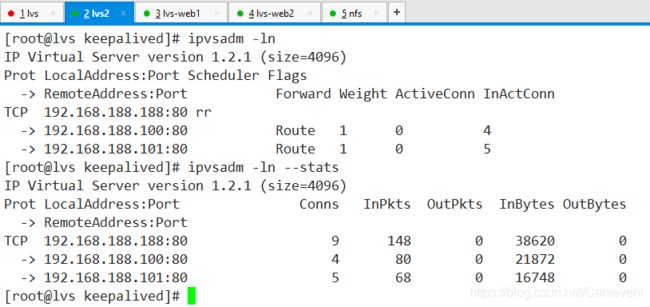
ipvsadm -ln --stats

IP Virtual Server version 1.2.1 (size=4096)
Prot LocalAddress:Port               Conns   InPkts  OutPkts  InBytes OutBytes
  -> RemoteAddress:Port
TCP  192.168.188.188:80                  4       44        0     8417        0
  -> 192.168.188.100:80                  2       12        0     1486        0
  -> 192.168.188.101:80                  2       32        0     6931        0
补充:
- Conns 连接数
- InPkts 入站数据包
- OutPkts 出站数据包 dr模式只接收入站数据包,出站由真实服务器处理 因此为0
- InBytes 入站字节
- OutBytes 出站字节
安装和配置Keepalived
配置主机的keepalived
可以使用源码包,也可以使用yum安装
yum install -y kernel-devel openssl-devel popt-devel
yum install -y keepalived

配置keepalived
vim /etc/keepalived/keepalived.conf

# 配置如下
! Configuration File for keepalived

global_defs {

   router_id LVS1		# 服务器名称,不能重复
}

vrrp_instance VI_1 {
     	# 定义VRRP热备实例名称
    state MASTER	# 热备状态MASTER为主服务器
    interface ens33	# 承载VIP地址的物理接口网卡 通过这张网卡做心跳检测
    virtual_router_id 66 # 虚拟服务器的ID号,每个热备份组保持一致
    priority 100	# 权重(优先级)最大不超过150 官网建议主和从之间差距为50
    advert_int 1	# 通告间隔秒数 检测间隔1秒
    authentication {
     	# 认证信息,每个热备份组保持一致
        auth_type PASS	# 认证类型
        auth_pass 123456	# 密码字串
    }
    virtual_ipaddress {
     	# 指定漂移地址VIP 可以有多个
        192.168.188.188
    }
}

virtual_server 192.168.188.188 80 {
     	# 虚拟服务器地址与端口
    delay_loop 6	# 健康检测间隔时间
    lb_algo rr		# 指定算法
    lb_kind DR		# 指定群集模式
    persistence_timeout 50	# 持久化时间
    protocol TCP	# 采用的协议为TCP

    real_server 192.168.188.100 80 {
     	# 第一个web 节点服务器的地址和端口
        weight 1	# 权重
                TCP_CHECK {
     		# 健康检查方式
                        connect_port 80		# 检查目标端口
                        connect_timeout 3	# 连接超时时间
                        nb_get_retry 3		# 重试次数
                        delay_before_retry 4	# 重试间隔时间
        }
    }
   real_server 192.168.188.101 80 {

        weight 1
                TCP_CHECK {

                        connect_port 80
                        connect_timeout 3
                        nb_get_retry 3
                        delay_before_retry 4
        }
    }
}

开启keepalived
systemctl start keepalived

查看日志
cat /var/log/messages
Apr  2 14:13:24 lvs Keepalived_vrrp[14857]: VRRP_Instance(VI_1) Sending/queueing gratuitous ARPs on ens33 for 192.168.188.188
Apr  2 14:13:24 lvs Keepalived_vrrp[14857]: Sending gratuitous ARP on ens33 for 192.168.188.188
Apr  2 14:13:24 lvs Keepalived_vrrp[14857]: Sending gratuitous ARP on ens33 for 192.168.188.188
Apr  2 14:13:24 lvs Keepalived_vrrp[14857]: Sending gratuitous ARP on ens33 for 192.168.188.188
Apr  2 14:13:24 lvs Keepalived_vrrp[14857]: Sending gratuitous ARP on ens33 for 192.168.188.188

说明已经监听到ens33 使用的192.168.188.188的VIP了
主服务器就配置完毕
配置从机的keepalived
在从机上创建网卡使用vip
cp -a ifcfg-ens33 ifcfg-ens33:0
vim !$

NAME=ens33:0
DEVICE=ens33:0
IPADDR=192.168.188.188
NETMASK=255.255.255.0

启动网卡
[root@lvs network-scripts]# ifup ens33:0
ERROR     : [/etc/sysconfig/network-scripts/ifup-eth] Error, some other host (00:0C:29:80:75:C4) already uses address 192.168
.188.188.

无法启动,因此我们需要去设置一下网卡的启动脚本
[root@lvs network-scripts]# vim /etc/sysconfig/network-scripts/ifup-eth
再次开启网卡
ifup ens33:0

ifconfig
ens33:0: flags=4163<UP,BROADCAST,RUNNING,MULTICAST>  mtu 1500
        inet 192.168.188.188  netmask 255.255.255.0  broadcast 192.168.188.255
        ether 00:0c:29:34:cf:2a  txqueuelen 1000  (Ethernet)


安装keepalived
yum install -y kernel-devel openssl-devel popt-devel
yum install -y keepalived

使用scp将主机的配置文件直接发过来
scp [email protected]:/etc/keepalived/keepalived.conf /etc/keepalived/keepalived.conf

vim keepalived.conf

! Configuration File for keepalived

global_defs {

   router_id LVS2	# 名字需要修改
}

vrrp_instance VI_1 {

    state BACKUP
    interface ens33
    virtual_router_id 66
    priority 80		# 优先级修改	其他都一样就行
    advert_int 1
    authentication {

        auth_type PASS
        auth_pass 123456
    }
    virtual_ipaddress {

        192.168.188.188
    }
}

virtual_server 192.168.188.188 80 {

    delay_loop 6
    lb_algo rr
    lb_kind DR
    persistence_timeout 50
    protocol TCP

    real_server 192.168.188.100 80 {

        weight 1
                TCP_CHECK {

                        connect_port 80
                        connect_timeout 3
                        nb_get_retry 3
                        delay_before_retry 4
        }
    }
   real_server 192.168.188.101 80 {

        weight 1
                TCP_CHECK {

                        connect_port 80
                        connect_timeout 3
                        nb_get_retry 3
                        delay_before_retry 4
        }
   }
}


yum install -y ipvsadm
systemctl start ipvsadm
第一次查看策略 没有信息
ipvsadm -ln

IP Virtual Server version 1.2.1 (size=4096)
Prot LocalAddress:Port Scheduler Flags
  -> RemoteAddress:Port           Forward Weight ActiveConn InActConn


systemctl start keepalived

开启keepalived之后查看

ipvsadm -ln
IP Virtual Server version 1.2.1 (size=4096)
Prot LocalAddress:Port Scheduler Flags
  -> RemoteAddress:Port           Forward Weight ActiveConn InActConn
TCP  192.168.188.188:80 rr persistent 50
  -> 192.168.188.100:80           Route   1      0          0
  -> 192.168.188.101:80           Route   1      0          0

最后关闭网卡重定向
vim /etc/sysctl.conf
net.ipv4.conf.all.send_redirects = 0
net.ipv4.conf.default.send_redirects = 0
net.ipv4.conf.ens33.send_redirects = 0

sysctl -p
net.ipv4.conf.all.send_redirects = 0
net.ipv4.conf.default.send_redirects = 0
net.ipv4.conf.ens33.send_redirects = 0
[root@lvs network-scripts]# ipvsadm -ln
IP Virtual Server version 1.2.1 (size=4096)
Prot LocalAddress:Port Scheduler Flags
  -> RemoteAddress:Port           Forward Weight ActiveConn InActConn
TCP  192.168.188.188:80 rr
  -> 192.168.188.100:80           Route   1      0          5
  -> 192.168.188.101:80           Route   1      0          5
[root@lvs network-scripts]# ipvsadm -ln --stats
IP Virtual Server version 1.2.1 (size=4096)
Prot LocalAddress:Port               Conns   InPkts  OutPkts  InBytes OutBytes
  -> RemoteAddress:Port
TCP  192.168.188.188:80                 34      238        0    36669        0
  -> 192.168.188.100:80                 17      111        0    15772        0
  -> 192.168.188.101:80                 17      127        0    20897        0
高可用测试
我们将主机网断了 然后看整个集群能否继续工作
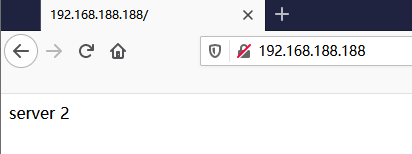
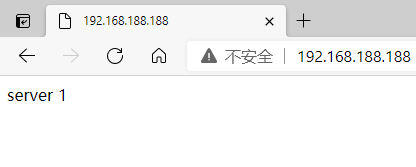
刷新网页 仍然可以访问

然后又启动主机
刷新网页之后 主机又继续使用虚拟地址承担调度的作用

至此我们的实验还差nfs共享服务
在两台真实服务器上面
挂载nfs
vim /etc/fstab

192.168.79.200:/mynfs    /var/www/html                   nfs     defaults,_netdev        0 0

mount -a

df -hT


