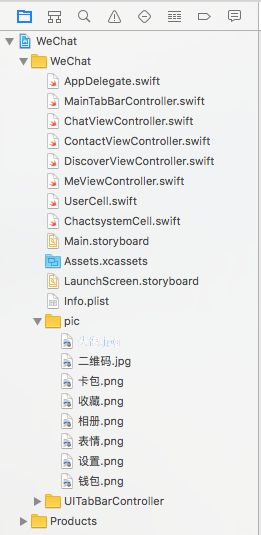
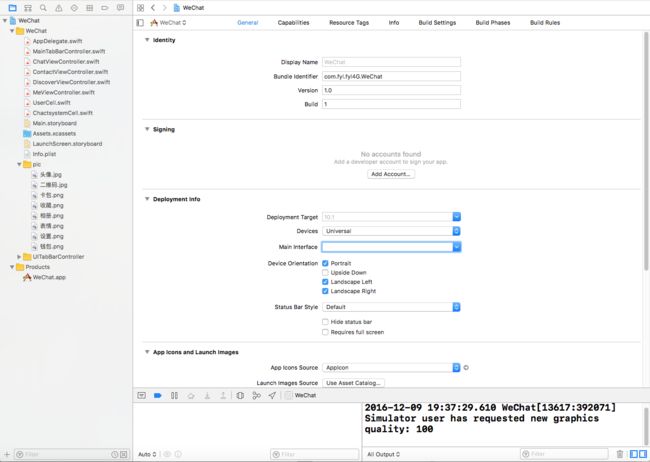
- 给每个视图(UIViewController)设置颜色
AppDelegate.swift代码如下:
import UIKit

@UIApplicationMain
class AppDelegate: UIResponder, UIApplicationDelegate {

    var window: UIWindow?


    func application(_ application: UIApplication, didFinishLaunchingWithOptions launchOptions: [UIApplicationLaunchOptionsKey: Any]?) -> Bool {
        self.window = UIWindow(frame:UIScreen.main.bounds)
        self.window?.backgroundColor = #colorLiteral(red: 0.4745098054, green: 0.8392156959, blue: 0.9764705896, alpha: 1)
        self.window?.makeKeyAndVisible()
        //创建标签视图控制器
        let tabBarVC = MainTabBarController()
        //将标签视图控制器指定为window的根视图控制器
        self.window?.rootViewController = tabBarVC

        return true
    }
MainTabBarController.swift代码如下:
import UIKit

//屏幕的宽
let kScreenWidth = UIScreen.main.bounds.size.width
//屏幕的高
let kScreenHight = UIScreen.main.bounds.size.height

class MainTabBarController: UITabBarController {

    override func viewDidLoad() {
        super.viewDidLoad()

        self.setupViewController()
    }
    func setupViewController(){
        //消息:Chats
        let chatVC = ChatViewController()

        let chatNC = UINavigationController(rootViewController: chatVC)

        chatVC.title = "Chats"

        chatVC.tabBarItem.image = UIImage(named: "[email protected]")

        //通讯录:Contacts
        let contactVC = ContactViewController()

        let contactNC = UINavigationController(rootViewController: contactVC)

        contactVC.title = "Contacts"

        contactVC.tabBarItem.image = UIImage(named: "[email protected]")

        //发现:Discover
        let discoverVC = DiscoverViewController()

        let discoverNC = UINavigationController(rootViewController: discoverVC)

        discoverVC.title = "Discover"

        discoverVC.tabBarItem.image = UIImage(named: "[email protected]")

        //我:Me
        let meVC = MeViewController()

        let meNC = UINavigationController(rootViewController: meVC)

        meVC.title = "Me"

        meVC.tabBarItem.image = UIImage(named: "[email protected]")

        self.viewControllers = [chatNC,contactNC,discoverNC,meNC]

        self.tabBar.tintColor = #colorLiteral(red: 0.4666666687, green: 0.7647058964, blue: 0.2666666806, alpha: 1)

    }

    override func didReceiveMemoryWarning() {
        super.didReceiveMemoryWarning()
        // Dispose of any resources that can be recreated.
    }

    /*
    // MARK: - Navigation

    // In a storyboard-based application, you will often want to do a little preparation before navigation
    override func prepare(for segue: UIStoryboardSegue, sender: Any?) {
        // Get the new view controller using segue.destinationViewController.
        // Pass the selected object to the new view controller.
    }
    */

}
MeViewController.swift代码如下:
import UIKit

class MeViewController: UITableViewController {

    let MeCellReuseIdentifer = "userCell"
    let chatSystemCell = "chatCell"
    let dataSource:[[String]] = [["相册","收藏","钱包","卡包"],["表情"],
["设置"]]
    override func loadView() {
        let tableView = UITableView(frame: UIScreen.main.bounds, style: .grouped)
        self.tableView = tableView
    }

    override func viewDidLoad() {
        super.viewDidLoad()
        self.view.backgroundColor = #colorLiteral(red: 0.9568627477, green: 0.6588235497, blue: 0.5450980663, alpha: 1)
        self.tableView.register(UserCell.self, forCellReuseIdentifier: MeCellReuseIdentifer)
        self.tableView.register(ChactsystemCell.self, forCellReuseIdentifier: chatSystemCell)
        // Uncomment the following line to preserve selection between presentations
        // self.clearsSelectionOnViewWillAppear = false

        // Uncomment the following line to display an Edit button in the navigation bar for this view controller.
        // self.navigationItem.rightBarButtonItem = self.editButtonItem()
    }

    override func didReceiveMemoryWarning() {
        super.didReceiveMemoryWarning()
        // Dispose of any resources that can be recreated.
    }

    // MARK: - Table view data source

    override func numberOfSections(in tableView: UITableView) -> Int {
        // #warning Incomplete implementation, return the number of sections
        return 4
    }

    override func tableView(_ tableView: UITableView, numberOfRowsInSection section: Int) -> Int {
        // #warning Incomplete implementation, return the number of rows
        return section == 1 ? 4 : 1
    }
    override func tableView(_ tableView: UITableView, heightForRowAt indexPath: IndexPath) -> CGFloat {
        return indexPath.section == 0 ? 100 : 50
    }

    override func tableView(_ tableView: UITableView, cellForRowAt indexPath: IndexPath) -> UITableViewCell {
        //返回UserCell
        if indexPath.section == 0 {
            let cell = tableView.dequeueReusableCell(withIdentifier: MeCellReuseIdentifer) as! UserCell
            cell.userPic.image = #imageLiteral(resourceName: "头像.jpg")
            cell.userNameLable.text = "风的低语"
            cell.userIDLable.text = "微信号:fyl13314749700"
            cell.userQRView.image = #imageLiteral(resourceName: "二维码.jpg")
            return cell

        }else{//返回ChactsystemCell
            let cell = tableView.dequeueReusableCell(withIdentifier: chatSystemCell) as! ChactsystemCell
            let group = dataSource[indexPath.section - 1]
            let str = group[indexPath.row]
            cell.iconView.image = UIImage(named: str)
            cell.infoLable.text = str
            return cell
        }
    }

    /*
    // Override to support conditional editing of the table view.
    override func tableView(_ tableView: UITableView, canEditRowAt indexPath: IndexPath) -> Bool {
        // Return false if you do not want the specified item to be editable.
        return true
    }
    */

    /*
    // Override to support editing the table view.
    override func tableView(_ tableView: UITableView, commit editingStyle: UITableViewCellEditingStyle, forRowAt indexPath: IndexPath) {
        if editingStyle == .delete {
            // Delete the row from the data source
            tableView.deleteRows(at: [indexPath], with: .fade)
        } else if editingStyle == .insert {
            // Create a new instance of the appropriate class, insert it into the array, and add a new row to the table view
        }
    }
    */

    /*
    // Override to support rearranging the table view.
    override func tableView(_ tableView: UITableView, moveRowAt fromIndexPath: IndexPath, to: IndexPath) {

    }
    */

    /*
    // Override to support conditional rearranging of the table view.
    override func tableView(_ tableView: UITableView, canMoveRowAt indexPath: IndexPath) -> Bool {
        // Return false if you do not want the item to be re-orderable.
        return true
    }
    */

    /*
    // MARK: - Navigation

    // In a storyboard-based application, you will often want to do a little preparation before navigation
    override func prepare(for segue: UIStoryboardSegue, sender: Any?) {
        // Get the new view controller using segue.destinationViewController.
        // Pass the selected object to the new view controller.
    }
    */
}
UserCell.swift代码如下:
import UIKit

class UserCell: UITableViewCell {
    //用户头像
    var userPic:UIImageView!
    //用户名
    var userNameLable:UILabel!
    //用户帐号
    var userIDLable:UILabel!
    //用户二维码
    var userQRView:UIImageView!

    override init(style: UITableViewCellStyle, reuseIdentifier: String?) {
        super.init(style: style, reuseIdentifier: reuseIdentifier)
        self.setupViews()
    }
    func setupViews(){
        //用户头像
        userPic = UIImageView(frame: CGRect(x: 15, y: 10, width: 80, height: 80))
        self.contentView.addSubview(userPic)
        //用户名
        userNameLable = UILabel(frame: CGRect(x: 110, y: 15, width: 100, height: 30))
        self.contentView.addSubview(userNameLable)
        //用户帐号
        userIDLable = UILabel(frame: CGRect(x: 110, y: 55, width: kScreenWidth*0.6, height: 30))
        self.contentView.addSubview(userIDLable)
        //用户二维码
        userQRView = UIImageView(frame: CGRect(x: kScreenWidth*0.8, y: 30, width: 47, height: 47))
        self.contentView.addSubview(userQRView)

    }

    required init?(coder aDecoder: NSCoder) {
        fatalError("init(coder:) has not been implemented")
    }

    override func awakeFromNib() {
        super.awakeFromNib()
        // Initialization code
    }

    override func setSelected(_ selected: Bool, animated: Bool) {
        super.setSelected(selected, animated: animated)

        // Configure the view for the selected state
    }
}
ChactsystemCell.swift代码如下:
import UIKit

class ChactsystemCell: UITableViewCell {
    //图片
    var iconView:UIImageView!
    //说明
    var infoLable:UILabel!

    override init(style: UITableViewCellStyle, reuseIdentifier: String?) {
        super.init(style: style, reuseIdentifier: reuseIdentifier)
        self.setupViews()
    }
    //cell高50
    func setupViews(){
        //图片
        iconView = UIImageView(frame: CGRect(x: 15, y: 10, width: 30, height: 30))
        self.contentView.addSubview(iconView)
        //说明
        infoLable = UILabel(frame: CGRect(x: 55, y: 10, width: 100, height: 30))
        self.contentView.addSubview(infoLable)

    }

    required init?(coder aDecoder: NSCoder) {
        fatalError("init(coder:) has not been implemented")
    }

    override func awakeFromNib() {
        super.awakeFromNib()
        // Initialization code
    }

    override func setSelected(_ selected: Bool, animated: Bool) {
        super.setSelected(selected, animated: animated)

        // Configure the view for the selected state
    }
}

