LLDB 是 Xcode 中自带的一个调试工具 ,chisel 是 facebook 开源的一个 LLDB 命令的集合,它简化和扩展了 LLDB 的命令,使用方法在 chisel github 中介绍的也比较详细。我在这里简单介绍一下,并结合我的使用经验,做些说明。
1. 安装 (安装工具:终端)
- 若未安装 homebrew , 则 先执行
/usr/bin/ruby -e "$(curl -fsSL https://raw.githubusercontent.com/Homebrew/install/master/install)"安装 homebrew brew updatebrew install chiseltouch ~/.lldbinitopen ~/.lldbinit- 将
command script import /usr/local/opt/chisel/libexec/fblldb.py这条命令粘贴到 ~/.lldbinit 文件中 - 重启 Xcode 即可。
提示: 若重启 Xcode 后,未生效,可以将 chisel 下载到本地,并将command script import /path/to/fblldb.py添加到 ~/.lldbinit 文件中。/path/to/fblldb.py 替换为 fblldb.py 所在的真实路径
2. Command 介绍
在 Xcode 控制台可以使用 help 命令查看所有支持的命令。 这里只介绍下面一些常用的命令:
| Command | Description | iOS | OS X |
|---|---|---|---|
| pviews | 递归打印 key window 上的 View | Yes | Yes |
| pvc | 递归打印 key window 上的 View Controller | Yes | No |
| visualize | 在 Mac 的预览 APP 中打开 UIImage, CGImageRef, UIView, CALayer, NSData (of an image), UIColor, CIColor, or CGColorRef |
Yes | No |
| fv | 在视图层级中,找到类名包含要搜索类名的所有 View | Yes | No |
| fvc | 在视图层级中,找到类名包含要搜索类名的所有 View Controller | Yes | No |
| show/hide | 显示或隐藏指定的 View 或者 Layer | Yes | Yes |
| mask/unmask | 在 View 或者 Layer 的上方添加/隐藏一个透明的蒙版 | Yes | No |
| border/unborder | 给 View 或者 Layer 添加/隐藏一个边框 | Yes | Yes |
| caflush | 重新渲染页面 | Yes | Yes |
| bmessage | 给类方法或实例方法添加一个断点,即使这个类没有实现该方法(父类实现了该方法) | Yes | Yes |
| presponder | 打印从指定对象开始的响应链 | Yes | Yes |
上述 Command 的实现源码在 /chisel/commands/目录下
3. Command 使用例子
使用 help
pvc
, state: appeared, view:
   | , state: appeared, view:
   |    | , state: disappeared, view:  not in the window
   |    | , state: appeared, view:
pviews
; layer = >
   | >
   |    | >
   |    |    | >
   |    |    |    | >
  ......
   |    |    |    |    |    |    | <_UIVisualEffectContentView: 0x7fd9fd7052f0; frame = (0 0; 371 48); autoresize = W+H; tintColor = UIExtendedGrayColorSpace 1 1; layer = > disablesGroupFiltering
   |    |    |    |    |    | >
   |    |    |    |    |    | >
pviews 打印的东西太多,"......" 省略了许多内容。想查找关心的 view,比较难查找,我们通过 help pviews 可以查看更详细的使用方法。
help pviews
     Print the recursion description of .  Expects 'raw' input (see
     'help raw-input'.)

Syntax: pviews
Print the recursion description of .

Arguments:
  ; Type: UIView*/NSView*; The view to print the description of.

Options:
  --up/-u ; Print only the hierarchy directly above the view, up to its window.
  --depth/-d ; Type: int; Print only to a given depth. 0 indicates
  infinite depth.
  --window/-w ; Type: int; Specify the window to print a description
  of. Check which windows exist with "po (id)[[UIApplication sharedApplication]
  windows]".
  --short/-s ; Print a short description of the view
  --medium/-m ; Print a medium description of the view

Syntax: pviews [--up] [--depth=depth] [--window=window] [--short] [--medium]


This command is implemented as FBPrintViewHierarchyCommand in
/Users/yanghu/chisel/commands/FBPrintCommands.py.
我们加上 -m 参数
pviews 0x7fda0000d760 -m
   |
   |    |
   |
   |    |
   |
   |    |
   |
   |    |
visualize
visualize 0x7fda0000e7f0
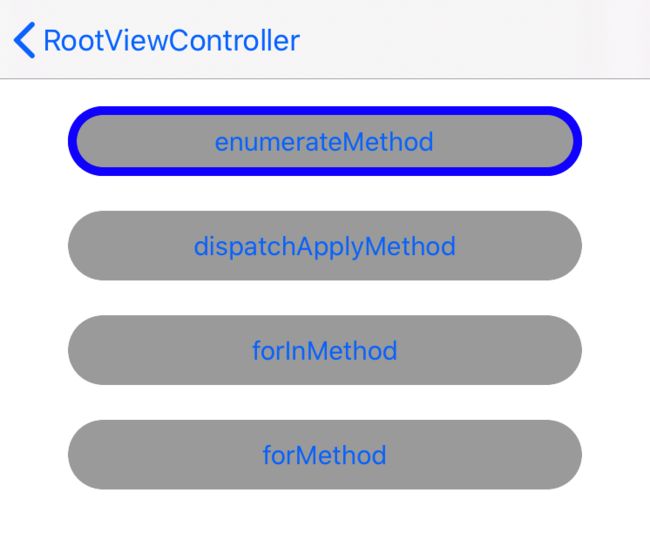
fvc enum
0x7fda02001140 EnumerateDemoViewController
fv UIButton
0x7fda0000d8c0 UIButton
0x7fd9fd40d0b0 UIButtonLabel
0x7fda0000e7f0 UIButton
0x7fd9fd40ce20 UIButtonLabel
0x7fda0000ea90 UIButton
0x7fd9fd40cb90 UIButtonLabel
0x7fda0000ed30 UIButton
0x7fd9fd40c6f0 UIButtonLabel
0x7fda00013880 _UIButtonBarButton
0x7fda000153e0 UIButtonLabel
hide 0x7fda0000d8c0
show 0x7fda0000d8c0
caflush
e (void)[0x7fda0000d8c0 setBackgroundColor:[UIColor redColor]]
caflush
border
border 0x7fda0000e7f0 -c 'blue' -w 5
caflush
unborder
unborder 0x7fda0000e7f0
caflush
mask 0x7fda0000e7f0

unmask 0x7fda0000e7f0
presponder 0x7fda00015db0
>
   | >
   |    |
   |    |    | >
   |    |    |    | >
   |    |    |    |    | ; layer = >
   |    |    |    |    |    |
   |    |    |    |    |    |    | >
   |    |    |    |    |    |    |    | >
   |    |    |    |    |    |    |    |    | >
   |    |    |    |    |    |    |    |    |    |
   |    |    |    |    |    |    |    |    |    |    | >
   |    |    |    |    |    |    |    |    |    |    |    | >
   |    |    |    |    |    |    |    |    |    |    |    |    | ; layer = >
   |    |    |    |    |    |    |    |    |    |    |    |    |    | ; persistentIdentifier = B5525011-A1BC-40F3-AFB4-D8A8187B7102; activationState = UISceneActivationStateForegroundActive; settingsCanvas = ; windows = (
    "; layer = >",
    ">"
)>
   |    |    |    |    |    |    |    |    |    |    |    |    |    |    |
   |    |    |    |    |    |    |    |    |    |    |    |    |    |    |    |
bmessage
bmessage "-[EnumerateDemoViewController viewDidAppear:]"

4. 自定义 Command
- 新建 Python 文件 , 例 /path/to/test.py
- 添加
script fblldb.loadCommandsInDirectory('/path/to/')到 ~/.lldbinit 文件中。注意:/path/to/ 要使用绝对路径,否则会报错。 - 重启 Xcode 或者 在 Xcode 的控制台输入命令
command source ~/.lldbinit
加载自定义 command 的过程,参考源码:fblldb.py : loadCommandsInDirectory()
实例: 新建 Python 文件 : ~/lldbCustom/threadcheck.py , 修改 ~/.lldbinit 文件 :
# ~/.lldbinit

command script import ~/chisel/fblldb.py
script fblldb.loadCommandsInDirectory('/Users/yanghu/lldbCustom/')
添加 yhct 命令 ,打印当前线程; 添加 yhctm 命令 ,打印当前线程是否是主线程;
#!/usr/bin/python

# Copyright (c) Facebook, Inc. and its affiliates. All Rights Reserved
#
# This source code is licensed under the MIT license found in the
# LICENSE file in the root directory of this source tree.

import os

import lldb
import fblldbbase as fb

def lldbcommands():
  return [
    YHCurrentThreadCheckCommand(),
    YHCurrentThreadMainCheckCommand()
  ]

class YHCurrentThreadCheckCommand(fb.FBCommand):
  def name(self):
    return 'yhct'

  def description(self):
    return 'print current thread'

  def run(self, arguments, options):
    command = 'po [NSThread currentThread]'
    lldb.debugger.HandleCommand(command)

class YHCurrentThreadMainCheckCommand(fb.FBCommand):
  def name(self):
    return 'yhctm'

  def description(self):
    return 'check current thread is or is not equal to main thread'

  def run(self, arguments, options):
    command = 'po [NSThread currentThread].isMainThread'
    lldb.debugger.HandleCommand(command)
5. Command 源码解读 ( 以 visualize 为例)
在 Xcode 控制台执行 help visualize 命令,控制台打印如下:
Open a UIImage, CGImageRef, UIView, or CALayer in Preview.app on your Mac.
     Expects 'raw' input (see 'help raw-input'.)

Syntax: visualize
Open a UIImage, CGImageRef, UIView, or CALayer in Preview.app on your Mac.

Arguments:
  ; Type: (id); The object to visualize.

Syntax: visualize

This command is implemented as FBVisualizeCommand in
/Users/yanghu/chisel/commands/FBVisualizationCommands.py.
根据最后一行打印的路径,我们打开 FBVisualizationCommands.py 文件如下 ( "......" 省略了一些无关信息) :
......
def _showImage(commandForImage):
  imageDirectory = '/tmp/xcode_debug_images/'

  imageName = time.strftime("%Y-%m-%d-%H-%M-%S", time.gmtime()) + ".png"
  imagePath = imageDirectory + imageName

  try:
    os.makedirs(imageDirectory)
  except OSError as e:
    if e.errno == errno.EEXIST and os.path.isdir(imageDirectory):
      pass
    else:
      raise

  toPNG = '(id)UIImagePNGRepresentation((id){})'.format(commandForImage)
  imageDataAddress = fb.evaluateExpressionValue(toPNG, tryAllThreads=True).GetValue()
  imageBytesStartAddress = fb.evaluateExpression('(void *)[(id)' + imageDataAddress + ' bytes]')
  imageBytesLength = fb.evaluateExpression('(NSUInteger)[(id)' + imageDataAddress + ' length]')

  address = int(imageBytesStartAddress, 16)
  length = int(imageBytesLength)

  if not (address or length):
    print('Could not get image data.')
    return

  process = lldb.debugger.GetSelectedTarget().GetProcess()
  error = lldb.SBError()
  mem = process.ReadMemory(address, length, error)

  if error is not None and str(error) != 'success':
    print(error)
  else:
    imgFile = open(imagePath, 'wb')
    imgFile.write(mem)
    imgFile.close()
    os.system('open ' + imagePath)

......

def _showLayer(layer):
  layer = '(' + layer + ')'
  size = '((CGRect)[(id)' + layer + ' bounds]).size'

  width = float(fb.evaluateExpression('(CGFloat)(' + size + '.width)'))
  height = float(fb.evaluateExpression('(CGFloat)(' + size + '.height)'))
  if width == 0.0 or height == 0.0:
    print('Nothing to see here - the size of this element is {} x {}.'.format(width, height))
    return

  fb.evaluateEffect('UIGraphicsBeginImageContextWithOptions(' + size + ', NO, 0.0)')
  fb.evaluateEffect('[(id)' + layer + ' renderInContext:(void *)UIGraphicsGetCurrentContext()]')

  result = fb.evaluateExpressionValue('(UIImage *)UIGraphicsGetImageFromCurrentImageContext()')
  if result.GetError() is not None and str(result.GetError()) != 'success':
    print(result.GetError())
  else:
    image = result.GetValue()
    _showImage(image)

  fb.evaluateEffect('UIGraphicsEndImageContext()')

......

def _visualize(target):
  target = fb.evaluateInputExpression(target)

  if fb.evaluateBooleanExpression('(unsigned long)CFGetTypeID((CFTypeRef)' + target + ') == (unsigned long)CGImageGetTypeID()'):
    _showImage('(id)[UIImage imageWithCGImage:' + target + ']')
  else:
    if objectHelpers.isKindOfClass(target, 'UIImage'):
      _showImage(target)
    elif objectHelpers.isKindOfClass(target, 'UIView'):
      _showLayer('[(id)' + target + ' layer]')
    elif objectHelpers.isKindOfClass(target, 'CALayer'):
      _showLayer(target)
    elif objectHelpers.isKindOfClass(target, 'UIColor') or objectHelpers.isKindOfClass(target, 'CIColor') or _colorIsCGColorRef(target):
      _showColor(target)
    elif objectHelpers.isKindOfClass(target, 'NSData'):
      if _dataIsImage(target):
        _showImage('(id)[UIImage imageWithData:' + target + ']')
      elif _dataIsString(target):
        print(fb.describeObject('[[NSString alloc] initWithData:' + target + ' encoding:4]'))
      else:
        print('Data isn\'t an image and isn\'t a string.')
    else:
      print('{} isn\'t supported. You can visualize UIImage, CGImageRef, UIView, CALayer, NSData, UIColor, CIColor, or CGColorRef.'.format(objectHelpers.className(target)))

class FBVisualizeCommand(fb.FBCommand):
  def name(self):
    return 'visualize'

  def description(self):
    return 'Open a UIImage, CGImageRef, UIView, or CALayer in Preview.app on your Mac.'

  def args(self):
    return [ fb.FBCommandArgument(arg='target', type='(id)', help='The object to visualize.') ]

  def run(self, arguments, options):
    _visualize(arguments[0])
在控制台输入 visualize 0x7fda0000e7f0 命令,会执行 FBVisualizeCommand 类的 run(self, arguments, options) 方法 , 该方法实现里调用 _visualize(target) 方法。
_visualize(target) 方法的执行步骤如下:
- 确认传参符合要求
fb.evaluateInputExpression(target) - 判断传参的类型
objectHelpers.isKindOfClass(target, 'class'), 不同类型执行不同的方法。该例中传参为一个 UIButton 对象,objectHelpers.isKindOfClass(target, 'UIView')条件成立。因此执行_showLayer('[(id)' + target + ' layer]')方法。 -
_showLayer(layer)方法内,开启了一个图片上下文,在该上下文里绘制一张图片。绘制成功后,调用_showImage(commandForImage)方法。 -
_showImage(commandForImage)方法内,为图片创建一个临时存储路径,将图片流写入文件中imgFile.write(mem), 然后用 Mac 自带的预览工具打开该图片文件os.system('open ' + imagePath)
自定义 Command 源码解读
自定义的 Command 需要添加脚本 script fblldb.loadCommandsInDirectory('/path/to/') 到 ~/.lldbinit 文件中, 该脚本中,重点调用了 fblldb.py 文件中的 loadCommandsInDirectory() 方法 ( "......" 省略了一些无关信息) :
def loadCommandsInDirectory(commandsDirectory):
  for file in os.listdir(commandsDirectory):
    fileName, fileExtension = os.path.splitext(file)
    if fileExtension == '.py':
      module = imp.load_source(fileName, os.path.join(commandsDirectory, file))

      if hasattr(module, 'lldbinit'):
        module.lldbinit()

      if hasattr(module, 'lldbcommands'):
        module._loadedFunctions = {}
        for command in module.lldbcommands():
          loadCommand(module, command, commandsDirectory, fileName, fileExtension)

def loadCommand(module, command, directory, filename, extension):
  func = makeRunCommand(command, os.path.join(directory, filename + extension))
  ......
  lldb.debugger.HandleCommand('script ' + functionName + ' = sys.modules[\'' + module.__name__ + '\']._loadedFunctions[\'' + key + '\']')
  lldb.debugger.HandleCommand('command script add --help "{help}" --function {function} {name}'.format(
    help=helpText.replace('"', '\\"'), # escape quotes
    function=functionName,
    name=name))

def makeRunCommand(command, filename):
  def runCommand(debugger, input, exe_ctx, result, _):
    ......
    if validateArgsForCommand(args, command):
      command.run(args, options)

  runCommand.__doc__ = helpForCommand(command, filename)
  return runCommand
该方法的执行步骤如下:
- 加载自定义 Command 文件
module = imp.load_source(fileName, os.path.join(commandsDirectory, file)) - 遍历自定义 Command 文件中
lldbcommands方法的类对象数组,对每个类对象调用loadCommand(module, command, directory, filename, extension)方法。 -
loadCommand(module, command, directory, filename, extension)方法内调用func = makeRunCommand(command, os.path.join(directory, filename + extension))方法,获取具体执行命令的方法。makeRunCommand(command, filename)方法调用类对象的run(self, arguments, options)方法,返回执行命令的方法。 - 调用
lldb.debugger.HandleCommand()执行命令