我的CSDN地址:https://blog.csdn.net/qq_26999509/article/details/79829670
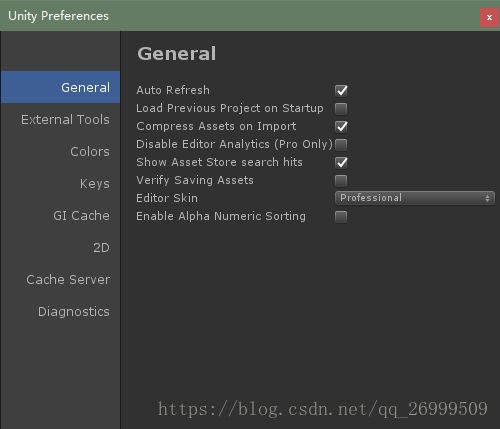
Unity Preferences Window如下图所示:
作为Unity 的参数设置窗口,这个窗口支持新增项,当然本文不介绍这个内容,本次介绍如何利用反射、以及Unity Editor代码来实现用代码打开Preferences Window以及设置选中项。
使用ILSpy工具反编译UnityEditor.dll后呢,在下图目录中的PreferencesWinndow.cs脚本
里面有一个接口是”ShowPreferencesWindow”,从字面上就可以理解到是用来打开PreferencesWindow的。
```
private static void ShowPreferencesWindow()
{
EditorWindow window = EditorWindow.GetWindow(true, "Unity Preferences");
window.minSize = new Vector2(500f, 400f);
window.maxSize = new Vector2(window.minSize.x, window.maxSize.y);
window.position = new Rect(new Vector2(100f, 100f), window.minSize);
window.m_Parent.window.m_DontSaveToLayout = true;
}
```
该函数是私有的,没办法直接调,利用反射试一下。
using System.Collections;using System.Collections.Generic;using UnityEngine;using UnityEditor;using System.Reflection;using System;public class OpenPreferencesWindow : EditorWindow
{
[MenuItem("Tool/OpenPreferencesWindow")]
public static void Open()
{
OpenPreferencesWindow editor = EditorWindow.GetWindow();
}
private void OnGUI()
{
if (GUILayout.Button("打开PerferencesWindow"))
{
Assembly assembly = Assembly.GetAssembly(typeof(UnityEditor.EditorWindow));
Type type = assembly.GetType("UnityEditor.PreferencesWindow");
type.GetMethod("ShowPreferencesWindow", BindingFlags.NonPublic | BindingFlags.Static).Invoke(null, null);
}
}
}
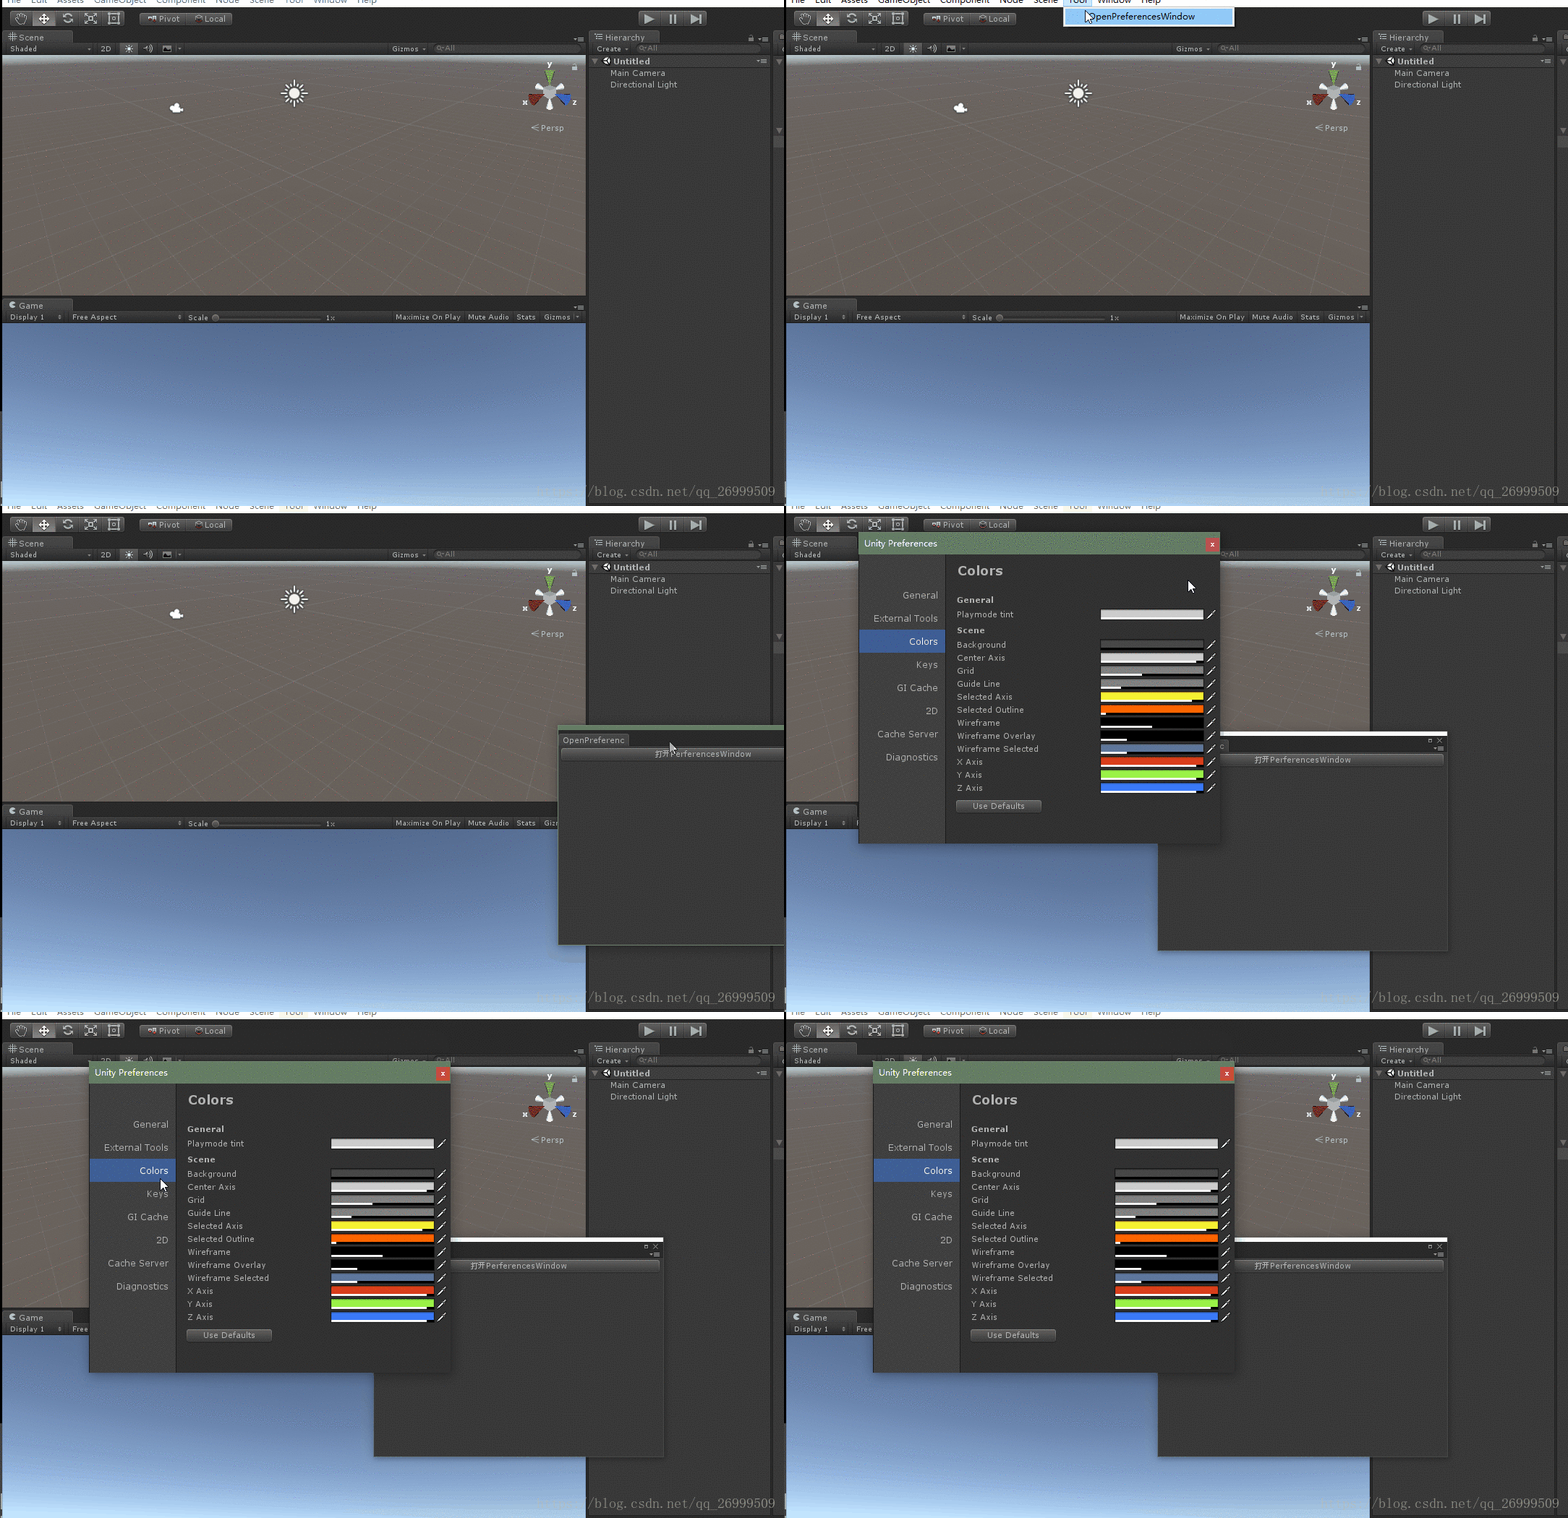
效果图:
接下来,就是如何实现在打开window之后直接选中某一项。
查看一下OnEnable函数,初始化里面做了啥?
private void OnEnable()
{
this.prefWinExtensions = ModuleManager.GetPreferenceWindowExtensions();
this.ReadPreferences();
this.m_Sections = new List();
this.m_Sections.Add(new PreferencesWindow.Section("General", new PreferencesWindow.OnGUIDelegate(this.ShowGeneral)));
this.m_Sections.Add(new PreferencesWindow.Section("External Tools", new PreferencesWindow.OnGUIDelegate(this.ShowExternalApplications)));
this.m_Sections.Add(new PreferencesWindow.Section("Colors", new PreferencesWindow.OnGUIDelegate(this.ShowColors)));
this.m_Sections.Add(new PreferencesWindow.Section("Keys", new PreferencesWindow.OnGUIDelegate(this.ShowKeys)));
this.m_Sections.Add(new PreferencesWindow.Section("GI Cache", new PreferencesWindow.OnGUIDelegate(this.ShowGICache)));
this.m_Sections.Add(new PreferencesWindow.Section("2D", new PreferencesWindow.OnGUIDelegate(this.Show2D))); if (Unsupported.IsDeveloperBuild() || UnityConnect.preferencesEnabled)
{
this.m_Sections.Add(new PreferencesWindow.Section("Unity Services", new PreferencesWindow.OnGUIDelegate(this.ShowUnityConnectPrefs)));
}
this.m_RefreshCustomPreferences = true;
}
与PreferencesWindow图对比之后发现,m_Sections这个集合里存的Section对象应该就是Window左侧的可选项了。
接着看看Section这个类
private class Section
{
public GUIContent content;
public PreferencesWindow.OnGUIDelegate guiFunc;
public Section(string name, PreferencesWindow.OnGUIDelegate guiFunc)
{
this.content = new GUIContent(name); this.guiFunc = guiFunc;
}
public Section(string name, Texture2D icon, PreferencesWindow.OnGUIDelegate guiFunc)
{
this.content = new GUIContent(name, icon);
this.guiFunc = guiFunc;
}
public Section(GUIContent content, PreferencesWindow.OnGUIDelegate guiFunc)
{
this.content = content; this.guiFunc = guiFunc;
}
}
PreferencesWindow在OnEnable的时候,就有实例化几个对象,其中传入的第一个参数,例如“Colors”,就存在类的content中,那么只需要反射到这个content的,再遍历这个m_Sections,就可以实现选中左侧了。
完整代码,如下:
using System.Collections;
using System.Collections.Generic;
using UnityEngine;
using UnityEditor;
using System.Reflection;
using System;
public class OpenPreferencesWindow : EditorWindow
{
[MenuItem("Tool/OpenPreferencesWindow")]
public static void Open()
{
OpenPreferencesWindow editor = EditorWindow.GetWindow();
}
private void OnGUI()
{
if (GUILayout.Button("打开PerferencesWindow"))
{
Assembly assembly = Assembly.GetAssembly(typeof(UnityEditor.EditorWindow));
Type type = assembly.GetType("UnityEditor.PreferencesWindow");
type.GetMethod("ShowPreferencesWindow", BindingFlags.NonPublic | BindingFlags.Static).Invoke(null, null); EditorWindow window = EditorWindow.GetWindow(type);
FieldInfo sectionsField = type.GetField("m_Sections", BindingFlags.Instance | BindingFlags.NonPublic);
IList sections = sectionsField.GetValue(window) as IList;
Type sectionType = sectionsField.FieldType.GetGenericArguments()[0];
FieldInfo sectionContentField = sectionType.GetField("content", BindingFlags.Instance | BindingFlags.Public);
for (int i = 0; i < sections.Count; i++)
{
GUIContent sectionContent = sectionContentField.GetValue(sections[i]) as GUIContent;
if (sectionContent.text == "Colors")
{
FieldInfo sectionIndexField = type.GetField("m_SelectedSectionIndex", BindingFlags.Instance | BindingFlags.NonPublic);
sectionIndexField.SetValue(window, i); return;
}
}
}
}
}
如果插件中有在PreferencesWindow中添加项,就可以通过这个让用户快捷打开了。
通过这篇文章,希望可以帮助大家学会如何分析反编译出的代码,分析UnityEditor如何实现的编辑器,以此来写出更加实用的插件
以上知识分享,如有错误,欢迎指出,共同学习,共同进步。


