If your image has random noise, uneven illumination, holes in front objects, etc. There are few things that you can do before posting your image to a computer vision API. In this article, we go through few processing techniques to boost OCR results using OpenCV
如果您的图像有随机的噪点,照明不均匀,前面的物体上有Kong等等,那么在将图像发布到计算机视觉API之前,您可以做的事情很少。 在本文中,我们介绍了几种使用OpenCV提高OCR结果的处理技术
TL;DR: full code
TL; DR:完整代码
安装OpenCV (Install OpenCV)
Install OpenCV using your preferred package manager
使用您首选的软件包管理器安装OpenCV
conda install -c conda-forge opencv
pip install opencv-python
读取图像 (Read the image)
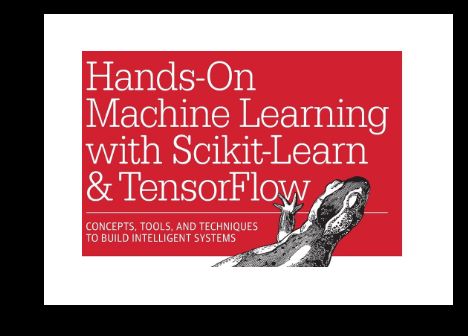
I will use the cover of the 1st edition of one of my favorite books as an example. Let’s first read the image, specifying the colour type of the image to coloured. This will read the image in the default colour format in OpenCV which is BGR (Blue-Green-Red). We will then convert the colour space to the more common RGB order (and for visualisation), and finally, write a small function to show the image without any interpolation:
我将以我最喜欢的一本书的第一版的封面为例。 让我们先来读取图像,指定图像的色彩类型 着色 。 这将以OpenCV中默认的颜色格式BGR (蓝-绿-红)读取图像。 然后,我们将色彩空间转换为更常见的RGB阶数(并用于可视化),最后,编写一个小的函数来显示图像而无需任何插值:
import cv2
import matplotlib.pyplot as plt


img = cv2.imread(
  filename='hands-on-machine-learning.jpg',
  flags=cv2.IMREAD_COLOR,
)


h, w, c = img.shape
print(f'Image shape: {h}H x {w}W x {c}C')


img = cv2.cvtColor(
  src=img,
  code=cv2.COLOR_BGR2RGB,
)


def show_image(img, **kwargs):
    """
    Show an RGB numpy array of an image without any interpolation
    """
    plt.subplot()
    plt.axis('off')
    plt.imshow(
        X=img,
        interpolation='none',
        **kwargs
    )


show_image(img)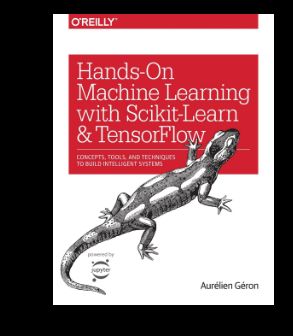
裁剪图片 (Crop image)
Mostly, you either have a box coordinates around the text (from a labelling tool), or you are only interested in part of your image. Our image is a 3D numpy array. To crop it, we can simply slice along the height and width:
通常,您要么在文本周围有一个框坐标(通过标签工具),要么只对图像的一部分感兴趣。 我们的图像是一个3D numpy数组。 要裁剪它,我们可以简单地沿高度和宽度切片:
ymin, ymax = 200, 780
xmin, xmax = 100, 1000


img = img[
    int(ymin): int(ymax),
    int(xmin): int(xmax),
]


h, w, c = img.shape
print(f'Image shape: {h}H x {w}W x {c}C')

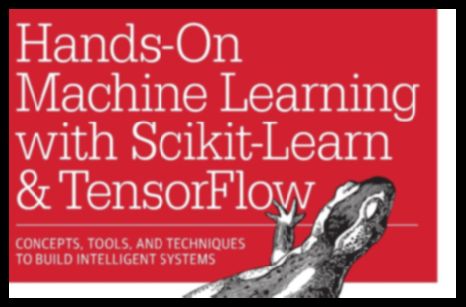
show_image(img)添加边框(即填充)( doc ) (Add border (i.e. padding) (doc))
This might be useful for APIs with OCR models trained on documents (documents usually have white border)
这对于在文档上训练了OCR模型的API可能很有用 (文档通常带有白色边框)
img_border = cv2.copyMakeBorder(
    src=img,
    top=10,
    bottom=10,
    left=10,
    right=10,
    borderType=cv2.BORDER_CONSTANT,
    value=(255, 255, 255),
)


h, w, c = img_border.shape
print(f'Image shape: {h}H x {w}W x {c}C')


show_image(img_border)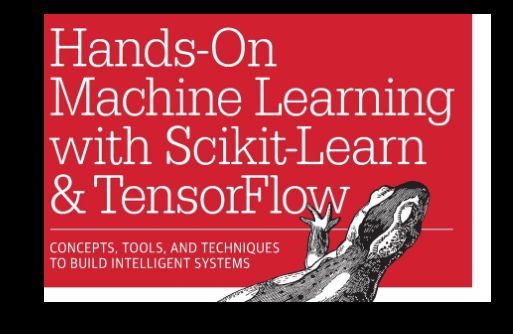
调整图片大小( doc ) (Resize image (doc))
APIs will have a maximum dimension for input images. If the image needs resizing, the aspect ratio should be preserved
API将具有输入图像的最大尺寸。 如果图像需要调整大小,则应保留宽高比
MAX_PIX = 800


def resize_image(img, flag):
    """
    Resize an RGB numpy array of an image, either along the height or the width, and keep its aspect ratio. Show restult.
    """
    h, w, c = img.shape


    if flag == 'h':
        dsize = (int((MAX_PIX * w) / h), int(MAX_PIX))
    else:
        dsize = (int(MAX_PIX), int((MAX_PIX * h) / w))


    img_resized = cv2.resize(
        src=img,
        dsize=dsize,
        interpolation=cv2.INTER_CUBIC,
    )


    h, w, c = img_resized.shape
    print(f'Image shape: {h}H x {w}W x {c}C')

    show_image(img_resized)


    return img_resized


if h > MAX_PIX:
    img_resized = resize_image(img, 'h')


if w > MAX_PIX:
    img_resized = resize_image(img, 'w')
应用形态学运算( doc ) (Apply morphological operations (doc))
To read more about the different morphological operations, check this tutorial. The below function applies either:
要了解有关不同形态学操作的更多信息,请查看本教程 。 以下功能适用:
Opening (erosion followed by dilation using 5 x 5 kernel) which is useful for removing noise
开Kong(侵蚀后使用5 x 5内核膨胀) 对于消除噪声很有用
Closing (dilation followed by Erosion using 5 x 5 kernel) which is useful for closing small holes inside the foreground objects, or small black points on the object
闭合(使用5 x 5内核进行扩张,然后进行侵蚀) 对于闭合前景对象内的小Kong或对象上的小黑点非常有用
def apply_morphology(img, method):
    """
    Apply a morphological operation, either opening (i.e. erosion followed by dilation) or closing (i.e. dilation followed by erosion). Show result.
    """
    if method == 'open':
        op = cv2.MORPH_OPEN
    elif method == 'close':
        op = cv2.MORPH_CLOSE


    img_morphology = cv2.morphologyEx(
        src=img,
        op=op,
        kernel=np.ones((5, 5), np.uint8),
    )


    show_image(img_morphology)


    return img_morphology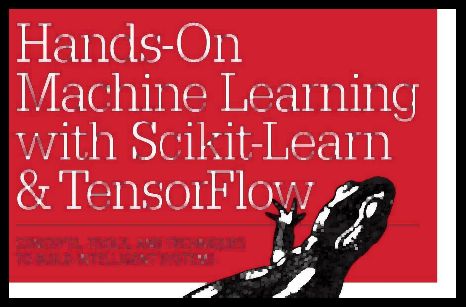
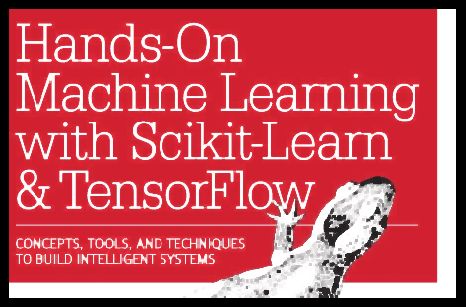
应用高斯模糊( doc ) (Apply Gaussian blurring (doc))
Image blurring (a.k.a smoothing) is useful for removing high frequency content (e.g. noise) from the image by convolving it with a low-pass filter kernel (Gaussian in this case). Note that bigger kernels result in more blurring effect. To read more about image smoothing techniques check this tutorial
图像模糊(aka平滑) 可用于通过与低通滤波器内核(在这种情况下为高斯)卷积来去除图像中的高频成分(例如,噪声 )。 请注意,较大的内核会导致更模糊的效果。 要了解有关图像平滑技术的更多信息,请查看本教程。
img_gaussian = cv2.GaussianBlur(
    src=img,
    ksize=(5, 5),
    sigmaX=0,
    sigmaY=0,
)
应用适应性阈值( doc ) (Apply adaptive thresholding (doc))
Thresholding transforms a grayscale image to a binary image. Adaptive thresholding is useful when the image has different lighting conditions in different areas as it calculates different thresholds for different regions. To read more about image thresholding techniques check this tutorial
阈值处理将灰度图像转换为二进制图像。 当图像在不同区域具有不同的光照条件时,自适应阈值将很有用,因为它为不同区域计算不同的阈值。 要了解有关图像阈值处理技术的更多信息,请参阅本教程。
The below function applies adaptive thresholding using either one of the two following methods:
以下功能使用以下两种方法之一应用自适应阈值处理:
- Gaussian: threshold value is the weighted sum of neighbourhood values where weights are a Gaussian window 高斯:阈值是邻域值的加权和,其中权重是高斯窗口
- Mean: threshold value is the mean of neighbourhood area 平均值:阈值是邻域的平均值
def apply_adaptive_threshold(img, method):
    """
    Apply adaptive thresholding, either Gaussian (threshold value is the weighted sum of neighbourhood values where weights are a Gaussian window) or mean (threshold value is the mean of neighbourhood area). Show result.
    """
    img = cv2.cvtColor(
        src=img,
        code=cv2.COLOR_RGB2GRAY,
    )


    if method == 'gaussian':
        adaptive_method = cv2.ADAPTIVE_THRESH_GAUSSIAN_C
    elif method == 'mean':
        adaptive_method = cv2.ADAPTIVE_THRESH_MEAN_C


    img_adaptive = cv2.adaptiveThreshold(
        src=img,
        maxValue=255,
        adaptiveMethod=adaptive_method,
        thresholdType=cv2.THRESH_BINARY,
        blockSize=11,
        C=2,
    )


    show_image(img_adaptive, cmap='gray')


    return img_adaptive
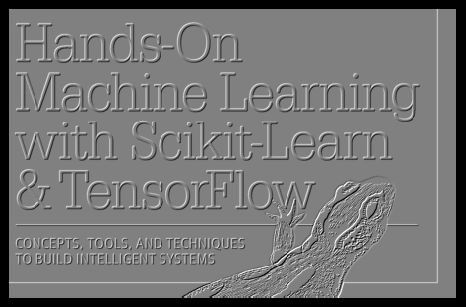
应用Sobel过滤器( doc ) (Apply Sobel filter (doc))
Sobel operators combine Gaussian smoothing and differentiation (the first derivative of the image along x or y). They are useful to detect horizontal or vertical edges and are resistant to noise. To detect both horizontal and vertical edges, we can apply the filter along x and y separately , then add the results. To read more about Sobel derivatives check this tutorial
Sobel算子结合了高斯平滑和微分(图像沿x 或 y)。 它们可用于检测水平或垂直边缘,并具有抗噪性 。 要检测水平边缘和垂直边缘,我们可以分别沿x和y应用滤镜,然后添加结果。 要了解有关Sobel衍生品的更多信息,请查看本教程
def apply_sobel(img, direction):


    img = cv2.cvtColor(
        src=img,
        code=cv2.COLOR_RGB2GRAY,
    )


    if direction == 'h':
        dx, dy = 0, 1


    elif direction == 'v':
        dx, dy = 1, 0


    img_sobel = cv2.Sobel(
        src=img,
        ddepth=cv2.CV_64F,
        dx=dx,
        dy=dy,
        ksize=5,
    )


return img_sobel应用拉普拉斯过滤器( doc ) (Apply Laplacian filter (doc))
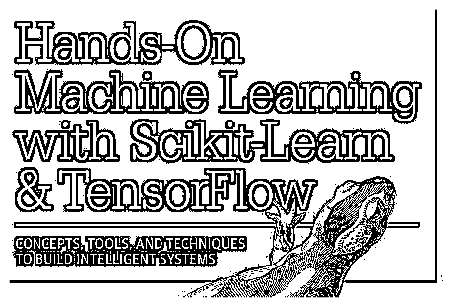
Similar to Sobel operators, Laplacian operators use differentiation, however, they use the second derivative of the image along x and y (by internally adding up the second x and y derivatives calculated using the Sobel operator). Laplacian operators are useful to detect edges (and other possibly meaningless locations where the second derivative is 0, so they should by applied only where needed). To read more about the Laplacian derivatives check this tutorial
与Sobel算子类似,Laplacian算子使用微分,但是,它们沿x和y使用图像的二阶导数(通过内部加和使用Sobel算子计算出的第二x和y导数)。 拉普拉斯算子可用于检测边缘 (以及二阶导数为0的其他可能无意义的位置,因此应仅在需要时应用它们) 。 要了解有关拉普拉斯算子的更多信息,请查看本教程。
def apply_laplacian(img):


    img = cv2.cvtColor(
        src=img,
        code=cv2.COLOR_RGB2GRAY,
    )


    img_laplacian = np.uint8(
        np.absolute(
            cv2.Laplacian(
                src=img,
                ddepth=cv2.CV_64F,
            )
        )
    )


    show_image(img_laplacian, cmap='gray')


    return img_laplacian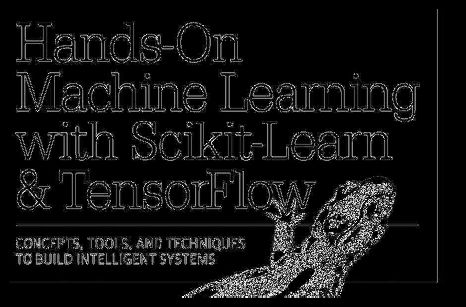
编码方式 (Encoding)
Lastly, when you do have a number of box coordinates for different regions in your image (e.g. you used a labelling tool to annotate title, sub-title, author, etc.), you don’t want to: crop each region > save cropped image locally > post a request to API using the local image, as this slows done your pipeline (and some cleaning to do)
最后,当您确实在图像中的不同区域具有多个框坐标(例如,您使用标签工具注释标题,副标题,作者等)时,您不想:裁剪每个区域>保存在本地裁剪图像>使用本地图像向API发布请求,因为这会减缓您的管道工作(以及一些清理工作)
To solve this, you can instead: crop each region > encode cropped image into memory buffer > post request using the image in memory buffer. This is faster than the first approach
要解决此问题,您可以改为:裁剪每个区域>将裁剪的图像编码到内存缓冲区中>使用内存缓冲区中的图像发布请求。 这比第一种方法快
The below shows how to encode an image into buffer and then get the data ready for the OCR request using the buffer (and how to decode the image back if you need to):
下面显示了如何将图像编码到缓冲区中,然后使用缓冲区准备好数据以进行OCR请求(以及在需要时如何将图像解码回):
_, buf = cv2.imencode(
    ext=".jpg",
    img=img,
)


data = buf.tostring()


img = cv2.imdecode(
    buf=buf,
    flags=cv2.IMREAD_UNCHANGED,
)
接下来是什么? (What is next?)
In the next article (coming soon), I go through a practical example that covers:
在下一篇文章(即将发布)中,我将通过一个实际的示例进行介绍:
- Labelling an image using an open source labelling tool 使用开源标签工具为图像添加标签
- Parsing the labelling output file to get box coordinates per region 解析标签输出文件以获取每个区域的框坐标
- Sending API requests to Azure Computer Vision OCR 将API请求发送到Azure计算机视觉OCR
- Validating the API responses against ground-truth 验证API响应的真实性
Happy coding!
编码愉快!
翻译自: https://medium.com/@DrGabrielHarris/python-how-image-processing-for-ocr-using-opencv-966acfae07a6