SpringCloud-Zuul
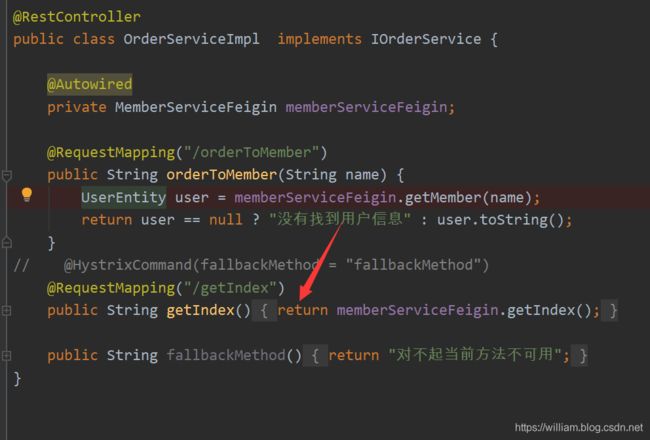
项目是在原有的SpringCloud-Feign演变而来,具体可以先参考
文章目录
- 1.代码地址
- 1.Zuul的转发
- 2.Zuul的过滤
- 3.搭建动态网关
- 4.搭建Zuul网关集群
1.代码地址
链接:https://pan.baidu.com/s/1yyl32rthrYGx17gKU_PzVA
提取码:0r4x
复制这段内容后打开百度网盘手机App,操作更方便哦
1.Zuul的转发
- 依赖
<dependencies>
    <dependency>
        <groupId>org.springframework.cloudgroupId>
        <artifactId>spring-cloud-starter-netflix-eureka-clientartifactId>
    dependency>
    <dependency>
        <groupId>org.springframework.cloudgroupId>
        <artifactId>spring-cloud-starter-netflix-zuulartifactId>
    dependency>
dependencies>
project>
2.配置文件
###注册 中心
eureka:
  client:
    serviceUrl:
      defaultZone: http://localhost:8100/eureka/
server:
  port: 80
###网关名称
spring:
  application:
    name: service-zuul
### 配置网关反向代理
zuul:
  routes:
    api-a:
      ### 当客户端发送127.0.0.1:80/api-member/ 开头的 会被转发到会员服务
      path: /api-member/**
      serviceId: app-itmayiedu-member
    api-b:
      ### 当客户端发送127.0.0.1:80/api-order/ 开头的 会被转发到订单服务
      path: /api-order/**
      serviceId: app-itmayiedu-order
3.启动类
@SpringBootApplication
@EnableEurekaClient
@EnableZuulProxy
public class ZuulApplication {

    public static void main(String[] args) {

        SpringApplication.run(ZuulApplication.class,args);
    }
}
2.Zuul的过滤
在Zuul的服务里面创建一个过滤器
不要只关于run方法,其他方法的参数也要设置,不然会有空指针异常
@Component
public class TokenFilter extends ZuulFilter {

    @Override
    public String filterType() {

        return "pre";
    }

    @Override
    public int filterOrder() {

        return 0;
    }

    @Override
    public boolean shouldFilter() {

        return true;
    }

    @Override
    public Object run() throws ZuulException {

        // 获取上下文
        RequestContext currentContext = RequestContext.getCurrentContext();
        HttpServletRequest request = currentContext.getRequest();
        String userToken = request.getParameter("userToken");
        if (StringUtils.isEmpty(userToken)) {

            currentContext.setSendZuulResponse(false);
            currentContext.setResponseStatusCode(401);
            currentContext.setResponseBody("userToken is null");
            return currentContext;
        }
        // 否则正常执行业务逻辑.....
        return null;
    }
}
3.搭建动态网关
当我们对配置文件修改的时候,我们需要进行重启,这样不是很合理,我们可以结合SpringCloud-Config 进行整合,实现动态网关
首先我们自己创建一个网关中心服务.具体请参考
https://william.blog.csdn.net/article/details/103208309
把配置信息写入到git的文件里面

可以先提前用 config服务中心浏览器放下确认服务中心没有问题
zuul网关配置文件
###注册 中心
eureka:
  client:
    serviceUrl:
      defaultZone: http://localhost:8100/eureka/
server:
  port: 80
###网关名称
spring:
  application:
    name: service-zuul
  cloud:
    config:
      ####读取后缀
      profile: dev
      ####读取config-server注册地址
      discovery:
        service-id: config-server
        enabled: true
#zuul:
#  routes:
#    api-a:
#      ### 当客户端发送127.0.0.1:80/api-member/ 开头的 会被转发到会员服务
#      path: /api-member/**
#      serviceId: app-itmayiedu-member
#    api-b:
#      ### 当客户端发送127.0.0.1:80/api-order/ 开头的 会被转发到订单服务
#      path: /api-order/**
#      serviceId: app-itmayiedu-order

#### 网上有人让写这段配置信息,但是我这里加上就报错,建议根据情况而定选择,我这里删除
#management:
#  endpoint:
#  endpoints:
#    web:
#      exposure:
#        include: "*"
启动类
@SpringBootApplication
@EnableEurekaClient
@EnableZuulProxy
public class ZuulApplication {

    public static void main(String[] args) {

        SpringApplication.run(ZuulApplication.class,args);
    }

    @RefreshScope
    @ConfigurationProperties("zuul")
    public ZuulProperties zuulProperties(){

        ZuulProperties zuulProperties = new ZuulProperties();
        return zuulProperties;
    }
}
4.搭建Zuul网关集群
原理:
当客户进行访问的时候,通过nginx的方向代理和负载均衡,分别进行轮训到zuul网关集群中,最后通过网关把请求发送到服务器当中
1.修改nginx负载均衡配置
	 upstream  backServer{

	    server 127.0.0.1:81;  # 两个网关的集群
	    server 127.0.0.1:82;
	}


    #gzip  on;

    server {

        listen       80;
        server_name  localhost; # 类似 localhost:80

        #charset koi8-r;

        #access_log  logs/host.access.log  main;

        location / {

		    proxy_pass http://backServer/;  # 指定负载均衡的配置
            index  index.html index.htm;

        }
}
-
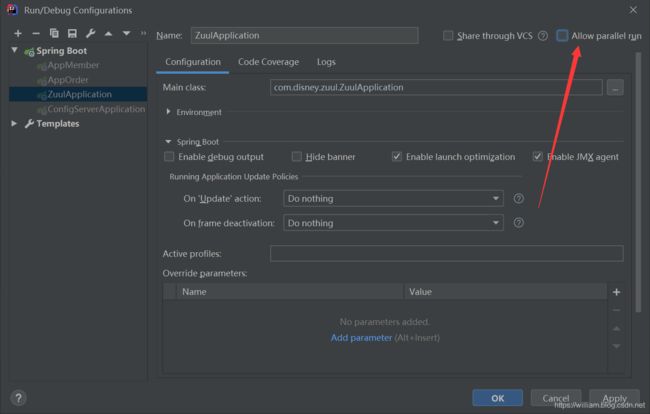
启动代码地址地面的 Eureka,Config,Member,Consumer,Zuul 网关(需要两个服务,但是我们没有必须写两个,教大家一个技巧)
当启动完81 网关的时候,勾选这个选项
3.为了看到效果,这里我打印服务的端口号
@Component
public class TokenFilter extends ZuulFilter {

    @Value("${server.port}")
    private String port;
    @Override
    public String filterType() {

        return "pre";
    }

    @Override
    public int filterOrder() {

        return 0;
    }

    @Override
    public boolean shouldFilter() {

        return true;
    }

    @Override
    public Object run() throws ZuulException {

        // 获取上下文
        System.out.println("网关"+port+"已经在启动");
        RequestContext currentContext = RequestContext.getCurrentContext();
        HttpServletRequest request = currentContext.getRequest();
        String userToken = request.getParameter("userToken");
        if (StringUtils.isEmpty(userToken)) {

            currentContext.setSendZuulResponse(false);
            currentContext.setResponseStatusCode(401);
            currentContext.setResponseBody("userToken is null");
            return currentContext;
        }
        // 否则正常执行业务逻辑.....
        return null;
    }
}


