Pytorch+ResNet18+CIFAR10:图像分类识别项目代码
一、CIFAR10
该数据集共有60000张彩色图像,这些图像是32*32,分为10个类,每类6000张图。这里面有50000张用于训练,构成了5个训练批,每一批10000张图;另外10000用于测试,单独构成一批。测试批的数据里,取自10类中的每一类,每一类随机取1000张。抽剩下的就随机排列组成了训练批。注意一个训练批中的各类图像并不一定数量相同,总的来看训练批,每一类都有5000张图。

二、ResNet18
import torch
import torch.nn as nn
from torch.nn import functional as F

class ResBlock(nn.Module):
    def __init__(self,ch_in,ch_out,stride=2):
        super(ResBlock,self).__init__()
        self.conv1 = nn.Conv2d(ch_in,ch_out,kernel_size=3,stride=stride,padding=1) # ! (h-3+2)/2 + 1 = h/2 图像尺寸减半
        self.bn1 = nn.BatchNorm2d(ch_out)
        self.conv2 = nn.Conv2d(ch_out,ch_out,kernel_size=3,stride=1,padding=1) # ! h-3+2*1+1=h 图像尺寸没变化
        self.bn2 = nn.BatchNorm2d(ch_out)

        self.extra = nn.Sequential(
            nn.Conv2d(ch_in,ch_out,kernel_size=1,stride=stride), # ! 这句话是针对原图像尺寸写的,要进行element wise add
                                                            # ! 因此图像尺寸也必须减半,(h-1)/2+1=h/2 图像尺寸减半
            nn.BatchNorm2d(ch_out)
        )


    def forward(self,x):
        out = x
        x = torch.relu(self.bn1(self.conv1(x)))
        x = self.bn2(self.conv2(x))
        # short cut
        # ! element wise add [b,ch_in,h,w] [b,ch_out,h,w] 必须当ch_in = ch_out时才能进行相加
        out = x + self.extra(out) # todo self.extra强制把输出通道变成一致
        return out

class ResNet18(nn.Module):
    def __init__(self):
        super(ResNet18,self).__init__()
        self.conv1 = nn.Sequential(
            nn.Conv2d(3,64,kernel_size=3,stride=1,padding=1), # ! 图像尺寸不变
            nn.BatchNorm2d(64)
        )
        # 4个ResBlock
        #  [b,64,h,w] --> [b,128,h,w]
        self.block1 = ResBlock(64,128)
        #  [b,128,h,w] --> [b,256,h,w]
        self.block2 = ResBlock(128,256)
        #  [b,256,h,w] --> [b,512,h,w]
        self.block3 = ResBlock(256,512)
        #  [b,512,h,w] --> [b,512,h,w]
        self.block4 = ResBlock(512,512)

        self.outlayer = nn.Linear(512,10)

    def forward(self,x):
        x = torch.relu(self.conv1(x))
        # [b,64,h,w] --> [b,1024,h,w]
        x = self.block1(x)
        x = self.block2(x)
        x = self.block3(x)
        x = self.block4(x)
        # print("after conv:",x.shape)
        #[b,512,h,w] --> [b,512,1,1]
        x = F.adaptive_avg_pool2d(x,[1,1])
        #flatten
        x = x.view(x.shape[0],-1)
        x = self.outlayer(x)
        return x
这里跟着某视频学习搭建了一下ResNet18,ResNet18采用的是基本残差块,CIFAR10图像尺寸是32*32,经过每一个基本残差块图像尺寸减半,最后生成深度为512的2*2大小的5feature map,采用池化降采样为1*1,最后一层通过全连接生成10分类的结果。
三、训练及测试
训练代码与数据处理代码部分如下:
import torch
import torchvision.transforms as transforms
from torch.utils.data import DataLoader
from torchvision.datasets import CIFAR10
from resnet import ResNet18
import torch.nn as nn

def get_acc(output, label):
    total = output.shape[0]
    pred_label = output.argmax(dim=1)
    num_correct = (pred_label == label).float().sum().item()
    return num_correct / total

def main():
    batchsz=64
    cifar10_train = CIFAR10('./CIFAR10',train=True,download=True,transform=transforms.Compose([
        transforms.Resize(32,32),
        transforms.ToTensor()
    ]))

    cifar10_train = DataLoader(cifar10_train,batch_size=batchsz,shuffle=True)

    cifar10_test = CIFAR10('./CIFAR10',train=False,download=True,transform=transforms.Compose([
        transforms.Resize(32,32),
        transforms.ToTensor()
    ]))

    cifar10_test = DataLoader(cifar10_test,batch_size=batchsz,shuffle=True)

    # x,label = iter(cifar10_train).next()
    # print('x:',x.shape,'label:',label.shape)

    device = torch.device('cuda:0')
    model = ResNet18()
    model.to(device)
    # print(model)
    criteon = nn.CrossEntropyLoss().to(device) #包含了softmax操作
    optimizer = torch.optim.Adam(model.parameters(),lr=1e-3)
    for epoch in range(10):
        train_loss = 0
        train_acc = 0
        model.train()
        for batchidx,(x,label) in enumerate(cifar10_train):
            #[b,3,32,32]
            #[b]
            x,label = x.to(device),label.to(device)
            # y_:[b,10]
            # label:[b]
            y_ = model(x)
            loss = criteon(y_,label)

            #反向传播
            optimizer.zero_grad()
            loss.backward()
            optimizer.step()

            train_loss += loss.item()
            train_acc += get_acc(y_,label)

        model.eval()
        print("epoch:%d,train_loss:%f,train_acc:%f"%(epoch, train_loss / len(cifar10_train),
            train_acc / len(cifar10_train)))
        torch.save(model,'./ResNet18_%d.pt'%(epoch))


if __name__ == "__main__":
    main()
训练了10个epoch的结果:

单张图片测试代码:
import torch
import torch.nn as nn
from resnet import ResNet18
from PIL import Image,ImageDraw,ImageFont
import numpy as np
import torchvision.transforms as transform

CIFAR10_class = ['airplane','automobile','brid','cat','deer','dog','frog','horse','ship','truck']
model_path = './ResNet18_9.pt'
# device = torch.device('cuda:0')
model = torch.load(model_path)
# model.to(device)

'''
读入一张图片
转换成model可以处理的格式
'''
def readImage(path='2.jpg'):
    mode = Image.open(path)
    transform1 = transform.Compose([
        transform.Resize((32,32)),
        transform.ToTensor()
    ])
    mode = transform1(mode)
    return mode

'''
在图片上添加预测标签
在图片上添加数字,imageFile为要添加数字的图片文件,fontFile为字体文件,
targetImageFile为添加数字后保存的图片文件,txtnum为添加的数字
'''
def DrawImageTxt(imageFile,targetImageFile,txtnum):
    #设置字体大小
    font = ImageFont.truetype('abc.ttf', 50)
    #打开文件
    im = Image.open(imageFile)
    #字体坐标
    draw = ImageDraw.Draw(im)
    draw.text((0,0), txtnum , (255,255,0), font=font)

    #保存
    im.save(targetImageFile)
    #关闭
    im.close()

if __name__ == "__main__":
    img = readImage("./2.jpg")
    # print(img.shape)
    img.unsqueeze_(0) #增加一个维度 第0维度增加
    # print(img.shape)

    '''
    预测
    '''
    img = img.cuda()
    pre = model(img).argmax(dim=1)
    print(pre)
    imageFile = './2.jpg'
    targetImageFile = './2_pre.jpg'
    txtnum = CIFAR10_class[pre.item()]
    DrawImageTxt(imageFile,targetImageFile,txtnum)
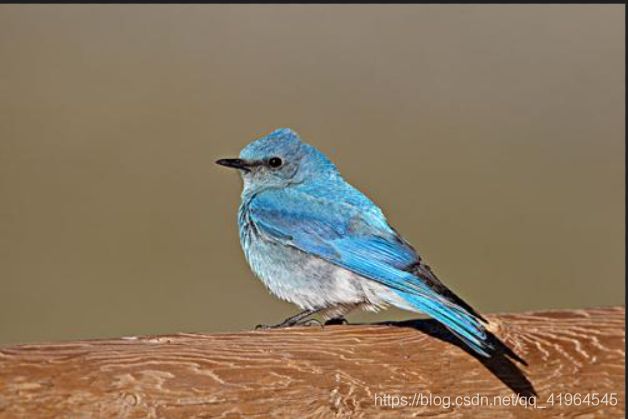
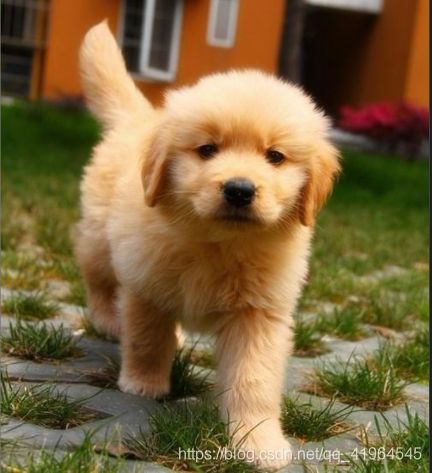
测试图片:


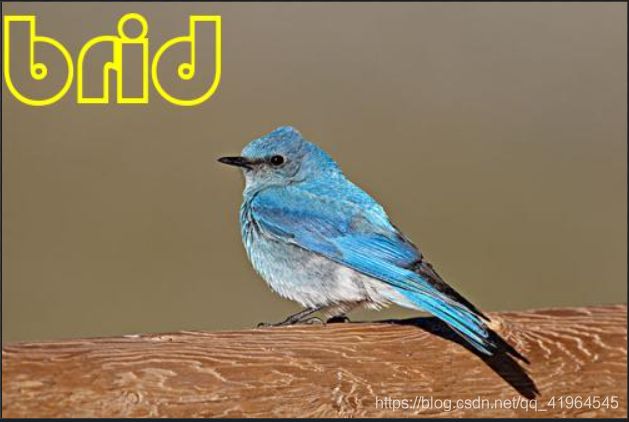
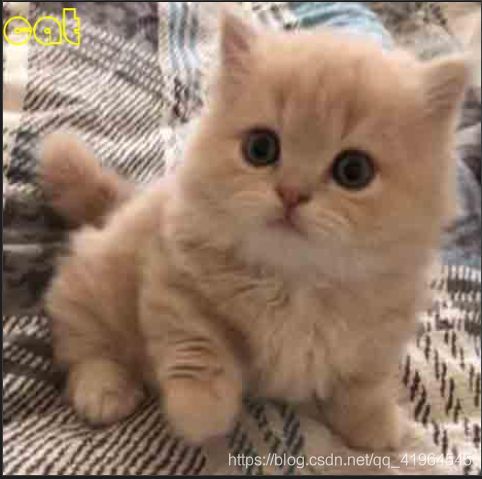
测试结果:


整个代码上传至CSDN
下载链接:https://download.csdn.net/download/qq_41964545/15600385
如果您觉得对你有帮助的话,就请您帮我点个赞吧!