YOLOX训练自己的数据集(包含自己数据集,预训练模型,代码公开),踩扁很多细节坑全部补充

首先 看下作者给的性能对比图

YOLOX 是旷视开源的高性能检测器。旷视的研究者将解耦头、数据增强、无锚点以及标签分类等目
标检测领域的优秀进展与 YOLO 进行了巧妙的集成组合,提出了 YOLOX,不仅实现了超越 YOLOv3、
YOLOv4 和 YOLOv5 的 AP,而且取得了极具竞争力的推理速度。
YOLOX训练自己的数据集(包含自己数据集,预训练模型,代码公开),踩扁很多细节坑全部补充_第1张图片
YOLOX: Exceeding YOLO Series in 2021

作者单位:旷视科技
代 码:https://github.com/Megvii-BaseDetection/YOLOX
论 文:https://arxiv.org/abs/2107.08430

其中YOLOX-L版本以 68.9 FPS 的速度在 COCO 上实现了 50.0% AP,比 YOLOv5-L 高出 1.8% AP!
还提供了支持 ONNX、TensorRT、NCNN 和 Openvino 的部署版本。

第一、配置环境

操作系统:Ubuntu18.04
torch:1.7.1
cuda:11.0
cudnn:7.6.5
torchvision:0.8.2

其他版本都可以训练,没啥问题。

1.1 下载源码:

**GitHub地址:**https://github.com/Megvii-BaseDetection/YOLOX,下载完成后放到自己路径的目录,
然后用PyCharm打开。

git clone git@github.com:Megvii-BaseDetection/YOLOX.git
cd YOLOX
pip3 install -U pip 
pip3 install -r requirements.txt              # 在requirements.txt 里我把torch注释掉了
pip3 install -v -e .  # or  python3 setup.py develop or python setup.py install

YOLOX训练自己的数据集(包含自己数据集,预训练模型,代码公开),踩扁很多细节坑全部补充_第2张图片

默认requirements.txt安装的话是安装最新版的2.0,而我在跑代码的时候因为2.0版本的问题报错了,cuda加载不上,如果你遇到同样的问题的话建议独自安装1.7.1版本的torch。

1.2 安装依赖包

安装nvidia混合精度库apex:
APEX是英伟达开源的,完美支持PyTorch框架,用于改变数据格式来减小模型显存占用的工具。其
中最有价值的是amp(Automatic Mixed Precision),将模型的大部分操作都用Float16数据类型测
试,一些特别操作仍然使用Float32。并且用户仅仅通过三行代码即可完美将自己的训练代码迁移到该模
型。实验证明,使用Float16作为大部分操作的数据类型,并没有降低参数,在一些实验中,反而由于可
以增大Batch size,带来精度上的提升,以及训练速度上的提升。

git clone https://github.com/NVIDIA/apex
cd apex
pip3 install -v --disable-pip-version-check --no-cache-dir --global-option="--cpp_ext" --global-option="--cuda_ext" ./

在这里可能会遇到,cuda和torch版本不一致的问题:
GPU是3090,cuda是11.2,pytorch还没有11.2的版本,所以用的11.1的,所以会有这样的报错,若你的cuda版本不是很高,则可以进行pytorch版本的改变;若是感觉麻烦,可以直接忽略版本检查。

torch.__version__  = 1.9.0+cu111


    /tmp/pip-req-build-6xbwecb4/setup.py:67: UserWarning: Option --pyprof not specified. Not installing PyProf dependencies!
      warnings.warn("Option --pyprof not specified. Not installing PyProf dependencies!")

    Compiling cuda extensions with
    nvcc: NVIDIA (R) Cuda compiler driver
    Copyright (c) 2005-2021 NVIDIA Corporation
    Built on Sun_Feb_14_21:12:58_PST_2021
    Cuda compilation tools, release 11.2, V11.2.152
    Build cuda_11.2.r11.2/compiler.29618528_0
    from /usr/local/cuda/bin

    Traceback (most recent call last):
      File "", line 1, in <module>
      File "/tmp/pip-req-build-6xbwecb4/setup.py", line 171, in <module>
        check_cuda_torch_binary_vs_bare_metal(torch.utils.cpp_extension.CUDA_HOME)
      File "/tmp/pip-req-build-6xbwecb4/setup.py", line 102, in check_cuda_torch_binary_vs_bare_metal
        raise RuntimeError("Cuda extensions are being compiled with a version of Cuda that does " +
    RuntimeError: Cuda extensions are being compiled with a version of Cuda that does not match the version used to compile Pytorch binaries.  Pytorch binaries were compiled with Cuda 11.1.
    In some cases, a minor-version mismatch will not cause later errors:  https://github.com/NVIDIA/apex/pull/323#discussion_r287021798.  You can try commenting out this check (at your own risk).
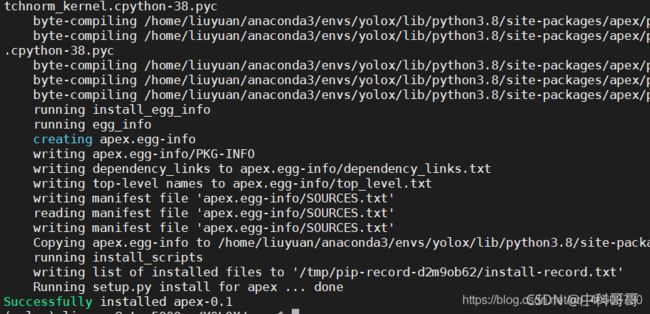
    Running setup.py install for apex ... error
ERROR: Command errored out with exit status 1: /home/liuyuan/anaconda3/envs/yolox/bin/python3.8 -u -c 'import io, os, sys, setuptools, tokenize; sys.argv[0] = '"'"'/tmp/pip-req-build-6xbwecb4/setup.py'"'"'; __file__='"'"'/tmp/pip-req-build-6xbwecb4/setup.py'"'"';f = getattr(tokenize, '"'"'open'"'"', open)(__file__) if os.path.exists(__file__) else io.StringIO('"'"'from setuptools import setup; setup()'"'"');code = f.read().replace('"'"'\r\n'"'"', '"'"'\n'"'"');f.close();exec(compile(code, __file__, '"'"'exec'"'"'))' --cpp_ext --cuda_ext install --record /tmp/pip-record-l1tq4rlf/install-record.txt --single-version-externally-managed --compile --install-headers /home/liuyuan/anaconda3/envs/yolox/include/python3.8/apex Check the logs for full command output.
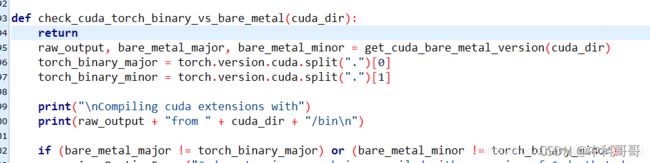
解决办法:
也就是将setup.py里面的 check_cuda_torch_binary_vs_bare_metal函数进行更改,直接return

def check_cuda_torch_binary_vs_bare_metal(cuda_dir):
    return
    raw_output, bare_metal_major, bare_metal_minor = get_cuda_bare_metal_version(cuda_dir)
    torch_binary_major = torch.version.cuda.split(".")[0]
    torch_binary_minor = torch.version.cuda.split(".")[1]

    print("\nCompiling cuda extensions with")
    print(raw_output + "from " + cuda_dir + "/bin\n")

    if (bare_metal_major != torch_binary_major) or (bare_metal_minor != torch_binary_minor):
        raise RuntimeError("Cuda extensions are being compiled with a version of Cuda that does " +
                           "not match the version used to compile Pytorch binaries.  " +
                           "Pytorch binaries were compiled with Cuda {}.\n".format(torch.version.cuda) +
                           "In some cases, a minor-version mismatch will not cause later errors:  " +
                           "https://github.com/NVIDIA/apex/pull/323#discussion_r287021798.  "
                           "You can try commenting out this check (at your own risk).")

YOLOX训练自己的数据集(包含自己数据集,预训练模型,代码公开),踩扁很多细节坑全部补充_第3张图片

然后继续安装:

pip install -v --no-cache-dir --global-option="--cpp_ext" --global-option="--cuda_ext" ./

安装成功会看到如下界面:

YOLOX训练自己的数据集(包含自己数据集,预训练模型,代码公开),踩扁很多细节坑全部补充_第4张图片

1.3 安装 pycocotools.

pip3 install cython; pip3 install 'git+https://github.com/cocodataset/cocoapi.git#subdirectory=PythonAPI'

1.4 验证环境

环境配置完后,来运行一下demo测试,看看环境是否安装成功。
下载预训练权重:https://download.csdn.net/download/weixin_38353277/43617945

将模型放到根目录下执行如下操作

python tools/demo.py image -f exps/default/yolox_s.py -c ./yolox_s.pth --path
assets/dog.jpg --conf 0.3 --nms 0.65 --tsize 640 --save_result --device gpu

参数说明:

YOLOX训练自己的数据集(包含自己数据集,预训练模型,代码公开),踩扁很多细节坑全部补充_第5张图片

注意:他这里的demo代码出错了也不会报错,直接跳出终止,所以如果你运行了发现没有如下的运行结果,可能是程序终止了,需要自己排查,我在这里遇到的问题是img的张量cuda加载不上,后面排查是因为torch1.9的问题。

在这里插入图片描述
推理后的图片保存在data文件夹中,效果还不错的样子:

YOLOX训练自己的数据集(包含自己数据集,预训练模型,代码公开),踩扁很多细节坑全部补充_第6张图片

看到上图说明基本环境没有问题了。下来就是开始训练模型了。搞起来!!!!!

首先提供本人数据集给大家:

https://download.csdn.net/download/weixin_38353277/43619443

本数据是基于VOC2007制作的,

2.制作数据集

将你的图片和标注好的json文件放一起,运行如下代码就可以了,分好数据并制做好数据集

import os
import numpy as np
import codecs
import json
from glob import glob
import cv2
import shutil
from sklearn.model_selection import train_test_split
#1.标签路径
labelme_path = "./"              #原始labelme标注数据路径
saved_path = "./VOC2007/"                #保存路径

#2.创建要求文件夹
if not os.path.exists(saved_path + "Annotations"):
    os.makedirs(saved_path + "Annotations")
if not os.path.exists(saved_path + "JPEGImages/"):
    os.makedirs(saved_path + "JPEGImages/")
if not os.path.exists(saved_path + "ImageSets/Main/"):
    os.makedirs(saved_path + "ImageSets/Main/")
    
#3.获取待处理文件
files = glob(labelme_path + "*.json")
files = [i.split("/")[-1].split(".json")[0] for i in files]

#4.读取标注信息并写入 xml
for json_file_ in files:
    json_filename = labelme_path + json_file_ + ".json"
    json_file = json.load(open(json_filename,"r",encoding="utf-8"))
    height, width, channels = cv2.imread(labelme_path + json_file_ +".jpg").shape
    with codecs.open(saved_path + "Annotations/"+json_file_ + ".xml","w","utf-8") as xml:
        xml.write('\n')
        xml.write('\t' + 'UAV_data' + '\n')
        xml.write('\t' + json_file_ + ".jpg" + '\n')
        xml.write('\t\n')
        xml.write('\t\tThe UAV autolanding\n')
        xml.write('\t\tUAV AutoLanding\n')
        xml.write('\t\tflickr\n')
        xml.write('\t\tNULL\n')
        xml.write('\t\n')
        xml.write('\t\n')
        xml.write('\t\tNULL\n')
        xml.write('\t\tNULL\n')
        xml.write('\t\n')
        xml.write('\t\n')
        xml.write('\t\t'+ str(width) + '\n')
        xml.write('\t\t'+ str(height) + '\n')
        xml.write('\t\t' + str(channels) + '\n')
        xml.write('\t\n')
        xml.write('\t\t0\n')
        for multi in json_file["shapes"]:
            points = np.array(multi["points"])
            xmin = min(points[:,0])
            xmax = max(points[:,0])
            ymin = min(points[:,1])
            ymax = max(points[:,1])
            label = multi["label"]
            if xmax <= xmin:
                pass
            elif ymax <= ymin:
                pass
            else:
                xml.write('\t\n')
                xml.write('\t\t'+ str(label)+'\n') 
                xml.write('\t\tUnspecified\n')
                xml.write('\t\t1\n')
                xml.write('\t\t0\n')
                xml.write('\t\t\n')
                xml.write('\t\t\t' + str(xmin) + '\n')
                xml.write('\t\t\t' + str(ymin) + '\n')
                xml.write('\t\t\t' + str(xmax) + '\n')
                xml.write('\t\t\t' + str(ymax) + '\n')
                xml.write('\t\t\n')
                xml.write('\t\n')
                print(json_filename,xmin,ymin,xmax,ymax,label)
        xml.write('')
        
#5.复制图片到 VOC2007/JPEGImages/下
image_files = glob(labelme_path + "*.jpg")
print("copy image files to VOC007/JPEGImages/")
for image in image_files:
    shutil.copy(image,saved_path +"JPEGImages/")
    
#6.split files for txt
txtsavepath = saved_path + "ImageSets/Main/"
ftrainval = open(txtsavepath+'/trainval.txt', 'w')
ftest = open(txtsavepath+'/test.txt', 'w')
ftrain = open(txtsavepath+'/train.txt', 'w')
fval = open(txtsavepath+'/val.txt', 'w')
total_files = glob("./VOC2007/Annotations/*.xml")
total_files = [i.split("/")[-1].split(".xml")[0] for i in total_files]
#test_filepath = ""
for file in total_files:
    ftrainval.write(file + "\n")
#test
#for file in os.listdir(test_filepath):
#    ftest.write(file.split(".jpg")[0] + "\n")
#split
train_files,val_files = train_test_split(total_files,test_size=0.15,random_state=42)
#train
for file in train_files:
    ftrain.write(file + "\n")
#val
for file in val_files:
    fval.write(file + "\n")

ftrainval.close()
ftrain.close()
fval.close()
#ftest.close()

test 数据需要的话,把最后一行解注释就可以了。数据就做好了!!!!!!!!!!!!!!!!!

数据格式如下:

├── data #手动创建data、VOCdevkit、VOC2007、Annotations、JPEGImages、ImageSets、Main这些文件夹
│   ├── VOCdevkit
│   │   ├── VOC2007
│   │   │   ├── Annotations #把test.txt、trainval.txt对应的xml文件放在这
│   │   │   ├── JPEGImages #把test.txt、trainval.txt对应的图片放在这
│   │   │   ├── ImageSets
│   │   │   │   ├── Main
│   │   │   │   │   ├── test.txt 
│   │   │   │   │   ├── trainval.txt
————————————————

YOLOX训练自己的数据集(包含自己数据集,预训练模型,代码公开),踩扁很多细节坑全部补充_第7张图片
VOC的目录如下,所以要新建data/VOCdevkit目录,然后将上面的结果复制进去

YOLOX训练自己的数据集(包含自己数据集,预训练模型,代码公开),踩扁很多细节坑全部补充_第8张图片
到这里,数据集制作完成。

三、 修改数据配置文件

3.1 修改类别

文件路径:exps/example/yolox_voc/yolox_voc_s.py,本次使用的类别有2类,所以将num_classes修改为2。

YOLOX训练自己的数据集(包含自己数据集,预训练模型,代码公开),踩扁很多细节坑全部补充_第9张图片

打开yolox/data/datasets/voc_classes.py文件,修改为自己的类别名:

YOLOX训练自己的数据集(包含自己数据集,预训练模型,代码公开),踩扁很多细节坑全部补充_第10张图片

3.2 修改数据集目录

文件路径:exps/example/yolox_voc/yolox_voc_s.py,data_dir修改为“./data/VOCdevkit”,image_sets删除2012的,最终结果如下:

YOLOX训练自己的数据集(包含自己数据集,预训练模型,代码公开),踩扁很多细节坑全部补充_第11张图片
接着往下翻,修改test的路径,如下图:
YOLOX训练自己的数据集(包含自己数据集,预训练模型,代码公开),踩扁很多细节坑全部补充_第12张图片

打开yolox/data/datasets/voc.py,这里面有个错误。画框位置,将大括号的“%s”去掉,否则验证的时候一直报找不到文件的错误。

YOLOX训练自己的数据集(包含自己数据集,预训练模型,代码公开),踩扁很多细节坑全部补充_第13张图片
修改完成后,再次编译YOLOX,执行

python setup.py install

4. 训练

推荐使用命令行的方式训练。
执行命令:

python tools/train.py -f exps/example/yolox_voc/yolox_voc_s.py -d 1 -b 4 --fp16
-c yolox_s.pth

就可以开始训练了。如果不喜欢使用命令行的方式,想直接运行train.py,那就需要就如train.py修
改参数了。首先把train.py从tools里面复制一份到工程的根目录(建议这样做,否则需要修改的路径比
较多,新手容易犯错误)。我喜欢写成shell,方便!
如图
YOLOX训练自己的数据集(包含自己数据集,预训练模型,代码公开),踩扁很多细节坑全部补充_第14张图片
打开,修改里面的参数。需要修改的参数如下:

parser.add_argument("-b", "--batch-size", type=int, default=4, help="batch
size")
parser.add_argument(
"-d", "--devices", default=1, type=int, help="device for training"
)
parser.add_argument(
"-f",
"--exp_file",
default="exps/example/yolox_voc/yolox_voc_s.py",
type=str,
help="plz input your expriment description file",
)
parser.add_argument("-c", "--ckpt", default='yolox_s.pth', type=str,
help="checkpoint file")
parser.add_argument(
"--fp16",
dest="fp16",
default=True,
action="store_true",
help="Adopting mix precision training.",
)

按照上面的参数配置就可以运行了,如下图:
YOLOX训练自己的数据集(包含自己数据集,预训练模型,代码公开),踩扁很多细节坑全部补充_第15张图片
如果训练了一段时间,再想接着以前的模型再训练,应该如何做呢?修改train.py的参数即可,
需要修改的参数如下:

parser.add_argument(
"--resume", default=True, action="store_true", help="resume training"
)
parser.add_argument("-c", "--ckpt",
default='YOLOX_outputs/yolox_voc_s/best_ckpt.pth', type=str, help="checkpoint
file")
parser.add_argument(
"-e",
"--start_epoch",
default=100,
type=int,
help="resume training start epoch",
)

运行指令:

python tools/train.py -f exps/example/yolox_voc/yolox_voc_s.py -d 1 -b 4 -c
YOLOX_outputs/yolox_voc_s/latest_ckpt.pth.tar -resume -start_epoch=100

再次训练,你发现epoch不是从0开始了。
YOLOX训练自己的数据集(包含自己数据集,预训练模型,代码公开),踩扁很多细节坑全部补充_第16张图片

5 测试

测试的时候需要改动三个地方:很关键哈

5.1 修改加载的数据模型格式

gedit exps/example/yolox_voc/yolox_voc_s.py

YOLOX训练自己的数据集(包含自己数据集,预训练模型,代码公开),踩扁很多细节坑全部补充_第17张图片

YOLOX训练自己的数据集(包含自己数据集,预训练模型,代码公开),踩扁很多细节坑全部补充_第18张图片

YOLOX训练自己的数据集(包含自己数据集,预训练模型,代码公开),踩扁很多细节坑全部补充_第19张图片

然后修改第二处文件

分别在yolox/data/datasets/init.py、yolox/evaluators/init.py两个文件中添加:

YOLOX训练自己的数据集(包含自己数据集,预训练模型,代码公开),踩扁很多细节坑全部补充_第20张图片
YOLOX训练自己的数据集(包含自己数据集,预训练模型,代码公开),踩扁很多细节坑全部补充_第21张图片
修改第三处文件
运行之前的demo.py文件,但是需要修改一下demo.py,导入VOC_classes,然后修改可视化函数的传参
YOLOX训练自己的数据集(包含自己数据集,预训练模型,代码公开),踩扁很多细节坑全部补充_第22张图片
YOLOX训练自己的数据集(包含自己数据集,预训练模型,代码公开),踩扁很多细节坑全部补充_第23张图片
最后,修改exps/default/yolox_s.py文件
YOLOX训练自己的数据集(包含自己数据集,预训练模型,代码公开),踩扁很多细节坑全部补充_第24张图片
修改你的类别数,不加的话会按照默认的coco 80类初始化网络,然后训练的权值无法加载会中断程序。这里我把best的权重放到了weights文件夹下,如果不修改运行后像这样:
在这里插入图片描述

修改完成后就可以预测了,执行指令:

python tools/demo.py image -f exps/example/yolox_voc/yolox_voc_s.py -c
YOLOX_outputs/yolox_voc_s/best_ckpt.pth --path ./assets/aircraft_107.jpg --
conf 0.3 --nms 0.65 --tsize 640 --save_result --device gpu

运行结果:
YOLOX训练自己的数据集(包含自己数据集,预训练模型,代码公开),踩扁很多细节坑全部补充_第25张图片
YOLOX训练自己的数据集(包含自己数据集,预训练模型,代码公开),踩扁很多细节坑全部补充_第26张图片
YOLOX训练自己的数据集(包含自己数据集,预训练模型,代码公开),踩扁很多细节坑全部补充_第27张图片
YOLOX训练自己的数据集(包含自己数据集,预训练模型,代码公开),踩扁很多细节坑全部补充_第28张图片
YOLOX训练自己的数据集(包含自己数据集,预训练模型,代码公开),踩扁很多细节坑全部补充_第29张图片
YOLOX训练自己的数据集(包含自己数据集,预训练模型,代码公开),踩扁很多细节坑全部补充_第30张图片

如果想批量预测图片,将图片放在一起assets文件夹下,执行下面指令:

python tools/demo.py image -f exps/example/yolox_voc/yolox_voc_s.py -c YOLOX_outputs/yolox_voc_s/best_ckpt.pth --path ./assets/ --conf 0.3 --nms 0.65 --tsize 640 --save_result --device gpu

效果感觉也还行吧,和v5s的效果差不多,精度也比较接近。

踩的坑

1.训练时:

YOLOX训练自己的数据集(包含自己数据集,预训练模型,代码公开),踩扁很多细节坑全部补充_第31张图片

你可能会遇到这样的问题,在迭代第二轮的时候迭代出来的内容为None,这时候需要去yolox/data/data_prefetcher.py文件下修改:

YOLOX训练自己的数据集(包含自己数据集,预训练模型,代码公开),踩扁很多细节坑全部补充_第32张图片
注释掉后面三行,改为pass。然后继续训练,正常训练后的输出如下,每两个轮次评估一次,可以在yolox_voc_s.py中修改self.eval_interval = 2来选择,这里只用了两百张左右的图片训练,可以看到收敛的速度非常的快,在两轮后已经有这么高的精度了:
YOLOX训练自己的数据集(包含自己数据集,预训练模型,代码公开),踩扁很多细节坑全部补充_第33张图片

  1. RuntimeError: DataLoader worker (pid(s) 9368,12520, 6392, 7384) exited unexpectedly

错误原因:torch.utils.data.DataLoader中的num_workers错误
将num_workers改为0即可,0是默认值。
num_workers是用来指定开多进程的数量,默认值为0,表示不启用多进程。
打开yolox/exp/yolox_base.py,将data_num_workers设置为0,如下图:

YOLOX训练自己的数据集(包含自己数据集,预训练模型,代码公开),踩扁很多细节坑全部补充_第34张图片
将num_workers设置为0,程序报错,并提示设置环境变量KMP_DUPLICATE_LIB_OK=TRUE
那你可以在设置环境变量KMP_DUPLICATE_LIB_OK=TRUE
或者使用临时环境变量:(在代码开始处添加这行代码)

在tools/train.py中加入:

import os
os.environ[‘KMP_DUPLICATE_LIB_OK’] = ‘TRUE’

YOLOX训练自己的数据集(包含自己数据集,预训练模型,代码公开),踩扁很多细节坑全部补充_第35张图片
3. RuntimeError: cuDNN error: CUDNN_STATUS_INTERNAL_ERROR

报的错误,把训练,测试 时的 -“-o”去掉后就正常了。

  1. 如果是服务器,需要指定用哪张卡
  2. 在tools/train.py 前面加上:

import os
os.environ[“CUDA_VISIBLE_DEVICES”] = ‘2,3’ 注意训练时的参数-d 就是2,用显卡的个数。

总算是搞完了,写博客不易,给个赞再走呗,哈哈哈哈!!!!

需要本人源码的,可以私信我,点赞再走!!!!!!!!!!!!!!!!!!!

你可能感兴趣的:(yolov,系列,ubuntu,ubuntu,深度学习,视觉检测,目标检测,人工智能)