使用labelme制作自己的深度学习图像分割数据集
要实现深度学习图像分割应用,首先要获取图像分割标注数据,比如PASCAL VOC、COCO、SBD等大型数据集,但这些数据集主要用于训练预训练模型和评价分割模型精度性能,针对实际应用还需要我们根据项目需求制作自己的训练数据集。这里介绍一种基于labelme图像标注工具的图像分割数据集制作流程。
一、安装图像标注工具labelme
pip install labelme==3.6
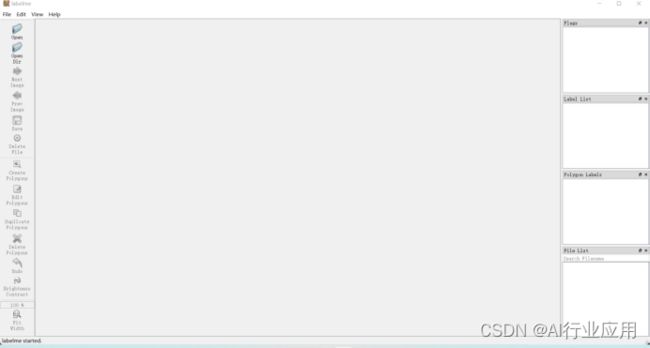
安装完成后在终端输入命令labelme,如果出现标注软件界面,则证明安装成功。
二、图像标注
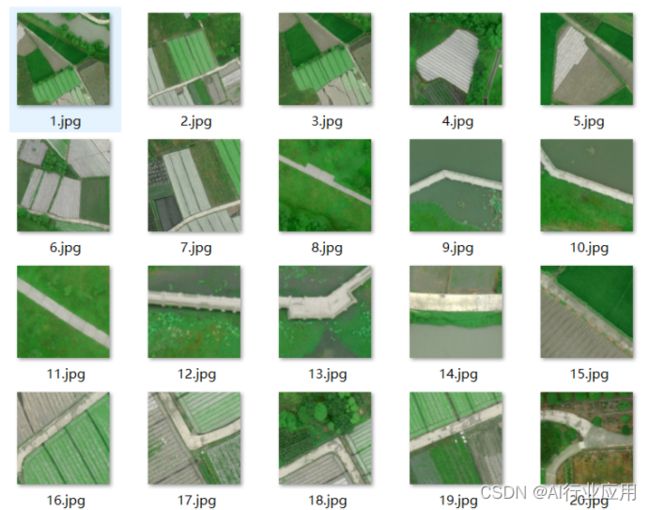
首先获取应用场景下足够多的图像,根据需要将图像裁剪到固定尺寸,比如后期使用Unet模型训练,那么需要将图像裁剪为572*572,这些图像上包含了需要检测的各种类别。以遥感图像道路分割为例,这里收集了20张图像作为数据集。
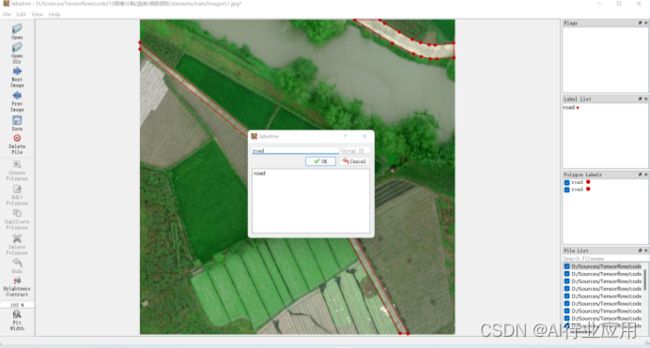
启动labelme后,点击OpenDir打开数据集路径,通过点击create polygongs开始在图像上根据目标形状进行区域绘制,绘制完成后双击鼠标,在弹出窗口中输入类别名称。
完成所有图像的分割标注后,每张图像会生成对应的json文件,点击保存,进行下一步处理。
三、制作分割实例图像
图像标注后,生成的json文件是保存的分割边界坐标,还需要进一步处理,将描述文件转换为分割实例图像。通过以下脚本进行处理。
import glob
import json
import os
import os.path as osp
import numpy as np
import PIL.Image
import labelme

def main():
    input_dir = './datasets/train/images/'
    output_dir= 'data_dataset_voc'
    labels = './label.txt'

    os.makedirs(output_dir)
    os.makedirs(osp.join(output_dir, 'JPEGImages'))
    os.makedirs(osp.join(output_dir, 'SegmentationClass'))
    os.makedirs(osp.join(output_dir, 'SegmentationClassPNG'))
    os.makedirs(osp.join(output_dir, 'SegmentationClassVisualization'))
    os.makedirs(osp.join(output_dir, 'SegmentationObject'))
    os.makedirs(osp.join(output_dir, 'SegmentationObjectPNG'))
    os.makedirs(osp.join(output_dir, 'SegmentationObjectVisualization'))
    print('Creating dataset:', output_dir)

    class_names = []
    class_name_to_id = {}
    for i, line in enumerate(open(labels).readlines()):
        class_id = i - 1  # starts with -1
        class_name = line.strip()
        class_name_to_id[class_name] = class_id
        if class_id == -1:
            assert class_name == '__ignore__'
            continue
        elif class_id == 0:
            assert class_name == '_background_'
        class_names.append(class_name)
    class_names = tuple(class_names)
    print('class_names:', class_names)
    out_class_names_file = osp.join(output_dir, 'class_names.txt')
    with open(out_class_names_file, 'w') as f:
        f.writelines('\n'.join(class_names))
    print('Saved class_names:', out_class_names_file)

    colormap = labelme.utils.label_colormap(255)

    for label_file in glob.glob(osp.join(input_dir, '*.json')):
        print('Generating dataset from:', label_file)
        with open(label_file) as f:
            base = osp.splitext(osp.basename(label_file))[0]
            out_img_file = osp.join(
                output_dir, 'JPEGImages', base + '.jpg')
            out_cls_file = osp.join(
                output_dir, 'SegmentationClass', base + '.npy')
            out_clsp_file = osp.join(
                output_dir, 'SegmentationClassPNG', base + '.png')
            out_clsv_file = osp.join(
                output_dir,
                'SegmentationClassVisualization',
                base + '.jpg',
            )
            out_ins_file = osp.join(
                output_dir, 'SegmentationObject', base + '.npy')
            out_insp_file = osp.join(
                output_dir, 'SegmentationObjectPNG', base + '.png')
            out_insv_file = osp.join(
                output_dir,
                'SegmentationObjectVisualization',
                base + '.jpg',
            )

            data = json.load(f)

            img_file = osp.join(osp.dirname(label_file), data['imagePath'])
            img = np.asarray(PIL.Image.open(img_file))
            PIL.Image.fromarray(img).save(out_img_file)

            cls, ins = labelme.utils.shapes_to_label(
                img_shape=img.shape,
                shapes=data['shapes'],
                label_name_to_value=class_name_to_id,
                type='instance',
            )
            ins[cls == -1] = 0  # ignore it.

            # class label
            labelme.utils.lblsave(out_clsp_file, cls)
            np.save(out_cls_file, cls)
            clsv = labelme.utils.draw_label(
                cls, img, class_names, colormap=colormap)
            PIL.Image.fromarray(clsv).save(out_clsv_file)

            # instance label
            labelme.utils.lblsave(out_insp_file, ins)
            np.save(out_ins_file, ins)
            instance_ids = np.unique(ins)
            instance_names = [str(i) for i in range(max(instance_ids) + 1)]
            insv = labelme.utils.draw_label(ins, img, instance_names)
            PIL.Image.fromarray(insv).save(out_insv_file)


if __name__ == '__main__':
    main()
运行脚本,生成分割实例图像。
接下来,新建一个datasets目录,在datasets下新建train和validation文件夹,trian和validation目录下分别新建images和instance文件夹,将原始图像放入images,分割实例图像放入validation。
为了方便后续的训练,还需要将分割实例图像转换为标签图像,由于这里只进行单一类别分割,标签图像只需要用0和1两种值标注,因此生成的标签图像几乎为黑。
通过以下脚本生成标签图像:
import glob
import cv2
import os

for item in glob.glob('./train/instances/' + '*.png'):
    img = cv2.imread(item, 0)
    img[img == 38] = 1
    img = cv2.resize(img, (388, 388))

    os.remove(item)
    cv2.imwrite(item, img)
生成标签图像后,会自动删除原来的分割实例图像。
到这里,图像分割数据集制作已经完成了,接下来就可以开始模型搭建和训练了。


