选择类似RabbitMQ全功能的消息代理。安装消息代理后,以支持STOMP的情况情况运行服务。
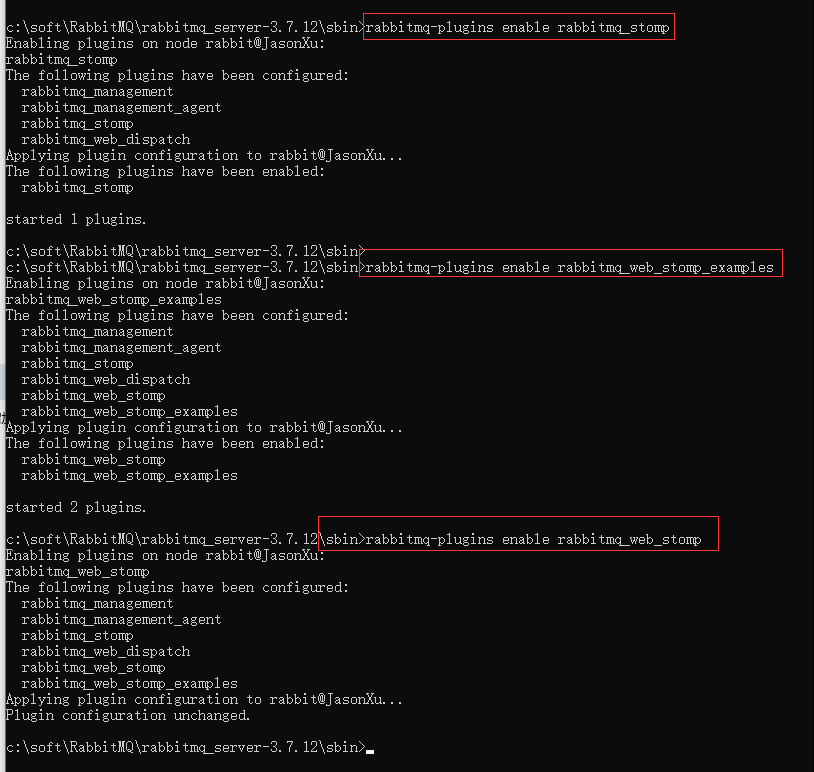
开启rabbitmq_web_stomp插件
我们在RabbitMQ上启动rabbitmq_web_stomp插件
rabbitmq-plugins enable rabbitmq_stomp
rabbitmq-plugins enable rabbitmq_web_stomp_examples
rabbitmq-plugins enable rabbitmq_web_stomp
Springboot集成
github代码:代码
配置类 : RabbitMQConfig
package com.xjxxxc.rabbitmqdemo;

import org.springframework.amqp.core.AcknowledgeMode;
import org.springframework.amqp.core.Binding;
import org.springframework.amqp.core.BindingBuilder;
import org.springframework.amqp.core.DirectExchange;
import org.springframework.amqp.core.Message;
import org.springframework.amqp.core.Queue;
import org.springframework.amqp.rabbit.connection.CachingConnectionFactory;
import org.springframework.amqp.rabbit.connection.ConnectionFactory;
import org.springframework.amqp.rabbit.core.ChannelAwareMessageListener;
import org.springframework.amqp.rabbit.listener.SimpleMessageListenerContainer;
import org.springframework.context.annotation.Bean;
import org.springframework.context.annotation.Configuration;

/**
 * @author: Jason Xu
 * @Date: 2019年3月30日
 * @description:  RabiitMQ配置类
 */
@Configuration
public class RabbitMQConfig {
    /** 消息交换机的名字*/
    public static final String EXCHANGE = "my-mq-exchange";
    /** 队列key1*/
    public static final String ROUTINGKEY1 = "queue_one_key1";
    /** 队列key2*/
    public static final String ROUTINGKEY2 = "queue_one_key2";

    /**
     * @Title: connectionFactory
     * @Description: 配置链接信息
     * @return ConnectionFactory
     */
    @Bean
    public ConnectionFactory connectionFactory() {
        CachingConnectionFactory connectionFactory = new CachingConnectionFactory("127.0.0.1", 5672);

        connectionFactory.setUsername("guest");
        connectionFactory.setPassword("guest");
        connectionFactory.setVirtualHost("/");
        connectionFactory.setPublisherConfirms(true); // 必须要设置
        return connectionFactory;
    }

    /**
     *
     * 针对消费者配置
        FanoutExchange: 将消息分发到所有的绑定队列,无routingkey的概念
        HeadersExchange :通过添加属性key-value匹配
        DirectExchange:按照routingkey分发到指定队列
        TopicExchange:多关键字匹配
     */
    /**
     * @Title: defaultExchange
     * @Description: 配置消息交换机
     * FanoutExchange: 将消息分发到所有的绑定队列,无routingkey的概念
        HeadersExchange :通过添加属性key-value匹配
        DirectExchange:按照routingkey分发到指定队列
        TopicExchange:多关键字匹配
     * @return DirectExchange
     */
    @Bean
    public DirectExchange defaultExchange() {
        return new DirectExchange(EXCHANGE, true, false);
    }

    /**
     * @Title: queue
     * @Description:  配置消息队列1,针对消费者配置
     * @return Queue
     */
    @Bean
    public Queue queue() {
        //队列持久
        return new Queue("queue_one", true);

    }

    /**
     * @Title: binding
     * @Description: 将消息队列1与交换机绑定,针对消费者配置
     * @return
     */
    @Bean
    public Binding binding() {
        return BindingBuilder.bind(queue()).to(defaultExchange()).with(RabbitMQConfig.ROUTINGKEY1);
    }

    /**
     * @Title: queue1
     * @Description: 配置消息队列2,针对消费者配置
     * @return
     */
    @Bean
    public Queue queue1() {
         //队列持久
        return new Queue("queue_one1", true);

    }

    /**
     * 将消息队列2与交换机绑定
     * 针对消费者配置
     * @return
     */
    @Bean
    public Binding binding1() {
        return BindingBuilder.bind(queue1()).to(defaultExchange()).with(RabbitMQConfig.ROUTINGKEY2);
    }

    /**
     * 接受消息的监听,这个监听会接受消息队列1的消息
     * 针对消费者配置
     * @return
     */
    @Bean
    public SimpleMessageListenerContainer messageContainer() {
        SimpleMessageListenerContainer container = new SimpleMessageListenerContainer(connectionFactory());
        container.setQueues(queue());
        container.setExposeListenerChannel(true);
        container.setMaxConcurrentConsumers(1);
        container.setConcurrentConsumers(1);
        container.setAcknowledgeMode(AcknowledgeMode.MANUAL); //设置确认模式手工确认
        container.setMessageListener(new ChannelAwareMessageListener() {

            public void onMessage(Message message, com.rabbitmq.client.Channel channel) throws Exception {
                byte[] body = message.getBody();
                System.out.println("收到消息 : " + new String(body));
                channel.basicAck(message.getMessageProperties().getDeliveryTag(), false); //确认消息成功消费

            }

        });
        return container;
    }

    /**
     * 接受消息的监听,这个监听会接受消息队列1的消息
     * 针对消费者配置
     * @return
     */
    @Bean
    public SimpleMessageListenerContainer messageContainer2() {
        SimpleMessageListenerContainer container = new SimpleMessageListenerContainer(connectionFactory());
        container.setQueues(queue1());
        container.setExposeListenerChannel(true);
        container.setMaxConcurrentConsumers(1);
        container.setConcurrentConsumers(1);
        container.setAcknowledgeMode(AcknowledgeMode.MANUAL); //设置确认模式手工确认
        container.setMessageListener(new ChannelAwareMessageListener() {

            public void onMessage(Message message, com.rabbitmq.client.Channel channel) throws Exception {
                byte[] body = message.getBody();
                System.out.println("queue1 收到消息 : " + new String(body));
                channel.basicAck(message.getMessageProperties().getDeliveryTag(), false); //确认消息成功消费

            }

        });
        return container;
    }
}
测试发送消息的控制层 : SendController
package com.xjxxxc.rabbitmqdemo;

import java.util.UUID;

import org.springframework.amqp.rabbit.core.RabbitTemplate;
import org.springframework.amqp.rabbit.support.CorrelationData;
import org.springframework.web.bind.annotation.RequestMapping;
import org.springframework.web.bind.annotation.RestController;

/**
 * @author: Jason Xu
 * @Date: 2019年3月30日
 * @description:  测试RabbitMQ发送消息的Controller
 */
@RestController
public class SendController implements RabbitTemplate.ConfirmCallback {
    private RabbitTemplate rabbitTemplate;

    /**
     * @Title: SendController
     * @Description:  配置发送消息的rabbitTemplate,因为是构造方法,所以不用注解Spring也会自动注入。
     * @param rabbitTemplate
     */
    public SendController(RabbitTemplate rabbitTemplate) {
        this.rabbitTemplate = rabbitTemplate;
        //设置消费回调
        this.rabbitTemplate.setConfirmCallback(this);
    }

    /**
     * @Title: send1
     * @Description: 向消息队列1中发送消息
     * @param msg
     * @return String
     */
    @RequestMapping("send1")
    public String send1(String msg) {
        String uuid = UUID.randomUUID().toString();
        CorrelationData correlationId = new CorrelationData(uuid);
        rabbitTemplate.convertAndSend(RabbitMQConfig.EXCHANGE, RabbitMQConfig.ROUTINGKEY1, msg, correlationId);
        return null;
    }

    /**
     * @Title: send2
     * @Description: 向消息队列2中发送消息
     * @param msg
     * @return String
     */
    @RequestMapping("send2")
    public String send2(String msg) {
        String uuid = UUID.randomUUID().toString();
        CorrelationData correlationId = new CorrelationData(uuid);
        rabbitTemplate.convertAndSend(RabbitMQConfig.EXCHANGE, RabbitMQConfig.ROUTINGKEY2, msg, correlationId);
        return null;
    }

    /**
     * @Title: confirm
     * @Description: 消息的回调,主要是实现RabbitTemplate.ConfirmCallback接口
     * 注意,消息回调只能代表消息发送成功,不能代表消息被成功处理
     * @param correlationData
     * @param ack
     * @param cause
     */
    public void confirm(CorrelationData correlationData, boolean ack, String cause) {
        System.out.println(" 回调id:" + correlationData);
        if (ack) {
            System.out.println("消息成功消费");
        } else {
            System.out.println("消息消费失败:" + cause + "\n重新发送");

        }
    }
}
测试
- 启动Application
- 浏览器访问:
http://localhost:9876/send1?msg=helloworld
http://localhost:9876/send2?msg=helloworld
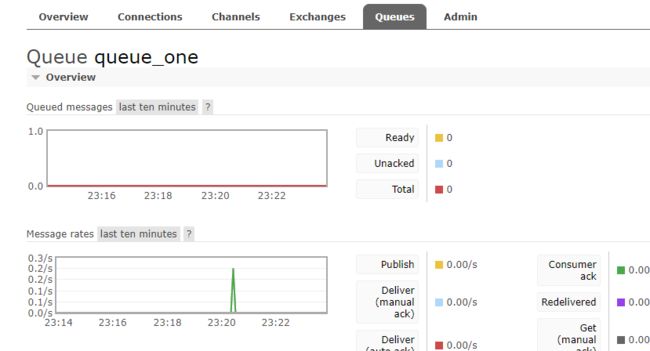
结果:(控制台可查看如下信息)
备注:个人博客同步至。


