最近项目需要对接海康威视的摄像头,兜兜转转摸索了一周,试了各种方法记录如下:
一,利用海康威视提供web3.0控件开发包
拿到海康威视摄像头,就到他们官网下载了sdk开发包,心里还想这个应该不会太难,毕竟海康也算大公司,各种对接方式应该都是成熟的,打开sdk包里面还是挺齐全的MFC、java、c#都有,依次调试里一下,都能对接成功,不过不是我想要web方式对接,都是C/S架构的,我想要的是B/S方式对接。
联系海康技术要了web3.0的开发包,基于ActiveX或者NPAPI插件,提供封装好的js接口。先安装\demo\codebase中WebComponentsKit.exe插件,之后打开\demo\cn中demo.html测试。
该控件开发包对浏览器版本有要求,具体看下注意事项中说明。
32位浏览器:
https://one.hikvision.com/#/link/JIlpt2mBpcwvkhj2MNXw 提取密码:c2wq
64位浏览器:
https://one.hikvision.com/#/link/YMBApRWUh0MYbul3YQeJ 提取密码:GT2c
注意事项:
1.支持的浏览器有:IE6~IE11、Chrome8~ Chrome42、Firefox3.5~ Firefox52(32位,64位是到Firefox40)、Safari5.0.2+,需要浏览器支持NPAPI。
2.我们这个插件是根据浏览器位数来的,比如说您64位电脑,使用的32位浏览器,则需要安装32位浏览器。如果出现已安装插件,但是仍旧提示未安装插件,可以将32位插件和64位插件都安装一下之后再用IE打开我们demo.html测试下,这个是不影响的。
3.我们WEB3.0控件开发包,登陆使用的是HTTP端口(默认80).
可惜这种方式不支持高版本chrome浏览器,项目又是基于chrome浏览器开发的,基本放弃了ie,只能另外想办法解决!!!
二,VLC
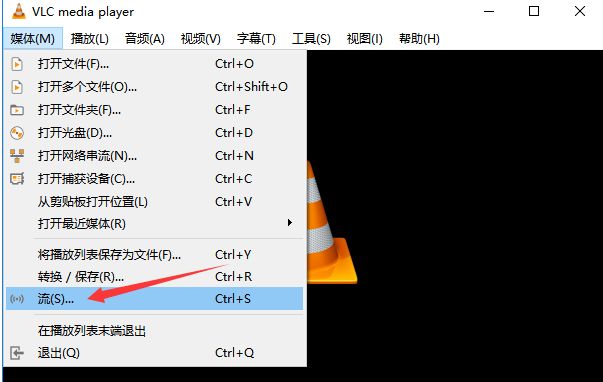
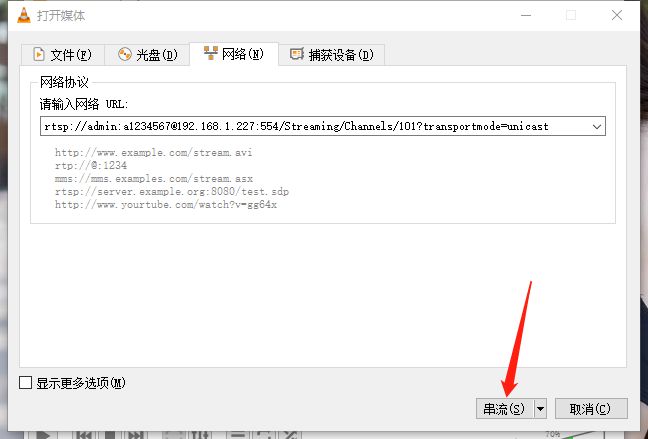
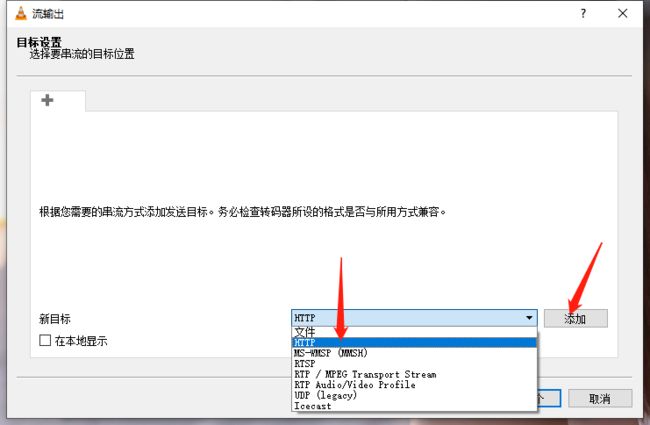
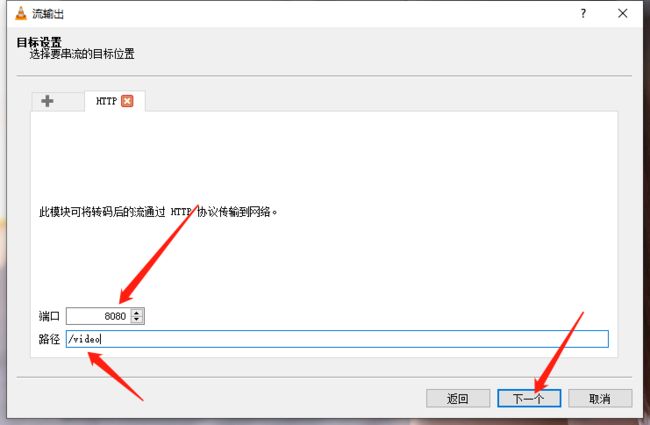
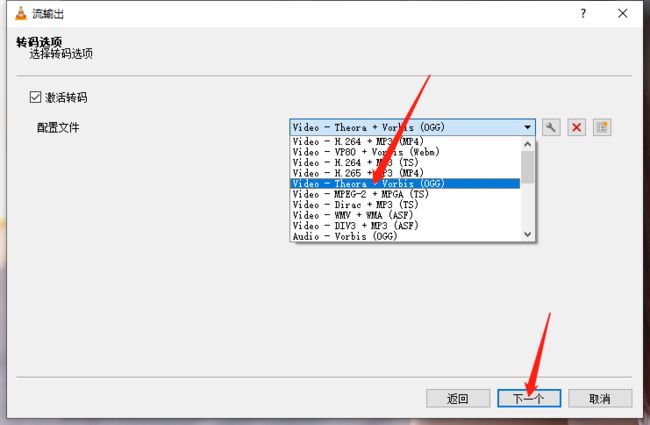
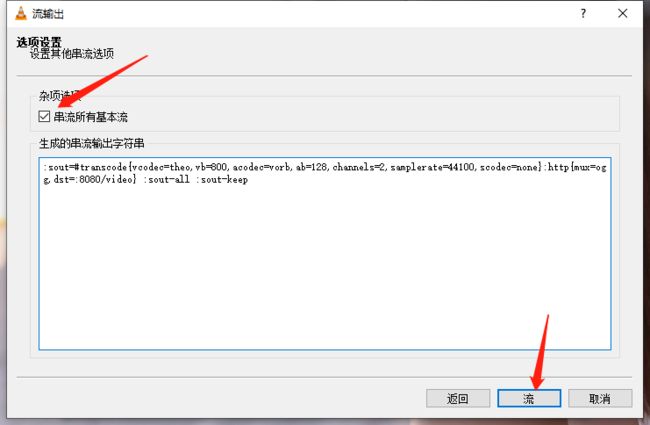
利用vlc播放器把rtsp转http
在官网下载https://www.videolan.org
并安装
局域网内访问
不支持
三,ffmpeg+Nginx(windows配置)
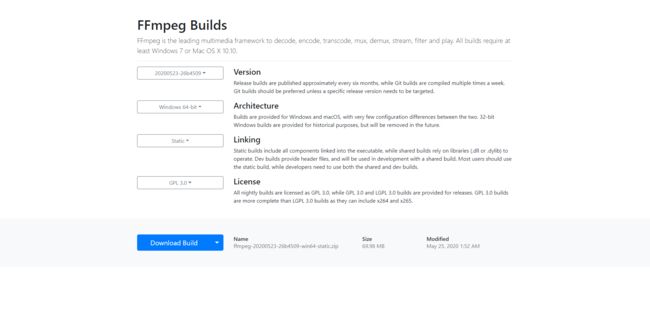
下载ffmpeg:https://ffmpeg.zeranoe.com/builds/
下载后解压
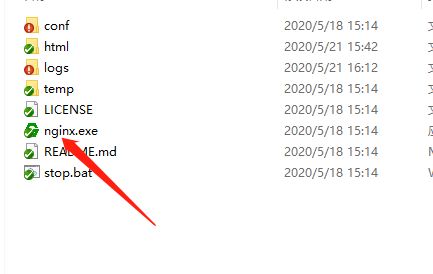
下载nginx.exe:https://github.com/illuspas/nginx-rtmp-win32
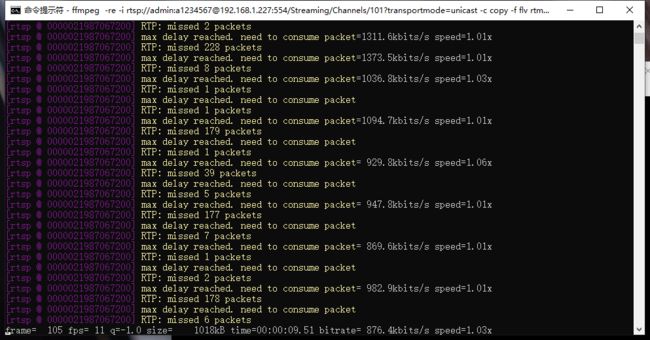
打开cmd运行
ffmpeg -re -i rtsp://admin:a1234567@192.168.1.227:554/Streaming/Channels/101?transportmode=unicast -c copy -f flv rtmp://localhost:1935/live/room
浏览器显示,需要浏览器允许flash
playerOptions: {
live: true,
autoplay: true,
fluid: true,
notSupportedMessage: '暂时无法播放',
controlBar: {
timeDivider: true,
durationDisplay: true,
remainingTimeDisplay: false,
fullscreenToggle: true // 全屏按钮
},
techOrder: ['flash'],
flash: {
hls: { withCredentials: false }
// swf: SWF_URL // 引入静态文件swf
},
sources: [
{
// 流配置,数组形式,会根据兼容顺序自动切换
type: 'rtmp/mp4',
src: 'rtmp://localhost:1935/live/room'
}
]
}
四,ffmpeg+Nginx( Linux配置)
##########下面所有步骤均在centos7上进行########
1、nginx安装依赖
yum install gcc
yum -y install zlib-devel #zlib-devel:压缩依赖包
yum -y install openssl-devel #openssl-devel:提供ssl/tls功能
yum -y install pcre-devel #pcre-devle:支持地址重写rewrite
2、关闭selinux
查看 selinux 状态:/usr/sbin/sestatus -v
临时关闭(不用重启机器):
setenforce 0 ##设置SELinux 成为permissive模式
##setenforce 1 设置SELinux 成为enforcing模式
修改/etc/selinux/config 文件
将SELINUX=enforcing改为SELINUX=disabled 重启机器即可
3、为nginx运行创建帐号、组
groupadd -r nginx
useradd -s /sbin/nolgoin -g nginx -r nginx
4、文件下载
下载rtmp流媒体插件
wget https://github.com/arut/nginx-rtmp-module/archive/master.zip
下载nginx源码
wget http://nginx.org/download/nginx-1.14.2.tar.gz
5、编译nginx 将rtmp模块编译安装进nginx
cd /opt/nginx/nginx-1.14.2
[root@1-251 nginx-1.14.2]# ./configure \
> --add-module=/opt/rtmp/nginx-rtmp-module-master \ #rtmp模块
> --prefix=/usr/local/nginx \
> --conf-path=/etc/nginx/nginx.conf \
> --error-log-path=/var/log/nginx/erro.log \
> --pid-path=/var/run/nginx/nginx.pid \
> --lock-path=/var/lock/nginx.lock \
> --user=nginx \
> --group=nginx \
> --with-http_ssl_module \
> --with-http_stub_status_module \
> --with-select_module \
> --with-poll_module \
> --with-threads \
> --with-debug \
> --with-http_ssl_module \
> --with-http_v2_module \
> --with-http_gzip_static_module \
> --with-perl=/usr/local/bin \
> --http-client-body-temp-path=/var/tmp/nginx/client \
> --http-proxy-temp-path=/var/tmp/nginx/proxy \
> --http-fastcgi-temp-path=/var/tmp/nginx/fastcgi \
> --http-uwsgi-temp-path=/var/tmp/nginx/uwsgi \
>
6、编译完成
nginx path prefix: "/usr/local/nginx" #nginx 目录
nginx binary file: "/usr/local/nginx/sbin/nginx" #nginx 命令目录
nginx modules path: "/usr/local/nginx/modules" #nginx 模块目录
nginx configuration prefix: "/etc/nginx" #nginx 配置文件目录
nginx configuration file: "/etc/nginx/nginx.conf" #nginx 配置文件路径
nginx pid file: "/var/run/nginx/nginx.pid" #nginx PID文件
nginx error log file: "/var/log/nginx/erro.log" #nginx 错误日志文件
nginx http access log file: "/usr/local/nginx/logs/access.log" #nginx 访问日志
nginx http client request body temporary files: "/var/tmp/nginx/client" #nginx 请求文件位置
nginx http proxy temporary files: "/var/tmp/nginx/proxy" #nginx 代理文件位置
nginx http fastcgi temporary files: "/var/tmp/nginx/fastcgi" #nginx fastcgi 协议
nginx http uwsgi temporary files: "/var/tmp/nginx/uwsgi" #nginx uwsgi(python)协议
nginx http scgi temporary files: "scgi_temp" #nginx scgi协议
7、安装nginx
make && make install
8、mkdir /var/tmp/nginx
9、启动nginx
指定配置文件启动
/usr/local/nginx/sbin/nginx -c /etc/nginx/nginx.conf
重新加载配置文件
/usr/local/nginx/sbin/nginx -s reload
重启|关闭
/usr/local/nginx/sbin/nginx stop|start
10、测试访问
http://192.168.1.251
11、安装ffmpeg
11.1 安装ffmpeg依赖
sudo yum install epel-release -y
sudo yum update -y
sudo shutdown -r now
11.2、安装Nux Dextop YUM repo
sudo rpm --import http://li.nux.ro/download/nux/RPM-GPG-KEY-nux.ro
sudo rpm -Uvh http://li.nux.ro/download/nux/dextop/el7/x86_64/nux-dextop-release-0-5.el7.nux.noarch.rpm
11.3、安装ffmpeg
sudo yum install ffmpeg ffmpeg-devel -y
11.4、测试ffmpeg是否安装成功
[root@1-251 opt]# ffmpeg
ffmpeg version 2.8.15 Copyright (c) 2000-2018 the FFmpeg developers #ffmpeg 版本
built with gcc 4.8.5 (GCC) 20150623 (Red Hat 4.8.5-36) #gcc 版本
configuration: --prefix=/usr --bindir=/usr/bin --datadir=/usr/share/ffmpeg --incdir=/usr/include/ffmpeg --libdir=/usr/lib64 --mandir=/usr/share/man --arch=x86_64 --optflags='-O2 -g -pipe -Wall -Wp,-D_FORTIFY_SOURCE=2 -fexceptions -fstack-protector-strong --param=ssp-buffer-size=4 -grecord-gcc-switches -m64 -mtune=generic' --extra-ldflags='-Wl,-z,relro ' --enable-libopencore-amrnb --enable-libopencore-amrwb --enable-libvo-amrwbenc --enable-version3 --enable-bzlib --disable-crystalhd --enable-gnutls --enable-ladspa --enable-libass --enable-libcdio --enable-libdc1394 --enable-libfdk-aac --enable-nonfree --disable-indev=jack --enable-libfreetype --enable-libgsm --enable-libmp3lame --enable-openal --enable-libopenjpeg --enable-libopus --enable-libpulse --enable-libschroedinger --enable-libsoxr --enable-libspeex --enable-libtheora --enable-libvorbis --enable-libv4l2 --enable-libx264 --enable-libx265 --enable-libxvid --enable-x11grab --enable-avfilter --enable-avresample --enable-postproc --enable-pthreads --disable-static --enable-shared --enable-gpl --disable-debug --disable-stripping --shlibdir=/usr/lib64 --enable-runtime-cpudetect
libavutil 54. 31.100 / 54. 31.100
libavcodec 56. 60.100 / 56. 60.100
libavformat 56. 40.101 / 56. 40.101
libavdevice 56. 4.100 / 56. 4.100
libavfilter 5. 40.101 / 5. 40.101
libavresample 2. 1. 0 / 2. 1. 0
libswscale 3. 1.101 / 3. 1.101
libswresample 1. 2.101 / 1. 2.101
libpostproc 53. 3.100 / 53. 3.100
Hyper fast Audio and Video encoder
usage: ffmpeg [options] [[infile options] -i infile]... {[outfile options] outfile}...
Use -h to get full help or, even better, run 'man ffmpeg'
#出现上面的信息说明ffmpeg安装成功
#安装目录 --prefix=/usr
#执行目录 --bindir=/usr/bin
#数据目录 --datadir=/usr/share/ffmpeg
#包含目录 --incdir=/usr/include/ffmpeg
#依赖库目录 --libdir=/usr/lib64
#man手册目录 --mandir=/usr/share/man
#...... .............
12、配置nginx rtmp
[root@1-251 ~]# cat /etc/nginx/nginx.conf
#user nobody;
worker_processes 1;
#error_log logs/error.log;
#error_log logs/error.log notice;
#error_log logs/error.log info;
#pid logs/nginx.pid;
events {
worker_connections 1024;
}
#rtmp config
rtmp {
server {
listen 1935;
chunk_size 4096;
application live {
live on;
}
application hls {
live on;
hls on;
hls_path /usr/local/nginx/html/hls;
hls_fragment 8s;
}
}
}
http {
include mime.types;
default_type application/octet-stream;
sendfile on;
keepalive_timeout 65;
#gzip on;
server {
listen 80;
server_name localhost;
location / {
root html;
index index.html index.htm;
}
location /stat {
rtmp_stat all;
rtmp_stat_stylesheet stat.xsl;
}
location /stat.xsl {
root /opt/rtmp/nginx-rtmp-module-master;
}
location /hls {
#server hls fragments
types {
application/vnd.apple.mpegurl m3u8;
video/mp2t ts;
}
alias /usr/local/nginx/html/hls;
expires -1;
}
# redirect server error pages to the static page /50x.html
#
error_page 500 502 503 504 /50x.html;
location = /50x.html {
root html;
}
}
}
五,Streamedian
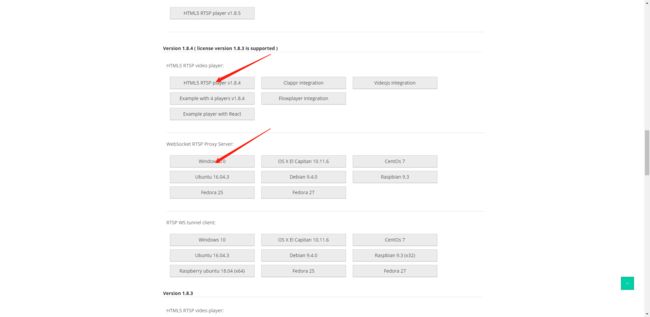
官网地址https://streamedian.com/
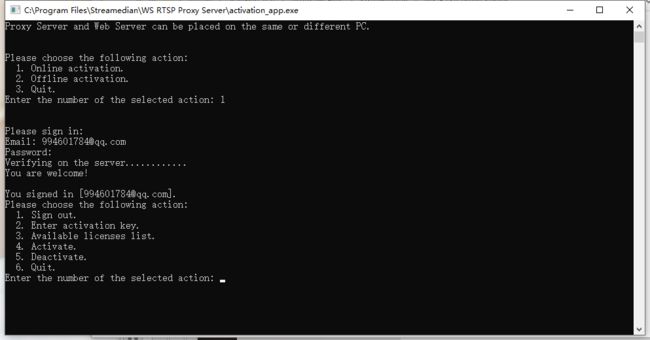
安装server并运行,弹出运行界面
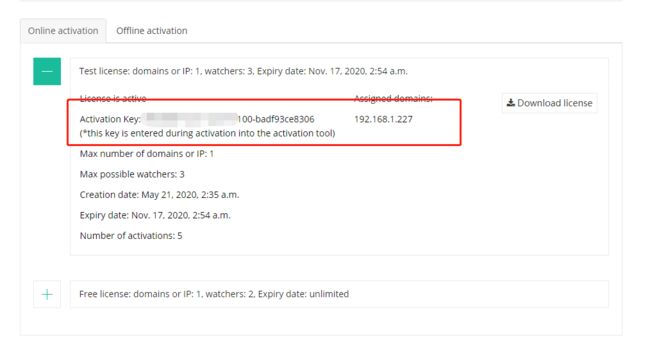
先注册账号,先下载个免费的license
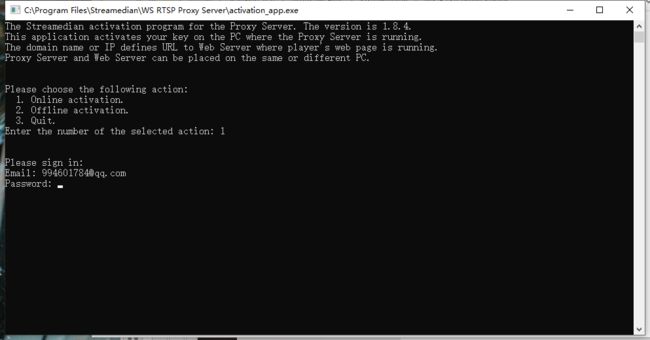
到C:\Program Files\Streamedian\WS RTSP Proxy Server\activation_app并运行
获取到激活码
根据提示步骤输入注册账号里面的key
在线激活失败,也可以选择离线激活,稍麻烦点,但也不难,我都能看的懂的英文,相信也难不住大家()
浏览器显示
参考文章:https://blog.csdn.net/u012902367/article/details/93714393


