越狱(jailBreak)
通过iOS系统安全启动链漏洞,从而禁止掉信任链中负责验证的组件。拿到iOS系统最大权限ROOT权限.
iOS系统安全启动链
当启动一台iOS设备时,系统首先会从只读的ROM中读取初始化指令,也就是系统的引导程序(事实上所有的操作系统启动时都要经过这一步,只是过程略有不同)。这个引导ROM包含苹果官方权威认证的公钥,他会验证底层启动加载器(LLB)的签名,一旦通过验证后就启动系统。LLB会所一些基础工作,然后验证第二级引导程序iBoot。iBoot启动后,设备就可以进入恢复模式或启动内核。在iBoot验证完内核签名的合法性之后,整个启动程序开始步入正轨:加载驱动程序、检测设备、启动系统守护进程。这个信任链会确保所有的系统组件都有苹果官方写入、签名、分发,不能来自第三方机构。
越狱的工作原理正是攻击这一信任链。所有的越狱工具的作者都需要找到这一信任链上的漏洞,从而禁止掉信任链中负责验证的组件。拿到iOS系统最大权限ROOT权限。
完美越狱&非完美越狱
根据越狱的情况不同可以分为如下两种越狱:
完美越狱
所谓完美越狱就是破解iOS系统漏洞之后,每次系统重启都能自动调用注入的恶意代码,达到破坏安全验证,再次获得ROOT权限。非完美越狱
所谓非完美越狱是指,越狱系统后,并没有完全破解安全链,有部分信息或功能应用不佳;比如;关机以后必须去连接越狱软件来引导开机;或者重启会导致越狱的失效;这样的越狱称为“不完美越狱”。
插件
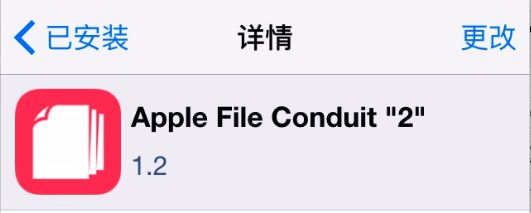
Cydia:就是越狱的应用商店
常用插件
-
可以获得访问更目录权限。
-
绕过签名检测
-
命令行
-
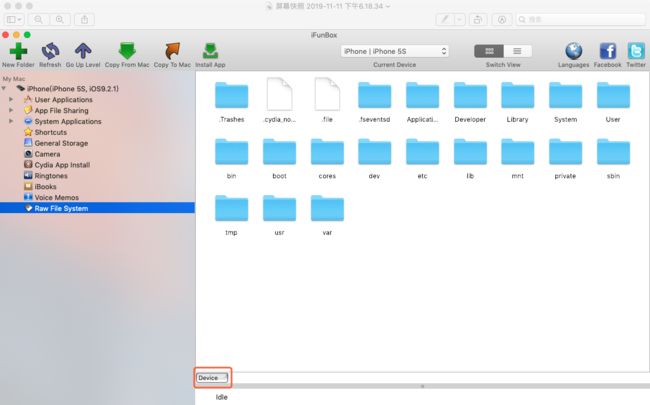
iFunBox查看系统的根目录
-
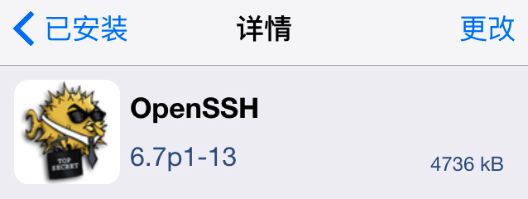
通过OpenSSH插件可以连接手机,进行远程控制, 或者传送文件。
连接手机
通过OpenSSH插件使用Wifi连接手机:
ssh 用户名@手机IP地址
$ssh [email protected]
$ssh [email protected]
默认密码:alpine
iOS 下两个用户:Root、mobile
Root用户:最高权限用户,可以访问任意文件
Mobile用户:普通用户,只能访问改用户目录下文件/var/Mobile
首次连接手机会提示,输入yes即可,且带着️继续
$ ssh [email protected]
The authenticity of host '172.20.9.183 (172.20.9.183)' can't be established.
RSA key fingerprint is SHA256:gcxpuRlKXIw7bI4y2/UjfHIupmTggpq14gbBaSquXOE.
Are you sure you want to continue connecting (yes/no)? yes
Warning: Permanently added '172.20.9.183' (RSA) to the list of known hosts.
OpenSSH和SSH
SSH
SSH是一种网络协议,用于计算机之间的加密登录。
1995年,芬兰学者Tatu Ylonen设计了SSH协议,将登录信息全部加密,成为互联网安全的一个基本解决方案,迅速在全世界获得推广,目前已经成为Linux系统的标准配置。OpenSSH
OpenSSH是SSH (Secure SHell)协议的免费开源实现,它是一款软件。中间人攻击(Man-in-the-middle attack)
存在一种隐患,如果有人冒充服务器,将生成的虚假公钥发给客户端,那么它将获得 客户端连接服务器的 密码
在mac电脑作为客户端连接手机服务端就涉及了SSH登录的过程
- Mac请求连接到iphone手机
- 手机将公钥发给Mac电脑
- Mac电脑通过收到的公钥加密登录密码
- iPhone手机利用私钥解密登录密码,是否允许登录
上面产生的RSA key其实就是说的第二步,只不过显示的是经过哈希的一串字符gcxpuRlKXIw7bI4y2/UjfHIupmTggpq14gbBaSquXOE,公钥保存在Mac端是与服务端的公钥做对比,避免中间人冒充服务器发送假的公钥给客户端,从而获取客户端连接接服务器的密码 。
在MAC客户端查看这个公钥
$ cd ~/.ssh
$ ls -l
total 8
-rw-r--r--  1 niujf  staff  1987 11 12 14:30 known_hosts
$ cat known_hosts
...
172.20.9.183 ssh-rsa
AAAAB3NzaC1yc2EAAAADAQABAAABAQDap2pfW858oPCvWGIOEOAtAaw+SSiSdydhudxhc9an4KwHPvxGP++cYLFvc7YbabQpgcoAn6XHDno4IcvUtirNpySb+BDdFbrIP53N4GFfwp++uVJFfBVMgc8IAl5TX1lbTa6e49dl4IglF5icIlPQT+XH+9HE6lVMWalRYszL2PLKGOFEDuQa54UhWcvSEms3rcibpBlC7VapHLe3gJH+esSNSR/dG9V6atsJ803/4vuM+ydxVSeSYRshNx4vQJ0jtDjJWk/ri5fYQ8v6kDvfPPcls991lV549s6q/Ux1R24QupZZc8TIDgQhJj9ObY8mtB6yKWkRRbJCzSvcpPEH
在手机服务端我们可以查看这个公钥
$ ssh [email protected]
[email protected]'s password:
iPhone:~ root# cd /etc/ssh/
iPhone:/etc/ssh root# ls -l
total 272
-rw-r--r-- 1 root wheel 242153 Jan  9  2016 moduli
-rw-r--r-- 1 root wheel   1526 Jan  4  2008 ssh_config
-rw------- 1 root wheel    672 Dec 28  2017 ssh_host_dsa_key
-rw-r--r-- 1 root wheel    590 Dec 28  2017 ssh_host_dsa_key.pub
-rw------- 1 root wheel    965 Dec 28  2017 ssh_host_key
-rw-r--r-- 1 root wheel    630 Dec 28  2017 ssh_host_key.pub
-rw------- 1 root wheel   1679 Dec 28  2017 ssh_host_rsa_key
-rw-r--r-- 1 root wheel    382 Dec 28  2017 ssh_host_rsa_key.pub //作为SSH服务器发送给连接者的key
-rw-r--r-- 1 root wheel   3227 Feb  9  2008 sshd_config
iPhone:/etc/ssh root# cat ssh_host_rsa_key.pub
ssh-rsa AAAAB3NzaC1yc2EAAAADAQABAAABAQDap2pfW858oPCvWGIOEOAtAaw+SSiSdydhudxhc9an4KwHPvxGP++cYLFvc7YbabQpgcoAn6XHDno4IcvUtirNpySb+BDdFbrIP53N4GFfwp++uVJFfBVMgc8IAl5TX1lbTa6e49dl4IglF5icIlPQT+XH+9HE6lVMWalRYszL2PLKGOFEDuQa54UhWcvSEms3rcibpBlC7VapHLe3gJH+esSNSR/dG9V6atsJ803/4vuM+ydxVSeSYRshNx4vQJ0jtDjJWk/ri5fYQ8v6kDvfPPcls991lV549s6q/Ux1R24QupZZc8TIDgQhJj9ObY8mtB6yKWkRRbJCzSvcpPEH
删除保存的服务器地址的key
$ cd ~/.ssh
$ ls
known_hosts    //用于保存SSH登录服务器所接受的key
$ ssh-keygen -R 172.20.9.183
修改用户密码
$passwd 用户名 (修改用户密码)
$ ssh [email protected]
iPhone:~ root# passwd root
Changing password for root.
New password:
Retype new password:
iPhone:~ root# passwd mobile
Changing password for mobile.
New password:
Retype new password:
iPhone:~ root# exit
logout
Connection to 172.20.9.183 closed.
ROOT用户可以修改所有用户的密码
免密码登录
免密码登录也称“公钥登录”,原理就是用户将自己的公钥储存在远程主机上。登录的时候,远程主机会向用户发送一段随机字符串,用户用自己的私钥加密后,再发给远程主机。远程主机用事先储存的公钥进行解密,如果成功,就证明用户是可信的,直接允许登录 不再要求密码。
- 客户端在~/.ssh/目录下生成公钥 $ ssh-keygen
$ cd ~/.ssh
$ ls
known_hosts known_hosts.old
$ ssh-keygen
Generating public/private rsa key pair.
Enter file in which to save the key (/Users/niujf/.ssh/id_rsa):
Enter passphrase (empty for no passphrase):
Enter same passphrase again:
Your identification has been saved in /Users/niujf/.ssh/id_rsa.
Your public key has been saved in /Users/niujf/.ssh/id_rsa.pub.
The key fingerprint is:
SHA256:X+l8xTv2orZlHhUi0NuUU133pPF8QTj/ywGB+YK+EnY [email protected]
The key's randomart image is:
+---[RSA 2048]----+
|         .. o *+*|
|          .+ B *=|
|          ..=.*.=|
|         . o.=.oo|
|        S   + . =|
|       o E +   +o|
|      . o o o *+o|
|       . .  .=o+o|
|        .  .oo...|
+----[SHA256]-----+
$ ls
id_rsa//私钥  id_rsa.pub//公钥  known_hosts known_hosts.old
$ cat id_rsa.pub
ssh-rsa AAAAB3NzaC1yc2EAAAADAQABAAABAQCb7Xt+wRUg/Pc+dA6S37p21S1cO6KUwork4agksepwIOiHGFvjUeRKnSNrLi4kG45Gh5JaRjK3AqRFx53A6f2lU3hpE9CW21NYzf6sRKfYoxrsRvhXalyZuBpRFl2NGK9o2qQka8wcGANmd/OYxg1yzYBcfw2TsyWDUWLTAL/YMNt1qyWselo6fUX7jiyB3YigyUm0pqYg8WeiWZdPMNoxMmMZIsXJItNC93lydmCOu2ae+n9qQl01f1nmZqtqnsY8WjAYq4TRcY6HjPG1UmDgtp4V2fs96dRpxcHYpGNb7LGLWB3RnzlvT0le8c8CSDYWwjr9QTdFf2PBbEFZLLvX [email protected]
- 拷贝公钥给SSH服务器 $ssh-copy-id 用户名@服务器IP
$ ssh-copy-id [email protected]
/usr/bin/ssh-copy-id: INFO: Source of key(s) to be installed: "/Users/niujf/.ssh/id_rsa.pub"
The authenticity of host '172.20.9.183 (172.20.9.183)' can't be established.
RSA key fingerprint is SHA256:gcxpuRlKXIw7bI4y2/UjfHIupmTggpq14gbBaSquXOE.
Are you sure you want to continue connecting (yes/no)? yes
/usr/bin/ssh-copy-id: INFO: attempting to log in with the new key(s), to filter out any that are already installed
/usr/bin/ssh-copy-id: INFO: 1 key(s) remain to be installed -- if you are prompted now it is to install the new keys
[email protected]'s password:

Number of key(s) added:        1

Now try logging into the machine, with:   "ssh '[email protected]'"
and check to make sure that only the key(s) you wanted were added.
- 通过OpenSSH连接手机发现可以免密登录了
$ ssh [email protected]
iPhone:~ root#
- 在手机服务端查看这个公钥
iPhone:~ root# cd ~/.ssh/
iPhone:~/.ssh root# ls
authorized_keys  known_hosts
iPhone:~/.ssh root# cat authorized_keys
ssh-rsa AAAAB3NzaC1yc2EAAAADAQABAAABAQCb7Xt+wRUg/Pc+dA6S37p21S1cO6KUwork4agksepwIOiHGFvjUeRKnSNrLi4kG45Gh5JaRjK3AqRFx53A6f2lU3hpE9CW21NYzf6sRKfYoxrsRvhXalyZuBpRFl2NGK9o2qQka8wcGANmd/OYxg1yzYBcfw2TsyWDUWLTAL/YMNt1qyWselo6fUX7jiyB3YigyUm0pqYg8WeiWZdPMNoxMmMZIsXJItNC93lydmCOu2ae+n9qQl01f1nmZqtqnsY8WjAYq4TRcY6HjPG1UmDgtp4V2fs96dRpxcHYpGNb7LGLWB3RnzlvT0le8c8CSDYWwjr9QTdFf2PBbEFZLLvX [email protected]
配置ssh登录的别名
- 在~/.ssh 目录下创建一个config文件
$ cd ~/.ssh
$ ls
id_rsa  id_rsa.pub  known_hosts known_hosts.old
$ vi config
- 添加配置
Host 5s
Hostname 172.20.9.183
User root
- 连接手机
$ ssh 5s
iPhone:~ root#
USB登录
苹果有一个服务,叫usbmuxd,这个服务主要用于在USB协议上实现多路TCP连接.
- Python脚本端口映射:
cd /Users/xxxxx/python-client
$ ls
tcprelay.py usbmux.py   usbmux.pyc
$ python tcprelay.py -t 22:10010
Forwarding local port 10010 to remote port 22
将本地的10010端口映射到设备的TCP端口22,这样就可以通过本地的10010端口建立连接了
iPhone默认是使用22端口进行SSH通信,采用的是TCP协议
- Command+t打开新的页面,通过USB进行SSH连接
查看端口号
root# cd /etc/ssh/
iPhone:/etc/ssh root# ls
moduli  ssh_config  ssh_host_dsa_key  ssh_host_dsa_key.pub  ssh_host_key  ssh_host_key.pub  ssh_host_rsa_key  ssh_host_rsa_key.pub  sshd_config
iPhone:/etc/ssh root# cat sshd_config
$ ssh [email protected] -p 10010 或者 $ ssh root@localhost -p 10010
The authenticity of host '[127.0.0.1]:10010 ([127.0.0.1]:10010)' can't be established.
RSA key fingerprint is SHA256:gcxpuRlKXIw7bI4y2/UjfHIupmTggpq14gbBaSquXOE.
Are you sure you want to continue connecting (yes/no)? yes
Warning: Permanently added '[127.0.0.1]:10010' (RSA) to the list of known hosts.
iPhone:~ root#
ssh连接本地的10010,由于做了端口映射,所以会通过usb连接对面设备的22端口。
Iproxy端口映射
安装libimobiledevice工具
$ brew install libimobiledevice
映射端口
iproxy 10010 22
USB登录脚本连接
-
将python-client文件copy到如下图所示路径,创建Shell端口映射脚本文件usbConnect.sh
-
创建USB登录脚本文件usbLgoin.sh
$ open ~/ 打开根目录
- 配置环境变量
$ cd ~/
$ vim .bash_profile
添加如下环境变量
export NJSHELL=/Users/niujf/NJShell
export PATH=$CY_PATH_ROOT:$PATH:$NJSHELL
如果以前没有配置环境变量就是
export PATH=$NJSHELL
- 执行脚本
$ sh usbConnect.sh
Forwarding local port 10010 to remote port 22
command+t打开新的终端页面
$ sh usbLogin.sh
iPhone:~ root#
远程拷贝
1. 将Mac本地文件拷贝到手机~/目录下
$ cd /Users/niujf/Desktop/CopyTest
$ ls
$ vi 123.txt
$ ls
123.txt
$ cat 123.txt
hello
$ scp 123.txt [email protected]:~/
123.txt                                       100%    6     0.5KB/s   00:00
$ ssh 5s
iPhone:~ root# cd ~/
iPhone:~ root# ls
123.txt  Application Support  Library  Media
iPhone:~ root# cat 123.txt
hello
2. 将手机本地文件拷贝到Mac
手机本地~/目录删除123.txt,新建12345.txt
iPhone:~ root# rm 123.txt
iPhone:~ root# ls
Application Support  Library  Media
iPhone:~ root# touch 12345.txt
command+t新开终端页面,拷贝12345.txt到Mac
$ scp [email protected]:~/12345.txt /Users/niujf/Desktop/CopyTest
12345.txt                                                                                                   100%    0     0.0KB/s   00:00
$ ls
123.txt     12345.txt
3. 将手机本地文件通过USB拷贝到Mac
先在Mac本地删除12345.txt
xxx:CopyTest niujf$ ls
123.txt     12345.txt
xxx:CopyTest niujf$ rm 12345.txt
xxx:CopyTest niujf$ ls
123.txt
先端口映射
$ sh usbConnect.sh
Forwarding local port 10010 to remote port 22
Command+t新开终端页,USB拷贝文件到Mac
$ scp -P 10010 [email protected]:~/12345.txt /Users/niujf/Desktop/CopyTest
12345.txt                                                                                                   100%    0     0.0KB/s   00:00
$ cd /Users/niujf/Desktop/CopyTest
$ ls
123.txt     12345.txt
4. 将Mac本地文件通过USB拷贝到手机
$ scp -P 10010 /Users/niujf/Desktop/CopyTest [email protected]:~/12345.txt


