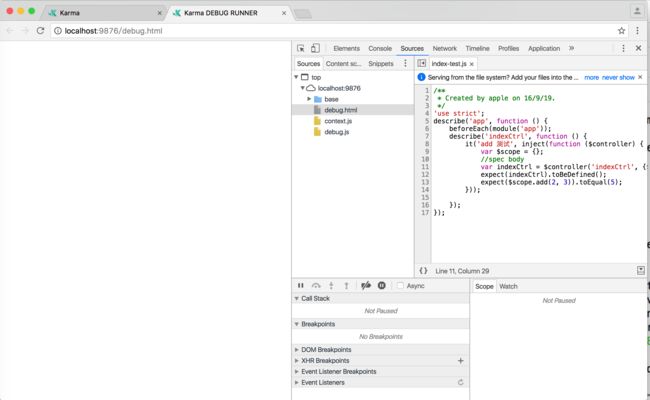
简单介绍通过karma与jsmine框架对angular开发的应用程序进行单元测试。
前提:nodejs,webstorm
1.创建项目基本目录
创建html、js,test文件夹,在项目中创建2个文件夹分别用于存放项目中用到的index.html、index.js,index-test.js文件。
2.安装框架
安装前端框架
项目中的前端框架主要为angularjs相关的框架,为了安装框架方便可安装bower包管理器。
- 安装bower包管理器
npm install bower -save
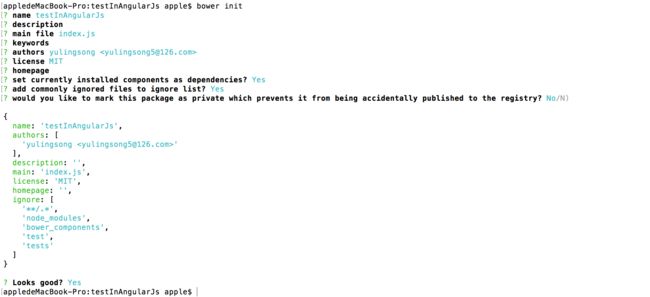
- 初始化bower.json文件,管理bower的依赖和配置
bower init
- 安装angular,angular-mocks框架
bower install bootstrap -save

bower install angular -save

bower install angular-mocks -save
安装服务器端框架
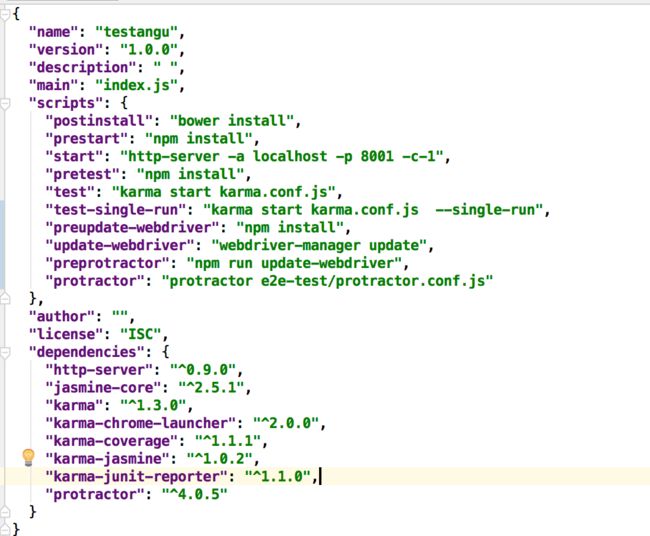
- 服务器依赖于nodejs,需要安装nodejs的包,生成package.json文件。
npm init
- 安装http-server模块
npm install http-server -save
- 安装其他模块
npm install jasmine-core --save   //javascript单元测试框架
npm install karma --save   //模拟javascript脚本在各种浏览器执行的工具
npm install karma-chrome-launcher --save  //在chrome浏览器执行的工具
npm install karma-jasmine --save  //jasmine-core在karma中的适配器
npm install karma-junit-reporter --save  //生成junit报告
npm install protractor --save  //E2E测试框架
偶尔会出现报错的时候,一般都是权限不够,在前面添加sudo就可以了。
scripts是自己定义的。
- 配置后运行命令,启动服务器,浏览器上输入http://localhost:8002
npm start
编写代码
index.html
    index


    +

    ={{add(a,b)}}
index.js
(function (angular) {
    angular.module('app', []).
    controller('indexCtrl', function ($scope) {
        $scope.add = function (a, b) {
            if(a&&b)
            return Number(a) + Number(b)
            return 0;
        }
    });
})(window.angular);
index-test.js
'use strict';
describe('app', function () {
    beforeEach(module('app'));
    describe('indexCtrl', function () {
        it('add 测试', inject(function ($controller) {
            var $scope = {};
            //spec body
            var indexCtrl = $controller('indexCtrl', {$scope: $scope});
            expect(indexCtrl).toBeDefined();
            expect($scope.add(2, 3)).toEqual(5);
        }));

    });
});
单元测试配置
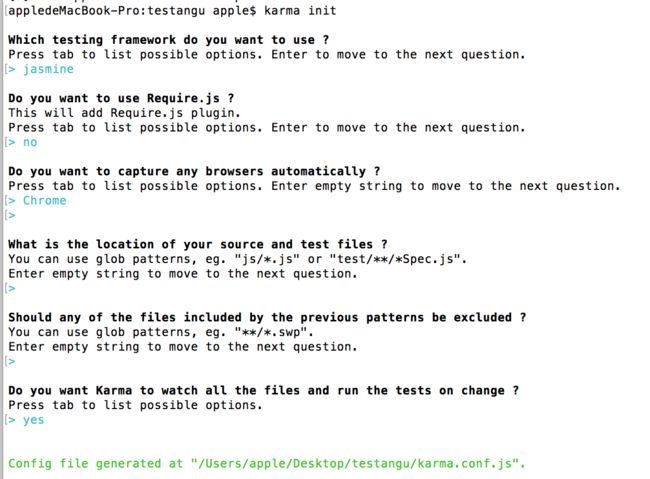
初始化karma配置文件,用于配置karma,执行命令
karma init
在karma配置文件代码中每个节点都有注释
// Karma configuration
// Generated on Mon Sep 12 2016 11:43:48 GMT+0800 (CST)

module.exports = function(config) {
  config.set({

    // base path that will be used to resolve all patterns (eg. files, exclude)
    basePath: '',


    // frameworks to use
    // available frameworks: https://npmjs.org/browse/keyword/karma-adapter
    frameworks: ['jasmine'],


    // list of files / patterns to load in the browser
    files: [
    ],


    // list of files to exclude
    exclude: [
    ],


    // preprocess matching files before serving them to the browser
    // available preprocessors: https://npmjs.org/browse/keyword/karma-preprocessor
    preprocessors: {
    },


    // test results reporter to use
    // possible values: 'dots', 'progress'
    // available reporters: https://npmjs.org/browse/keyword/karma-reporter
    reporters: ['progress'],


    // web server port
    port: 9876,


    // enable / disable colors in the output (reporters and logs)
    colors: true,


    // level of logging
    // possible values: config.LOG_DISABLE || config.LOG_ERROR || config.LOG_WARN || config.LOG_INFO || config.LOG_DEBUG
    logLevel: config.LOG_INFO,


    // enable / disable watching file and executing tests whenever any file changes
    autoWatch: true,


    // start these browsers
    // available browser launchers: https://npmjs.org/browse/keyword/karma-launcher
    browsers: ['Chrome'],


    // Continuous Integration mode
    // if true, Karma captures browsers, runs the tests and exits
    singleRun: false,

    // Concurrency level
    // how many browser should be started simultaneous
    concurrency: Infinity
  })
}
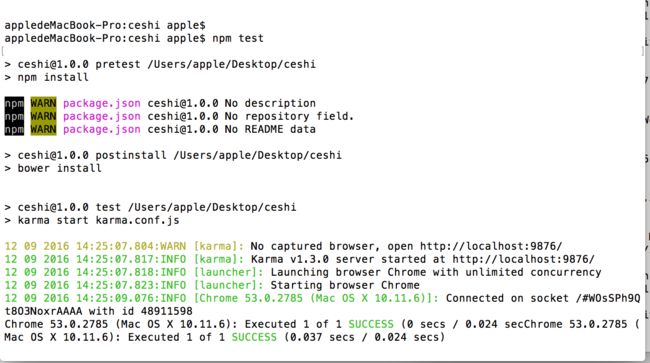
运行单元测试
npm test
添加网络测试
- $http service示例
var app = angular.module('Application', []);

app.controller('MainCtrl', function($scope, $http) {
    $http.get('Users/users.json').success(function(data){
        $scope.users = data;
    });
    $scope.text = 'Hello World!';
});
- 使用$httpBackend设置伪后台
describe('MainCtrl', function() {
    //我们会在测试中使用这个scope
    var scope, $httpBackend;

    //模拟我们的Application模块并注入我们自己的依赖
    beforeEach(angular.mock.module('Application'));

    //模拟Controller,并且包含 $rootScope 和 $controller
    beforeEach(angular.mock.inject(function($rootScope, $controller, _$httpBackend_) {
        //设置$httpBackend冲刷$http请求
        $httpBackend = _$httpBackend_;
        $httpBackend.when('GET', 'Users/users.json').respond([{
            id: 1,
            name: 'Bob'
        }, {
            id: 2,
            name: 'Jane'
        }]);
        //创建一个空的 scope
        scope = $rootScope.$new();

        //声明 Controller并且注入已创建的空的 scope
        $controller('MainCtrl', {
            $scope: scope
        });
    }));

    // 测试从这里开始
    it('should have variable text = "Hello World!"', function() {
        expect(scope.text).toBe('Hello World!');
    });
    it('should fetch list of users', function() {
        $httpBackend.flush();
        expect(scope.users.length).toBe(2);
        expect(scope.users[0].name).toBe('Bob');
        //输出结果以方便查看
        for(var i=0;i
以上示例中,可以使用$httpBackend.when和$httpBackend.expect提前设置请求的伪数据。最后在请求后执行$httpBackend.flush就会立即执行完成http请求。
在demo中具体情况是这样的,添加常规常量和变量测试,以及两个网络测试,具体代码如下:
//常规变量
    $scope.aaa = 1;
    $scope.testText = 'Hello Jsamine And Karma';

    //
    $http.get('users.json').success(function(data){
        $scope.users = data;
    }).error(function (error) {
        $scope.users = error;
    });

    //获取网络数据,制造伪后台
    $http.post('api/000').success(function(data){
        $scope.userInfo = data;
    }).error(function (error) {
        $scope.userInfo = error;
    });
在测试文件中这么写
/**
 * Created by apple on 16/9/19.
 */
'use strict';
describe('app', function () {
    beforeEach(module('app'));

    var scope,ctrl,$httpBackend;

    beforeEach(inject(function ($controller, $rootScope,_$httpBackend_) {

        $httpBackend = _$httpBackend_;


        $httpBackend.when('GET', 'users.json').respond([
            {
                "id": 1,
                "name": "Bob",
                "age":20
            },
            {
                "id": 2,
                "name": "Jane",
                "age":21
            },
            {
                "id": 3,
                "name": "gary",
                "age":22
            }
        ]);

        $httpBackend.when('POST', 'api/000').respond({
            "dataList": [
                {
                    "moduleId": "501",
                    "moduleList": [
                        {
                            "moduleId": "501001",
                            "moduleName": "融资申请",
                            "moduleUrl": "/financing",
                            "parentModuleId": "501"
                        },
                        {
                            "moduleId": "501002",
                            "moduleName": "融资进度查询",
                            "moduleUrl": "/myFinancing",
                            "parentModuleId": "501"
                        }
                    ],
                    "moduleName": "票据融资",
                    "moduleUrl": "",
                    "parentModuleId": "00"
                }
            ],
            "imgCaptchaRequired": "N",
            "isModifyPwd": "N",
            "isSetTradePwd": "N",
            "loginId": "15250964261",
            "loginType": "00",
            "participantName": "guyu",
            "phone": "15250964261",
            "retCode": "000000",
            "retMsg": "交易成功",
            "shortName": "",
            "totalCount": 3,
            "userName": "15250964261"
        });

        //模拟生成scope, $rootScope是angular中的顶级scope,angular中每个controller中的scope都是rootScope new出来的
        scope = $rootScope.$new();

        //模拟生成controller 并把先前生成的scope传入以方便测试
        ctrl = $controller('indexCtrl', {$scope: scope});


    }));


    describe('indexCtrl', function () {
        it('test add function', function () {
            expect(scope.add(2, 3)).toEqual(5);
        });
        it('test detect function', function () {
            expect(scope.detect(4,3)).toEqual(1);
        });
        it('test pr function', function () {
            expect(scope.pr()).toEqual();
        });

        it('test normal varibles', function () {
            expect(scope.testText).toEqual('Hello Jsamine And Karma');
            expect(scope.aaa).toBe(1);

        });

        //测试伪后台的json数据
        it('test get json', function () {
            $httpBackend.flush();
            expect(scope.users.length).toBe(3);
            expect(scope.users[0].name).toBe('Bob');
            expect(scope.users[1].name).toEqual('Jane');
            expect(scope.users[1].id).toBe(2);
            expect(scope.users[2].age).toBe(22);

            //输出结果以方便查看
            for(var i=0;i
测试结果:
补充:$httpBackend常用方法
when
新建一个后端定义(backend definition)。
when(method, url, [data], [headers]);
expect
新建一个请求期望(request expectation)。
expect(method, url, [data], [headers]);
when和expect都需要4个参数method, url, data, headers, 其中后2个参数可选。
method表示http方法注意都需要是大写(GET, PUT…);
url请求的url可以为正则或者字符串;
data请求时带的参数,
headers请求时设置的header。
如果这些参数都提供了,那只有当这些参数都匹配的时候才会正确的匹配请求。when和expect都会返回一个带respond方法的对象。respond方法有3个参数status,data,headers通过设置这3个参数就可以伪造返回的响应数据了。
区别:
$httpBackend.when与$httpBackend.expect的区别在于:$httpBackend.expect的伪后台只能被调用一次(调用一次后会被清除),第二次调用就会报错,而且$httpBackend.resetExpectations可以移除所有的expect而对when没有影响。
参考:
1.angular单元测试与自动化UI测试实践
2.Angular-mock之使用$httpBackend服务测试$http
3.AngularJS Tests With An HTTP Mock
4.Angularjs 基于karma和jasmine的单元测试
5.$httpBackend

