编写时间: 2018.09.15
socket.io 简介
Socket.IO 是一个面向实时 web 应用的 JavaScript 库。它使得服务器和客户端之间实时双向的通信成为可能。他有两个部分:在浏览器中运行的客户端库,和一个面向Node.js的服务端库。两者有着几乎一样的API。像Node.js一样,它也是事件驱动的。socket.io 底层是 engine.io,这个库实现了跨平台的双向通信。在不支持websocket的浏览器会使用polling来代替
协议支持
-
polling: XHR / JSONP polling transport. -
websocket: WebSocket transport
网站
- 官网: https://socket.io/
- github: https://github.com/socketio/socket.io
使用node编写一个简单的聊天程序(不要被我吓到,python的在后面)
- 官方参考地址: https://socket.io/get-started/chat/
开发环境
os: win10
Node.js: v8.11.2
npm: 5.6.0
开发环境安装
- 安装node.js, 下载:https://nodejs.org/en/download/选择安装, 安装过程比较简单,不懂请自行Google, 安装完成后自带npm
- 检查安装是否正确,命令行输入, 显示版本说明已正确安装
node -v
npm -v
- 使用node创建工程
3.1 创建chat文件夹(D:\work\node\projects\chat)
3.2 创建chat工程,命令行输入: npm init, 过程如下,默认直接回车即可
D:\work\node\projects\chat>npm init
This utility will walk you through creating a package.json file.
It only covers the most common items, and tries to guess sensible defaults.

See `npm help json` for definitive documentation on these fields
and exactly what they do.

Use `npm install ` afterwards to install a package and
save it as a dependency in the package.json file.

Press ^C at any time to quit.
package name: (chat)
version: (1.0.0)
description:
entry point: (index.js)
test command:
git repository:
keywords:
author:
license: (ISC)
About to write to D:\work\node\projects\chat\package.json:

{
  "name": "chat",
  "version": "1.0.0",
  "description": "",
  "main": "index.js",
  "scripts": {
    "test": "echo \"Error: no test specified\" && exit 1"
  },
  "author": "",
  "license": "ISC"
}


Is this ok? (yes)

D:\work\node\projects\chat>
3.3 安装依赖库
npm install --save [email protected]
npm install --save socket.io

# 安装过程如下
D:\work\node\projects\chat>npm install --save [email protected]
npm notice created a lockfile as package-lock.json. You should commit this file.
npm WARN [email protected] No description
npm WARN [email protected] No repository field.

+ [email protected]
added 46 packages in 5.126s

D:\work\node\projects\chat>npm install --save socket.io
npm WARN [email protected] No description
npm WARN [email protected] No repository field.

+ [email protected]
added 42 packages in 7.063s
3.5 在chat目录下创建index.js, 输入以下内容
var app = require('express')();
var http = require('http').Server(app);
var io = require('socket.io')(http);
app.get('/', function (req, res) {
// res.send('Hello World
')
res.sendFile(__dirname + '/index.html')
});
io.on('connection', function (socket) {
console.log('a user connected');
socket.on('disconnect', function () {
console.log('user disconnected');
});
socket.on('chat message', function (msg) {
console.log('message:' + msg);
// socket.broadcast.emit('chat message', msg);
io.emit('chat message', msg);
});
});
http.listen(3000, function () {
console.log('listening on *:3000');
});
3.4 在chat目录创建index.html文件, 输入
Socket.IO chat
3.6 最终目录如下
--  index.html
--  index.js
--  package-lock.json
--  package.json
--  node_modules
3.7 运行测试 输入node . (注意node空格后面有一点)
D:\work\node\projects\chat>node .
listening on *:3000
3.8 访问 http://localhost:3000/, 效果如下
协议说明
- socket.io-protocol:https://github.com/socketio/socket.io-protocol
- engine.io-protocol : https://github.com/socketio/engine.io-protocol
- 当前协议版本(2018.09.15)
engine.io: 3
socket.io: 4
Engine.IO 简单说明
详细请访问官方文档 https://github.com/socketio/engine.io-protocol
Engine.IO 会话流程
URLs格式
/engine.io/[?]
- 参数说明
-
transport: 类型,默认支持 polling, websocket -
j: 使用jsonp是必需参数 -
sid: 会话ID -
b64: 如果客户端不支持XHR2,则在查询字符串中发送b64 = 1,以通知服务器所有二进制数据应该发送base64编码。
-
编码
- packet
- payload
packet(可以是utf-8 或 二进制数据)
# utf-8
[]
# example
2probe

# binary
4|0|1|2|3|4|5
packet 类型
| 类型 | 描述 | example |
|---|---|---|
| 0 open | 新建连接时使用 | |
| 1 close | 关闭transport,但不关闭连接本身 | |
| 2 ping | 客户端发送ping包 | client sends: 2probe server sends: 3probe |
| 3 pong | 服务器响应ping包 | |
| 4 message | 消息 | 1.server sends: 4HelloWorld 2.client receives and calls callback socket.on('message', function (data) { console.log(data); }); |
| 5 upgrade | 切换协议时使用,判断是否支持 | |
| 6 noop | 主要用于在收到传入的websocket连接时强制轮询周期 | 1. client connects through new transport; 2.client sends 2probe 3.server receives and sends 3probe 4.client receives and sends 5 5.server flushes and closes old transport and switches to new. |
Payload
:[:[...]]
-
length: 以字符为单位的数据包长度 -
packet: 实际数据包
Socket.IO 简单说明
详细请访问官方文档 https://github.com/socketio/socket.io-protocol
Socket.IO数据包
Packet#CONNECT (0)Packet#DISCONNECT (1)Packet#EVENT (2)Packet#ACK (3)Packet#ERROR (4)Packet#BINARY_EVENT (5)Packet#BINARY_ACK (6)
使用python基于websocket-client创建一个简单的socket.io 客户端demo
建议先看这篇文章 https://www.jianshu.com/p/a3e06ec1a3a0
1.分析
1.1. 浏览器中打开上面的chat例子,控制台中查看(F12), 刷新浏览器之后信息如下
1.2 根据上面的协议可以知道 Frames Data的作用(绿色:客户端; 红色: 服务器)
# 创建websocket连接
2probe:
3probe
5
# 心跳
2
3
1.3 连接流程图可以参考这篇文章: https://www.jianshu.com/p/a3e06ec1a3a0
2. 编写代码
开发环境
win10
python3.6.3
2.1 安装websocket-client
pip install websocket-client
# github
https://github.com/websocket-client/websocket-client
# 我安装的版本
websocket-client              0.53.0
2.2 基于websocket-client官方例子修改
import time
from threading import Timer, Event, Thread

import websocket


class HeartbeatThread(Thread):
    """心跳"""

    def __init__(self, event, ws):
        super(HeartbeatThread, self).__init__()
        self.event = event
        self.ws = ws

    def run(self):
        while 1:
            # 发送ping包
            self.ws.send('2')
            self.event.wait(timeout=2)


def on_message(ws, message):
    """接收信息"""
    print(message)


def on_error(ws, error):
    print(error)


def on_close(ws):
    print("### closed ###")


def on_open(ws):
    """请求连接"""
    ws.send("2probe")


def on_emit(ws):
    # 创建心跳线程
    event = Event()
    heartbeat = HeartbeatThread(event, ws)
    heartbeat.start()

    while 1:
        content = input("input: ")
        # 发送信息
        # 4: engine.io message
        # 2: socket.io event
        # chat message event message
        ws.send('42["chat message","{0}"]'.format(content))
        time.sleep(.2)


if __name__ == "__main__":
    websocket.enableTrace(True)
    # url 格式
    # ws://host:prot/socket.io/?EIO=3&transport=websocket
    ws = websocket.WebSocketApp(
        "ws://127.0.0.1:3000/socket.io/?EIO=3&transport=websocket",
        on_message=on_message,
        on_error=on_error,
        on_close=on_close
    )
    ws.on_open = on_open

    t = Timer(3, on_emit, args=(ws,))
    t.start()

    ws.run_forever()
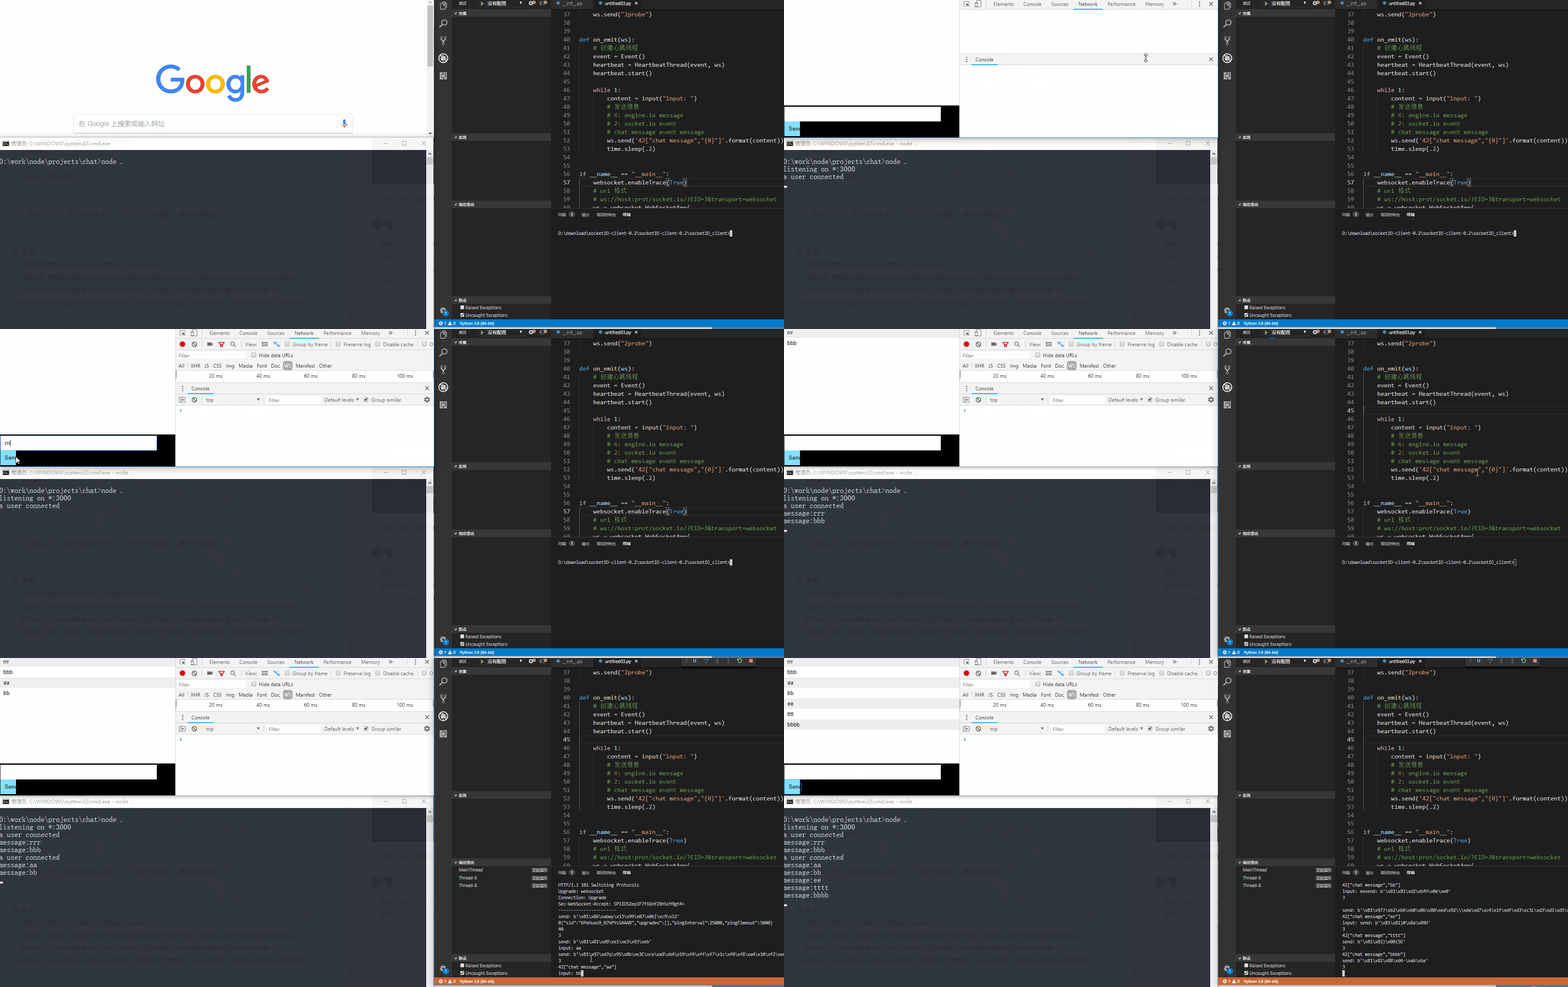
2.3 测试 运行上面的node 例子,并打开浏览器, 最终效果如下
python socket.io client 库选择(socket.io协议版本之间不完全兼容)
- socket.io protocol 2.x https://github.com/nexus-devs/socketIO-client-2.0.3
- socket.io protocol 1.x https://github.com/invisibleroads/socketIO-client
- socket.io protocol 0.9 https://pypi.org/project/socketIO-client/0.5.7.2/
参考
- 官网: https://socket.io/
- github: https://github.com/socketio/socket.io
- https://zh.wikipedia.org/wiki/Socket.IO
- https://www.zhihu.com/question/31965911
- https://www.jianshu.com/p/a3e06ec1a3a0


