将自己的代码提交到Cocoapods上面以便于自己或其他人使用Cocoapods安装使用。
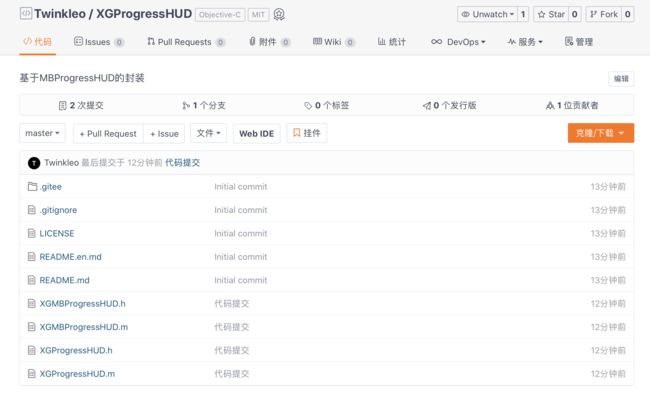
一,创建仓库,上传代码到码云(此处以码云为例)
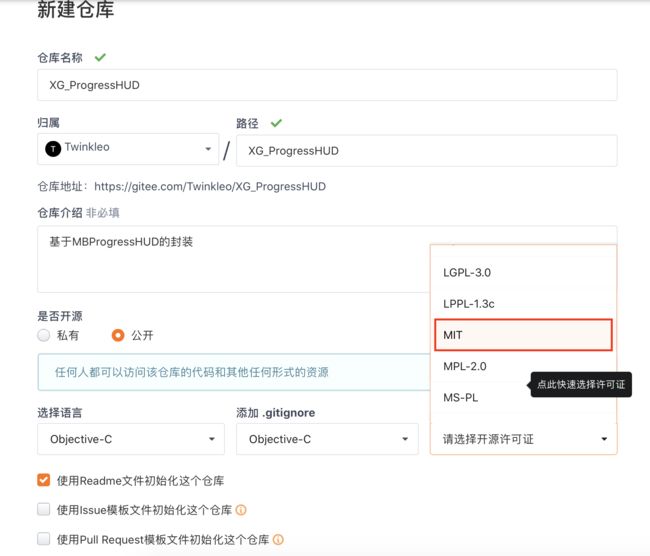
是否开源选择公开、语言和.gitignore按需选择、开源许可证必须要有、选择MIT,创建仓库、上传代码
二,给项目打tag
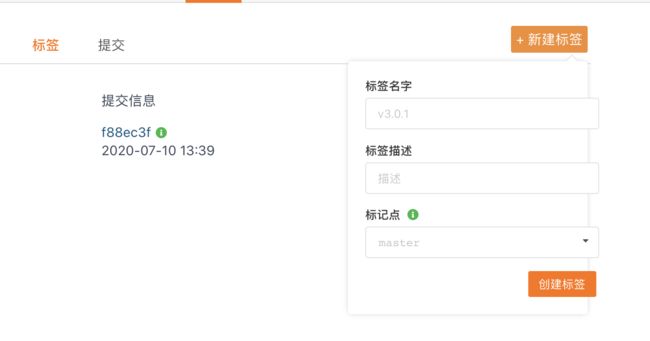
点击标签 新建标签,标签名字即版本号例如1.0.0,之后会用到,要和之后用到的时候保持一致,也是以后更新时需要改动的三,注册CocoaPods账号
打开终端用命令行注册cocoapods账号,有账号的话跳过,注册以后邮箱会收到一封确认邮件,进入邮件中的链接完成注册(使用QQ邮箱注册时虽然提示我去邮件里验证,但是邮箱一直没有收到邮件,于是换成了163邮箱)
Last login: Fri Jul 10 11:53:02 on ttys000
//注册  邮箱、昵称
twinkleo@TwinkleodeMacBook-Pro ~ % pod trunk register [email protected]  'YourName'
[!] Please verify the session by clicking the link in the verification email that has been sent to [email protected]

//查看自己的注册信息
twinkleo@TwinkleodeMacBook-Pro ~ % pod trunk me

//如果多人维护pod 可以添加其他维护者
twinkleo@TwinkleodeMacBook-Pro ~ % pod trunk add-owner name [email protected]
  - Name:     Twinkleo_LZ
  - Email:    [email protected]
  - Since:    July 7th, 02:55
  - Pods:     None
  - Sessions:
    - July 10th, 00:08 - November 15th, 00:09. IP:111.222.188.222
四、创建 .podspec文件
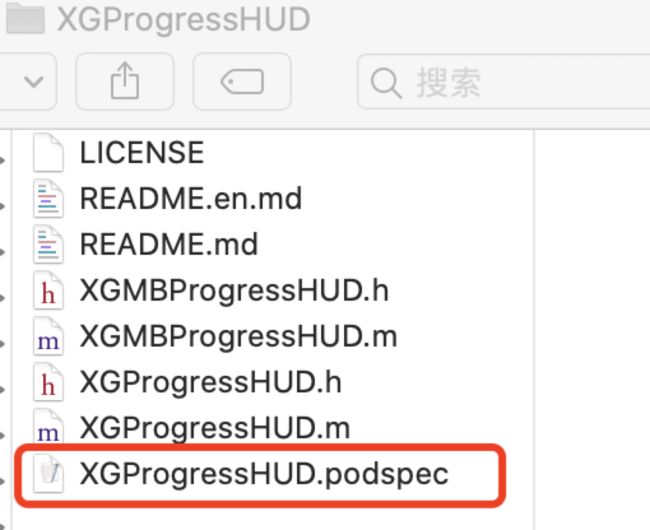
Podsepc文件:在所有支持Cocoapods导入的库的开源目录(如Github)下,我们都能看到一个.podspec文件。当然我们不管是做公有库或者是私有库都是必须配置这个文件的。这个文件是告诉Cocoapods你这个库的一些基本信息,包括你的版本号、获取的地址、那些文件是希望被包含进来的等一些信息。
这个文件是在你新建或者需要新提交一个版本的时候回进行改动的文件。
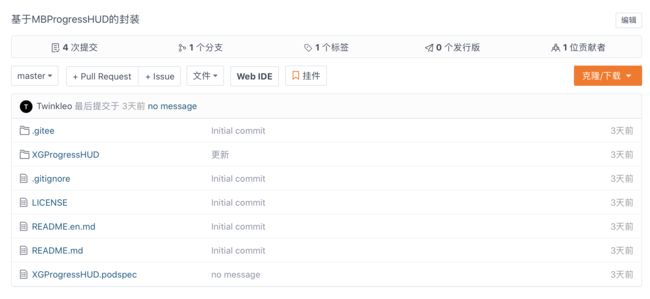
.podspec要放在clone到本地的git仓库的根目录下面,并提交到仓库的
终端创建
//cd到文件
twinkleo@TwinkleodeMacBook-Pro ~ % cd /Users/twinkleo/Desktop/XGProgressHUD

//命令行创建  这个名称就是之后cocoapods搜索使用的名称,
//例如AFNetworking、FMDB等
twinkleo@TwinkleodeMacBook-Pro XGProgressHUD % pod spec create XGProgressHUD

//提示创建完成
Specification created at XGProgressHUD.podspec
五、编辑 .podspec文件
可以用文本编辑工具打开编辑,也可以用终端打开编辑。 推荐终端编辑,用文本编辑工具有可能造成双引号变成中文导致在之后的验证中失败的问题。
终端打开vim XGProgressHUD.podspec
twinkleo@TwinkleodeMacBook-Pro XGProgressHUD % vim XGProgressHUD.podspec

  #  Not including the public_header_files will make all headers public.
  #

  spec.source_files  = "Classes", "Classes/**/*.{h,m}"
  spec.exclude_files = "Classes/Exclude"

  # spec.public_header_files = "Classes/**/*.h"


  # ――― Resources ―――――――――――――――――――――――――――――――――――――――――――――――――――――――――――――――― #
  #
  #  A list of resources included with the Pod. These are copied into the
  #  target bundle with a build phase script. Anything else will be cleaned.
  #  You can preserve files from being cleaned, please don't preserve
  #  non-essential files like tests, examples and documentation.
  #

  # spec.resource  = "icon.png"
  # spec.resources = "Resources/*.png"

  # spec.preserve_paths = "FilesToSave", "MoreFilesToSave"


  # ――― Project Linking ―――――――――――――――――――――――――――――――――――――――――――――――――――――――――― #
  #
  #  Link your library with frameworks, or libraries. Libraries do not include
  #  the lib prefix of their name.
  #

  # spec.framework  = "SomeFramework"
  # spec.frameworks = "SomeFramework", "AnotherFramework"

  # spec.library   = "iconv"
  # spec.libraries = "iconv", "xml2"


  # ――― Project Settings ――――――――――――――――――――――――――――――――――――――――――――――――――――――――― #
  #
  #  If your library depends on compiler flags you can set them in the xcconfig hash
  #  where they will only apply to your library. If you depend on other Podspecs
  #  you can include multiple dependencies to ensure it works.

  # spec.requires_arc = true

  # spec.xcconfig = { "HEADER_SEARCH_PATHS" => "$(SDKROOT)/usr/include/libxml2" }
  # spec.dependency "JSONKit", "~> 1.4"

end
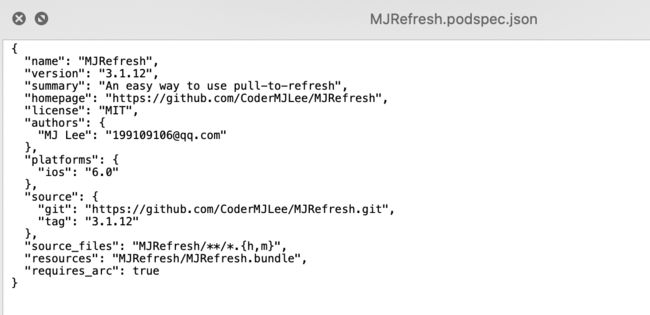
发现里面有很多,我们使用的其实并不多,只需要简单的一些介绍之类的就行,其余的全部可以删掉,建议全部删除重新写,.podspec在cocoapods中最终会以json格式展示,这里贴一个MJRefresh的.podspec.json
发现里面有框架的名称、版本、简介、框架主页、开源许可证、作者信息、最低支持版本、资源文件等
建议直接复制下面这一部分,然后更改信息
Pod::Spec.new do |s|
  s.name         = "XGProgressHUD" # 项目名称
  s.version      = "1.0.0"        # 版本号 与 你仓库的 标签号 对应
  s.license      = "MIT"   # 开源证书
  s.summary      = "基于MBProgressHUD的封装" # 项目简介

  s.homepage     = "https://gitee.com/Twinkleo/XGProgressHUD" # 你的主页
  s.source       = { :git => "https://gitee.com/Twinkleo/XGProgressHUD.git", :tag => "#{s.version}" }#你的仓库地址,不能用SSH地址
  s.source_files  = 'XGProgressHUD/XGProgressHUD.{h,m}'
  s.requires_arc = true # 是否启用ARC
  s.platform     = :ios, "10.0" #平台及支持的最低版本
  s.frameworks   = "UIKit", "Foundation", "CoreGraphics" #支持的框架

  # User
  s.author             = { "Twinkleo" => "[email protected]" } # 作者信息

end
六、验证podspec
//终端验证
pod lib lint
//或者
pod lib lint --allow-warnings
正确的话会显示
XGProgressHUD passed validation.
七、提交发布
pod trunk push XGProgressHUD.podspec
成功后显示
--------------------------------------------------------------------------------
   Congrats

   XGProgressHUD (1.0.0) successfully published
   March 7th, 01:39
   https://cocoapods.org/pods/XGProgressHUD
   Tell your friends!
八、更新cocoapods、查询、使用
常规操作
九、更新维护你的代码
代码更新维护后,就需要重写发布,流程是:
1,重新打标签、
2,更新XGProgressHUD.podspec中的版本号、
3,pod trunk push XGProgressHUD.podspec 推送到pods仓库
