import cv2
import numpy as np
from matplotlib import pyplot as plt
def cv_show_image(name, img):
cv2.imshow(name, img)
cv2.waitKey(0)
cv2.destroyAllWindows()
img = cv2.imread('images/naruto.jpg', cv2.IMREAD_GRAYSCALE)
img_float32 = np.float32(img)
dft = cv2.dft(img_float32, flags=cv2.DFT_COMPLEX_OUTPUT)
print(dft.shape)
dft_shift = np.fft.fftshift(dft)
print(dft_shift.shape)
magnitude_spectrum = 20 * np.log(cv2.magnitude(dft_shift[:, :, 0], dft_shift[:, :, 1]))
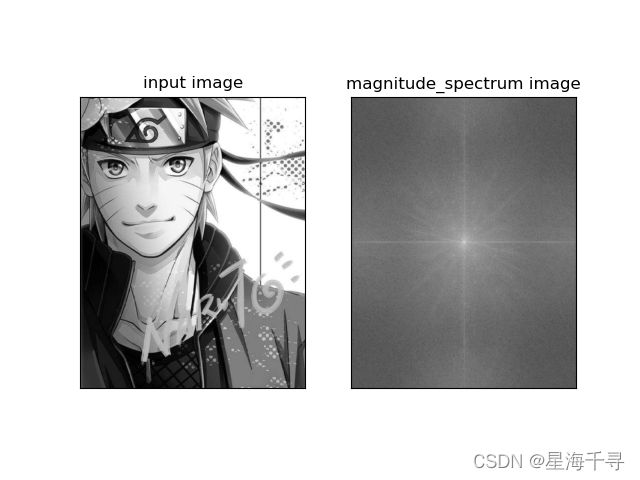
plt.subplot(1, 2, 1), plt.imshow(img, 'gray')
plt.title('input image'), plt.xticks([]), plt.yticks([])
plt.subplot(1, 2, 2), plt.imshow(magnitude_spectrum, 'gray')
plt.title('magnitude_spectrum image'), plt.xticks([]), plt.yticks([])
plt.show()
img = cv2.imread('images/naruto.jpg', cv2.IMREAD_GRAYSCALE)
img_float32 = np.float32(img)
dft = cv2.dft(img_float32, flags=cv2.DFT_COMPLEX_OUTPUT)
print(dft.shape)
dft_shift = np.fft.fftshift(dft)
print(dft_shift.shape)
rows, cols = img.shape
center_x, center_y = int(rows / 2), int(cols / 2)
mask_len = 50
mask_low = np.zeros((rows, cols, 2), np.uint8)
mask_low[center_x - mask_len: center_x + mask_len, center_y - mask_len: center_y + mask_len] = 1
mask_high = np.ones((rows, cols, 2), np.uint8)
mask_high[center_x - mask_len: center_x + mask_len, center_y - mask_len: center_y + mask_len] = 0
fshift_low = dft_shift * mask_low
f_ishift_low = np.fft.ifftshift(fshift_low)
idft_img_low = cv2.idft(f_ishift_low)
idft_img_low = cv2.magnitude(idft_img_low[:, :, 0], idft_img_low[:, :, 1])
fshift_high = dft_shift * mask_high
f_ishift_high = np.fft.ifftshift(fshift_high)
idft_img_high = cv2.idft(f_ishift_high)
idft_img_high = cv2.magnitude(idft_img_high[:, :, 0], idft_img_high[:, :, 1])
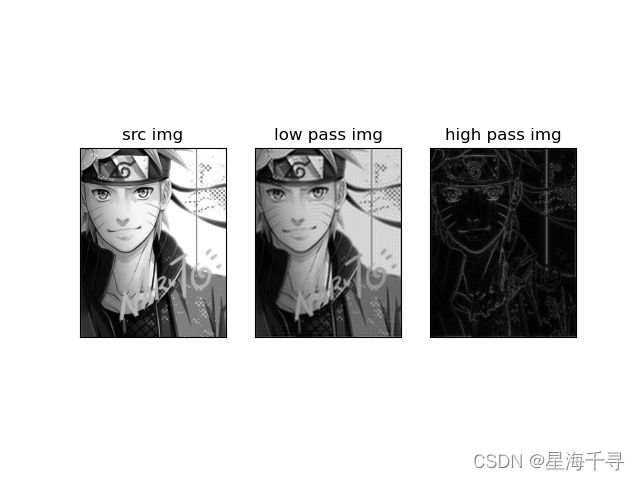
plt.subplot(131), plt.imshow(img, cmap='gray'), plt.title('src img')
plt.xticks([]), plt.yticks([])
plt.subplot(132)
plt.imshow(idft_img_low, cmap='gray'), plt.title('low pass img')
plt.xticks([]), plt.yticks([])
plt.subplot(133)
plt.imshow(idft_img_high, cmap='gray'), plt.title('high pass img')
plt.xticks([]), plt.yticks([])
plt.show()
图像和DFT后的结果

低通和高通的结果


