《iOS底层原理文章汇总》
clang插件开发
1.在下载的llvm/tools/clang/tools/CmakeLists.txt中增加要添加的插件名称
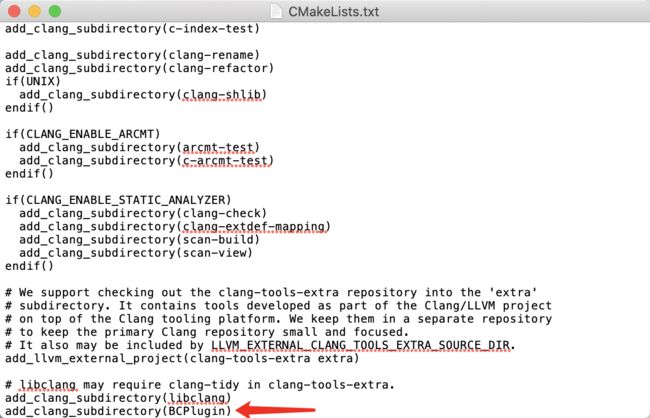
CMakeLists增加插件名[email protected]
2.在此目录下新建插件BCPlugin文件夹并新建CMakeLists.txt文件和BCPlugin.cpp文件
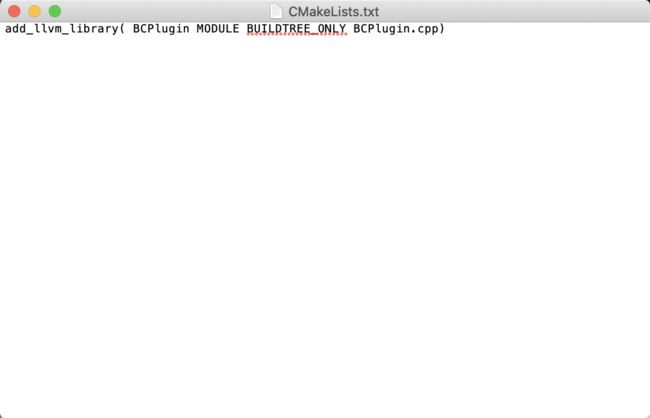
BCPlugin文件夹下[email protected]
- 可以参考下LLVMHello插件下的CMakeLists.txt文件和Hello.cpp文件
- 在build_xcode目录下编译执行cmake -G Xcode ../llvm,此时是增量编译,不会耗时太久,编译成功如下
增量编译@2x.png
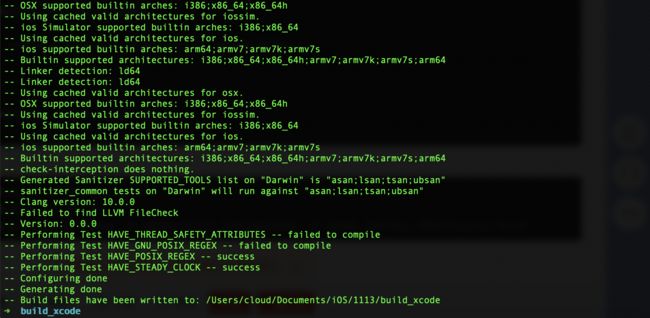
增量编译成功@2x.png
若遇到编译报错,删掉llvm文件夹下面的CMakeCache.txt文件,重新编译即可
CMakellvm报错@2x.png
-- The C compiler identification is AppleClang 11.0.3.11030032
-- The CXX compiler identification is AppleClang 11.0.3.11030032
-- The ASM compiler identification is Clang
-- Found assembler: /Applications/Xcode.app/Contents/Developer/Toolchains/XcodeDefault.xctoolchain/usr/bin/clang
-- Check for working C compiler: /Applications/Xcode.app/Contents/Developer/Toolchains/XcodeDefault.xctoolchain/usr/bin/clang
-- Check for working C compiler: /Applications/Xcode.app/Contents/Developer/Toolchains/XcodeDefault.xctoolchain/usr/bin/clang -- works
-- Detecting C compiler ABI info
-- Detecting C compiler ABI info - done
-- Detecting C compile features
-- Detecting C compile features - done
-- Check for working CXX compiler: /Applications/Xcode.app/Contents/Developer/Toolchains/XcodeDefault.xctoolchain/usr/bin/clang++
-- Check for working CXX compiler: /Applications/Xcode.app/Contents/Developer/Toolchains/XcodeDefault.xctoolchain/usr/bin/clang++ -- works
-- Detecting CXX compiler ABI info
-- Detecting CXX compiler ABI info - done
-- Detecting CXX compile features
-- Detecting CXX compile features - done
CMake Error at CMakeLists.txt:238 (message):
  In-source builds are not allowed.

  Please create a directory and run cmake from there, passing the path

  to this source directory as the last argument.

  This process created the file `CMakeCache.txt' and the directory
  `CMakeFiles'.

  Please delete them.


-- Configuring incomplete, errors occurred!
See also "/Users/cloud/Documents/iOS/1113/llvm/CMakeFiles/CMakeOutput.log".
See also "/Users/cloud/Documents/iOS/1113/llvm/CMakeFiles/CMakeError.log".
3.编译完成后在build_xcode打开编译好的llvm工程,会发现新建的BCPlugin插件,手动管理在Manage Schemes-> + -> BCPlugin
30.gif
4.编写插件代码
- 1.拷贝头文件信息
#include
#include "clang/AST/AST.h"
#include "clang/AST/DeclObjC.h"
#include "clang/AST/ASTConsumer.h"
#include "clang/ASTMatchers/ASTMatchers.h"
#include "clang/Frontend/CompilerInstance.h"
#include "clang/ASTMatchers/ASTMatchFinder.h"
#include "clang/Frontend/FrontendPluginRegistry.h"

using namespace clang;
using namespace std;
using namespace llvm;
using namespace clang::ast_matchers;
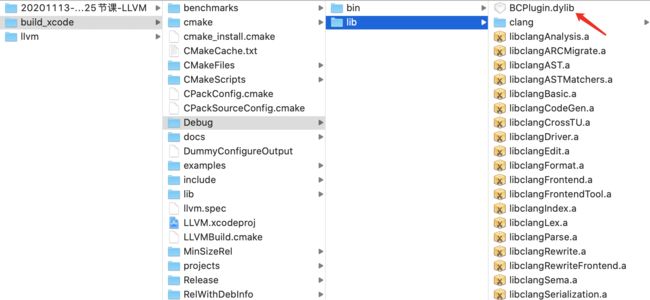
- 2.新建BCASTAction继承于PluginASTAction返回继承于抽象类ASTConsumer的BCConsumer,获取顶级节点解析和解析完成,cmd+B编译成功,会在build_xcode/debug/lib目录下生成BCPlugin.dylib
#include
#include "clang/AST/AST.h"
#include "clang/AST/DeclObjC.h"
#include "clang/AST/ASTConsumer.h"
#include "clang/ASTMatchers/ASTMatchers.h"
#include "clang/Frontend/CompilerInstance.h"
#include "clang/ASTMatchers/ASTMatchFinder.h"
#include "clang/Frontend/FrontendPluginRegistry.h"

using namespace clang;
using namespace std;
using namespace llvm;
using namespace clang::ast_matchers;

namespace BCPlugin {

    //自定义BCConsumer
    class BCConsumer:public ASTConsumer{
    public:
         //解析完一个顶级的声明,就回调一次
         bool HandleTopLevelDecl(DeclGroupRef D){
            cout<<"正在解析。。。。"< &arg){
            return true;
        }
        unique_ptr CreateASTConsumer(CompilerInstance &CI, StringRef InFile){
            return unique_ptr(new BCConsumer);
        }
    };
}
//注册插件 BCPlugin
static FrontendPluginRegistry::Add
BC("BCPlugin","this is BCPlugin");
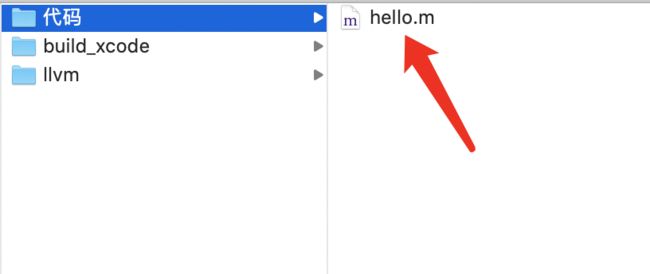
- 3.编写测试代码hello.m,查看代码中的顶级节点,在当前目录下新建代码文件夹下新建hello.m文件
int sum(int a);//顶级节点
int a;//顶级节点
int sum(int a){//顶级节点
int b = 10;
return a + b;
}
int sum2(int a,int b ){//顶级节点
int c = 10;
return a + b + c;
}
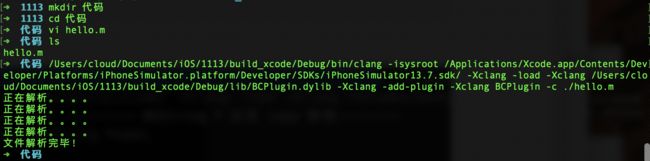
➜ 代码 /Users/cloud/Documents/iOS/1113/build_xcode/Debug/bin/clang -isysroot /Applications/Xcode.app/Contents/Developer/Platforms/iPhoneSimulator.platform/Developer/SDKs/iPhoneSimulator13.7.sdk/ -Xclang -load -Xclang /Users/cloud/Documents/iOS/1113/build_xcode/Debug/lib/BCPlugin.dylib -Xclang -add-plugin -Xclang BCPlugin -c ./hello.m
正在解析。。。。
正在解析。。。。
正在解析。。。。
正在解析。。。。
文件解析完毕!
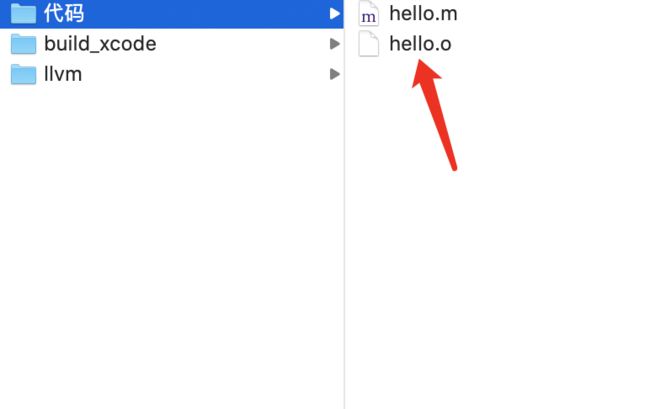
- 4.进行编译,需要用到三个文件:自己编译的clang文件,Xcode里面的模拟器sdk,自己新建的自定义插件编译好的.dylib,编译完成后在此hello.m目录下会生成hello.o文件,源文件变成目标文件,机器能识别的文件,根据打印信息存在4个顶级节点
自己编译的clang文件路径 -isysroot /Applications/Xcode.app/Contents/Developer/Platforms/iPhoneSimulator.platform/Developer/SDKs/iPhoneSimulat or12.2.sdk/
-Xclang -load -Xclang
插件(.dylib)路劲 -Xclang -add-plugin
-Xclang  插件名 -c  源码路径

/Users/cloud/Documents/iOS/1113/build_xcode/Debug/bin/clang -isysroot
/Applications/Xcode.app/Contents/Developer/Platforms/iPhoneSimulator.platform/Developer/SDKs/iPhoneSimulator13.7.sdk/
-Xclang -load -Xclang /Users/cloud/Documents/iOS/1113/build_xcode/Debug/lib/BCPlugin.dylib
-Xclang -add-plugin -Xclang BCPlugin -c ./hello.m
自定义插件编译[email protected]
31.gif
- 通过Xcode自带系统的编译器编译ViewController.m,获取抽象语法书节点
clang -isysroot /Applications/Xcode.app/Contents/Developer/Platforms/iPhoneSimulator.platform/Developer/SDKs/iPhoneSimulator13.7.sdk -fmodules -fsyntax-only -Xclang -ast-dump ViewController.m
- 5.获取上下文所有节点数据并打印,打印了包含系统的所有节点数据
namespace BCPlugin {
    class BCMatchCallback:public MatchFinder::MatchCallback{
    public:
        void run(const::MatchFinder::MatchResult &Result){
           //通过result获取到节点
         const ObjCPropertyDecl *propertyDecl =   Result.Nodes.getNodeAs("objcPropertyDecl");
            if (propertyDecl) {
                string typeStr = propertyDecl->getType().getAsString();
                cout<<"------拿到了:"< &arg){
            return true;
        }
        unique_ptr CreateASTConsumer(CompilerInstance &CI, StringRef InFile){
            return unique_ptr(new BCConsumer);
        }
    };
}
//注册插件 BCPlugin
static FrontendPluginRegistry::Add
BC("BCPlugin","this is BCPlugin");

/Users/cloud/Documents/iOS/1113/build_xcode/Debug/bin/clang -isysroot /Applications/Xcode.app/Contents/Developer/Platforms/iPhoneSimulator.platform/Developer/SDKs/iPhoneSimulator13.7.sdk/ -Xclang -load -Xclang /Users/cloud/Documents/iOS/1113/build_xcode/Debug/lib/BCPlugin.dylib -Xclang -add-plugin -Xclang BCPlugin -c ./ViewController.m
获取所有节点@2x.png
- 6.获取文件名称
获取文件名称@2x.png
- 7.过滤系统的节点,获取自己的代码节点
      bool isUserSourceCode(const string fileName){
            if (fileName.empty()) return false;
            //非Xcode中的源码都认为是用户的
            if (fileName.find("/Applications/Xcode.app/") == 0)
                return false;
            return true;
        }
获取自己的代码节点过滤系统的@2x.png
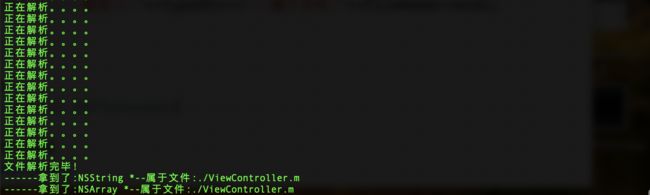
- 8.NSString,NSArray,NSDictionary用copy修饰
    //判断是否应该用copy修饰
        bool isShouldUseCopy(const string typeStr){
            if (typeStr.find("NSString") != string::npos ||
                typeStr.find("NSArray") != string::npos ||
                typeStr.find("NSDictionary") != string::npos) {
                return true;
            }
            return false;
        }
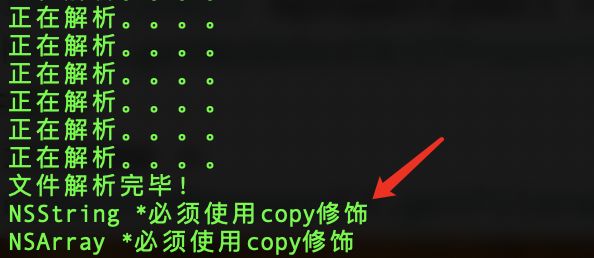
提示必须copy修饰@2x.png
- 9.定位到代码错误
//拿到节点的描述信息
ObjCPropertyDecl::PropertyAttributeKind attrKind = propertyDecl->getPropertyAttributes();
//判断应该使用copy但是没有使用copy
if (isShouldUseCopy(typeStr) && !(attrKind & ObjCPropertyDecl::OBJC_PR_copy)) {
            cout<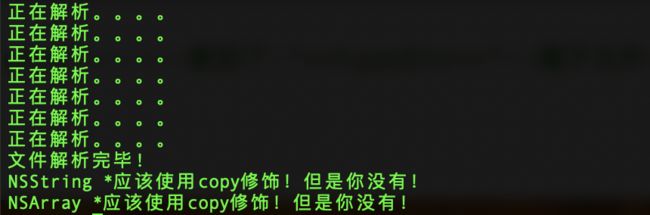
定位到代码错误@2x.png
- 10.发出警告
//判断应该使用copy但是没有使用copy
if (isShouldUseCopy(typeStr) && !(attrKind & ObjCPropertyDecl::OBJC_PR_copy)) {
cout<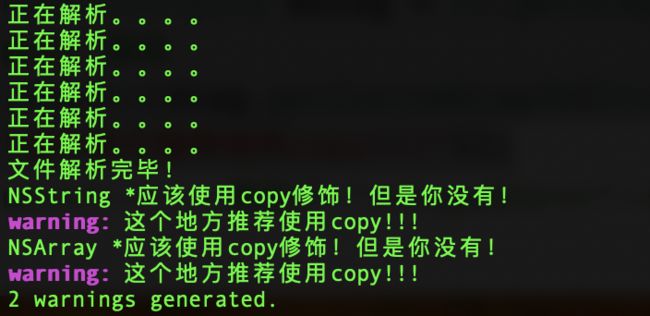
- 11.确定发生错误的位置,并警告
                //判断应该使用copy但是没有使用copy
                if (isShouldUseCopy(typeStr) && !(attrKind & ObjCPropertyDecl::OBJC_PR_copy)) {
                    cout<getBeginLoc(),diag.getCustomDiagID(DiagnosticsEngine::Warning, "这个地方推荐使用copy!!!"));

确定警告位置@2x.png
- 12.选定占位符,指出具体需要用copy修饰的位置
//判断应该使用copy但是没有使用copy
if (isShouldUseCopy(typeStr) && !(attrKind & ObjCPropertyDecl::OBJC_PR_copy)) {
cout<getBeginLoc(),diag.getCustomDiagID(DiagnosticsEngine::Warning, "%0这个地方推荐使用copy!!!"))< 
指定须用copy修饰的位置提示和警告@2x.png
- 13.删除cout代码,集成到Xcode中,编译后集成到Xcode中
- 1.在Xcode -> Build Settings Other C Flags中输入 -Xclang -load -Xclang 插件绝对路径 -Xclang -add-plugin -Xclang 插件名称(BCPlugin)
32.gif
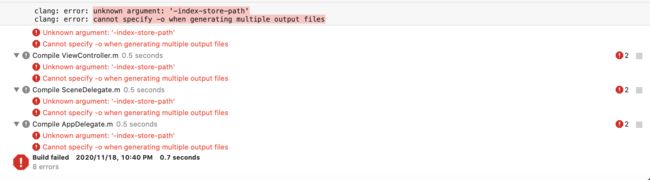
- 2.Cmd + B编译报错,由于clang插件需要使用对应的版本去加载,如果版本不一致则会导致编译错误,出现如下错误,网上download下来的llvm和Xcode的clang版本不一定匹配,Xcode集成的clang和插件所依赖的clang不一定一致

clang编译版本错误@2x.png
error: unable to load plugin '/Users/cloud/Documents/iOS/1113/build_xcode/Debug/lib/BCPlugin.dylib': 'dlopen(/Users/cloud/Documents/iOS/1113/build_xcode/Debug/lib/BCPlugin.dylib, 9): Symbol not found: __ZN5clang12ast_matchers16objcPropertyDeclE
  Referenced from: /Users/cloud/Documents/iOS/1113/build_xcode/Debug/lib/BCPlugin.dylib
  Expected in: flat namespace
 in /Users/cloud/Documents/iOS/1113/build_xcode/Debug/lib/BCPlugin.dylib'
warning: Could not read serialized diagnostics file: Cannot Load File: Failed to open diagnostics file (in target 'Demo' from project 'Demo')
Command CompileC failed with a nonzero exit code
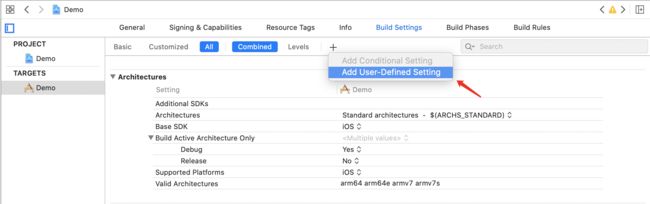
- 在Build Settings栏目中新增两项用户自定义的设置CC和CXX,CC对应的是自己编译的clang的绝对路径,CXX对应的是自己编译的clang++的绝对路径,
自己编译的clang和cxx的绝对路径在build_xcode/Debug/bin/路径下,clang为二进制可执行文件,clang++文件为快捷方式
33.gif
- 3.Cmd + B继续报错,在Build settings中搜索index,将Enable index-While-Building Functionality的Default改为NO。
index错误@2x.png
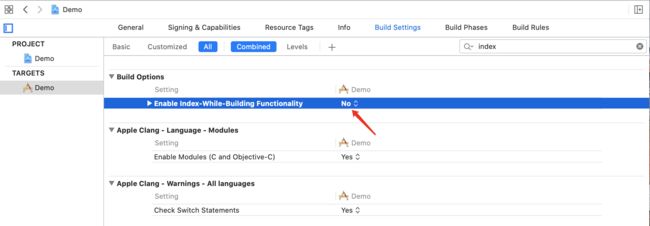
indexDefault改为[email protected]
-
4.Cmd + B重新编译,自定义插件生效
自定义插件生效@2x.png
#include
#include "clang/AST/AST.h"
#include "clang/AST/DeclObjC.h"
#include "clang/AST/ASTConsumer.h"
#include "clang/ASTMatchers/ASTMatchers.h"
#include "clang/Frontend/CompilerInstance.h"
#include "clang/ASTMatchers/ASTMatchFinder.h"
#include "clang/Frontend/FrontendPluginRegistry.h"

using namespace clang;
using namespace std;
using namespace llvm;
using namespace clang::ast_matchers;

namespace BCPlugin {
    class BCMatchCallback:public MatchFinder::MatchCallback{
    private:
        CompilerInstance &CI;
        bool isUserSourceCode(const string fileName){
            if (fileName.empty()) return false;
            //非Xcode中的源码都认为是用户的
            if (fileName.find("/Applications/Xcode.app/") == 0)
                return false;
            return true;
        }
        //判断是否应该用copy修饰
        bool isShouldUseCopy(const string typeStr){
            if (typeStr.find("NSString") != string::npos ||
                typeStr.find("NSArray") != string::npos ||
                typeStr.find("NSDictionary") != string::npos) {
                return true;
            }
            return false;
        }
    public:
        BCMatchCallback(CompilerInstance &CI):CI(CI){}
        //真正的回调!
        void run(const::MatchFinder::MatchResult &Result){
           //通过result获取到节点
         const ObjCPropertyDecl *propertyDecl =   Result.Nodes.getNodeAs("objcPropertyDecl");
            //打印文件名称
            string fileName = CI.getSourceManager().getFilename(propertyDecl->getSourceRange().getBegin()).str();
            //判断节点有值且是用户自己的代码不是系统的
            if (propertyDecl && isUserSourceCode(fileName)) {
                //拿到节点的类型!并打印!
                string typeStr = propertyDecl->getType().getAsString();
                //拿到节点的描述信息
                ObjCPropertyDecl::PropertyAttributeKind attrKind = propertyDecl->getPropertyAttributes();
                //判断应该使用copy但是没有使用copy
                if (isShouldUseCopy(typeStr) && !(attrKind & ObjCPropertyDecl::OBJC_PR_copy)) {
//                    cout<getBeginLoc(),diag.getCustomDiagID(DiagnosticsEngine::Warning, "%0这个地方推荐使用copy!!!"))< &arg){
            return true;
        }
        unique_ptr CreateASTConsumer(CompilerInstance &CI, StringRef InFile){
            return unique_ptr(new BCConsumer(CI));
        }
    };
}
//注册插件 BCPlugin
static FrontendPluginRegistry::Add
BC("BCPlugin","this is BCPlugin");