首先献上官方文档https://developer.android.google.cn/studio/build/gradle-tips
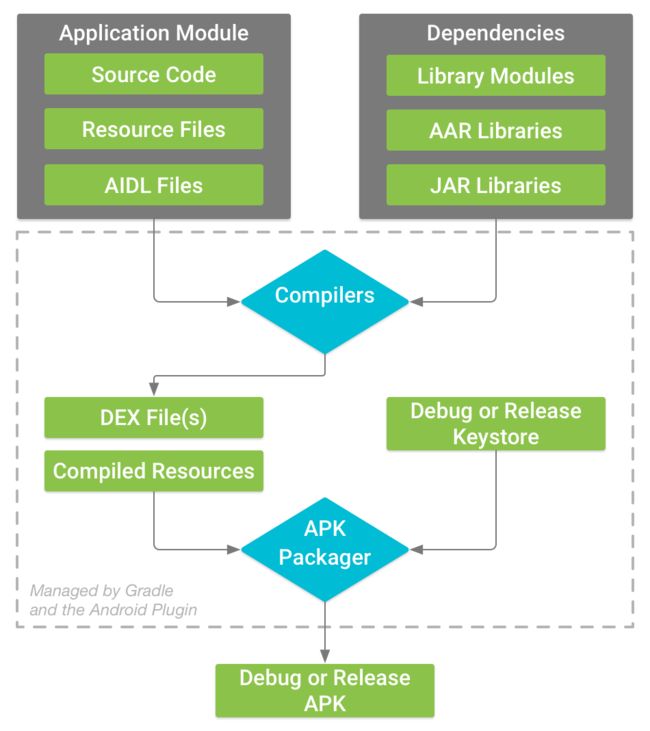
首先我们明确一下Android 的打包流程
https://developer.android.google.cn/studio/build/index.html
1、编译器①将安卓的源码编译为DEX文件,并将其他内容转为②已编译资源。
2、APK打包器将 DEX 文件与已编译资源合并③成为单个 APK。
3、APK打包器使用调试或发布秘钥库签名④ APK。
4、APK打包器使用 zipalign⑤对其进行优化。
结束构建。
这里有五个问题:
1、编译器将.java 编译为 dex 文件的过程是怎样的;
2、其他内容如何转为已编译资源的;
3、APK打包器如何将 dex 与已编译资源合并为 apk 的;
4、如何进行签名操作;
5、zipalign 是什么,以及如何对 apk 进行了优化;
project 层级的 build.gradle
/**
 * 您可以在buildscript块中为Gradle本身配置存储库和依赖项,
 * 这意味着您不应在此处包含模块的依赖项。
 * 例如,此块包含Gradle的Android插件作为依赖项,
 * 因为它提供了Gradle构建Android应用程序模块所需的其他指令。
 */
buildscript {
    /**
     * repositories块配置Gradle使用的repositories搜索或下载依赖项。
     * Gradle预先配置对远程的支持存储库,如JCenter,Maven Central和Ivy。 您也可以使用本地
     * 存储库或定义您自己的远程存储库。
     * 下面的代码定义JCenter作为存储库Gradle应该用来查找它的依赖项。
     * 使用Android Studio 3.0及更高版本创建的新项目还包括Google的Maven存储库。
     */
    repositories {
        google()
        jcenter()
    }
    /**
     * dependencies块配置Gradle需要用于构建项目的依赖项。
     * 以下行将Gradle版本3.4.0的Android插件添加为类路径依赖项。
     */
    dependencies {
        classpath 'com.android.tools.build:gradle:3.4.0'
    }
}
/**
 * allprojects块是您配置项目中所有模块使用的存储库和依赖项的方,
 * 例如第三方插件或库。
 * 但是,您应该在每个模块级build.gradle文件中配置特定于模块的赖项。
 * 对于新项目,Android Studio默认包含JCenter和Google的Maven存储库,
 * 但它不配置任何依赖项(除非您选择需要某些模板的模板)。
 */
allprojects {
    repositories {
        google()
        jcenter()
    }
}
APP 下的 build.gradle基本结构
/**
 * The first line in the build configuration applies the Android plugin for
 * Gradle to this build and makes the android block available to specify
 * Android-specific build options.
 */
apply plugin: 'com.android.application'
/**
 * The android block is where you configure all your Android-specific
 * build options.
 */
android {
    /**
     * compileSdkVersion specifies the Android API level Gradle should use to
     * compile your app. This means your app can use the API features included in
     * this API level and lower.
     */
    compileSdkVersion 28
    /**
     * buildToolsVersion specifies the version of the SDK build tools, command-line
     * utilities, and compiler that Gradle should use to build your app. You need to
     * download the build tools using the SDK Manager.
     *
     * This property is optional because the plugin uses a recommended version of
     * the build tools by default.
     */
    buildToolsVersion "28.0.3"
    /**
     * The defaultConfig block encapsulates default settings and entries for all
     * build variants, and can override some attributes in main/AndroidManifest.xml
     * dynamically from the build system. You can configure product flavors to override
     * these values for different versions of your app.
     */
    defaultConfig {
        /**
         * applicationId uniquely identifies the package for publishing.
         * However, your source code should still reference the package name
         * defined by the package attribute in the main/AndroidManifest.xml file.
         */
        applicationId 'com.example.myapp'
        // Defines the minimum API level required to run the app.
        minSdkVersion 15
        // Specifies the API level used to test the app.
        targetSdkVersion 28
        // Defines the version number of your app.
        versionCode 1
        // Defines a user-friendly version name for your app.
        versionName "1.0"
    }
    /**
     * The buildTypes block is where you can configure multiple build types.
     * By default, the build system defines two build types: debug and release. The
     * debug build type is not explicitly shown in the default build configuration,
     * but it includes debugging tools and is signed with the debug key. The release
     * build type applies Proguard settings and is not signed by default.
     */
    buildTypes {
        /**
         * By default, Android Studio configures the release build type to enable code
         * shrinking, using minifyEnabled, and specifies the Proguard settings file.
         */
        release {
            minifyEnabled true // Enables code shrinking for the release build type.
            proguardFiles getDefaultProguardFile('proguard-android.txt'), 'proguard-rules.pro'
        }
    }

    /**
     * The productFlavors block is where you can configure multiple product flavors.
     * This allows you to create different versions of your app that can
     * override the defaultConfig block with their own settings. Product flavors
     * are optional, and the build system does not create them by default.
     *
     * This example creates a free and paid product flavor. Each product flavor
     * then specifies its own application ID, so that they can exist on the Google
     * Play Store, or an Android device, simultaneously.
     *
     * If you declare product flavors, you must also declare flavor dimensions
     * and assign each flavor to a flavor dimension.
     */

    flavorDimensions "tier"
    productFlavors {
        free {
            dimension "tier"
            applicationId 'com.example.myapp.free'
        }

        paid {
            dimension "tier"
            applicationId 'com.example.myapp.paid'
        }
    }

    /**
     * The splits block is where you can configure different APK builds that
     * each contain only code and resources for a supported screen density or
     * ABI. You'll also need to configure your build so that each APK has a
     * different versionCode.
     */

    splits {
        // Settings to build multiple APKs based on screen density.
        density {

            // Enable or disable building multiple APKs.
            enable false

            // Exclude these densities when building multiple APKs.
            exclude "ldpi", "tvdpi", "xxxhdpi", "400dpi", "560dpi"
        }
    }
}

/**
 * The dependencies block in the module-level build configuration file
 * specifies dependencies required to build only the module itself.
 * To learn more, go to Add build dependencies.
 */

dependencies {
    implementation project(":lib")
    implementation 'com.android.support:appcompat-v7:28.0.0'
    implementation fileTree(dir: 'libs', include: ['*.jar'])
}
1、android插件的引入,使得 android{}部分可用
2、android 配置
3、dependences 依赖配置
首先来看 android {}部分
我们看看都支持哪些配置字段:
aaptOptions {}//指定Android资产包装工具(AAPT)的选项。
adbOptions {}//指定Android调试桥(ADB)的选项,例如APK安装选项。
buildTypes {}//封装此项目的所有构建类型配置。
compileOptions {}//指定Java编译器选项,例如Java源代码的语言级别和生成的字节码。
dataBinding {}//指定数据绑定库的选项。
defaultConfig {}//指定Android插件适用于所有构建变体的变体属性的默认值。
dexOptions {}//指定DEX工具的选项,例如启用库预处理。
externalNativeBuild {}//使用CMake或ndk-build配置外部本机构建。
jacoco {}//配置用于脱机检测和覆盖率报告的JaCoCo版本。
lintOptions {}//指定lint工具的选项。
packagingOptions {}//指定用于确定Android插件将哪些文件打包到APK中的选项和规则。
productFlavors {}//封装此项目的所有产品风格配置。
签名会话{}//封装可应用于BuildType和ProductFlavor配置的签名配置。
sourceSets {}//封装所有变体的源集配置。
splits{}//指定用于构建多个APK或APK拆分的配置。
testOptions {}//指定Android插件应如何运行本地和检测测试的选项。
详细说明祭出 google 文档 plugins:'com.android.application'
挑几个常用的说一下
首先新建项目时自动会生成的 defaultConfig{}
指定Android插件适用于所有构建变体的变体属性的默认值。
配置产品flavor时,可以覆盖任何defaultConfig属性。
有关可在此块中配置的属性的更多信息,请参阅ProductFlavor。
/**
     * applicationId uniquely identifies the package for publishing.
     * However, your source code should still reference the package name
     * defined by the package attribute in the main/AndroidManifest.xml file.
     */
    applicationId 'com.example.myapp'
    // Defines the minimum API level required to run the app.
    minSdkVersion 15
    // Specifies the API level used to test the app.
    targetSdkVersion 28
    // Defines the version number of your app.
    versionCode 1
    // Defines a user-friendly version name for your app.
    versionName "1.0"
      ..............
在渠道配置这里可以对 config 的属性进行覆盖 比如这里进行的覆盖就是 appid
productFlavors {
    free {
      dimension "tier"
      applicationId 'com.example.myapp.free'
    }
    paid {
      dimension "tier"
      applicationId 'com.example.myapp.paid'
    }
  }
buildTypes{}
您可以在模块级 build.gradle 文件的 android 代码块内部创建和配置构建类型。当您创建新模块时,Android Studio 会自动为您创建调试和发布这两种构建类型。尽管调试构建类型不会出现在构建配置文件中,Android Studio 会为其配置 debuggable true。这样,您可以在安全的 Android 设备上调试应用并使用通用调试密钥库配置 APK 签署。
如果您希望添加或更改特定设置,您可以将调试构建类型添加到您的配置中。以下示例为调试构建类型指定了 applicationIdSuffix,并配置了一个使用调试构建类型中的设置进行初始化的“staging”构建类型。
buildTypes {
        debug {
            minifyEnabled false
        }
        release {
            minifyEnabled false
            proguardFiles getDefaultProguardFile('proguard-android-optimize.txt'), 'proguard-rules.pro'
        }
    }
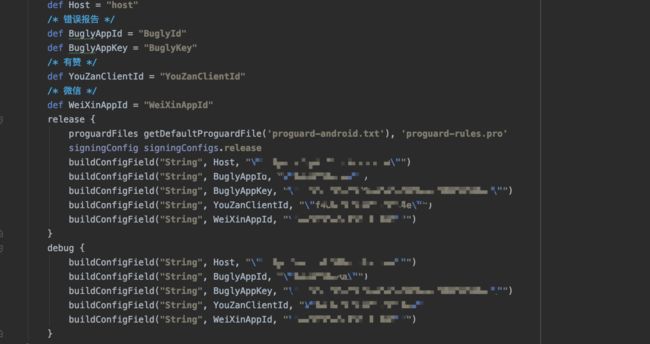
buildType 还可以做到对 buildConfig 文件写入变量来控制一些字段
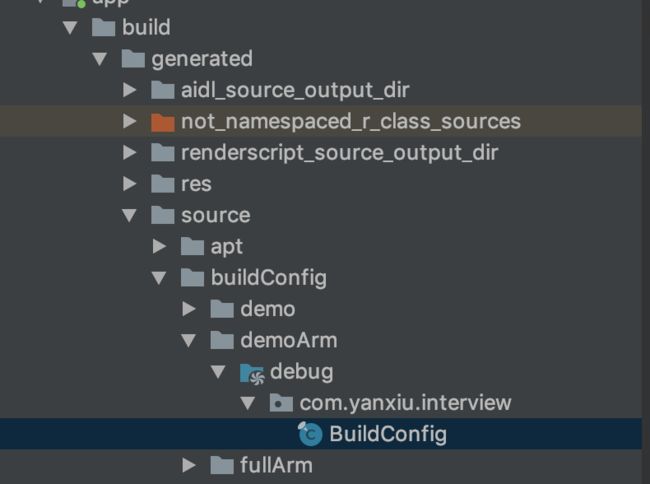
在这里设置的字段 最终会被编译到 buildConfig.java中
项目中就可以直接使用 buildConfig 文件来读取某些构建配置共代码层使用了。
productFlavors {}
创建产品风格与创建构建类型相似:只需将其添加到构建配置中的 productFlavors 代码块并加入所需的设置即可。产品风格支持与 defaultConfig 相同的属性,这是因为 defaultConfig 实际上属于 ProductFlavor 类。这意味着,您可以在 defaultConfig 代码块中提供所有风格的基本配置,每种风格均可更改任何这些默认值,例如 applicationId。
// Specifies one flavor dimension.
    flavorDimensions "version"
    productFlavors {
        demo {
            // Assigns this product flavor to the "version" flavor dimension.
            // This property is optional if you are using only one dimension.
            dimension "version"
            applicationIdSuffix ".demo"
            versionNameSuffix "-demo"
        }
        full {
            dimension "version"
            applicationIdSuffix ".full"
            versionNameSuffix "-full"
        }
    }
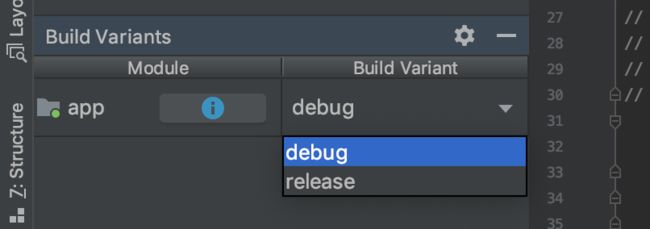
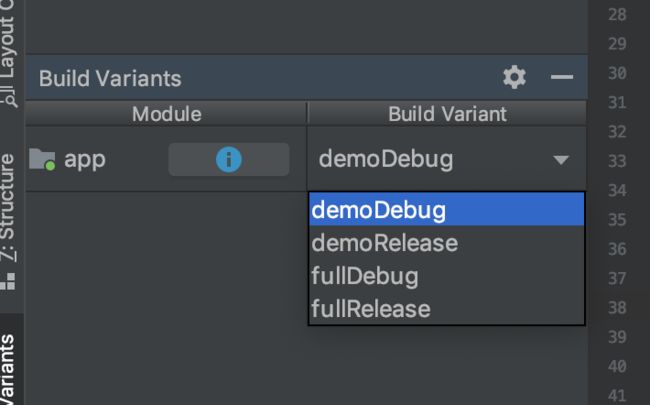
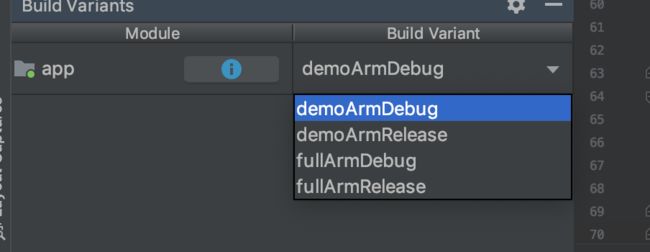
当你配置了产品风格以后 buildVariant 会变成上图所示的样子
buildType 与 ProductFlavor 进行了交叉组合
他们的区别是什么呢?
一般情况 buildType 是为了构建形式进行的设定,比如是 debug 还是 release 版本,这两种情况有些不同的配置比如服务器地址或。
productFlavor 更像是针对构建完成后产品的差异而进行的配置,比如我需要构建一个 某平台的 apk 包,这个平台要求的 minsdk 与其他不同 那么我在这里设置一个不同的值,两个版本的 apk 包,这时也可以使用 productFlavor 进行设置,我个人的理解是 buildType 是配置怎么构建,而 productFlavor 是构建给谁。
splits{}
splits {
    // Configures multiple APKs .
    ...
  }
另一个跟打包相关的块是 splits 分包块
这个块里面有两个常用的字段
1、abi cpu 架构
splits {

    // Configures multiple APKs based on ABI.
    abi {
      // Enables building multiple APKs per ABI.
      enable true
      // By default all ABIs are included, so use reset() and include to specify that we only
      // want APKs for x86 and x86_64.
      // Resets the list of ABIs that Gradle should create APKs for to none.
      reset()
      // Specifies a list of ABIs that Gradle should create APKs for.
      include "x86", "x86_64"
      // Specifies that we do not want to also generate a universal APK that includes all ABIs.
      universalApk false
    }
  }
2、density 屏幕分辨率
splits {
    // Configures multiple APKs based on screen density.
    density {
      // Configures multiple APKs based on screen density.
      enable true
      // Specifies a list of screen densities Gradle should not create multiple APKs for.
      exclude "ldpi", "xxhdpi", "xxxhdpi"
      // Specifies a list of compatible screen size settings for the manifest.
      compatibleScreens 'small', 'normal', 'large', 'xlarge'
    }
  }
我们再加入 abi 的部分
 splits {

        // Configures multiple APKs based on screen density.
        density {
            // Configures multiple APKs based on screen density.
            enable true
            // Specifies a list of screen densities Gradle should not create multiple APKs for.
            exclude "ldpi", "xxhdpi", "xxxhdpi"
            // Specifies a list of compatible screen size settings for the manifest.
            compatibleScreens 'small', 'normal', 'large', 'xlarge'
        }
        abi {
            // Enables building multiple APKs per ABI.
            enable true
            // By default all ABIs are included, so use reset() and include to specify that we only
            // want APKs for x86 and x86_64.
            // Resets the list of ABIs that Gradle should create APKs for to none.
            reset()
            // Specifies a list of ABIs that Gradle should create APKs for.
            include "x86", "x86_64"
            // Specifies that we do not want to also generate a universal APK that includes all ABIs.
            universalApk false
        }
    }
配置了这些后 如果我们部署测试机是怎么样的?
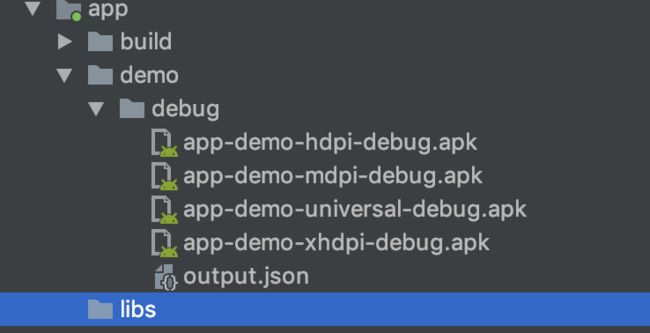
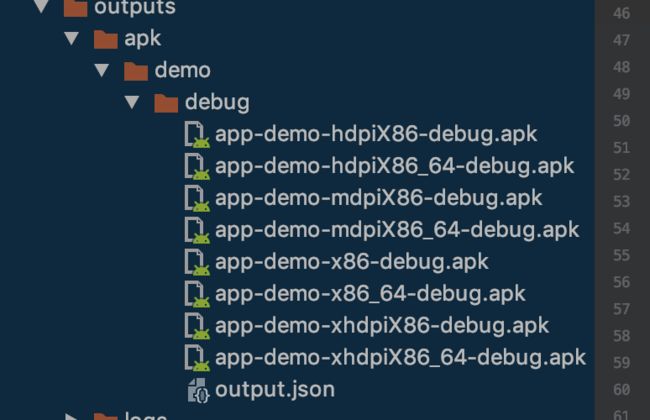
看到 执行了 assembleDemoDebug 也就是 执行了 buildTpye debug
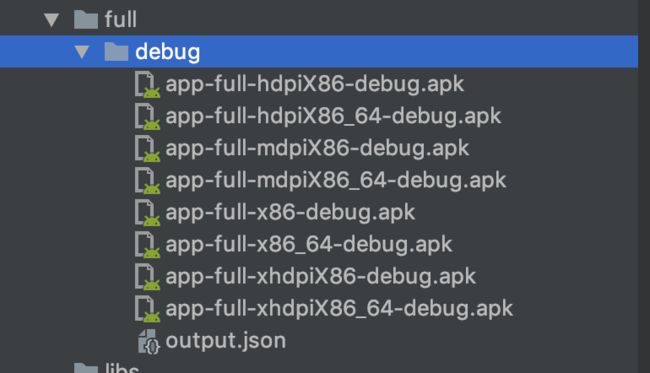
productFlavor demo 的组合 而在 build/output/apk中 我们看到了
所以这是先打出所有符合条件的包 再将符合规则的包部署到测试机上。
除了 splits 对包进行区分在 productFlavor 也可也达到同样的效果
   // Specifies one flavor dimension.
    flavorDimensions "version","abi"
    productFlavors {
        arm{
            dimension "abi"
            ndk {
                abiFilters "arm64-v8a", "armeabi", "armeabi-v7a"
            }
        }
    }
这样在指定 buildVariant 时就能直接指定 abi 架构了
(但是这个不能与 splits 的 abi 同时设置,会报冲突错误)
ERROR: Conflicting configuration : 'armeabi-v7a,armeabi,arm64-v8a' in ndk abiFilters cannot be present when splits abi filters are set : x86_64,x86
Affected Modules: app
sourceSets{}
sourceSets 的配置基本就是指定源文件的路径,通过添加一些配置文件的变量,可以达到根据配置编译不同的类文件或资源文件,在模块化项目中可以做到动态配置 lib木块功能及界面。
