全连接卷积神经网络(FCN)
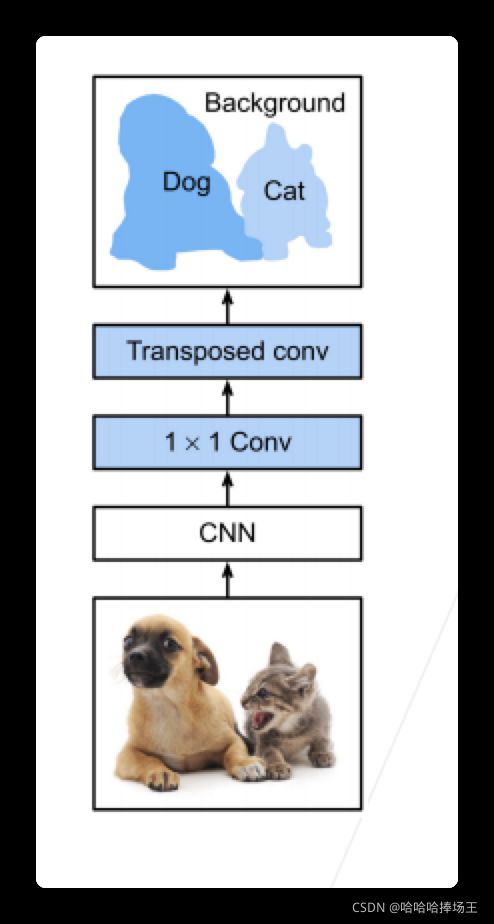
- FCN是用深度神经网络来做语义分割的奠基性工作
- 他用转置卷积层来替换CNN最后的全连接层,从而可以实现每个像素的预测

代码实现
%matplotlib inline
import torch
import torchvision
from torch import nn
from torch.nn import functional as F
from d2l import torch as d2l
pretrained_net = torchvision.models.resnet18(pretrained=True)
list(pretrained_net.children())[-3:]
[Sequential(
   (0): BasicBlock(
     (conv1): Conv2d(256, 512, kernel_size=(3, 3), stride=(2, 2), padding=(1, 1), bias=False)
     (bn1): BatchNorm2d(512, eps=1e-05, momentum=0.1, affine=True, track_running_stats=True)
     (relu): ReLU(inplace=True)
     (conv2): Conv2d(512, 512, kernel_size=(3, 3), stride=(1, 1), padding=(1, 1), bias=False)
     (bn2): BatchNorm2d(512, eps=1e-05, momentum=0.1, affine=True, track_running_stats=True)
     (downsample): Sequential(
       (0): Conv2d(256, 512, kernel_size=(1, 1), stride=(2, 2), bias=False)
       (1): BatchNorm2d(512, eps=1e-05, momentum=0.1, affine=True, track_running_stats=True)
     )
   )
   (1): BasicBlock(
     (conv1): Conv2d(512, 512, kernel_size=(3, 3), stride=(1, 1), padding=(1, 1), bias=False)
     (bn1): BatchNorm2d(512, eps=1e-05, momentum=0.1, affine=True, track_running_stats=True)
     (relu): ReLU(inplace=True)
     (conv2): Conv2d(512, 512, kernel_size=(3, 3), stride=(1, 1), padding=(1, 1), bias=False)
     (bn2): BatchNorm2d(512, eps=1e-05, momentum=0.1, affine=True, track_running_stats=True)
   )
 ),
 AdaptiveAvgPool2d(output_size=(1, 1)),
 Linear(in_features=512, out_features=1000, bias=True)]
net = nn.Sequential(*list(pretrained_net.children())[:-2])
X = torch.rand(size=(1, 3, 320, 480))
net(X).shape
/Users/tiger/opt/anaconda3/envs/d2l-zh/lib/python3.8/site-packages/torch/nn/functional.py:718: UserWarning: Named tensors and all their associated APIs are an experimental feature and subject to change. Please do not use them for anything important until they are released as stable. (Triggered internally at  ../c10/core/TensorImpl.h:1156.)
  return torch.max_pool2d(input, kernel_size, stride, padding, dilation, ceil_mode)


torch.Size([1, 512, 10, 15])
num_classes = 21
net.add_module('final_conv', nn.Conv2d(512, num_classes, kernel_size=1))
net.add_module(
'transpose_conv',
nn.ConvTranspose2d(num_classes, num_classes, kernel_size=64, padding=16,
stride=32))
def bilinear_kernel(in_channels, out_channels, kernel_size):
factor = (kernel_size + 1) // 2
if kernel_size % 2 == 1:
center = factor - 1
else:
center = factor - 0.5
og = (torch.arange(kernel_size).reshape(-1, 1),
torch.arange(kernel_size).reshape(1, -1))
filt = (1 - torch.abs(og[0] - center) / factor) * \
(1 - torch.abs(og[1] - center) / factor)
weight = torch.zeros(
(in_channels, out_channels, kernel_size, kernel_size))
weight[range(in_channels), range(out_channels), :, :] = filt
return weight
conv_trans = nn.ConvTranspose2d(3, 3, kernel_size=4, padding=1, stride=2,
bias=False)
conv_trans.weight.data.copy_(bilinear_kernel(3, 3, 4));
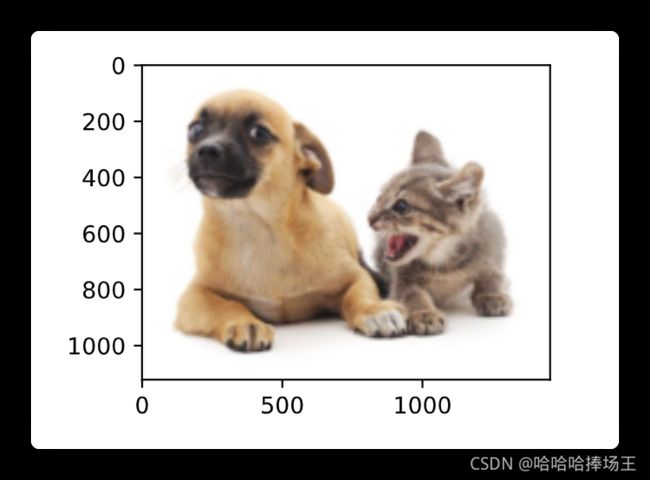
img = torchvision.transforms.ToTensor()(d2l.Image.open('/Users/tiger/Desktop/study/机器学习/李沐深度学习/d2l-zh/pytorch/img/catdog.jpg'))
X = img.unsqueeze(0)
Y = conv_trans(X)
out_img = Y[0].permute(1, 2, 0).detach()
d2l.set_figsize()
print('input image shape:', img.permute(1, 2, 0).shape)
d2l.plt.imshow(img.permute(1, 2, 0))
print('output image shape:', out_img.shape)
d2l.plt.imshow(out_img);
input image shape: torch.Size([561, 728, 3])
output image shape: torch.Size([1122, 1456, 3])

W = bilinear_kernel(num_classes, num_classes, 64)
net.transpose_conv.weight.data.copy_(W);
batch_size, crop_size = 32, (320, 480)
train_iter, test_iter = d2l.load_data_voc(batch_size, crop_size)
read 1114 examples
read 1078 examples
def loss(inputs, targets):
return F.cross_entropy(inputs, targets, reduction='none').mean(1).mean(1)
num_epochs, lr, wd, devices = 5, 0.001, 1e-3, d2l.try_all_gpus()
trainer = torch.optim.SGD(net.parameters(), lr=lr, weight_decay=wd)
d2l.train_ch13(net, train_iter, test_iter, loss, trainer, num_epochs, devices)
def predict(img):
X = test_iter.dataset.normalize_image(img).unsqueeze(0)
pred = net(X.to(devices[0])).argmax(dim=1)
return pred.reshape(pred.shape[1], pred.shape[2])
def label2image(pred):
colormap = torch.tensor(d2l.VOC_COLORMAP, device=devices[0])
X = pred.long()
return colormap[X, :]
voc_dir = d2l.download_extract('voc2012', 'VOCdevkit/VOC2012')
test_images, test_labels = d2l.read_voc_images(voc_dir, False)
n, imgs = 4, []
for i in range(n):
crop_rect = (0, 0, 320, 480)
X = torchvision.transforms.functional.crop(test_images[i], *crop_rect)
pred = label2image(predict(X))
imgs += [
X.permute(1, 2, 0),
pred.cpu(),
torchvision.transforms.functional.crop(test_labels[i],
*crop_rect).permute(1, 2, 0)]
d2l.show_images(imgs[::3] + imgs[1::3] + imgs[2::3], 3, n, scale=2);

