一起学Java——SSM整合及MyBatis-Plus的使用
目录
-
- 前言
- 学习内容
-
- 什么是SSM?
- SSM整合三阶段
-
- Spring与Spring MVC环境配置
- Spring与MyBatis的整合配置
- 整合其他组件
- 什么是MyBatis-Plus
- MyBatis-Plus整合
- MyBatis-Plus使用
- 总结
前言
前面的文章我们已经学习了Spring、Spring MVC和Mybatis,本节我们就来使用他们整合我们的SSM框架的整合运用。
学习内容
什么是SSM?
SSM(Spring+SpringMVC+MyBatis) 框架集由Spring、MyBatis两个开源框架整合而成(SpringMVC是Spring中的部分内容),常作为数据源较简单的web项目的框架。百度百科
SSM整合三阶段
- Spring与Spring MVC环境配置
- Spring与MyBatis的整合配置
- 整合其他组件:声明式事务/日志/任务调度/…
Spring与Spring MVC环境配置
- pom.xml依赖spring-webmvc
<project xmlns="http://maven.apache.org/POM/4.0.0"
         xmlns:xsi="http://www.w3.org/2001/XMLSchema-instance"
         xsi:schemaLocation="http://maven.apache.org/POM/4.0.0 http://maven.apache.org/xsd/maven-4.0.0.xsd">
    <modelVersion>4.0.0modelVersion>

    <groupId>com.fivegroupId>
    <artifactId>five-readerartifactId>
    <version>1.0-SNAPSHOTversion>

    <properties>
        <maven.compiler.source>8maven.compiler.source>
        <maven.compiler.target>8maven.compiler.target>
    properties>


    <repositories>
        <repository>
            <id>aliyunid>
            <name>aliyunname>
            <url>https://maven.aliyun.com/repository/publicurl>
        repository>
    repositories>
    <dependencies>
        <dependency>
            <groupId>org.springframeworkgroupId>
            <artifactId>spring-webmvcartifactId>
            <version>5.2.6.RELEASEversion>
        dependency>

        <dependency>
            <groupId>org.freemarkergroupId>
            <artifactId>freemarkerartifactId>
            <version>2.3.30version>
        dependency>
        <dependency>
            <groupId>org.springframeworkgroupId>
            <artifactId>spring-context-supportartifactId>
            <version>5.2.6.RELEASEversion>
        dependency>


        <dependency>
            <groupId>com.fasterxml.jackson.coregroupId>
            <artifactId>jackson-coreartifactId>
            <version>2.11.0version>
        dependency>

        <dependency>
            <groupId>com.fasterxml.jackson.coregroupId>
            <artifactId>jackson-databindartifactId>
            <version>2.11.0version>
        dependency>

        <dependency>
            <groupId>com.fasterxml.jackson.coregroupId>
            <artifactId>jackson-annotationsartifactId>
            <version>2.11.0version>
        dependency>
    dependencies>

project>
- web.xml配置DispatcherServlet
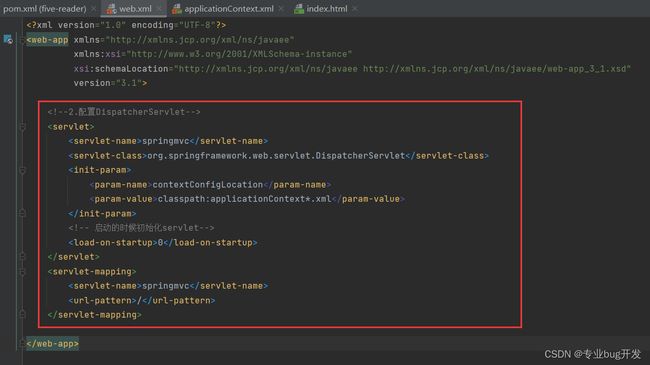
<servlet>
    <servlet-name>springmvcservlet-name>
    <servlet-class>org.springframework.web.servlet.DispatcherServletservlet-class>
    <init-param>
        <param-name>contextConfigLocationparam-name>
        <param-value>classpath:applicationContext*.xmlparam-value>
    init-param>

    <load-on-startup>0load-on-startup>
servlet>
<servlet-mapping>
    <servlet-name>springmvcservlet-name>
    <url-pattern>/url-pattern>
servlet-mapping>
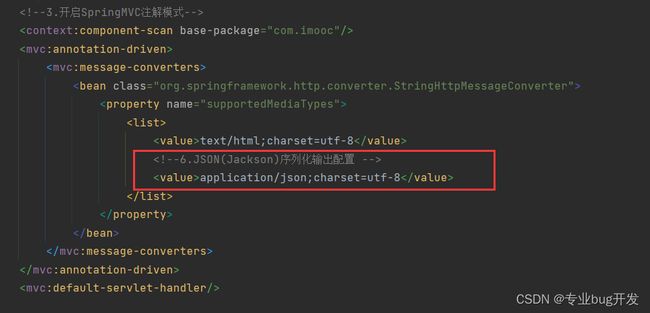
- 启用Spring MVC注解模式
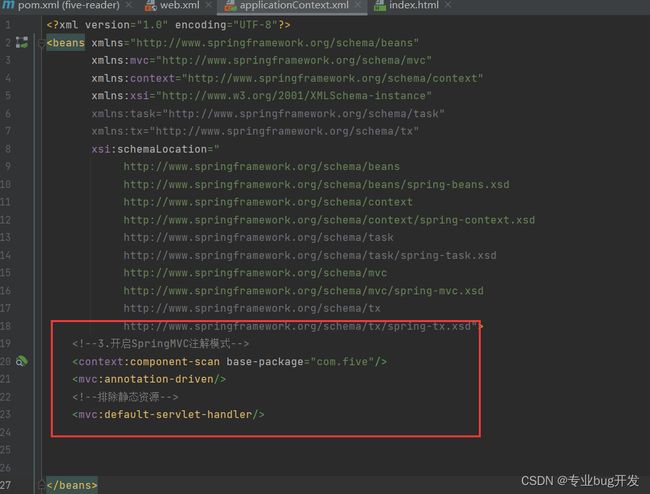
<context:component-scan base-package="com.five"/>
<mvc:annotation-driven/>

<mvc:default-servlet-handler/>
- web.xml配置请求与响应字符集
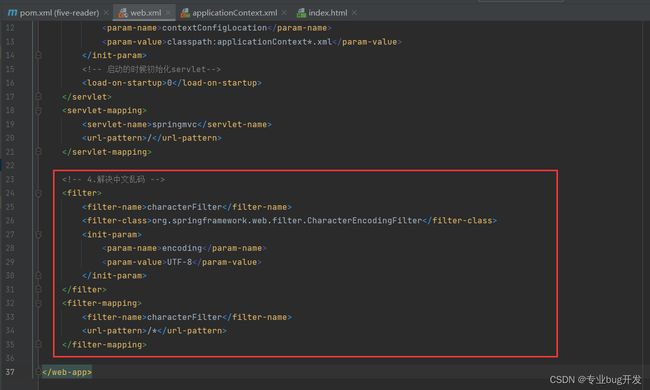
<filter>
    <filter-name>characterFilterfilter-name>
    <filter-class>org.springframework.web.filter.CharacterEncodingFilterfilter-class>
    <init-param>
        <param-name>encodingparam-name>
        <param-value>UTF-8param-value>
    init-param>
filter>
<filter-mapping>
    <filter-name>characterFilterfilter-name>
    <url-pattern>/*url-pattern>
filter-mapping>
- 配置FreeMarker模板引擎(applicationContext.xml)
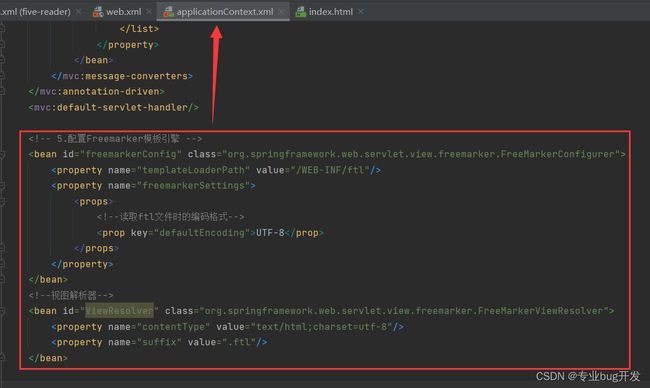
<bean id="freemarkerConfig" class="org.springframework.web.servlet.view.freemarker.FreeMarkerConfigurer">
    <property name="templateLoaderPath" value="/WEB-INF/ftl"/>
    <property name="freemarkerSettings">
        <props>

            <prop key="defaultEncoding">UTF-8prop>
        props>
    property>
bean>

<bean id="ViewResolver" class="org.springframework.web.servlet.view.freemarker.FreeMarkerViewResolver">
    <property name="contentType" value="text/html;charset=utf-8"/>
    <property name="suffix" value=".ftl"/>
bean>
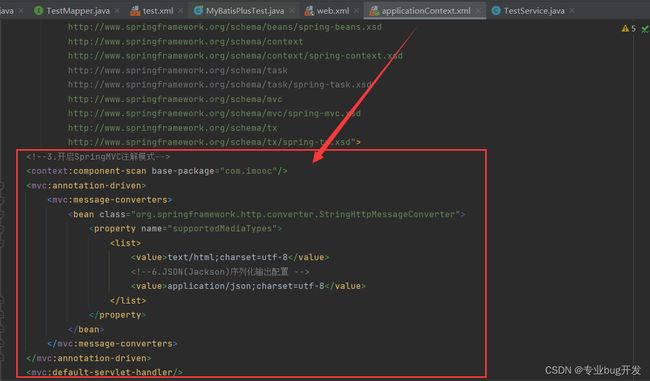
- 配置JSON序列化组件(applicationContext.xml)
测试整合结果:
- 编写测试Controller
/**
1. Description:
2. 3. @Author: kk(专业bug开发)
4. DateTime: 2022-02-11 14:17
*/
@Controller
public class TestController {
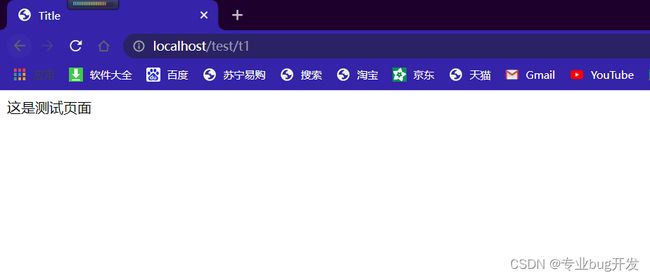
@GetMapping("/test/t1")
public ModelAndView test1(){
return new ModelAndView("/test");
}
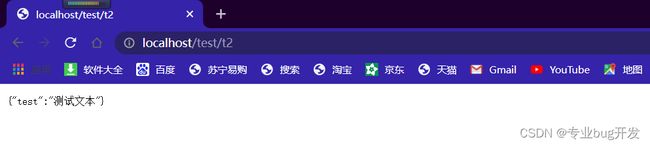
@GetMapping("/test/t2")
@ResponseBody
public Map test2(){
Map result = new HashMap();
result.put("test", "测试文本");
return result;
}
}
- 测试截图
Spring与MyBatis的整合配置
- 依赖mybatis-spring以及驱动
<dependency>
    <groupId>org.springframeworkgroupId>
    <artifactId>spring-jdbcartifactId>
    <version>5.2.6.RELEASEversion>
dependency>
<dependency>
    <groupId>org.mybatisgroupId>
    <artifactId>mybatisartifactId>
    <version>3.5.4version>
dependency>

<dependency>
    <groupId>org.mybatisgroupId>
    <artifactId>mybatis-springartifactId>
    <version>2.0.3version>
dependency>
<dependency>
    <groupId>mysqlgroupId>
    <artifactId>mysql-connector-javaartifactId>
    <version>8.0.16version>
dependency>
<dependency>
    <groupId>com.alibabagroupId>
    <artifactId>druidartifactId>
    <version>1.1.14version>
dependency>
- 配置数据源与连接池(applicationContext.xml)
<bean id="dataSource" class="com.alibaba.druid.pool.DruidDataSource">
    <property name="driverClassName" value="com.mysql.cj.jdbc.Driver"/>
    <property name="url" value="jdbc:mysql://localhost:3306/imooc_reader?useSSL=false&useUnicode=true&characterEncoding=UTF-8&serverTimezone=Asia/Shanghai&allowPublicKeyRetrieval=true"/>
    <property name="username" value="root"/>
    <property name="password" value="root"/>
    <property name="initialSize" value="5"/>
    <property name="maxActive" value="20"/>
bean>
- 配置SqlSessionFactory(applicationContext.xml)
<bean id="sessionFactory" class="com.baomidou.mybatisplus.extension.spring.MybatisSqlSessionFactoryBean">
    <property name="dataSource" ref="dataSource"/>
    <property name="mapperLocations" value="classpath:mappers/*.xml"/>

    <property name="configLocation" value="classpath:mybatis-config.xml"/>
bean>
- 配置Mapper扫描器(applicationContext.xml)
<bean class="org.mybatis.spring.mapper.MapperScannerConfigurer">
    <property name="basePackage" value="com.five.reader.mapper"/>
bean>
- 创建mybatis-config.xml
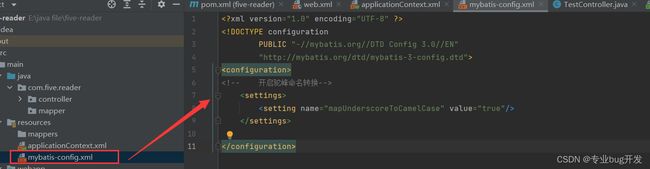
DOCTYPE configuration
        PUBLIC "-//mybatis.org//DTD Config 3.0//EN"
        "http://mybatis.org/dtd/mybatis-3-config.dtd">
<configuration>

    <settings>
        <setting name="mapUnderscoreToCamelCase" value="true"/>
    settings>

configuration>
整合其他组件
- 整合JUnit单元测试
- pom.xml引入依赖
<dependency>
    <groupId>org.springframeworkgroupId>
    <artifactId>spring-testartifactId>
    <version>5.2.6.RELEASEversion>
dependency>

<dependency>
    <groupId>junitgroupId>
    <artifactId>junitartifactId>
    <version>4.12version>
dependency>

<dependency>
    <groupId>javax.servletgroupId>
    <artifactId>javax.servlet-apiartifactId>
    <version>3.1.0version>
    <scope>providedscope>
dependency>
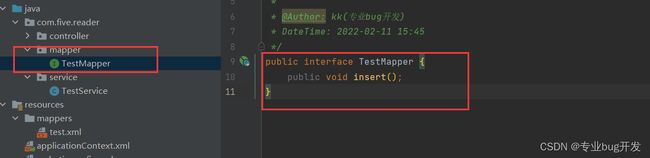
- 新建一个测试mapper
3. 新建test.xml的mappers
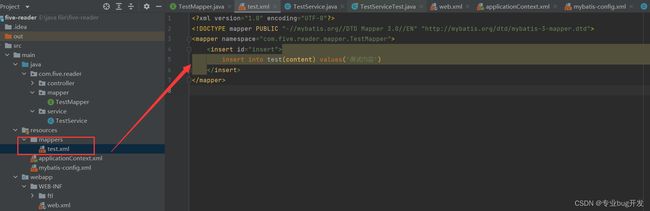
DOCTYPE mapper PUBLIC "-//mybatis.org//DTD Mapper 3.0//EN" "http://mybatis.org/dtd/mybatis-3-mapper.dtd">
<mapper namespace="com.five.reader.mapper.TestMapper">
    <insert id="insert">
        insert into test(content) values('测试内容')
    insert>
mapper>
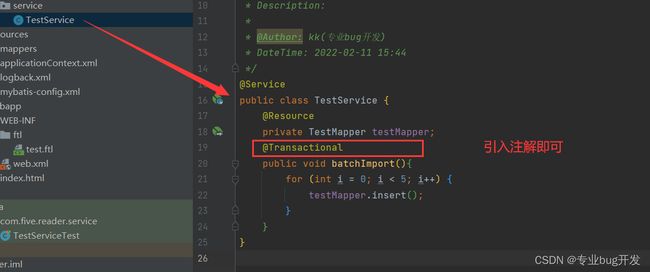
- 新建service
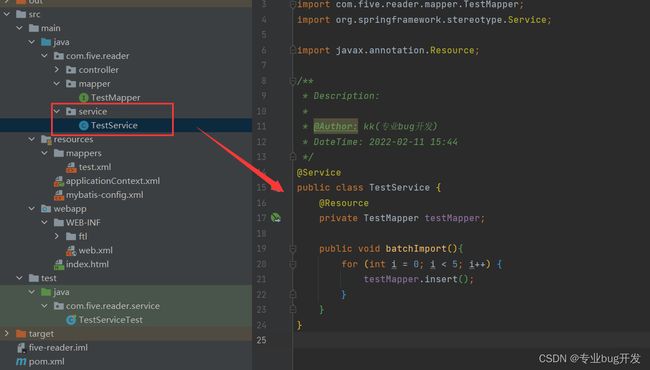
@Service
public class TestService {
    @Resource
    private TestMapper testMapper;

    public void batchImport(){
        for (int i = 0; i < 5; i++) {
            testMapper.insert();
        }
    }
}
- 新建单元测试用例
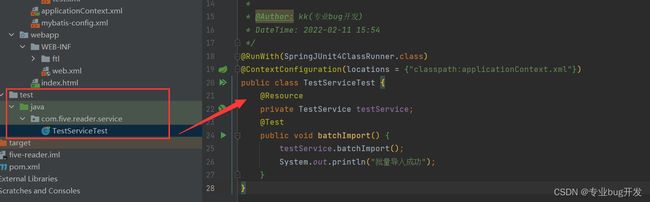
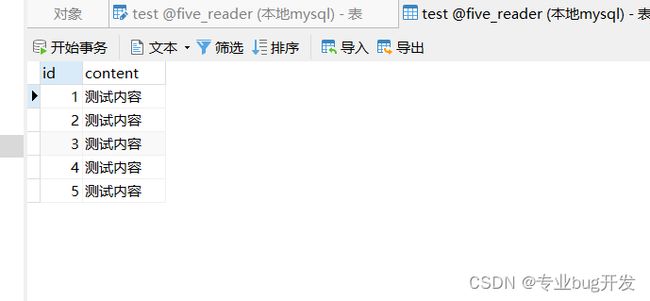
测试结果:
- 配置logback日志输出
- pom.xml添加依赖(Spring会自动检测依赖并使用)
<dependency>
    <groupId>ch.qos.logbackgroupId>
    <artifactId>logback-classicartifactId>
    <version>1.2.3version>
dependency>
自定义日志格式的时候可以参考前面的MyBatis部分的日志管理,新建logback.xml即可!!!
<configuration>
    <appender name="console" class="ch.qos.logback.core.ConsoleAppender">
        <encoder class="ch.qos.logback.classic.encoder.PatternLayoutEncoder">
            <pattern>%d{HH:mm:ss} %-5level [%thread] %logger{30} - %msg%npattern>
            <charset>UTF-8charset>
        encoder>
    appender>
    <root level="debug">
        <appender-ref ref="console"/>
    root>
configuration>
- 声明式事务配置
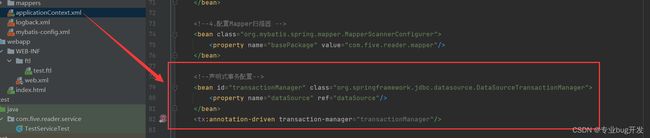
<bean id="transactionManager" class="org.springframework.jdbc.datasource.DataSourceTransactionManager">
    <property name="dataSource" ref="dataSource"/>
bean>
<tx:annotation-driven transaction-manager="transactionManager"/>
Tip:SSM整合完毕!!!!
什么是MyBatis-Plus
- MyBatis-Plus是一个MyBatis的增强工具
- 自动实现Mapper CRUD操作,极致提高数据库开发效率
- MyBatis-Plus在MyBatis的基础上只做增强不做改变
官网地址
MyBatis-Plus整合
- pom.xml引入MyBatis-Plus
<dependency>
    <groupId>com.baomidougroupId>
    <artifactId>mybatis-plusartifactId>
    <version>3.3.2version>
dependency>
- applicationContext.xml更改配置SqlSessionFactory实现类
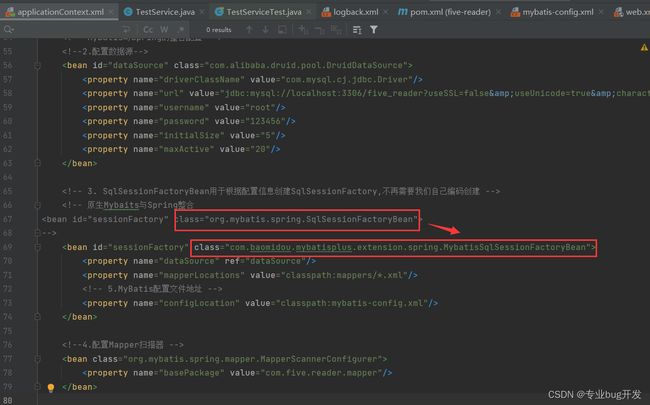
    <bean id="sessionFactory" class="com.baomidou.mybatisplus.extension.spring.MybatisSqlSessionFactoryBean">
        <property name="dataSource" ref="dataSource"/>
        <property name="mapperLocations" value="classpath:mappers/*.xml"/>

        <property name="configLocation" value="classpath:mybatis-config.xml"/>
    bean>
- mybatis-config.xml增加MP分页插件
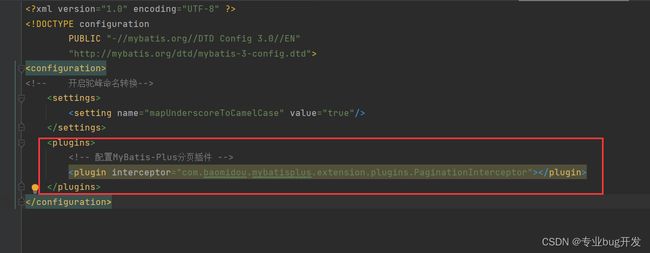
    <plugins>

        <plugin interceptor="com.baomidou.mybatisplus.extension.plugins.PaginationInterceptor">plugin>
    plugins>
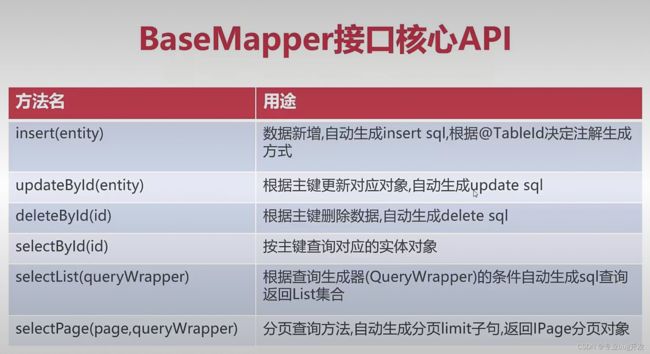
MyBatis-Plus使用
- 创建实体类,@TableName/@TableId/@TableFieId实现映射
| 注解 | 说明 |
|---|---|
| @TableName | 将实体类与表名映射 |
| @TableId | 说明对应属性是表的主键 |
| @TableFieId | 设置属性与列名的对应关系 |
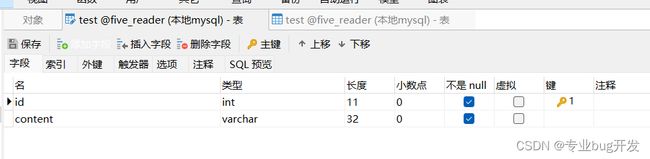
@TableName("test") //用于说明实体对应哪一张表
public class Test {
    @TableId(type = IdType.AUTO)   //用于说明谁是主键
    @TableField("id") //用于说明属性对应哪个字段
    private Integer id;

    @TableField("content") //如果字段名与属性名相同或者符合驼峰命名转换规则,则TableField可省略
    private String content;

    public Integer getId() {
        return id;
    }

    public void setId(Integer id) {
        this.id = id;
    }

    public String getContent() {
        return content;
    }

    public void setContent(String content) {
        this.content = content;
    }
}
- 创建Mapper接口继承BaseMapper,创建Mapper XML
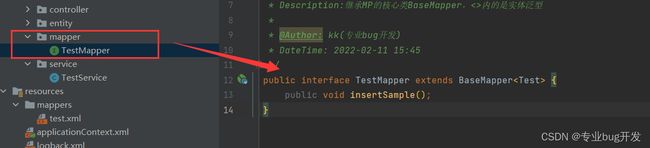
public interface TestMapper extends BaseMapper<Test> {
    public void insertSample();
}
- 开发时注入Mapper对象,通过内置API实现CRUD操作
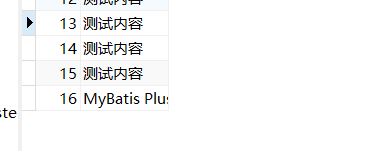
测试结果:
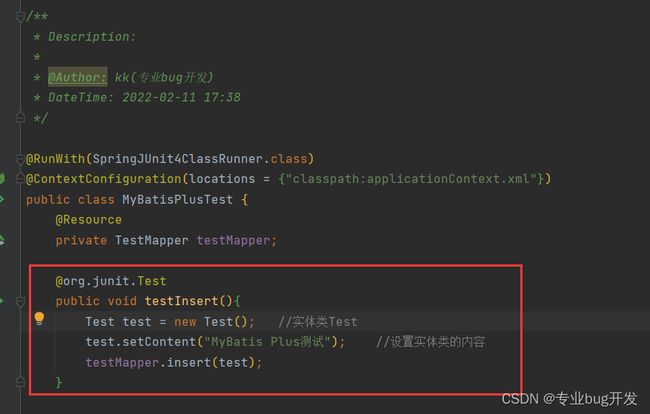
CRUD测试代码:
package com.five.reader;

import com.baomidou.mybatisplus.core.conditions.query.QueryWrapper;
import com.five.reader.entity.Test;
import com.five.reader.mapper.TestMapper;
import org.junit.runner.RunWith;
import org.springframework.test.context.ContextConfiguration;
import org.springframework.test.context.junit4.SpringJUnit4ClassRunner;

import javax.annotation.Resource;
import java.util.List;

/**
 * Description:
 *
 * @Author: kk(专业bug开发)
 * DateTime: 2022-02-11 17:38
 */

@RunWith(SpringJUnit4ClassRunner.class)
@ContextConfiguration(locations = {"classpath:applicationContext.xml"})
public class MyBatisPlusTest {
    @Resource
    private TestMapper testMapper;

    //测试MP添加数据
    @org.junit.Test
    public void testInsert(){
        Test test = new Test();   //实体类Test
        test.setContent("MyBatis Plus测试");    //设置实体类的内容
        testMapper.insert(test);
    }

    //测试MP更新数据
    @org.junit.Test
    public void testUpdate(){
        Test test = testMapper.selectById(16);   //MP内置的selectById方法
        test.setContent("MyBatis Plus测试1");
        testMapper.updateById(test);
    }

    //测试MP删除数据
    @org.junit.Test
    public void testDelete(){
        testMapper.deleteById(16);
    }

    //测试MP查询方法
    @org.junit.Test
    public void testSelect(){
        QueryWrapper<Test> queryWrapper = new QueryWrapper<Test>();
        queryWrapper.eq("id", 7);
        queryWrapper.gt("id", 5);
        List<Test> list = testMapper.selectList(queryWrapper);   //传入一个包装对象
        System.out.println(list.get(0));
    }
}
查询的时候queryWrapper参见下面的文档说明!!!!
queryWrapper文档地址
总结
这节课应该是个转折点了,前面我们都是单独的开发学习,现在我们对SSM进行了整合,更引入了高效开发的MyBatis-Plus,这样我们结合前面的知识就可以开始我们的SSM开发了~
如果你发现文章中存在问题,欢迎评论区交流指正~