网络管理(redhat 8.0)
网络基础管理
网卡命名
1.1 传统网卡命名机制
传统命名:
以太网[eth0.1,2…]
wlan[0.1,2…]
1.2 redhat 7 网卡命名机制systemd对网络设备的命名方式
-
如果Firmware或BIOS为主板上集成的设备提供的索引信息可用,且可预测,则根据此索引进行命名,例如eno1
-
如果Firmware或BIOS为PCI-E扩展槽所提供的索引信息可用,且可预测,则根据此索引进行命名,例如ens1
-
如果硬件接口的物理位置信息可用,则根据此信息进行命名,例如enp2s0
-
如果用户显式启动,也可根据MAC地址进行命名,例如enx2387a1dc56
-
.上述均不可用时,则使用传统命名机制
上述命名机制中,有的需要biosdevname程序的参与。所以必须安装biosdevname程序且启用它。
1.3网络接口名称组成格式
基于固件、设备结构、设备类型
-
由两个字母开头标示固件
-
以太网网卡以en开头
-
线网卡以wl开头
-
-
设备结构
-
o:主板上集成的设备的设备索引号:
-
s:扩展槽的索引号
-
x:基于MAC地址的命名
-
ps: 基于物理位置拓扑的命名。如enp2s1,表示PCI总线上第2个总线的第1个插槽的设备
-
回归传统命名
- 修改网卡配置文件
[root@localhost ~]# cd /etc/sysconfig/network-scripts/
[root@localhost network-scripts]# vim ifcfg-ens160

- 修改文件名
[root@localhost network-scripts]# mv ifcfg-ens160 ifcfg-eth0
- 进入/etc/default/grub进行编辑
#编辑/etc/default/grub配置文件,在以GRUB_ CMDLINE_ LINUX开头的行内rhgb的前面加上net . ifnames=0
[root@localhost network-scripts]# vim /etc/default/grub

- 为grub2生成配置文件
[root@localhost network-scripts]# grub2-mkconfig -o /etc/grub2.cfg
Generating grub configuration file ...
done
[root@localhost network-scripts]# reboot
- 网卡回归传统命名完成
[root@localhost ~]# ip add
1: lo: <LOOPBACK,UP,LOWER_UP> mtu 65536 qdisc noqueue state UNKNOWN group default qlen 1000
    link/loopback 00:00:00:00:00:00 brd 00:00:00:00:00:00
    inet 127.0.0.1/8 scope host lo
       valid_lft forever preferred_lft forever
    inet6 ::1/128 scope host
       valid_lft forever preferred_lft forever
2: eth0: <BROADCAST,MULTICAST,UP,LOWER_UP> mtu 1500 qdisc fq_codel state UP group default qlen 1000
    link/ether 00:0c:29:91:0b:d4 brd ff:ff:ff:ff:ff:ff
    inet 192.168.72.5/24 brd 192.168.72.255 scope global noprefixroute eth0
       valid_lft forever preferred_lft forever
    inet6 fe80::20c:29ff:fe91:bd4/64 scope link
       valid_lft forever preferred_lft forever
3: eth1: <BROADCAST,MULTICAST,UP,LOWER_UP> mtu 1500 qdisc fq_codel state UP group default qlen 1000
    link/ether 00:0c:29:91:0b:de brd ff:ff:ff:ff:ff:ff
网络管理常用命令
1.1 ifconfig
[root@localhost ~]# ifconfig
eth0: flags=4163<UP,BROADCAST,RUNNING,MULTICAST>  mtu 1500
        inet 192.168.72.5  netmask 255.255.255.0  broadcast 192.168.72.255
        inet6 fe80::20c:29ff:fe91:bd4  prefixlen 64  scopeid 0x20<link>
        ether 00:0c:29:91:0b:d4  txqueuelen 1000  (Ethernet)
        RX packets 311  bytes 25623 (25.0 KiB)
        RX errors 0  dropped 0  overruns 0  frame 0
        TX packets 167  bytes 17551 (17.1 KiB)
        TX errors 0  dropped 0 overruns 0  carrier 0  collisions 0

eth1: flags=4163<UP,BROADCAST,RUNNING,MULTICAST>  mtu 1500
        ether 00:0c:29:91:0b:de  txqueuelen 1000  (Ethernet)
        RX packets 129  bytes 8439 (8.2 KiB)
        RX errors 0  dropped 0  overruns 0  frame 0
        TX packets 0  bytes 0 (0.0 B)
        TX errors 0  dropped 0 overruns 0  carrier 0  collisions 0

lo: flags=73<UP,LOOPBACK,RUNNING>  mtu 65536
        inet 127.0.0.1  netmask 255.0.0.0
        inet6 ::1  prefixlen 128  scopeid 0x10<host>
        loop  txqueuelen 1000  (Local Loopback)
        RX packets 0  bytes 0 (0.0 B)
        RX errors 0  dropped 0  overruns 0  frame 0
        TX packets 0  bytes 0 (0.0 B)
        TX errors 0  dropped 0 overruns 0  carrier 0  collisions 0
1.2 ip
语法: ip [ OPTIONS ] OBJECT { COMMAND| help }
OBJECT:
link:网络接口属性
addr:协议地址
route:路由
- 查看网卡连接状态、IP地址、路由
ip link show
[root@localhost ~]# ip link show
1: lo: <LOOPBACK,UP,LOWER_UP> mtu 65536 qdisc noqueue state UNKNOWN mode DEFAULT group default qlen 1000
    link/loopback 00:00:00:00:00:00 brd 00:00:00:00:00:00
2: eth0: <BROADCAST,MULTICAST,UP,LOWER_UP> mtu 1500 qdisc fq_codel state UP mode DEFAULT group default qlen 1000
    link/ether 00:0c:29:91:0b:d4 brd ff:ff:ff:ff:ff:ff
3: eth1: <BROADCAST,MULTICAST,UP,LOWER_UP> mtu 1500 qdisc fq_codel state UP mode DEFAULT group default qlen 1000
    link/ether 00:0c:29:91:0b:de brd ff:ff:ff:ff:ff:ff
ip -s link show
[root@localhost ~]# ip -s link show
1: lo: <LOOPBACK,UP,LOWER_UP> mtu 65536 qdisc noqueue state UNKNOWN mode DEFAULT group default qlen 1000
    link/loopback 00:00:00:00:00:00 brd 00:00:00:00:00:00
    RX: bytes  packets  errors  dropped overrun mcast
    0          0        0       0       0       0
    TX: bytes  packets  errors  dropped carrier collsns
    0          0        0       0       0       0
2: eth0: <BROADCAST,MULTICAST,UP,LOWER_UP> mtu 1500 qdisc fq_codel state UP mode DEFAULT group default qlen 1000
    link/ether 00:0c:29:91:0b:d4 brd ff:ff:ff:ff:ff:ff
    RX: bytes  packets  errors  dropped overrun mcast
    221401     1725     0       0       0       0
    TX: bytes  packets  errors  dropped carrier collsns
    56014      591      0       0       0       0
3: eth1: <BROADCAST,MULTICAST,UP,LOWER_UP> mtu 1500 qdisc fq_codel state UP mode DEFAULT group default qlen 1000
    link/ether 00:0c:29:91:0b:de brd ff:ff:ff:ff:ff:ff
    RX: bytes  packets  errors  dropped overrun mcast
    62428      955      0       0       0       0
    TX: bytes  packets  errors  dropped carrier collsns
    62971      358      0       0       0       0
4: eth2: <BROADCAST,MULTICAST,UP,LOWER_UP> mtu 1500 qdisc fq_codel state UP mode DEFAULT group default qlen 1000
    link/ether 00:0c:29:91:0b:e8 brd ff:ff:ff:ff:ff:ff
    RX: bytes  packets  errors  dropped overrun mcast
    108617     1098     0       0       0       0
    TX: bytes  packets  errors  dropped carrier collsns
    1146       15       0       0       0       0
ip addr show
[root@localhost ~]# ip addr show
1: lo: <LOOPBACK,UP,LOWER_UP> mtu 65536 qdisc noqueue state UNKNOWN group default qlen 1000
    link/loopback 00:00:00:00:00:00 brd 00:00:00:00:00:00
    inet 127.0.0.1/8 scope host lo
       valid_lft forever preferred_lft forever
    inet6 ::1/128 scope host
       valid_lft forever preferred_lft forever
2: eth0: <BROADCAST,MULTICAST,UP,LOWER_UP> mtu 1500 qdisc fq_codel state UP group default qlen 1000
    link/ether 00:0c:29:91:0b:d4 brd ff:ff:ff:ff:ff:ff
    inet 192.168.72.5/24 brd 192.168.72.255 scope global noprefixroute eth0
       valid_lft forever preferred_lft forever
    inet6 fe80::20c:29ff:fe91:bd4/64 scope link
       valid_lft forever preferred_lft forever
3: eth1: <BROADCAST,MULTICAST,UP,LOWER_UP> mtu 1500 qdisc fq_codel state UP group default qlen 1000
    link/ether 00:0c:29:91:0b:de brd ff:ff:ff:ff:ff:ff
ip route show
[root@localhost ~]# ip route show
default via 192.168.72.254 dev eth0 proto static metric 100
192.168.72.0/24 dev eth0 proto kernel scope link src 192.168.72.5 metric 100
启用/禁用网卡
- 禁用网卡
[root@localhost ~]# ip link set eth0 down
[root@localhost ~]# ip link show eth0
2: eth0: <BROADCAST,MULTICAST> mtu 1500 qdisc fq_codel state DOWN mode DEFAULT group default qlen 1000
    link/ether 00:0c:29:91:0b:d4 brd ff:ff:ff:ff:ff:ff
#此时状态为DOWN mode
- 启用网卡
[root@localhost ~]# ip link set eth0 up
[root@localhost ~]# ip link show eth0
2: eth0: <BROADCAST,MULTICAST,UP,LOWER_UP> mtu 1500 qdisc fq_codel state UP mode DEFAULT group default qlen 1000
    link/ether 00:0c:29:91:0b:d4 brd ff:ff:ff:ff:ff:ff
#此时状态为UP mode
查看指定网卡的IP地址
[root@localhost ~]# ip addr show eth0
2: eth0: <BROADCAST,MULTICAST,UP,LOWER_UP> mtu 1500 qdisc fq_codel state UP group default qlen 1000
    link/ether 00:0c:29:91:0b:d4 brd ff:ff:ff:ff:ff:ff
    inet 192.168.72.5/24 brd 192.168.72.255 scope global noprefixroute eth0
       valid_lft forever preferred_lft forever
    inet6 fe80::20c:29ff:fe91:bd4/64 scope link
       valid_lft forever preferred_lft forever
给指定网卡添加IP地址
ip addr add IP地址/子网掩码 dev 网卡名
[root@localhost ~]# ip addr add 192.168.72.25/24 dev eth0
[root@localhost ~]# ip addr show eth0
2: eth0: <BROADCAST,MULTICAST,UP,LOWER_UP> mtu 1500 qdisc fq_codel state UP group default qlen 1000
    link/ether 00:0c:29:91:0b:d4 brd ff:ff:ff:ff:ff:ff
    inet 192.168.72.5/24 brd 192.168.72.255 scope global noprefixroute eth0
       valid_lft forever preferred_lft forever
    inet 192.168.72.25/24 scope global secondary eth0
       valid_lft forever preferred_lft forever
    inet6 fe80::20c:29ff:fe91:bd4/64 scope link
       valid_lft forever preferred_lft forever
删除网卡中的IP地址
[root@localhost ~]# ip addr del 192.168.72.25/24 dev eth0
[root@localhost ~]# ip addr show eth0
2: eth0: <BROADCAST,MULTICAST,UP,LOWER_UP> mtu 1500 qdisc fq_codel state UP group default qlen 1000
    link/ether 00:0c:29:91:0b:d4 brd ff:ff:ff:ff:ff:ff
    inet 192.168.72.5/24 brd 192.168.72.255 scope global noprefixroute eth0
       valid_lft forever preferred_lft forever
    inet6 fe80::20c:29ff:fe91:bd4/64 scope link
       valid_lft forever preferred_lft forever
1.3 route
Linux主机之间是使用IP进行通信,假设A主机和B主机同在同一个网段内且网卡都处于激活状态,则A具备和B直接通信的能力,但如果A主机和B主机处于两个不同的网段,则A必须通过路由器才能和B通信,路由器属于IT设备的基础设施,每一个网段都应该至少有一个网关
查看当前路由表
[root@localhost ~]# route
Kernel IP routing table
Destination     Gateway         Genmask         Flags Metric Ref    Use Iface
default         _gateway        0.0.0.0         UG    100    0        0 eth0
default         _gateway        0.0.0.0         UG    102    0        0 eth2
192.168.72.0    0.0.0.0         255.255.255.0   U     100    0        0 eth0
192.168.72.0    0.0.0.0         255.255.255.0   U     102    0        0 eth2
以数字的方式显示各主机或端口等相关信息
[root@localhost ~]# route -n
Kernel IP routing table
Destination     Gateway         Genmask         Flags Metric Ref    Use Iface
0.0.0.0         192.168.72.254  0.0.0.0         UG    100    0        0 eth0
0.0.0.0         192.168.72.254  0.0.0.0         UG    102    0        0 eth2
192.168.72.0    0.0.0.0         255.255.255.0   U     100    0        0 eth0
192.168.72.0    0.0.0.0         255.255.255.0   U     102    0        0 eth2
如果未安装route命令,查询提供命令的软件包:
[root@localhost ~]# yum provides *bin/route
Updating Subscription Management repositories.
Unable to read consumer identity
This system is not registered to Red Hat Subscription Management. You can use subscription-manager to register.
上次元数据过期检查:0:00:19 前,执行于 2020年08月18日 星期二 02时27分49秒。
net-tools-2.0-0.51.20160912git.el8.x86_64 : Basic networking tools
仓库        :@System
匹配来源:
其它       : *bin/route

net-tools-2.0-0.51.20160912git.el8.x86_64 : Basic networking tools
仓库        :base
匹配来源:
其它       : *bin/route
再安装对应软件包
添加/删除路由条目
语法:route add [-net/-host] target [netmask Nm] [gateway] [device If]
- 添加网络路由
[root@localhost ~]# route add -net 0.0.0.0/0 gw 192.168.72.254 dev eth1
[root@localhost ~]# route -n
Kernel IP routing table
Destination     Gateway         Genmask         Flags Metric Ref    Use Iface
0.0.0.0         192.168.72.254  0.0.0.0         UG    0      0        0 eth1
0.0.0.0         192.168.72.254  0.0.0.0         UG    100    0        0 eth0
0.0.0.0         192.168.72.254  0.0.0.0         UG    102    0        0 eth2
0.0.0.0         192.168.72.254  0.0.0.0         UG    103    0        0 eth1
192.168.72.0    0.0.0.0         255.255.255.0   U     100    0        0 eth0
192.168.72.0    0.0.0.0         255.255.255.0   U     102    0        0 eth2
192.168.72.0    0.0.0.0         255.255.255.0   U     103    0        0 eth1
注意:不要删除默认路由条目
- 删除网络路由条目
[root@localhost ~]# route del -net 0.0.0.0/0
[root@localhost ~]# route -n
Kernel IP routing table
Destination     Gateway         Genmask         Flags Metric Ref    Use Iface
0.0.0.0         192.168.72.254  0.0.0.0         UG    102    0        0 eth2
192.168.72.0    0.0.0.0         255.255.255.0   U     100    0        0 eth0
192.168.72.0    0.0.0.0         255.255.255.0   U     102    0        0 eth2
注意:如果在0.0.0.0/0后面什么也不加,会把默认的路由条目全部删除;应该写成route del -net 0.0.0.0/0 gw 192.168.72.254 eth1
添加/删除主机路由条目
- 添加主机路由
[root@localhost ~]# route add -host 192.168.72.5 gw 192.168.72.254
[root@localhost ~]# route -n
Kernel IP routing table
Destination     Gateway         Genmask         Flags Metric Ref    Use Iface
0.0.0.0         192.168.72.254  0.0.0.0         UG    103    0        0 eth0
0.0.0.0         192.168.72.254  0.0.0.0         UG    104    0        0 eth2
192.168.72.0    0.0.0.0         255.255.255.0   U     103    0        0 eth0
192.168.72.0    0.0.0.0         255.255.255.0   U     104    0        0 eth2
192.168.72.5    192.168.72.254  255.255.255.255 UGH   0      0        0 eth0
- 删除主机路由
[root@localhost ~]# route del -host 192.168.72.5 gw 192.168.72.254
[root@localhost ~]# route -n
Kernel IP routing table
Destination     Gateway         Genmask         Flags Metric Ref    Use Iface
0.0.0.0         192.168.72.254  0.0.0.0         UG    103    0        0 eth0
0.0.0.0         192.168.72.254  0.0.0.0         UG    104    0        0 eth2
192.168.72.0    0.0.0.0         255.255.255.0   U     103    0        0 eth0
192.168.72.0    0.0.0.0         255.255.255.0   U     104    0        0 eth2
注意:一张网卡只能配置一个网关,否则网卡将不知道选择哪个一个网关
1.4 hostname与hostnamectl
生产环境中必须配置主机名,同时主机名也需要遵循- -定的规范,比如:
- hostname查看主机名
[root@localhost ~]# hostname
localhost.localdomain
- hostname 主机名 临时修改主机名
[root@localhost ~]# hostname hostwcl
[root@localhost ~]# hostname
hostwcl
注意:修改之后重新登陆用户才会显示效果
- 永久修改主机名
hostnamectl set-hostname主机名
[root@hostwcl ~]# hostnamectl set-hostname system_rookie
[root@hostwcl ~]# logout
重新登陆用户
[root@system_rookie ~]#
网络配置相关文件
1.1网络配置文件
网络配置文件:/etc/sysconfig/network
#一般不进行配置
1.2 网络接口配置文件
网络接口即网卡,其接口配置文件的路径是/etc/sysconfig/network-scripts/ifcfg-INTERFACE_NAME
[root@system_rookie ~]#  cat /etc/sysconfig/network-scripts/ifcfg-eth0
TYPE=Ethernet
PROXY_METHOD=none
BROWSER_ONLY=no
BOOTPROTO=none
DEFROUTE=yes
IPV4_FAILURE_FATAL=no
NAME=eth0
UUID=cf3ccd2f-000d-41a5-b7d0-2507290de20d
DEVICE=eth0
ONBOOT=yes
IPADDR=192.168.72.5
NETMASK=255.255.255.0
GATEWAY=192.168.72.254
DNS1=114.114.114.114
PREFIX=24
IPV6INIT=no
网卡配置的几种类型:
- BOOTPROTO=dhcp
		YPE=Ethernet
		BOOTPROTO=dhcp
		DEVICE=eth0
		NAME=eth0
		ONBOOT=yes
- BOOTPROTO=static
		TYPE=Ethernet
		PROXY_METHOD=none
		BROWSER_ONLY=no
		BOOTPROTO=none
		DEFROUTE=yes
		IPV4_FAILURE_FATAL=no
		NAME=eth0
		UUID=cf3ccd2f-000d-41a5-b7d0-2507290de20d
		DEVICE=eth0
		ONBOOT=yes
		IPADDR=192.168.72.5
		NETMASK=255.255.255.0
		GATEWAY=192.168.72.254
		DNS1=114.114.114.114
网卡配置文件详解
BOOTPROTO=none	#引导协议[可选择dhcp/static/none]分别意为:使用dhcp协议、使用静态IP地址、无

NM_CONTROLLED	#NetworkManger的控制选项(在redhat8中已经默认开启)

TYPE	#接口类型。常见的接口类型有: Ethernet, Bridge

UUID	#设备的惟一标识

HWADDR	#硬件地址,要与硬件中的地址保持一致, 可省略

IPADDR=172.16.12.130	#固定IP地址

PREFIX=24	#子网掩码

NETMASK=255.255.255.0	#子网掩码

GATEWAY=172.16.12.2		#默认网关

DNS1=172.16.12.2		#第一个DNS服务器

DNS2					#第二个DNS服务器

DNS3					#第三个DNS服务器

DEVICE=eth1				#关联的设备名称,要与文件名的后半部" INTERFACE NAME" 保持一致

NAME="eth1"				#连接名称

ONB00T=yes				#在系统引导时是否自动激活此网络接口,可选值有{ yes / no }将接口设定为默认路由[yes |no]

USERCTL={yes |no}		#是否允许普通用户控制此接口的启用与禁用

PEERDNS={yes |no}		#是否在BOOTPROTO为dhcp时接受由dhcp服务器指定的DNS地址
在网卡配置文件中加IP地址子网掩码等
- 在配置文件中手动添加
[root@system_rookie ~]# cat /etc/sysconfig/network-scripts/ifcfg-eth0
TYPE=Ethernet
PROXY_METHOD=none
BROWSER_ONLY=no
BOOTPROTO=none
DEFROUTE=yes
IPV4_FAILURE_FATAL=no
NAME=eth0
UUID=cf3ccd2f-000d-41a5-b7d0-2507290de20d
DEVICE=eth0
ONBOOT=yes
IPADDR0=192.168.72.5
NETMASK0=255.255.255.0
GATEWAY0=192.168.72.254
DNS1=114.114.114.114
IPADDR1=192.168.72.2
NETMASK1=255.255.255.0
GATEWAY=192.168.72.254
[root@system_rookie ~]# nmcli connection reload
[root@system_rookie ~]# nmcli connection up eth0

[root@system_rookie ~]# ip addr show eth0
2: eth0: <BROADCAST,MULTICAST,UP,LOWER_UP> mtu 1500 qdisc fq_codel state UP group default qlen 1000
    link/ether 00:0c:29:91:0b:d4 brd ff:ff:ff:ff:ff:ff
    inet 192.168.72.5/24 brd 192.168.72.255 scope global noprefixroute eth0
       valid_lft forever preferred_lft forever
    inet 192.168.72.2/24 brd 192.168.72.255 scope global secondary noprefixroute eth0
       valid_lft forever preferred_lft forever
-
用
nmcli添加 -
保证ssh连接不中断的同时重启网卡
ifdown 网卡名;ifup 网卡名
[root@system_rookie ~]# ifdown eth2;ifup eth2
成功停用连接 "eth2"(D-Bus 活动路径:/org/freedesktop/NetworkManager/ActiveConnection/9)

连接已成功激活(D-Bus 活动路径:/org/freedesktop/NetworkManager/ActiveConnection/41)
1.3路由配置文件
路由配置文件:/etc/sysconfig/network-scripts/route-INTERFACE_NAME(默认是没有路由配置文件的)
- 方法一:
[root@system_rookie ~]# vim /etc/sysconfig/network-scripts/route-eth0
[root@system_rookie ~]# nmcli connection reload
[root@system_rookie ~]# nmcli connection up eth0
连接已成功激活(D-Bus 活动路径:/org/freedesktop/NetworkManager/ActiveConnection/50)
[root@system_rookie ~]# route -n
Kernel IP routing table
Destination     Gateway         Genmask         Flags Metric Ref    Use Iface
0.0.0.0         192.168.72.254  0.0.0.0         UG    106    0        0 eth2
0.0.0.0         192.168.72.254  0.0.0.0         UG    107    0        0 eth0
192.168.25.0    192.168.72.254  255.255.255.0   UG    107    0        0 eth0
192.168.72.0    0.0.0.0         255.255.255.0   U     106    0        0 eth2
192.168.72.0    0.0.0.0         255.255.255.0   U     107    0        0 eth0
192.168.72.0    0.0.0.0         255.255.255.0   U     107    0        0 eth0
- 方法二:
[root@system_rookie network-scripts]# cat /etc/sysconfig/network-scripts/route-eth0
ADDRESS0=192.168.2.0
NETMASK0=255.255.255.0
GATEWAY0=192.168.72.254
[root@system_rookie network-scripts]# nmcli connection reload
[root@system_rookie network-scripts]# nmcli connection up eth0
[root@system_rookie network-scripts]# route -n
Kernel IP routing table
Destination     Gateway         Genmask         Flags Metric Ref    Use Iface
0.0.0.0         192.168.72.254  0.0.0.0         UG    102    0        0 eth2
0.0.0.0         192.168.72.254  0.0.0.0         UG    103    0        0 eth0
192.168.2.0     192.168.72.254  255.255.255.0   UG    103    0        0 eth0
192.168.72.0    0.0.0.0         255.255.255.0   U     102    0        0 eth2
192.168.72.0    0.0.0.0         255.255.255.0   U     103    0        0 eth0
192.168.72.0    0.0.0.0         255.255.255.0   U     103    0
1.4DNS配置文件/etc/resolv.conf
vim /etc/resolv.conf
# Generated by NetworkManager
nameserver 114.114.114.114
nameserver为DNS
NetworkManager管理网络
R
HEL/Cent0S7系统默认使用NetworkManager来提供网络服务,这是-种动态管理网络配置的守护进
程,能够让网络设备保持连接状态。

NetworkManager提供的命令行和图形配置工具对网络进行设定,设定保存的配置文件

在/etc/sysconf ig/network-scripts目录下,工具有nmcli, nmtui, nm-connect ion-editor
device物理设备,例如ens33 , enp2s0, virbr0, team0

connection连接设置,具体网络配置方案
1.不同的网络连接配置可以应用到相同的物理设备,但物理设备同一时间只能应用其中某个网络连
2.针对物理网络接口,设定不同的网络连接,在不同的使用环境中激活相应的网络连接,就可以实现网络配置信息的自动切换了

使用nmcli命令查看设备以及连接情况
UUID
//设备的惟一标识

HWADDR
//硬件地址,要与硬件中的地址保持一-致, 可省

IPADDR=172.16.12.130
//固定IP地址

PREFIX=24
//子网掩码

NETMASK=255.255.255.0 // 子网掩码

GATEWAY=172.16.12.2
//默认网关

DNS1=172.16.12.2
//第一个DNS服务器指向

DNS2
//.第二个DNS服务器指向

DNS3
//第三个DNS服务器指向

DEVICE=eth1
//关联的设备名称,要与文件名的后半部"INTERFACENAME" 保持一致NAME="eth1"连接名称

ONB00T=yes
//在系统引导时是否自动激活此网络接口,可选值有{yes/no }将接口设定为默认路由[yes|no]USERCTL{yes|no}
#是否允许普通用户控制此接口的启用与禁用

PEERDNS={yes |no}
//是否在BOOTPROTO为dhcp时接受由dhcp服务器指定的DNS地址,此项设为yes 时药
网络检测工具与故障排查
1.1 ping
ping命令的目的在于测试另一台主机是否可达,如果ping不到某台主机,就说明对方主机已经出现了问题,但是不排除由于链路中的防火墙、ping被 丢弃等原因造成ping不通的情况
//ping命令常用选项:
-C指定ping的次数
-i指定ping包的发送间隔
-W如果ping没有回应,则在指定超时时间后退出
ping -c 5 -i 3 www.baidu.com
[root@system_rookie ~]# ping -c 5 -i 3 www.baidu.com
PING www.a.shifen.com (14.215.177.39) 56(84) bytes of data.
64 bytes from 14.215.177.39 (14.215.177.39): icmp_seq=1 ttl=128 time=25.3 ms
64 bytes from 14.215.177.39 (14.215.177.39): icmp_seq=2 ttl=128 time=27.8 ms
64 bytes from 14.215.177.39 (14.215.177.39): icmp_seq=3 ttl=128 time=25.9 ms
64 bytes from 14.215.177.39 (14.215.177.39): icmp_seq=4 ttl=128 time=26.5 ms
64 bytes from 14.215.177.39 (14.215.177.39): icmp_seq=5 ttl=128 time=38.3 ms

--- www.a.shifen.com ping statistics ---
5 packets transmitted, 5 received, 0% packet loss, time 28ms
rtt min/avg/max/mdev = 25.273/28.744/38.268/4.838 ms
1.2 host与nslookup
host/ns lookup命令用于查询DNS记录
[root@system_rookie ~]# nslookup www.baidu.com
Server:		114.114.114.114
Address:	114.114.114.114#53

Non-authoritative answer:
www.baidu.com	canonical name = www.a.shifen.com.
Name:	www.a.shifen.com
Address: 14.215.177.39
Name:	www.a.shifen.com
Address: 14.215.177.38
[root@system_rookie ~]# host www.baidu.com
www.baidu.com is an alias for www.a.shifen.com.
www.a.shifen.com has address 14.215.177.38
www.a.shifen.com has address 14.215.177.39
如果/etc/resolv.conf中的DNS记录被删除了,那么使用ping加域名的方式无法连通
[root@system_rookie ~]# cat /etc/resolv.conf
# Generated by NetworkManager
[root@system_rookie ~]# ping www.baidu.com
ping: www.baidu.com: 未知的名称或服务
[root@system_rookie ~]# nslookup www.baidu.com
;; connection timed out; no servers could be reached
重新写入DNS后
[root@system_rookie ~]# cat /etc/resolv.conf
# Generated by NetworkManager
nameserver 114.114.114.114
[root@system_rookie ~]# ping -c 5 -i 1 www.baidu.com
PING www.a.shifen.com (14.215.177.38) 56(84) bytes of data.
64 bytes from 14.215.177.38 (14.215.177.38): icmp_seq=1 ttl=128 time=21.7 ms
64 bytes from 14.215.177.38 (14.215.177.38): icmp_seq=2 ttl=128 time=21.2 ms
64 bytes from 14.215.177.38 (14.215.177.38): icmp_seq=3 ttl=128 time=21.8 ms
64 bytes from 14.215.177.38 (14.215.177.38): icmp_seq=4 ttl=128 time=21.4 ms
64 bytes from 14.215.177.38 (14.215.177.38): icmp_seq=5 ttl=128 time=21.6 ms

--- www.a.shifen.com ping statistics ---
5 packets transmitted, 5 received, 0% packet loss, time 11ms
rtt min/avg/max/mdev = 21.218/21.551/21.802/0.243 ms
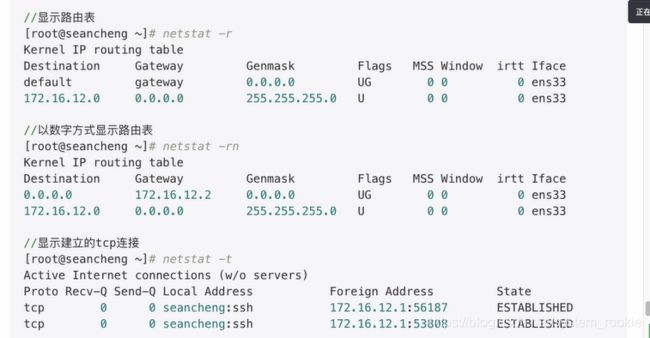
1.3netstat
netstat用于查看网络状态
通常用法:
[root@system_rookie ~]# netstat -tunlp
Active Internet connections (only servers)
Proto Recv-Q Send-Q Local Address           Foreign Address         State       PID/Program name
tcp        0      0 0.0.0.0:22              0.0.0.0:*               LISTEN      982/sshd
tcp6       0      0 :::22                   :::*                    LISTEN      982/sshd
udp        0      0 127.0.0.1:323           0.0.0.0:*                           969/chronyd
udp6       0      0 ::1:323                 :::*                                969/chronyd
[root@system_rookie ~]# netstat -antlp
Active Internet connections (servers and established)
Proto Recv-Q Send-Q Local Address           Foreign Address         State       PID/Program name
tcp        0      0 0.0.0.0:22              0.0.0.0:*               LISTEN      982/sshd
tcp        0     36 192.168.72.10:22        192.168.72.1:62827      ESTABLISHED 1459/sshd: root [pr
tcp6       0      0 :::22                   :::*                    LISTEN      982/sshd
常用参数

1.4 ss
与netstat用法相同,用于取代netstat

[root@system_rookie ~]# ss -antlp
State   Recv-Q   Send-Q      Local Address:Port     Peer Address:Port
LISTEN  0        128               0.0.0.0:22            0.0.0.0:*       users:(("sshd",pid=982,fd=5))
LISTEN  0        128                  [::]:22               [::]:*       users:(("sshd",pid=982,fd=7))
ss -antlp state 状态名称
[root@system_rookie ~]# ss -antlp state LISTENING
Recv-Q   Send-Q         Local Address:Port         Peer Address:Port
0        128                  0.0.0.0:22                0.0.0.0:*        users:(("sshd",pid=982,fd=5))
0        128                     [::]:22                   [::]:*        users:(("sshd",pid=982,fd=7))
[root@system_rookie ~]# ss -ant state ESTABLISHED
Recv-Q  Send-Q      Local Address:Port     Peer Address:Port
0       36          192.168.72.10:22       192.168.72.1:62827

[root@system_rookie ~]# ss -ant state ESTABLISHED '( dport = :22 or sport = :22 )'
Recv-Q  Send-Q      Local Address:Port     Peer Address:Port
0       36          192.168.72.10:22       192.168.72.1:62827
在netstat和ss命令中,-t为查看tcp协议的进程-u为查看udp协议的进程
网络进阶管理
bond链路聚合(重点)
网卡的链路聚合就是将多块网卡连接起来,当一块网卡损坏,网络依旧可以正常运行,可以有效的防止
因为网卡损坏带来的损失,同时也可以提高网络访问速度。
网卡的链路聚合方式:
- bond:最多可以添加两块网卡
- team:最多可以添加八块网卡
bond的常用的2种模式: - bond0(balance-rr)
- bond0用于负载轮询(2个网单独都是100MB,聚合为1个网络传输带宽为200MB)
- bond1 (active-backup)
- bond1用于高可用,其中一条线若断线,其他线路将会自动备援
配置负载轮询(balancer-rr)
- 配置前准备工作:
- 保证组成虚拟网卡的两张网卡没有IP地址
3: eth1: <BROADCAST,MULTICAST,UP,LOWER_UP> mtu 1500 qdisc fq_codel state UP group default qlen 1000
    link/ether 00:0c:29:91:0b:de brd ff:ff:ff:ff:ff:ff
4: eth2: <BROADCAST,MULTICAST,UP,LOWER_UP> mtu 1500 qdisc fq_codel state UP group default qlen 1000
    link/ether 00:0c:29:91:0b:e8 brd ff:ff:ff:ff:ff:ff
- 网卡连接没有eth1、eth2(组成虚拟网卡的两张网卡)
[root@system_rookie ~]# nmcli connection
NAME  UUID                                  TYPE      DEVICE
eth0  cf3ccd2f-000d-41a5-b7d0-2507290de20d  ethernet  eth0
- 网卡设备eth1、eth2已断开
[root@system_rookie ~]# nmcli device
DEVICE  TYPE      STATE   CONNECTION
eth0    ethernet  已连接  eth0
eth1    ethernet  已断开  --
eth2    ethernet  已断开  --
lo      loopback  未托管  --
- 添加配置
- 添加虚拟网卡
[root@system_rookie ~]# nmcli connection add type bond con-name bond0 ifname bond0 ipv4.method manual ipv4.addresses 192.168.72.25/24 ipv4.gateway 192.168.72.254 ipv4.dns 114.114.114.114
连接 "bond0" (2f3ff022-e460-460c-8442-4cf0e83ff17a) 已成功添加。
- 将两张网卡关联至虚拟网卡
eth1
[root@system_rookie ~]# nmcli connection add type bond-slave mode balance-rr con-name slave-eth1 ifname eth1 master bond0
连接 "slave-eth1" (af2910c9-35f4-4f43-be3f-8defea190092) 已成功添加。
eth2
[root@system_rookie ~]# nmcli connection add type bond-slave con-name slave-eth2 ifname eth2 master bond0
连接 "slave-eth2" (9cd4efcd-8f68-4518-8f71-8f1f984cae02) 已成功添加。
- 配置成功
[root@system_rookie ~]# nmcli device
DEVICE  TYPE      STATE   CONNECTION
eth0    ethernet  已连接  eth0
bond0   bond      已连接  bond0
eth1    ethernet  已连接  slave-eth1
eth2    ethernet  已连接  slave-eth2
lo      loopback  未托管  --
- 查看
/proc/net/bonding/bond0文件
[root@system_rookie ~]# cat /proc/net/bonding/bond0
Ethernet Channel Bonding Driver: v3.7.1 (April 27, 2011)

Bonding Mode: load balancing (round-robin)
MII Status: up
MII Polling Interval (ms): 100
Up Delay (ms): 0
Down Delay (ms): 0

Slave Interface: eth1
MII Status: up
Speed: 10000 Mbps
Duplex: full
Link Failure Count: 0
Permanent HW addr: 00:0c:29:91:0b:de
Slave queue ID: 0

Slave Interface: eth2
MII Status: up
Speed: 10000 Mbps
Duplex: full
Link Failure Count: 0
Permanent HW addr: 00:0c:29:91:0b:e8
Slave queue ID: 0
配置高可用(active-backup)
- 配置前准备(同上)
- 添加配置
- 添加虚拟网卡
[root@system_rookie ~]# nmcli connection add type bond mode active-backup con-name bond0 ifname bond0 ipv4.method manual ipv4.addresses 192.168.72.25/24 ipv4.gateway 192.168.72.254 ipv4.dns 114.114.114.114
连接 "bond0" (5f4e9588-a34c-4488-a53a-f6d9799dec16) 已成功添加。
- 将两张网卡与虚拟网卡关联
[root@system_rookie ~]# nmcli connection add type bond-slave con-name eth1-slave ifname eth1 master bond0
连接 "eth1-slave" (e61f3841-f02f-44e2-bcd2-e8e97b9ba00a) 已成功添加。
[root@system_rookie ~]# nmcli connection add type bond-slave con-name eth2-slave ifname eth2 master bond0
连接 "eth2-slave" (bc094e08-1356-45ee-982b-940cf138cf58) 已成功添加。
- 查看网络连接和网卡设备信息
[root@system_rookie ~]# nmcli connection
NAME        UUID                                  TYPE      DEVICE
eth0        cf3ccd2f-000d-41a5-b7d0-2507290de20d  ethernet  eth0
bond0       5f4e9588-a34c-4488-a53a-f6d9799dec16  bond      bond0
eth1-slave  e61f3841-f02f-44e2-bcd2-e8e97b9ba00a  ethernet  eth1
eth2-slave  bc094e08-1356-45ee-982b-940cf138cf58  ethernet  eth2
[root@system_rookie ~]# nmcli device
DEVICE  TYPE      STATE   CONNECTION
eth0    ethernet  已连接  eth0
bond0   bond      已连接  bond0
eth1    ethernet  已连接  eth1-slave
eth2    ethernet  已连接  eth2-slave
lo      loopback  未托管  --
- 查看
/proc/net/bonding/bond0文件
[root@system_rookie ~]# cat /proc/net/bonding/bond0
Ethernet Channel Bonding Driver: v3.7.1 (April 27, 2011)

Bonding Mode: fault-tolerance (active-backup)
Primary Slave: None
Currently Active Slave: eth1
MII Status: up
MII Polling Interval (ms): 100
Up Delay (ms): 0
Down Delay (ms): 0

Slave Interface: eth1
MII Status: up
Speed: 10000 Mbps
Duplex: full
Link Failure Count: 0
Permanent HW addr: 00:0c:29:91:0b:de
Slave queue ID: 0

Slave Interface: eth2
MII Status: up
Speed: 10000 Mbps
Duplex: full
Link Failure Count: 0
Permanent HW addr: 00:0c:29:91:0b:e8
Slave queue ID: 0
team聚合链路(重点)
centos/rhce7使用teaming实现聚合链路能够提供网卡绑定之后的网络吞吐性能并且提供网卡的故
障切换处理能力。
Team是基于一个小型内核驱动实现聚合链路,在用户层提供teamd命令实现链路管理。
teamd可以实现以下模式的聚合链路
- broadcast广播容错
- roundrobin负载轮询
- activebackup主备(必考)
- loadbalance负载均衡(必考)
- lacp需要交换机支持lacp协议
配置team的一般语法:
nmcli con add type team con-name team0 ifname team0 config
'{
	"runner":{
		"name":"activebackup" 	#选择需要的team模式
	}

}'
ipv4.method manual ipv4.addresses 192.168.72.25/24 ipv4.gateway 192.168.72.254 ipv4.dns 114.114.114.114
- 创建虚拟网卡
[root@system_rookie ~]# nmcli connection add type team con-name team0 ifname team0 config '{"runner":{"name":"activebackup"}}' ipv4.method manual ipv4.addresses 192.168.72.25/24 ipv4.gateway 192.168.72.254 ipv4.dns 114.114.114.114
连接 "team0" (47c7982b-27d2-4052-a1fd-c0343036d1a7) 已成功添加。
- 将两张网卡与虚拟网卡关联
[root@system_rookie ~]# nmcli connection add type team-slave con-name eth1-slave ifname eth1 master team0
连接 "eth1-slave" (4f5f7764-0e57-4bbc-8531-ca0836cf898e) 已成功添加。
[root@system_rookie ~]# nmcli connection add type team-slave con-name eth2-slave ifname eth2 master team0
连接 "eth2-slave" (455e79fd-aec9-450a-a3f4-e7413eedb480) 已成功添加。
- 查看网络连接和网络设备配置
[root@system_rookie ~]# nmcli connection
NAME        UUID                                  TYPE      DE>
eth0        cf3ccd2f-000d-41a5-b7d0-2507290de20d  ethernet  et>
team0       47c7982b-27d2-4052-a1fd-c0343036d1a7  team      te>
eth1-slave  4f5f7764-0e57-4bbc-8531-ca0836cf898e  ethernet  et>
eth2-slave  455e79fd-aec9-450a-a3f4-e7413eedb480  ethernet  et>
lines 1-5/5 (END)
[root@system_rookie ~]# nmcli device
DEVICE  TYPE      STATE   CONNECTION
eth0    ethernet  已连接  eth0
team0   team      已连接  team0
eth1    ethernet  已连接  eth1-slave
eth2    ethernet  已连接  eth2-slave
- 通过
teamdctl命令查看team0配置状态
[root@system_rookie ~]# teamdctl team0 state
setup:
  runner: activebackup
ports:
  eth1
    link watches:
      link summary: up
      instance[link_watch_0]:
        name: ethtool
        link: up
        down count: 0
  eth2
    link watches:
      link summary: up
      instance[link_watch_0]:
        name: ethtool
        link: up
        down count: 0
runner:
  active port: eth1		#现在正在用的网卡
- 断开eth1测试team0
[root@system_rookie ~]# nmcli device disconnect eth1
成功断开设备 "eth1"。
[root@system_rookie ~]# teamdctl team0 state
setup:
  runner: activebackup
ports:
  eth2
    link watches:
      link summary: up
      instance[link_watch_0]:
        name: ethtool
        link: up
        down count: 0
runner:
  active port: eth2			#此时变成eth2
动态修改team模式
- 导出配置进行修改(man teamd. conf )
[root@wangqing ~]# teamdctl team0 config dump > / tmp/ team. conf
[root@wangqing ~]# vim / tmp/ team. conf
- 以最新修改的配置选项修改team0属性
[root@wangqing ~]# nmcli con mod team0 team.config /tmp/team.conf
- 修改之后需要重启team0
[root@wangqing ~]# nmcli connection down team0;nmcli connection up team0
[root@wangqing ~]# nmcli connectiorf up team0-port1
[root@wangqing ~]# nmcli connection up team0-port2
配置过程
- 导出并生成配置文件
[root@system_rookie ~]# teamdctl team0 config dump > /tmp/team0.conf
[root@system_rookie ~]# vim /tmp/team0.conf
{
    "device": "team0",		#team名称
    "mcast_rejoin": {
        "count": 1
    },
    "notify_peers": {
        "count": 1
    },
    "ports": {
        "eth1": {				#组成网卡
            "link_watch": {
                "name": "ethtool"
            }
        },
        "eth2": {				#组成网卡
            "link_watch": {
                "name": "ethtool"
            }
        }
    },
    "runner": {
        "name": "activebackup"	#当前使用的模式(可修改为:loadbalancing、roundrobin、broadcast)
    }
}
- 以最新修改的配置选项修改team0属性
[root@system_rookie ~]# nmcli connection modify team0 team.config /tmp/team0.conf
- 重新连接team0、eth1-slave、eth2-slave
[root@system_rookie ~]# nmcli connection down team0;nmcli connection up team0
成功停用连接 "team0"(D-Bus 活动路径:/org/freedesktop/NetworkManager/ActiveConnection/27)

连接已成功激活(master waiting for slaves)(D-Bus 活动路径:/org/freedesktop/NetworkManager/ActiveConnection/30)
[root@system_rookie ~]# nmcli connection up eth1-slave
连接已成功激活(D-Bus 活动路径:/org/freedesktop/NetworkManager/ActiveConnection/33)
[root@system_rookie ~]# nmcli connection up eth2-slave
连接已成功激活(D-Bus 活动路径:/org/freedesktop/NetworkManager/ActiveConnection/34)
- 查看team0的状态
[root@system_rookie ~]# teamdctl team0 state
setup:
  runner: loadbalance
ports:
  eth1
    link watches:
      link summary: up
      instance[link_watch_0]:
        name: ethtool
        link: up
        down count: 0
  eth2
    link watches:
      link summary: up
      instance[link_watch_0]:
        name: ethtool
        link: up
        down count: 0