Android开发学习总结day1-1
Android开发学习总结day1-1
- preface
- About download and Install
- Make new project
- Download the virtual phone environment
- Controllers
-
- where can we write our code or design
- the formal way to write attributes details in controller
-
- example
- LinearLayout
- TextView
-
- About Attributes
-
- layout_width
- layout_height
- id
-
- how to get the controllers
- text
- textColor
- textStyle
- textSize
- background
- gravity
- shawdow(android:shadowColor,android:shadowRadius,android:shadowDx,android:shadowDy)
- singleLine
- ellipsize
- focusable and focusableInTouchMode
- marqueeRepeatLimit
- clickable
- requestFocus
preface
This series of articles is my sum of study
I will write it use English cause I use this way to improve both of the abilities
So if you have any questions , you can ask me and I will answer you as soon as possible
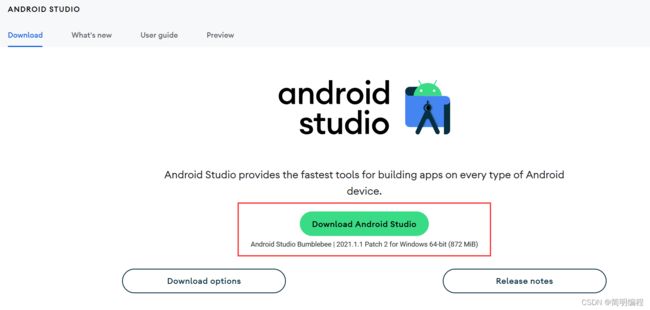
About download and Install
address: https://developer.android.google.cn/studio/
Make new project
I think it is very simple and similiar to IDEA
so I skip here
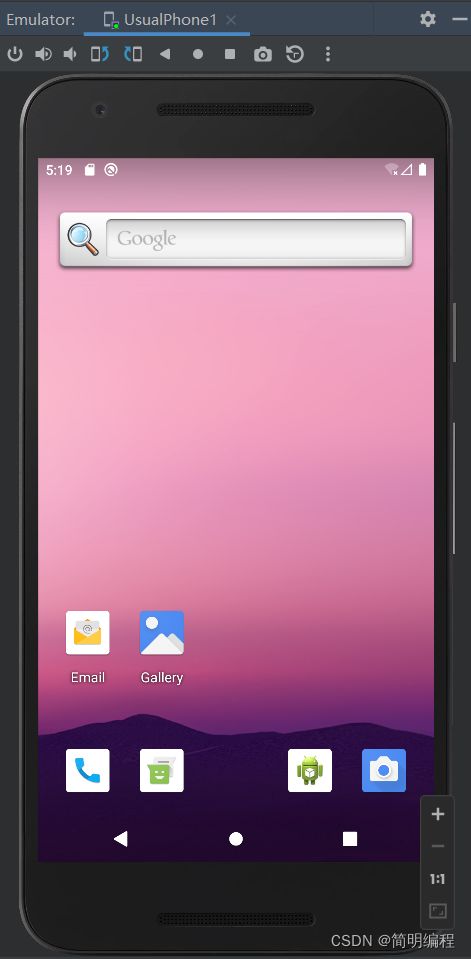
Download the virtual phone environment


then click the download
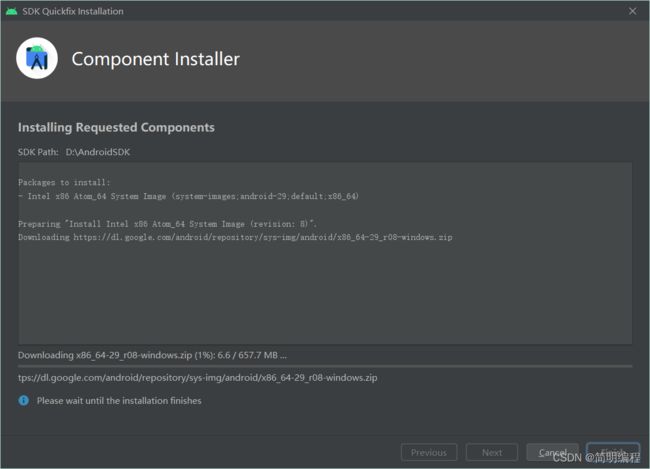
wait a moment and it will be ok

click the finish and you will see it in you right side

if you click the play button you will open the virtual phone
Controllers
where can we write our code or design
in activity_main.xml
usually you can click here with ctrl and then you will go to the activity_main.xml page

the formal way to write attributes details in controller
you can find res–>values in you project

actually we always write some attributes in these different xml files and then use @fileName/controllerId to add into the controller which you want to use these attributes!
example

LinearLayout
this is a container controller and it is required in you activity_main.xml to hold the other controllers
<LinearLayout xmlns:android="http://schemas.android.com/apk/res/android"
    android:layout_height="match_parent"
    android:layout_width="match_parent"
    android:orientation="vertical">
</LinearLayout>
TextView
    <TextView
        android:id="@+id/textview1"
        android:text="Hello World Hello World Hello World Hello World Hello World Hello World"
        android:textColor="#30E623"
        android:textStyle="italic"
        android:textSize="20sp"
        android:background="@color/yellow"
        android:gravity="center"
        android:layout_width="match_parent"
        android:shadowColor="@color/purple_700"
        android:shadowRadius="3"
        android:shadowDx="5"
        android:shadowDy="20"
        android:singleLine="true"
        android:ellipsize="marquee"
        android:focusable="true"
        android:clickable="true"
        android:focusableInTouchMode="true"
        android:marqueeRepeatLimit="marquee_forever"
        android:layout_height="match_parent"></TextView>
About Attributes
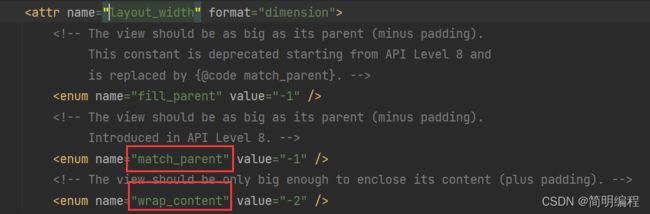
layout_width
the width of the controller
| AttriName | description | example |
|---|---|---|
| match_parent | the controller will have the same width as it’s father controller means:width = 100% | android:layout_width=“match_parent” |
| wrap_content | the controller won’t have width unless it has some other controllers in it means: width = son controller1 + son contoller2…+son controller n | android:layout_width=“wrap_content” |
| num | you can also wirte number in it means:width = num dp | android:layout_width=“100dp” |
layout_height
the height of the controller

| AttriName | description | example |
|---|---|---|
| match_parent | the controller will have the same height as it’s father controller means:height = 100% | android:layout_height=“match_parent” |
| wrap_content | the controller won’t have width unless it has some other controllers in it means: height = son controller1 + son contoller2…+son controller n | android:layout_height=“wrap_content” |
| num | you can also wirte number in it means:height = num dp | android:layout_height=“100dp” |
id
the name of the controller and you can use it to get the controller in you java code
format: @+id/XXX
example:android:id="@+id/textview1"
how to get the controllers
findViewById(R.id.textview1);
text
the text of the controller
what you write will show on your virtual phone
example:
android:text="Hello World"

textColor
the font color of the text in you contollers
example:
android:textColor="#30E623"
textStyle
the style of your text default as normal
example:
android:textStyle="italic"


textSize
the size of your text and we always use sp as it’s unit
example:
android:textSize="20sp"
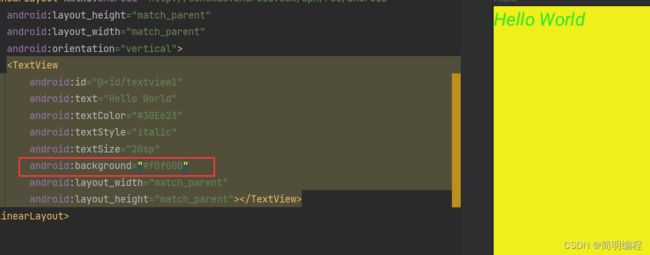
background
the background of the controller you can set it use color or images
example:
android:background="#f0f000"
gravity
the position of the text in your controller
example:
android:gravity="center"

<attr name="gravity">
        <!-- Push object to the top of its container, not changing its size. -->
        <flag name="top" value="0x30" />
        <!-- Push object to the bottom of its container, not changing its size. -->
        <flag name="bottom" value="0x50" />
        <!-- Push object to the left of its container, not changing its size. -->
        <flag name="left" value="0x03" />
        <!-- Push object to the right of its container, not changing its size. -->
        <flag name="right" value="0x05" />
        <!-- Place object in the vertical center of its container, not changing its size. -->
        <flag name="center_vertical" value="0x10" />
        <!-- Grow the vertical size of the object if needed so it completely fills its container. -->
        <flag name="fill_vertical" value="0x70" />
        <!-- Place object in the horizontal center of its container, not changing its size. -->
        <flag name="center_horizontal" value="0x01" />
        <!-- Grow the horizontal size of the object if needed so it completely fills its container. -->
        <flag name="fill_horizontal" value="0x07" />
        <!-- Place the object in the center of its container in both the vertical and horizontal axis, not changing its size. -->
        <flag name="center" value="0x11" />
        <!-- Grow the horizontal and vertical size of the object if needed so it completely fills its container. -->
        <flag name="fill" value="0x77" />
        <!-- Additional option that can be set to have the top and/or bottom edges of
             the child clipped to its container's bounds.
             The clip will be based on the vertical gravity: a top gravity will clip the bottom
             edge, a bottom gravity will clip the top edge, and neither will clip both edges. -->
        <flag name="clip_vertical" value="0x80" />
        <!-- Additional option that can be set to have the left and/or right edges of
             the child clipped to its container's bounds.
             The clip will be based on the horizontal gravity: a left gravity will clip the right
             edge, a right gravity will clip the left edge, and neither will clip both edges. -->
        <flag name="clip_horizontal" value="0x08" />
        <!-- Push object to the beginning of its container, not changing its size. -->
        <flag name="start" value="0x00800003" />
        <!-- Push object to the end of its container, not changing its size. -->
        <flag name="end" value="0x00800005" />
    </attr>
shawdow(android:shadowColor,android:shadowRadius,android:shadowDx,android:shadowDy)
the shadow of the text
attation:
- if you want to use shadow you should use shadowColor and shadowRadius together!
- about shadowRadius you just can write the range between 0~3
example:
        android:shadowColor="@color/purple_700"
        android:shadowRadius="3"
        android:shadowDx="5"
        android:shadowDy="20"

singleLine
if you want to show the text in a single line not multiple lines you can use this attribute
example:
android:singleLine="true"
no singleLine:

use singleLine

ellipsize
set the ellipsize(省略) place in the singleLine
example:
android:ellipsize="start"

    <attr name="ellipsize">
        <enum name="none" value="0" />
        <enum name="start" value="1" />
        <enum name="middle" value="2" />
        <enum name="end" value="3" />
        <enum name="marquee" value="4" />
    </attr>
focusable and focusableInTouchMode
set whether the controller can be focused in control view pattern
example:
android:focusable="true"
android:focusableInTouchMode="true"
marqueeRepeatLimit
sets the number of subtitle animation repetitions
attation:
if you want to use the attribute you must use android:ellipsize="marquee" together!
example:
android:marqueeRepeatLimit="marquee_forever"
clickable
set whether you can click the controller and get focus
that means you should use it with focusable and focusableInTouchMode
example:
android:clickable="true"
requestFocus
this controller can automatically focus the father controller
attation:you should set focusable = “true” and focusableInTouchMode=“true” in the father controller!
example:
<TextView
 	    android:focusable="true"
        android:clickable="true"
        android:focusableInTouchMode="true">
<requestFocus />
</TextView>