【Detectron2 教程】Detectron2 安装 运行demo 运行预训练模型 在一个新的数据集上训练一个detectron2模型 训练自定义数据集 balloon_dataset 气球数据集
最近被毕业论文搞得焦头烂额,我做的是时空行为检测,目前我查到的比较好的是slowfast这个东西,slowfast的时空行为检测又是基于Detectron2 框架中的faster r-cnn。但是毕业论文总得有点新东西,不能总抄别人的,所以,这篇博客总结以下Detectron2 怎么训练自己的数据集。
目录
- 参考
- 1,安装
-
- 1.1 创建实例
- 1.2 安装Detectron2
- 1.3 错误解决
- 2,运行一个预训练模型(Run a pre-trained detectron2 model)
-
- 2.1 创建test.py
- 2.2 import 各种库
- 2.3 coco图片显示(将要检测的)
- 2.4 创建配置和DefaultPredictor
- 2.5 打印出输出的结果
- 2.6 保存输出的图片
- 2.7 在终端运行test.py
- 2.8 最后结果
- 2.9 完整代码
- 3, 自定义数据集
-
- 3.1 下载气球数据集
- 3.2 获取并转换气球数据集格式
- 3.3 可视化数据集
- 3.4 完整代码
- 3.5 结果
- 4,训练!
-
- 4.1 训练代码
- 完整代码
- 5 在tensorboard中可视化训练过程
-
- 5.1 可视化操作简介
- 5.2 完整代码
- 5.3 结果显示
- 6 inference、可视化、结果评估
-
- 6.1 修改配置文件
- 6.2 可视化预测结果
- 6.3 性能评估
- 6.4 完整代码
参考
detectron2实现Faster RCNN目标检测
Detectron2 Beginner’s Tutorial(需要翻过去才能访问)
detectron2项目地址
detectron2文档
1,安装
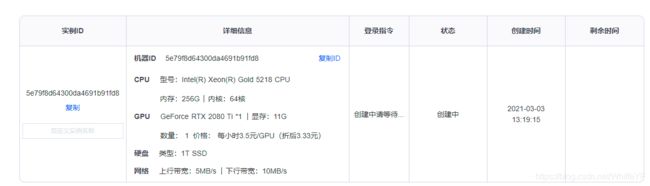
1.1 创建实例
还是现在AI云平台上单独创捷一个实例(这段时间邀请新用户送50元已经取消了,不知道啥时候恢复)
镜像选择:
框架选择Pytorch,版本1.4,python 3.7,CUDA版本 10.1

1.2 安装Detectron2
pip install -U torch torchvision cython
pip install -U 'git+https://github.com/facebookresearch/fvcore.git' 'git+https://github.com/cocodataset/cocoapi.git#subdirectory=PythonAPI'
git clone https://github.com/facebookresearch/detectron2 detectron2_repo
pip install -e detectron2_repo
1.3 错误解决
运行过程中可能会出现
Traceback (most recent call last):
File “demo.py”, line 7, in
import cv2
File “/opt/conda/lib/python3.7/site-packages/cv2/init.py”, line 5, in
from .cv2 import *
ImportError: libGL.so.1: cannot open shared object file: No such file or directory
解决方案:
在终端运行:
apt update
apt install libgl1-mesa-glx
2,运行一个预训练模型(Run a pre-trained detectron2 model)
这一小部分会在coco数据集上选择一张图片,然后放在一个预训练模型上运行,最后查看运行结果
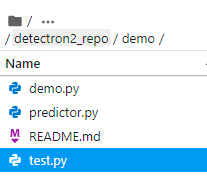
2.1 创建test.py
在目录/detectron2_repo/demo/下创建test.py
2.2 import 各种库
在test.py里粘贴下面的代码
import torch, torchvision

# Some basic setup:
# Setup detectron2 logger
import detectron2
from detectron2.utils.logger import setup_logger
setup_logger()

# import some common libraries
import numpy as np
import os, json, cv2, random


# import some common detectron2 utilities
from detectron2 import model_zoo
from detectron2.engine import DefaultPredictor
from detectron2.config import get_cfg
from detectron2.utils.visualizer import Visualizer
from detectron2.data import MetadataCatalog, DatasetCatalog
2.3 coco图片显示(将要检测的)
进入终段,到/detectron2_repo/demo目录下,输入以下命令:
wget http://images.cocodataset.org/val2017/000000439715.jpg -q -O input.jpg
然后就可以在JupyterLab看到如下图片
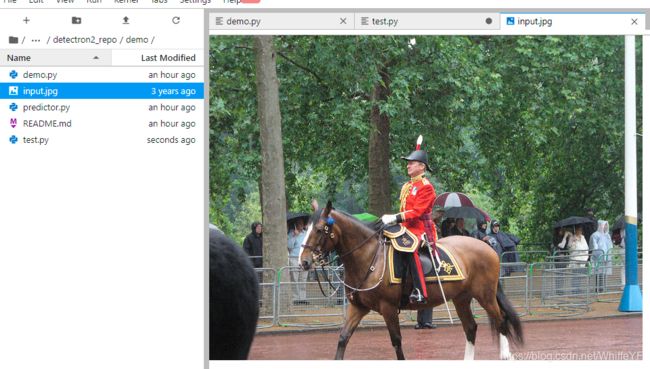
在test.py中输入以下代码,用于读取该图片
im = cv2.imread("./input.jpg")
2.4 创建配置和DefaultPredictor
然后,我们创建一个detectron2配置和一个detectron2 DefaultPredictor来对这个图像运行推断。(下面的代码复制粘贴到test.py后面)
cfg = get_cfg()
# add project-specific config (e.g., TensorMask) here if you're not running a model in detectron2's core library
cfg.merge_from_file(model_zoo.get_config_file("COCO-InstanceSegmentation/mask_rcnn_R_50_FPN_3x.yaml"))
cfg.MODEL.ROI_HEADS.SCORE_THRESH_TEST = 0.5  # set threshold for this model
# Find a model from detectron2's model zoo. You can use the https://dl.fbaipublicfiles... url as well
cfg.MODEL.WEIGHTS = model_zoo.get_checkpoint_url("COCO-InstanceSegmentation/mask_rcnn_R_50_FPN_3x.yaml")
predictor = DefaultPredictor(cfg)
outputs = predictor(im)
2.5 打印出输出的结果
# look at the outputs. See https://detectron2.readthedocs.io/tutorials/models.html#model-output-format for specification
print(outputs["instances"].pred_classes)
print(outputs["instances"].pred_boxes)
2.6 保存输出的图片
# We can use `Visualizer` to draw the predictions on the image.
v = Visualizer(im[:, :, ::-1], MetadataCatalog.get(cfg.DATASETS.TRAIN[0]), scale=1.2)
out = v.draw_instance_predictions(outputs["instances"].to("cpu"))
cv2.imwrite('./output.jpg', out.get_image()[:, :, ::-1])
2.7 在终端运行test.py
python test.py

2.8 最后结果
2.9 完整代码
import torch, torchvision

# Some basic setup:
# Setup detectron2 logger
import detectron2
from detectron2.utils.logger import setup_logger
setup_logger()

# import some common libraries
import numpy as np
import os, json, cv2, random


# import some common detectron2 utilities
from detectron2 import model_zoo
from detectron2.engine import DefaultPredictor
from detectron2.config import get_cfg
from detectron2.utils.visualizer import Visualizer
from detectron2.data import MetadataCatalog, DatasetCatalog


im = cv2.imread("./input.jpg")

cfg = get_cfg()
# add project-specific config (e.g., TensorMask) here if you're not running a model in detectron2's core library
cfg.merge_from_file(model_zoo.get_config_file("COCO-InstanceSegmentation/mask_rcnn_R_50_FPN_3x.yaml"))
cfg.MODEL.ROI_HEADS.SCORE_THRESH_TEST = 0.5  # set threshold for this model
# Find a model from detectron2's model zoo. You can use the https://dl.fbaipublicfiles... url as well
cfg.MODEL.WEIGHTS = model_zoo.get_checkpoint_url("COCO-InstanceSegmentation/mask_rcnn_R_50_FPN_3x.yaml")
predictor = DefaultPredictor(cfg)
outputs = predictor(im)

# look at the outputs. See https://detectron2.readthedocs.io/tutorials/models.html#model-output-format for specification
print(outputs["instances"].pred_classes)
print(outputs["instances"].pred_boxes)

# We can use `Visualizer` to draw the predictions on the image.
v = Visualizer(im[:, :, ::-1], MetadataCatalog.get(cfg.DATASETS.TRAIN[0]), scale=1.2)
out = v.draw_instance_predictions(outputs["instances"].to("cpu"))
cv2.imwrite('./output.jpg', out.get_image()[:, :, ::-1])
3, 自定义数据集
在这一节中,将在现行的Detectron2上训练一个新的自定义数据集,使用气球分割数据集,这个数据集只有一个类:气球。采用在coco数据集上预训练的模型,在现行的Detectron2上训练气球的分割模型。这个预训练模型可以在Detectron2的模型库里找到。
在coco数据集里,是没有气球这个类,我们可以在几分中内实现识别这个新类。
3.1 下载气球数据集
在 detectron2_repo目录下新建文件balloon_dataset,数据将存在这个新创建得文件夹里,在终端进入到detectron2_repo/balloon_dataset/目录下
在终端输入:
wget https://github.com/matterport/Mask_RCNN/releases/download/v2.1/balloon_dataset.zip
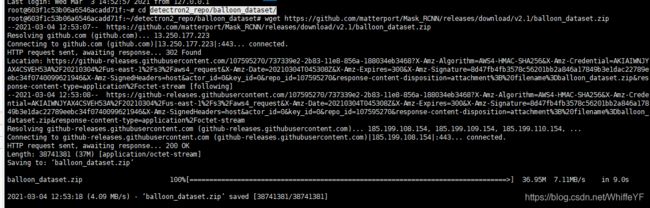
解压,在终端输入:
unzip balloon_dataset.zip
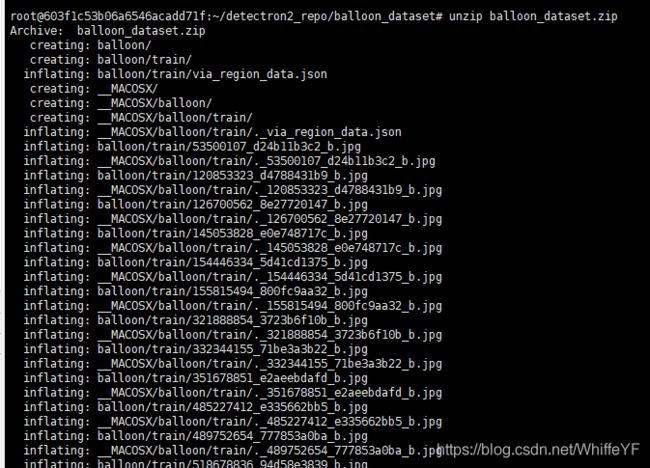
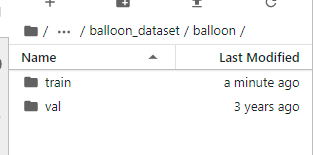
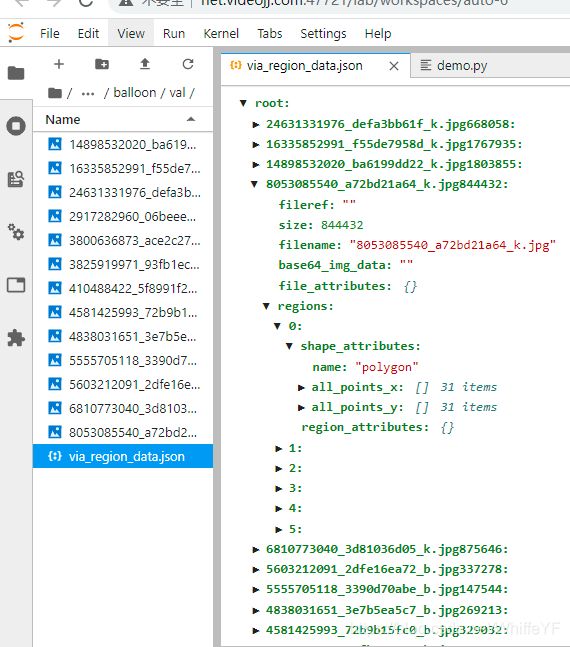
解压后,会有一个balloon文件夹,在这个文件夹下面还有train和vak文件夹
via_region_data.json文件下是图片得标注信息
3.2 获取并转换气球数据集格式
将气球数据集放入Detectron2 中,需要参考Detectron2 中自定义数据集教程,这里得气球数据集是它自己自定义得格式,我们写一个函数将这个自定义的数据集格式转化为Detectron2 的格式,如果要知道更多细节,参考Detectron2 中自定义数据集教程
在/detectron2_repo/demo目录下新建一个python文件:balloon.py
# if your dataset is in COCO format, this cell can be replaced by the following three lines:
# from detectron2.data.datasets import register_coco_instances
# register_coco_instances("my_dataset_train", {}, "json_annotation_train.json", "path/to/image/dir")
# register_coco_instances("my_dataset_val", {}, "json_annotation_val.json", "path/to/image/dir")

from detectron2.structures import BoxMode

def get_balloon_dicts(img_dir):
    json_file = os.path.join(img_dir, "via_region_data.json")
    with open(json_file) as f:
        imgs_anns = json.load(f)

    dataset_dicts = []
    for idx, v in enumerate(imgs_anns.values()):
        record = {}

        filename = os.path.join(img_dir, v["filename"])
        height, width = cv2.imread(filename).shape[:2]

        record["file_name"] = filename
        record["image_id"] = idx
        record["height"] = height
        record["width"] = width

        annos = v["regions"]
        objs = []
        for _, anno in annos.items():
            assert not anno["region_attributes"]
            anno = anno["shape_attributes"]
            px = anno["all_points_x"]
            py = anno["all_points_y"]
            poly = [(x + 0.5, y + 0.5) for x, y in zip(px, py)]
            poly = [p for x in poly for p in x]

            obj = {
                "bbox": [np.min(px), np.min(py), np.max(px), np.max(py)],
                "bbox_mode": BoxMode.XYXY_ABS,
                "segmentation": [poly],
                "category_id": 0,
            }
            objs.append(obj)
        record["annotations"] = objs
        dataset_dicts.append(record)
    return dataset_dicts

for d in ["train", "val"]:
    DatasetCatalog.register("balloon_" + d, lambda d=d: get_balloon_dicts("../balloon_dataset/balloon/" + d))
    MetadataCatalog.get("balloon_" + d).set(thing_classes=["balloon"])
balloon_metadata = MetadataCatalog.get("balloon_train")
3.3 可视化数据集
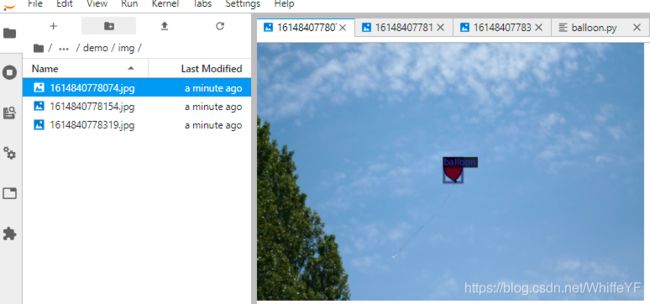
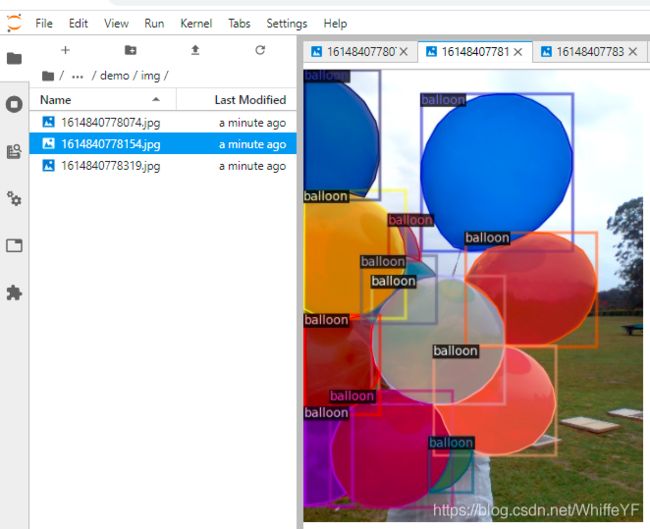
为了保证数据集加载的正确性,我们从训练集中随机选择一个进行可视化的标注。
为了保存可视化得图片,在/detectron2_repo/demo/下创建img文件夹
dataset_dicts = get_balloon_dicts("../balloon_dataset/balloon/train")
for d in random.sample(dataset_dicts, 3):
    img = cv2.imread(d["file_name"])
    visualizer = Visualizer(img[:, :, ::-1], metadata=balloon_metadata, scale=0.5)
    out = visualizer.draw_dataset_dict(d)
    cv2.imwrite('./img/'+str(round(time.time()*1000))+'.jpg', out.get_image()[:, :, ::-1])
3.4 完整代码
# if your dataset is in COCO format, this cell can be replaced by the following three lines:
# from detectron2.data.datasets import register_coco_instances
# register_coco_instances("my_dataset_train", {}, "json_annotation_train.json", "path/to/image/dir")
# register_coco_instances("my_dataset_val", {}, "json_annotation_val.json", "path/to/image/dir")

from detectron2.structures import BoxMode

import torch, torchvision

# Some basic setup:
# Setup detectron2 logger
import detectron2
from detectron2.utils.logger import setup_logger
setup_logger()

# import some common libraries
import numpy as np
import os, json, cv2, random


# import some common detectron2 utilities
from detectron2 import model_zoo
from detectron2.engine import DefaultPredictor
from detectron2.config import get_cfg
from detectron2.utils.visualizer import Visualizer
from detectron2.data import MetadataCatalog, DatasetCatalog

import time


def get_balloon_dicts(img_dir):
    json_file = os.path.join(img_dir, "via_region_data.json")
    with open(json_file) as f:
        imgs_anns = json.load(f)

    dataset_dicts = []
    for idx, v in enumerate(imgs_anns.values()):
        record = {}

        filename = os.path.join(img_dir, v["filename"])
        height, width = cv2.imread(filename).shape[:2]

        record["file_name"] = filename
        record["image_id"] = idx
        record["height"] = height
        record["width"] = width

        annos = v["regions"]
        objs = []
        for _, anno in annos.items():
            assert not anno["region_attributes"]
            anno = anno["shape_attributes"]
            px = anno["all_points_x"]
            py = anno["all_points_y"]
            poly = [(x + 0.5, y + 0.5) for x, y in zip(px, py)]
            poly = [p for x in poly for p in x]

            obj = {
                "bbox": [np.min(px), np.min(py), np.max(px), np.max(py)],
                "bbox_mode": BoxMode.XYXY_ABS,
                "segmentation": [poly],
                "category_id": 0,
            }
            objs.append(obj)
        record["annotations"] = objs
        dataset_dicts.append(record)
    return dataset_dicts

for d in ["train", "val"]:
    DatasetCatalog.register("balloon_" + d, lambda d=d: get_balloon_dicts("../balloon_dataset/balloon/" + d))
    MetadataCatalog.get("balloon_" + d).set(thing_classes=["balloon"])
balloon_metadata = MetadataCatalog.get("balloon_train")

dataset_dicts = get_balloon_dicts("../balloon_dataset/balloon/train")
for d in random.sample(dataset_dicts, 3):
    img = cv2.imread(d["file_name"])
    visualizer = Visualizer(img[:, :, ::-1], metadata=balloon_metadata, scale=0.5)
    out = visualizer.draw_dataset_dict(d)
    cv2.imwrite('./img/'+str(round(time.time()*1000))+'.jpg', out.get_image()[:, :, ::-1])
3.5 结果
4,训练!
在气球数据集上微调coco预训练模型 R50-FPN Mask R-CNN 模型,在AI云平台上使用单个GPU跑,大概1分钟左右就可以训练完模型。
4.1 训练代码
from detectron2.engine import DefaultTrainer

cfg = get_cfg()
cfg.merge_from_file(model_zoo.get_config_file("COCO-InstanceSegmentation/mask_rcnn_R_50_FPN_3x.yaml"))
cfg.DATASETS.TRAIN = ("balloon_train",)
cfg.DATASETS.TEST = ()
cfg.DATALOADER.NUM_WORKERS = 2
cfg.MODEL.WEIGHTS = model_zoo.get_checkpoint_url("COCO-InstanceSegmentation/mask_rcnn_R_50_FPN_3x.yaml")  # Let training initialize from model zoo
cfg.SOLVER.IMS_PER_BATCH = 2
cfg.SOLVER.BASE_LR = 0.00025  # pick a good LR
cfg.SOLVER.MAX_ITER = 300    # 300 iterations seems good enough for this toy dataset; you will need to train longer for a practical dataset
cfg.SOLVER.STEPS = []        # do not decay learning rate
cfg.MODEL.ROI_HEADS.BATCH_SIZE_PER_IMAGE = 128   # faster, and good enough for this toy dataset (default: 512)
cfg.MODEL.ROI_HEADS.NUM_CLASSES = 1  # only has one class (ballon). (see https://detectron2.readthedocs.io/tutorials/datasets.html#update-the-config-for-new-datasets)
# NOTE: this config means the number of classes, but a few popular unofficial tutorials incorrect uses num_classes+1 here.

os.makedirs(cfg.OUTPUT_DIR, exist_ok=True)
trainer = DefaultTrainer(cfg)
trainer.resume_or_load(resume=False)
trainer.train()
完整代码
沿用第三节的balloon.py文件,在文件最后添加4.1的代码
# if your dataset is in COCO format, this cell can be replaced by the following three lines:
# from detectron2.data.datasets import register_coco_instances
# register_coco_instances("my_dataset_train", {}, "json_annotation_train.json", "path/to/image/dir")
# register_coco_instances("my_dataset_val", {}, "json_annotation_val.json", "path/to/image/dir")

from detectron2.structures import BoxMode

import torch, torchvision

# Some basic setup:
# Setup detectron2 logger
import detectron2
from detectron2.utils.logger import setup_logger
setup_logger()

# import some common libraries
import numpy as np
import os, json, cv2, random


# import some common detectron2 utilities
from detectron2 import model_zoo
from detectron2.engine import DefaultPredictor
from detectron2.config import get_cfg
from detectron2.utils.visualizer import Visualizer
from detectron2.data import MetadataCatalog, DatasetCatalog

import time


def get_balloon_dicts(img_dir):
    json_file = os.path.join(img_dir, "via_region_data.json")
    with open(json_file) as f:
        imgs_anns = json.load(f)

    dataset_dicts = []
    for idx, v in enumerate(imgs_anns.values()):
        record = {}

        filename = os.path.join(img_dir, v["filename"])
        height, width = cv2.imread(filename).shape[:2]

        record["file_name"] = filename
        record["image_id"] = idx
        record["height"] = height
        record["width"] = width

        annos = v["regions"]
        objs = []
        for _, anno in annos.items():
            assert not anno["region_attributes"]
            anno = anno["shape_attributes"]
            px = anno["all_points_x"]
            py = anno["all_points_y"]
            poly = [(x + 0.5, y + 0.5) for x, y in zip(px, py)]
            poly = [p for x in poly for p in x]

            obj = {
                "bbox": [np.min(px), np.min(py), np.max(px), np.max(py)],
                "bbox_mode": BoxMode.XYXY_ABS,
                "segmentation": [poly],
                "category_id": 0,
            }
            objs.append(obj)
        record["annotations"] = objs
        dataset_dicts.append(record)
    return dataset_dicts

for d in ["train", "val"]:
    DatasetCatalog.register("balloon_" + d, lambda d=d: get_balloon_dicts("../balloon_dataset/balloon/" + d))
    MetadataCatalog.get("balloon_" + d).set(thing_classes=["balloon"])
balloon_metadata = MetadataCatalog.get("balloon_train")

dataset_dicts = get_balloon_dicts("../balloon_dataset/balloon/train")
for d in random.sample(dataset_dicts, 3):
    img = cv2.imread(d["file_name"])
    visualizer = Visualizer(img[:, :, ::-1], metadata=balloon_metadata, scale=0.5)
    out = visualizer.draw_dataset_dict(d)
    cv2.imwrite('./img/'+str(round(time.time()*1000))+'.jpg', out.get_image()[:, :, ::-1])

from detectron2.engine import DefaultTrainer

cfg = get_cfg()
cfg.merge_from_file(model_zoo.get_config_file("COCO-InstanceSegmentation/mask_rcnn_R_50_FPN_3x.yaml"))
cfg.DATASETS.TRAIN = ("balloon_train",)
cfg.DATASETS.TEST = ()
cfg.DATALOADER.NUM_WORKERS = 2
cfg.MODEL.WEIGHTS = model_zoo.get_checkpoint_url("COCO-InstanceSegmentation/mask_rcnn_R_50_FPN_3x.yaml")  # Let training initialize from model zoo
cfg.SOLVER.IMS_PER_BATCH = 2
cfg.SOLVER.BASE_LR = 0.00025  # pick a good LR
cfg.SOLVER.MAX_ITER = 300    # 300 iterations seems good enough for this toy dataset; you will need to train longer for a practical dataset
cfg.SOLVER.STEPS = []        # do not decay learning rate
cfg.MODEL.ROI_HEADS.BATCH_SIZE_PER_IMAGE = 128   # faster, and good enough for this toy dataset (default: 512)
cfg.MODEL.ROI_HEADS.NUM_CLASSES = 1  # only has one class (ballon). (see https://detectron2.readthedocs.io/tutorials/datasets.html#update-the-config-for-new-datasets)
# NOTE: this config means the number of classes, but a few popular unofficial tutorials incorrect uses num_classes+1 here.

os.makedirs(cfg.OUTPUT_DIR, exist_ok=True)
trainer = DefaultTrainer(cfg)
trainer.resume_or_load(resume=False)
trainer.train()
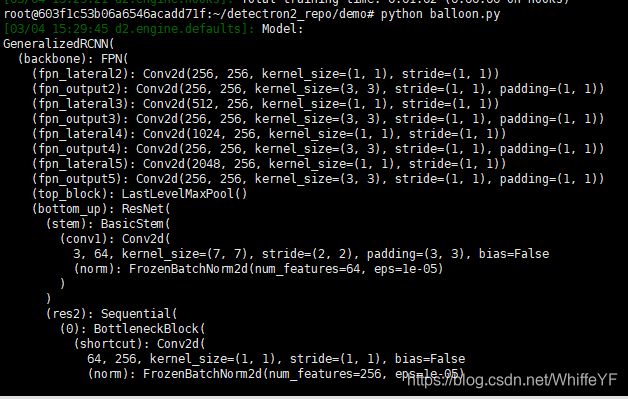
在终端,目录定位到:/detectron2_repo/demo下,然后输入:
python balloon.py
5 在tensorboard中可视化训练过程
5.1 可视化操作简介
关于tensorboard的使用,我也是第一次使用,在网上找了些资料,罗列如下:
- TensorBoard 使用(极链AI云平台的使用方法)、
- 开始使用 TensorBoard(tensorflow官网使用方法)
在极链AI云平台中,有如下描述: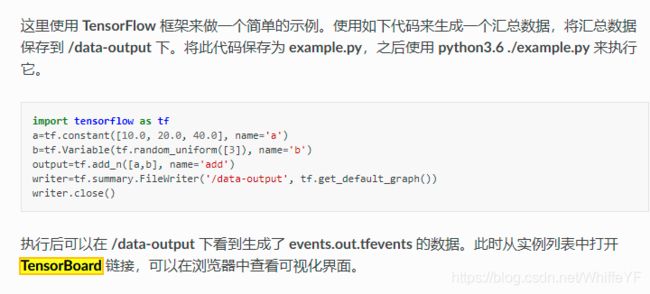
把代码生成的汇总数据保存在云服务器的 ‘/data-output’目录下,所以在第4节的代码基础上,做了如下修改: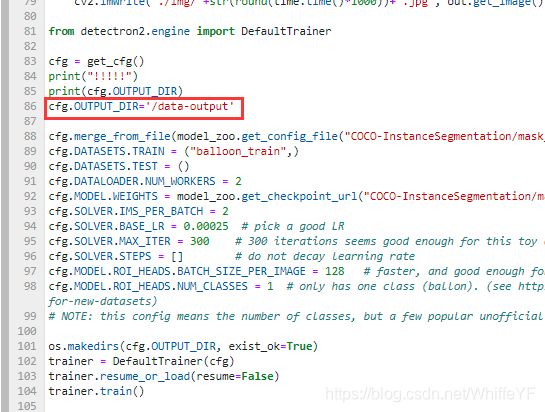
即增加了:
cfg.OUTPUT_DIR='/data-output'
5.2 完整代码
# if your dataset is in COCO format, this cell can be replaced by the following three lines:
# from detectron2.data.datasets import register_coco_instances
# register_coco_instances("my_dataset_train", {}, "json_annotation_train.json", "path/to/image/dir")
# register_coco_instances("my_dataset_val", {}, "json_annotation_val.json", "path/to/image/dir")

from detectron2.structures import BoxMode

import torch, torchvision

# Some basic setup:
# Setup detectron2 logger
import detectron2
from detectron2.utils.logger import setup_logger
setup_logger()

# import some common libraries
import numpy as np
import os, json, cv2, random


# import some common detectron2 utilities
from detectron2 import model_zoo
from detectron2.engine import DefaultPredictor
from detectron2.config import get_cfg
from detectron2.utils.visualizer import Visualizer
from detectron2.data import MetadataCatalog, DatasetCatalog

import time


def get_balloon_dicts(img_dir):
    json_file = os.path.join(img_dir, "via_region_data.json")
    with open(json_file) as f:
        imgs_anns = json.load(f)

    dataset_dicts = []
    for idx, v in enumerate(imgs_anns.values()):
        record = {}

        filename = os.path.join(img_dir, v["filename"])
        height, width = cv2.imread(filename).shape[:2]

        record["file_name"] = filename
        record["image_id"] = idx
        record["height"] = height
        record["width"] = width

        annos = v["regions"]
        objs = []
        for _, anno in annos.items():
            assert not anno["region_attributes"]
            anno = anno["shape_attributes"]
            px = anno["all_points_x"]
            py = anno["all_points_y"]
            poly = [(x + 0.5, y + 0.5) for x, y in zip(px, py)]
            poly = [p for x in poly for p in x]

            obj = {
                "bbox": [np.min(px), np.min(py), np.max(px), np.max(py)],
                "bbox_mode": BoxMode.XYXY_ABS,
                "segmentation": [poly],
                "category_id": 0,
            }
            objs.append(obj)
        record["annotations"] = objs
        dataset_dicts.append(record)
    return dataset_dicts

for d in ["train", "val"]:
    DatasetCatalog.register("balloon_" + d, lambda d=d: get_balloon_dicts("../balloon_dataset/balloon/" + d))
    MetadataCatalog.get("balloon_" + d).set(thing_classes=["balloon"])
balloon_metadata = MetadataCatalog.get("balloon_train")

dataset_dicts = get_balloon_dicts("../balloon_dataset/balloon/train")
for d in random.sample(dataset_dicts, 3):
    img = cv2.imread(d["file_name"])
    visualizer = Visualizer(img[:, :, ::-1], metadata=balloon_metadata, scale=0.5)
    out = visualizer.draw_dataset_dict(d)
    cv2.imwrite('./img/'+str(round(time.time()*1000))+'.jpg', out.get_image()[:, :, ::-1])

from detectron2.engine import DefaultTrainer

cfg = get_cfg()
cfg.OUTPUT_DIR='/data-output'

cfg.merge_from_file(model_zoo.get_config_file("COCO-InstanceSegmentation/mask_rcnn_R_50_FPN_3x.yaml"))
cfg.DATASETS.TRAIN = ("balloon_train",)
cfg.DATASETS.TEST = ()
cfg.DATALOADER.NUM_WORKERS = 2
cfg.MODEL.WEIGHTS = model_zoo.get_checkpoint_url("COCO-InstanceSegmentation/mask_rcnn_R_50_FPN_3x.yaml")  # Let training initialize from model zoo
cfg.SOLVER.IMS_PER_BATCH = 2
cfg.SOLVER.BASE_LR = 0.00025  # pick a good LR
cfg.SOLVER.MAX_ITER = 300    # 300 iterations seems good enough for this toy dataset; you will need to train longer for a practical dataset
cfg.SOLVER.STEPS = []        # do not decay learning rate
cfg.MODEL.ROI_HEADS.BATCH_SIZE_PER_IMAGE = 128   # faster, and good enough for this toy dataset (default: 512)
cfg.MODEL.ROI_HEADS.NUM_CLASSES = 1  # only has one class (ballon). (see https://detectron2.readthedocs.io/tutorials/datasets.html#update-the-config-for-new-datasets)
# NOTE: this config means the number of classes, but a few popular unofficial tutorials incorrect uses num_classes+1 here.

os.makedirs(cfg.OUTPUT_DIR, exist_ok=True)
trainer = DefaultTrainer(cfg)
trainer.resume_or_load(resume=False)
trainer.train()
在终端运行:
python balloon.py
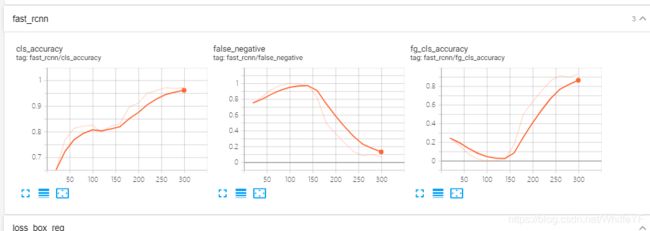
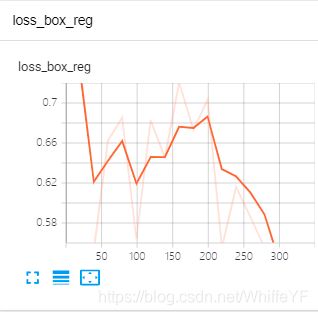
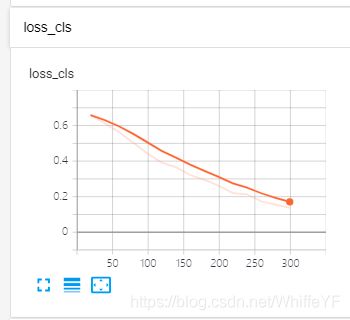
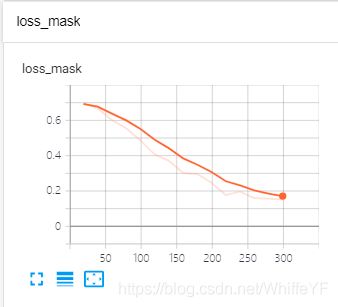
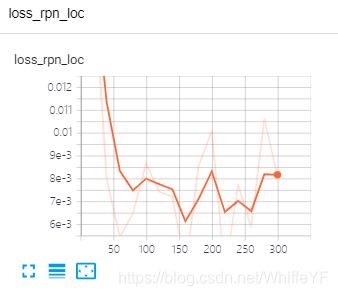
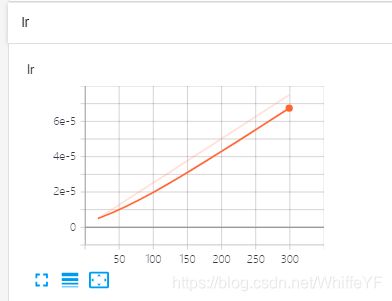
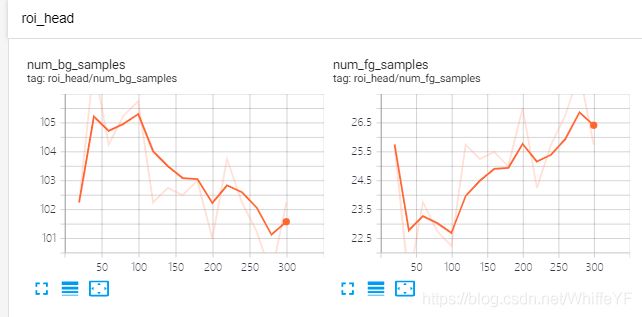
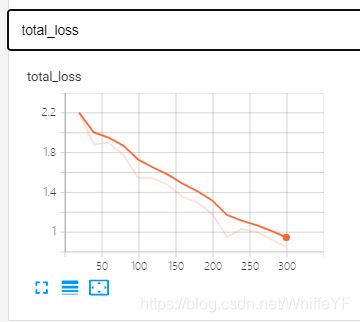
5.3 结果显示
在极链AI平台,进入到我的实例界面,点击如下的tensorboard位置:
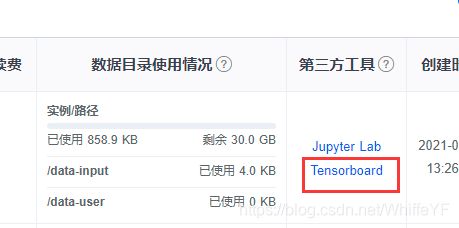
结果如下: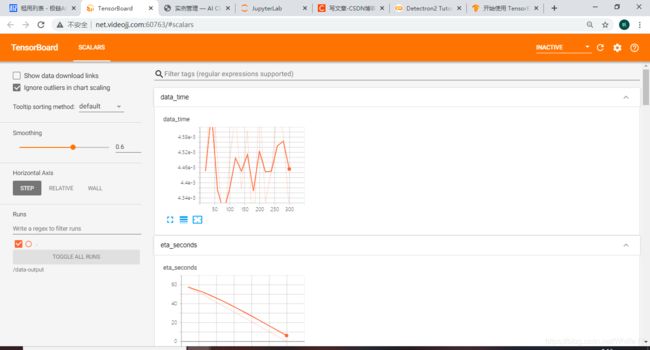


6 inference、可视化、结果评估
这里之所以用英文的原因是,我感觉把 ‘inference’ 直接翻译为 ‘推断’ 有点不妥。在深度学习里面,使用学习好的模型做预测的过程叫inference。
这里我们使用训练好的模型在气球的验证数据集上进行 inference,我们先使用训练的模型创建一个predictor。
6.1 修改配置文件
Inference 使用的配置文件的参数是之前训练过程所使用的,配置文件cfg在我们之前的设置中已经包含了我们所需的东西,但有一点点东西需要微调。
下面是微调的内容:
# Inference should use the config with parameters that are used in training
# cfg now already contains everything we've set previously. We changed it a little bit for inference:
cfg.MODEL.WEIGHTS = os.path.join(cfg.OUTPUT_DIR, "model_final.pth")  # path to the model we just trained
cfg.MODEL.ROI_HEADS.SCORE_THRESH_TEST = 0.7   # set a custom testing threshold
predictor = DefaultPredictor(cfg)
6.2 可视化预测结果
接下来我们随机选择一些样本来随机可视化预测结果
from detectron2.utils.visualizer import ColorMode

dataset_dicts = get_balloon_dicts("../balloon_dataset/balloon/val")
for d in random.sample(dataset_dicts, 3):
    im = cv2.imread(d["file_name"])
    outputs = predictor(im)  # format is documented at https://detectron2.readthedocs.io/tutorials/models.html#model-output-format
    v = Visualizer(im[:, :, ::-1],
                   metadata=balloon_metadata,
                   scale=0.5,
                   instance_mode=ColorMode.IMAGE_BW   # remove the colors of unsegmented pixels. This option is only available for segmentation models
    )
    out = v.draw_instance_predictions(outputs["instances"].to("cpu"))
    cv2.imwrite('./inference_img/'+str(round(time.time()*1000))+'.jpg', out.get_image()[:, :, ::-1])
6.3 性能评估
我们使用在COCO API中实现的AP度量来评估它的性能。它展示出来的AP值约70,还不错。
from detectron2.evaluation import COCOEvaluator, inference_on_dataset
from detectron2.data import build_detection_test_loader
evaluator = COCOEvaluator("balloon_val", ("bbox", "segm"), False, output_dir="./output/")
val_loader = build_detection_test_loader(cfg, "balloon_val")

with open('./inference_evaluation/1.txt','a',encoding='utf-8') as f:
    text = str(inference_on_dataset(trainer.model, val_loader, evaluator))
    f.write(text)


# another equivalent way to evaluate the model is to use `trainer.test`
/inference_evaluation/1.txt的内容:
OrderedDict([(‘bbox’, {‘AP’: 68.2612117946228, ‘AP50’:
86.58943483285331, ‘AP75’: 84.1705250849794, ‘APs’: 24.534653465346537, ‘APm’: 55.61888122293561, ‘APl’: 80.56504030779422}), (‘segm’, {‘AP’: 77.01405040310588, ‘AP50’: 86.14802846311417, ‘AP75’: 85.16868858144753, ‘APs’: 11.730868782078604, ‘APm’: 59.18627528027219, ‘APl’: 92.1329490046318})])
6.4 完整代码
# if your dataset is in COCO format, this cell can be replaced by the following three lines:
# from detectron2.data.datasets import register_coco_instances
# register_coco_instances("my_dataset_train", {}, "json_annotation_train.json", "path/to/image/dir")
# register_coco_instances("my_dataset_val", {}, "json_annotation_val.json", "path/to/image/dir")

from detectron2.structures import BoxMode

import torch, torchvision

# Some basic setup:
# Setup detectron2 logger
import detectron2
from detectron2.utils.logger import setup_logger
setup_logger()

# import some common libraries
import numpy as np
import os, json, cv2, random


# import some common detectron2 utilities
from detectron2 import model_zoo
from detectron2.engine import DefaultPredictor
from detectron2.config import get_cfg
from detectron2.utils.visualizer import Visualizer
from detectron2.data import MetadataCatalog, DatasetCatalog
from detectron2.utils.visualizer import ColorMode

import time


def get_balloon_dicts(img_dir):
    json_file = os.path.join(img_dir, "via_region_data.json")
    with open(json_file) as f:
        imgs_anns = json.load(f)

    dataset_dicts = []
    for idx, v in enumerate(imgs_anns.values()):
        record = {}

        filename = os.path.join(img_dir, v["filename"])
        height, width = cv2.imread(filename).shape[:2]

        record["file_name"] = filename
        record["image_id"] = idx
        record["height"] = height
        record["width"] = width

        annos = v["regions"]
        objs = []
        for _, anno in annos.items():
            assert not anno["region_attributes"]
            anno = anno["shape_attributes"]
            px = anno["all_points_x"]
            py = anno["all_points_y"]
            poly = [(x + 0.5, y + 0.5) for x, y in zip(px, py)]
            poly = [p for x in poly for p in x]

            obj = {
                "bbox": [np.min(px), np.min(py), np.max(px), np.max(py)],
                "bbox_mode": BoxMode.XYXY_ABS,
                "segmentation": [poly],
                "category_id": 0,
            }
            objs.append(obj)
        record["annotations"] = objs
        dataset_dicts.append(record)
    return dataset_dicts

for d in ["train", "val"]:
    DatasetCatalog.register("balloon_" + d, lambda d=d: get_balloon_dicts("../balloon_dataset/balloon/" + d))
    MetadataCatalog.get("balloon_" + d).set(thing_classes=["balloon"])
balloon_metadata = MetadataCatalog.get("balloon_train")

dataset_dicts = get_balloon_dicts("../balloon_dataset/balloon/train")
for d in random.sample(dataset_dicts, 3):
    img = cv2.imread(d["file_name"])
    visualizer = Visualizer(img[:, :, ::-1], metadata=balloon_metadata, scale=0.5)
    out = visualizer.draw_dataset_dict(d)
    cv2.imwrite('./img/'+str(round(time.time()*1000))+'.jpg', out.get_image()[:, :, ::-1])

from detectron2.engine import DefaultTrainer

cfg = get_cfg()
cfg.OUTPUT_DIR='/data-output'

cfg.merge_from_file(model_zoo.get_config_file("COCO-InstanceSegmentation/mask_rcnn_R_50_FPN_3x.yaml"))
cfg.DATASETS.TRAIN = ("balloon_train",)
cfg.DATASETS.TEST = ()
cfg.DATALOADER.NUM_WORKERS = 2
cfg.MODEL.WEIGHTS = model_zoo.get_checkpoint_url("COCO-InstanceSegmentation/mask_rcnn_R_50_FPN_3x.yaml")  # Let training initialize from model zoo
cfg.SOLVER.IMS_PER_BATCH = 2
cfg.SOLVER.BASE_LR = 0.00025  # pick a good LR
cfg.SOLVER.MAX_ITER = 300    # 300 iterations seems good enough for this toy dataset; you will need to train longer for a practical dataset
cfg.SOLVER.STEPS = []        # do not decay learning rate
cfg.MODEL.ROI_HEADS.BATCH_SIZE_PER_IMAGE = 128   # faster, and good enough for this toy dataset (default: 512)
cfg.MODEL.ROI_HEADS.NUM_CLASSES = 1  # only has one class (ballon). (see https://detectron2.readthedocs.io/tutorials/datasets.html#update-the-config-for-new-datasets)
# NOTE: this config means the number of classes, but a few popular unofficial tutorials incorrect uses num_classes+1 here.

os.makedirs(cfg.OUTPUT_DIR, exist_ok=True)
trainer = DefaultTrainer(cfg)
trainer.resume_or_load(resume=False)
trainer.train()


# Inference should use the config with parameters that are used in training
# cfg now already contains everything we've set previously. We changed it a little bit for inference:
cfg.MODEL.WEIGHTS = os.path.join(cfg.OUTPUT_DIR, "model_final.pth")  # path to the model we just trained
cfg.MODEL.ROI_HEADS.SCORE_THRESH_TEST = 0.7   # set a custom testing threshold
predictor = DefaultPredictor(cfg)

dataset_dicts = get_balloon_dicts("../balloon_dataset/balloon/val")
for d in random.sample(dataset_dicts, 3):
    im = cv2.imread(d["file_name"])
    outputs = predictor(im)  # format is documented at https://detectron2.readthedocs.io/tutorials/models.html#model-output-format
    v = Visualizer(im[:, :, ::-1],
                   metadata=balloon_metadata,
                   scale=0.5,
                   instance_mode=ColorMode.IMAGE_BW   # remove the colors of unsegmented pixels. This option is only available for segmentation models
    )
    out = v.draw_instance_predictions(outputs["instances"].to("cpu"))
    cv2.imwrite('./inference_img/'+str(round(time.time()*1000))+'.jpg', out.get_image()[:, :, ::-1])

from detectron2.evaluation import COCOEvaluator, inference_on_dataset
from detectron2.data import build_detection_test_loader
evaluator = COCOEvaluator("balloon_val", ("bbox", "segm"), False, output_dir="./output/")
val_loader = build_detection_test_loader(cfg, "balloon_val")

with open('./inference_evaluation/1.txt','a',encoding='utf-8') as f:
    text = str(inference_on_dataset(trainer.model, val_loader, evaluator))
    f.write(text)