在Windows下完成ChIP-Seq分析
纯粹就是记录下如何在Window下完成ChIP-Seq,并没有详细讲解ChIP-Seq的原理和每一步背后的含义。想深入了解可以翻生信技能树,生信宝典,组学大讲堂等等公众号。本文里的命令都是用(powershell or cmd, 部分需要cygwin64) 和 R脚本。
本文参考文章
Genome‑wide discovery of OsHOX24‑binding sites and regulation
of desiccation stress response in rice
工具准备
conda (需要添加到环境变量, 这里用的是3.8,miniconda 就可以了)Windows 10下安装Miniconda3
perl5 (需要添加到环境变量, 我装的草莓版的)windows环境安装Perl
java (需要添加到环境变量)[JAVA(windows)安装教程]
R Windows下安装R的详细教程
SRA Toolkit (需要添加到环境变量,仅用于将sra文件转为fastq)下载地址
bowtie2 (需要添加到环境变量,最新版的还没被编译到windows平台,这里用的是2.3.4版本, 名字含mingw的zip就可以。运行bowtie2需要perl在环境变量中)下载地址
Trimmomatic (用来去reads的接头,需要java)下载地址
samtools (需要添加到环境变量,这个是1.3.1版本。原作者Li Heng 写过能用mingw/msy2编译的makefile文件,但在最新版的1.13版的编译中总是报错,所以找了个旧的支持windows的版本)[下载地址]
FastQC windows 安装 fastqc; fastqc
IGV 简单介绍IGV软件的安装和使用
cygwin64 (用于跑HOMER,在安装过程中需要选装gcc-core gcc-g++ make zip unzip wget ,gcc 建议装低版本,不然编译HOMER过程会有奇怪的问题) Windows:安装cygwin教程
HOMER 我是参考了[软件使用 2] HOMER安装和使用攻略,如何获取Motif?
。在官网下载configureHomer.pl,然后在cygwin终端就是用perl configureHomer.pl -install 进行安装,会安装在configureHomer.pl所在的文件夹,安装好后记得要把该目录下bin文件夹加入环境变量,并在cygwin的配置文件夹(一般就是\cygwin64\home\user\)下找到.bash_profile,在最后加上PATH=$PATH:/cygdrive/d/wgc_tools/HOMER/.//bin/(d/wgc_tools/HOMER/就是安装HOMER的位置)。成功安装如下图,如果有报错就把gcc调低个版本,在把-install 换成-make,这样就不用重新下载了。

bedtools (需要添加到环境变量) 这个软件官方也是没有能直接在windows下运行的文件,但我在Unipro UGENE的tools里找到了2.29.2版本的exe文件。安装好Unipro UGENE能在其tools文件夹下找到。Unipro UGENE
python 包:
multiqc install
macs2.2.7.1 需要先用conda install libpython m2w64-toolchain -c msys2 装一些库,下载source code,解压后找到PeakDetect.pyx文件,把145-148行改成下图。

在有setup.py文件为文件夹用
pip install -e .
命令就能安装了。我这里只是用了callpeak 命令没有问题 ,其他的还没试过。
R包:
ChIPseeker
clusterProfiler
DiffBind
ChIPQC
数据下载
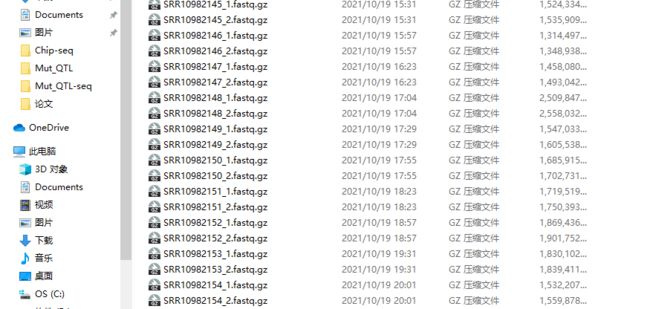
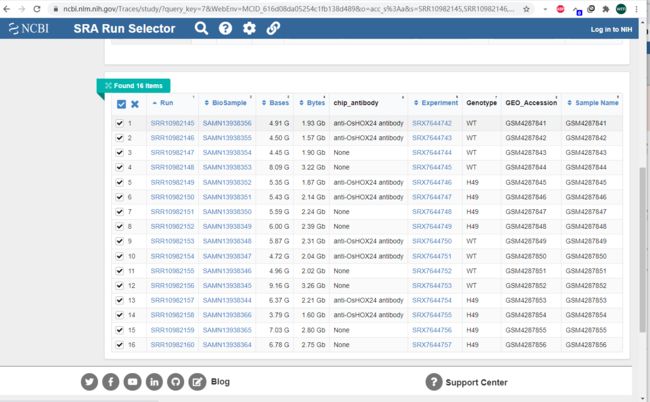
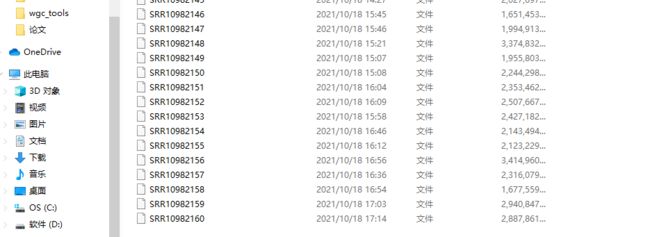
文献中有项目号:GSE144419。可以直接在GEO里找到数据下载。我这下的是SRA文件,就快一点。可以看到作者的实验设计是过表达和野生型分别在正常和干旱胁迫做ChIP,两个重复。我发现重复间的文件大小差的有点大,估计是这个重复做的不太行。

用fastq-dump 转成fastq格式
在powershell 键入命令
#sra to fastq.gz
cd F:\chip-seq\ #存SRR的文件夹
for($x=45;$x -lt 61;$x=$x+1)
{
#--split-3 用于双端测序 --gzip 输出结果为fastq.gz格式比较省空间,缺点是比对过程会慢些
fastq-dump --split-3 --gzip SRR109821$x
rm SRR109821$x
}
数据分析
FastQC
这里用FastQC和multiqc 来查看reads质量 。multiqc 能把FastQC的结果汇总,更好看点。
#fastqc
mkdir ./output/fastqc #存放fastqc结果
for($x=45;$x -lt 61;$x=$x+1)
{
perl D:\RNA-Seq_tools\FastQC\fastqc -t 4 SRR109821${x}_1.fastq.gz -q -o .\output\fastqc
perl D:\RNA-Seq_tools\FastQC\fastqc -t 4 SRR109821${x}_2.fastq.gz -q -o .\output\fastqc
###不知道为啥这个循环里的fastqc 是并行的,为了避免一次占太多线程,这个用了下sleep
sleep -s 150 #隔2.5分钟跑下一个
}

multiqc ./output/fastqc/*fastqc.zip -o ./output/fastqc --export # summary report
Trimmomatic
Trimmomatic是比较常用质控软件。质控后清除没用的文件,省点空间。
Trimmomatic参数参考

mkdir ./output/clean #存放质控后的fastq
for($x=45;$x -lt 61;$x=$x+1)
{
#存放trimmomatic的位置
java -jar "D:/RNA-Seq_tools/Trimmomatic-0.39/trimmomatic-0.39.jar" PE -threads 16 -phred33 -trimlog ./output/log/SRR109821${x}_trim.log SRR109821${x}_1.fastq.gz SRR109821${x}_2.fastq.gz ./output/clean/SRR109821${x}_R1.clean.fastq.gz ./output/clean/SRR109821${x}_R1.unpaired.fastq.gz ./output/clean/SRR109821${x}_R2.clean.fastq.gz ./output/clean/SRR109821${x}_R2.unpaired.fastq.gz ILLUMINACLIP:Merged.Adapter.fa:2:30:10:8:true SLIDINGWINDOW:4:15 LEADING:3 TRAILING:3 MINLEN:36
}
rm ./output/log/*_trim.log #clean trim log
rm SRR109821*.fastq.gz #clean ori fastq
rm ./output/clean/*.unpaired.fastq.gz #clean unpaired fastq
bowtie2 alignment
bowtie2 比对快一点,16个样本差不多用了15个小时。
#bulit index
mkdir .\output\ref #放引索
mkdir .\output\log
bowtie2-build E:\IRGSP-1.0_representative\referent_fasta\all.chrs.fasta output/ref/ref >> output/log/bowtie2.log
samtools faidx E:\IRGSP-1.0_representative\referent_fasta\all.chrs.fasta >> output/log/samtools.log

#alignment
mkdir ./output/bam #放bam
for($x=45;$x -lt 61;$x=$x+1)
{
bowtie2 -p 6 -x output/ref/ref -1 ./output/clean/SRR109821${x}_R1.clean.fastq.gz -2 ./output/clean/SRR109821${x}_R2.clean.fastq.gz -S ./output/bam/SRR109821${x}.sam >> ./output/log/alignment.log 2>&1
samtools fixmate -O bam ./output/bam/SRR109821${x}.sam ./output/bam/SRR109821${x}_fixmate.bam
rm ./output/bam/SRR109821${x}.sam
# 排序
samtools sort -@ 6 -O bam -m 1G -o ./output/bam/SRR109821${x}_sort.bam ./output/bam/SRR109821${x}_fixmate.bam
rm ./output/bam/SRR109821${x}_fixmate.bam
# 去掉重复reads
samtools rmdup -sS ./output/bam/SRR109821${x}_sort.bam ./output/bam/SRR109821${x}_rmdup.bam
rm ./output/bam/SRR109821${x}_sort.bamg
# 去掉质量低reads
samtools view -@ 6 -b -q 1 -o ./output/bam/SRR109821${x}.bam ./output/bam/SRR109821${x}_rmdup.bam
rm ./output/bam/SRR109821${x}_rmdup.bam
# bam 构建引索
samtools index ./output/bam/SRR109821${x}.bam ./output/bam/SRR109821${x}.bam.bai
}
得到bam可以直接用IGV查看。可以用自己的参考序列,这里我用的MSU下载到的染色体序列,也支持输入多个bam。ChIP-Seq的结果是能直接看到差异的peaks。

call peaks
这一步还是有很多选择的,最经常维护的是HOMER和macs2,主流就是用macs2,但我用HOMER发现得到的peaks少太多了。并且不同参数会对产生大的结果,并不是默认参数就是最好的,如果对你的蛋白和实验越了解,得到的结果越准确。文献中用的是macs2,这里用的是文献给的参数(其实就是软件默认值)。这里得到的结果发现重复样品peaks数差异很大,应该就是测序或取样没弄好。
HOMER
用HOMER 来call peaks 输入文件是sam格式 和makeTagDirectory,findPeaks。由于HOMER安装好后会生成这两个软件的exe执行文件所以可以在powershell里调用。
mkdir ./output/callpeakHOMER

for($x=45;$x -lt 61;$x=$x+1)
{
mkdir ./output/callpeakHOMER/SRR109821${x} #存放makeTagDirectory
###生成sam文件
samtools view -h -o ./output/bam/SRR109821${x}.sam ./output/bam/SRR109821${x}.bam
###call peaks 预处理 前一个是目标文件夹,后一个是输入的sam文件,由于是去重的reads,所有可以--keepAll
makeTagDirectory ./output/callpeakHOMER/SRR109821${x} ./output/bam/SRR109821${x}.sam -format sam -sspe --keepAll >> ./output/log/callpeakHOMER.log 2>&1
sleep -s 150
rm ./output/bam/SRR109821${x}.sam
}
###-style factor 是类型,一共是7种,还有组蛋白,增强子,启动子,具体可以看官方文档 -i 是对照样本的文件夹,得到差异的peaks,也可以不加,就是得到所有的peaks。
###得到的结果是narrowPeaks格式,可以用HOMER自带脚本转成bed格式
for($x=45;$x -lt 61;$x=$x+4)
{
$y=$x+2
$m=$x+1
$n=$x+3
findPeaks ./output/callpeakHOMER/SRR109821${x} -i ./output/callpeakHOMER/SRR109821${y} -style factor -o ./output/callpeakHOMER/SRR109821_${x}_${y}.txt >> ./output/log/callpeakHOMER.log 2>&1
perl D:/wgc_tools/HOMER/bin/pos2bed.pl ./output/callpeakHOMER/SRR109821_${x}_${y}.txt > ./output/callpeakHOMER/SRR109821_${x}_${y}.bed
findPeaks ./output/callpeakHOMER/SRR109821${x} -style factor -o ./output/callpeakHOMER/SRR109821_${x}.txt >> ./output/log/callpeakHOMER.log 2>&1
perl D:/wgc_tools/HOMER/bin/pos2bed.pl ./output/callpeakHOMER/SRR109821_${x}.txt > ./output/callpeakHOMER/SRR109821_${x}.bed
findPeaks ./output/callpeakHOMER/SRR109821${y} -style factor -o ./output/callpeakHOMER/SRR109821_${y}.txt >> ./output/log/callpeakHOMER.log 2>&1
perl D:/wgc_tools/HOMER/bin/pos2bed.pl ./output/callpeakHOMER/SRR109821_${y}.txt > ./output/callpeakHOMER/SRR109821_${y}.bed
findPeaks ./output/callpeakHOMER/SRR109821${m} -i ./output/callpeakHOMER/SRR109821${n} -style factor -o ./output/callpeakHOMER/SRR109821_${m}_${n}.txt >> ./output/log/callpeakHOMER.log 2>&1
perl D:/wgc_tools/HOMER/bin/pos2bed.pl ./output/callpeakHOMER/SRR109821_${m}_${n}.txt > ./output/callpeakHOMER/SRR109821_${m}_${n}.bed
findPeaks ./output/callpeakHOMER/SRR109821${m} -style factor -o ./output/callpeakHOMER/SRR109821_${m}.txt >> ./output/log/callpeakHOMER.log 2>&1
perl D:/wgc_tools/HOMER/bin/pos2bed.pl ./output/callpeakHOMER/SRR109821_${m}.txt > ./output/callpeakHOMER/SRR109821_${m}.bed
findPeaks ./output/callpeakHOMER/SRR109821${n} -style factor -o ./output/callpeakHOMER/SRR109821_${n}.txt >> ./output/log/callpeakHOMER.log 2>&1
perl D:/wgc_tools/HOMER/bin/pos2bed.pl ./output/callpeakHOMER/SRR109821_${n}.txt > ./output/callpeakHOMER/SRR109821_${n}.bed
}
macs2
###-f 是输入文件格式 BAMPE 双端的BAM文件;-g是基因组大小,水稻大概是3.9e8 -t 是treat 样本; -c是对照样本
### 其他有关模型的参数可以看用户手册,这玩意儿有点复制
for($x=45;$x -lt 61;$x=$x+4)
{
$y=$x+2
python C:/ProgramData/Miniconda3/envs/ngs/Scripts/macs2 callpeak -f BAMPE -g 3.9e8 -q 1e-5 -m 5 50 --bw 300 --keep-dup all -B --outdir ./output/callpeakmacs2 -n SRR109821_${x}_${y} -t ./output/bam/SRR109821${x}.bam -c ./output/bam/SRR109821${y}.bam >> ./output/log/macs2.log 2>&1
}

for($x=46;$x -lt 61;$x=$x+4)
{
$y=$x+2
python C:/ProgramData/Miniconda3/envs/ngs/Scripts/macs2 callpeak -f BAMPE -g 3.9e8 -q 1e-5 -m 5 50 --bw 300 --keep-dup all -B --outdir ./output/callpeakmacs2 -n SRR109821_${x}_${y} -t ./output/bam/SRR109821${x}.bam -c ./output/bam/SRR109821${y}.bam >> ./output/log/macs2.log 2>&1
}
主要重要的结果就是narrowPeak和bed文件,用于后续分析。
重复样本 overlapping 鉴定
文献中用的是bedops来鉴定重复样品中的overlapping peaks,但windows装不上。这里参考了第6篇:重复样本的处理——IDR
用bedtools的代码
mkdir ./output/bedtools/ #输出文件夹
# -wo 是输出overlap -a 是第一个bed文件 -b 是第二或更多的bed文件 narrowpeak文件也是可以的
for($x=45;$x -lt 61;$x=$x+4)
{
## 顺带按文献中定义修改个名字
if($x -eq 45){$name="WT-CT"}
if($x -eq 49){$name="H49-CT"}
if($x -eq 53){$name="WT-DS"}
if($x -eq 57){$name="H49-DS"}
$y=$x+2
$m=$x+1
$n=$x+3
bedtools intersect -wo -a ./output/callpeakmacs2/SRR109821_${x}_${y}_peaks.narrowPeak -b ./output/callpeakmacs2/SRR109821_${m}_${n}_peaks.narrowPeak >./output/bedtools/$name.bed
}
用idr
使用IDR需要先对MACS2的结果文件narrowPeak根据-log10(p-value)进行排序。用excel 对narrowPeak文件的第八列按大到小排序就可以了。
mkdir ./output/idr/ #放结果文件
for($x=45;$x -lt 61;$x=$x+4)
{
if($x -eq 45){$name="WT-CT"}
if($x -eq 49){$name="H49-CT"}
if($x -eq 53){$name="WT-DS"}
if($x -eq 57){$name="H49-DS"}
$y=$x+2
$m=$x+1
$n=$x+3
python C:/ProgramData/Miniconda3/envs/ngs/Scripts/idr --input-file-type narrowPeak --rank p.value --plot --output-file-type bed --log-output-file ./output/log/$name.idr.log --output-file ./output/idr/$name_peaks.narrowPeak --samples ./output/idr/SRR109821_${x}_${y}_peaks.narrowPeak ./output/idr/SRR109821_${m}_${n}_peaks.narrowPeak
}
用idr得到的peaks会比bedtools的少一些,但基本一致。
Peaks Annotation
这里主流的软件就是HOMER和ChIPseeker,文献里用的是HOMER,这里都介绍下。
HOMER
HOMER可以用来找peaks附近的genes和查找motifs。但这里要在cygwin终端里跑。
cd /cygdrive/f/chip-seq/ #chiq-seq文件位置
### 注释 这里用的是自己的参考基因组序列和注释文件(-gff3) 因为HOMER自带的注释文件和运行不了
mkdir ./output/annotateHOMER/ #结果存放
annotatePeaks.pl ./output/idr/WT-CT.bed E:/IRGSP-1.0_representative/referent_fasta/all.chrs.fasta -gff3 E:/IRGSP-1.0_representative/all.gff3 > ./output/annotateHOMER/WT-CT.annotation
annotatePeaks.pl ./output/idr/H49-CT.bed E:/IRGSP-1.0_representative/referent_fasta/all.chrs.fasta -gff3 E:/IRGSP-1.0_representative/all.gff3 > ./output/annotateHOMER/H49-CT.annotation
annotatePeaks.pl ./output/idr/WT-DS.bed E:/IRGSP-1.0_representative/referent_fasta/all.chrs.fasta -gff3 E:/IRGSP-1.0_representative/all.gff3 > ./output/annotateHOMER/WT-DS.annotation
annotatePeaks.pl ./output/idr/H49-DS.bed E:/IRGSP-1.0_representative/referent_fasta/all.chrs.fasta -gff3 E:/IRGSP-1.0_representative/all.gff3 > ./output/annotateHOMER/H49-DS.annotation

###findMotifs 这里只是示范下,因为findMotifsGenome这个脚本运行不了 rice.IRGSP-1.0 是HOMER 的参考序列
mkdir ./output/MotifsHOMER_H49-CT/
perl D:/wgc_tools/HOMER/bin/findMotifsGenome.pl ./output/idr/H49-CT.bed rice.IRGSP-1.0 ./output/MotifsHOMER_H49-CT/ -size 100 -keepFiles
虽然findMotifs运行不了,但找motifis是件很容易的事儿。narrowpeak文件前三列分别是Chr,start,end。可以用TBtools上的Fasta Extract SubSeq功能提取peaks的序列,然后再用MEME Wrapper就能搞定。
ChIPseeker
ChIPseeker 的功能比HOMER全,而且能注释到更多信息。ChIPseeker 需要用到txdb文件,也就是所有的转录本序列,但Bioc目前还没有水稻的序列和注释文件需要自己构造。
### r script
library("GenomicFeatures")
library("biomaRt")
listMarts()
listMarts(host = "http://plants.ensembl.org")
mart<-useMart(biomart = "plants_mart",host = "http://plants.ensembl.org")
datasets <- listDatasets(mart)
datasets$dataset #显示已有的物种
## rice
# 构造水稻的txdb文件,由于是在线下载,网速不好会下的比较慢,慢,慢
rice_txdb <- makeTxDbFromBiomart(biomart = "plants_mart",dataset = "osativa_eg_gene",host = "http://plants.ensembl.org")
saveDb(rice_txdb, file="E:/简书/Chip-seq/rice_2021_10.sqlite") #保存txdb文件
### r script
library(ChIPseeker)
library(GenomicFeatures)
library(UpSetR)
rice_txdb <- loadDb("E:/简书/Chip-seq/rice_2021_10.sqlite") #调用你建好的txdb对象
# 下载对应的注释文件(gff3)来构建annoDb,要不然可能会报错,在http://plants.ensembl.org里下
rice_anno_txdb <- makeTxDbFromGFF("E:/IRGSP-1.0_representative/Oryza_sativa.IRGSP-1.0.51.gff3.gz")
#bed 文件中chromsome ID 要和注释文件的一致
dir <- "F:/chip-seq/output/idr/"
bed_file <- c("WT-CT","H49-CT","WT-DS","H49-DS")
tail <- "bed"
### 去掉bed文件中的 Chr
bed_rebulid <- function(filename,str){
    sample <-read.table(paste0(dir,filename,".",tail),sep = "\n")
    test <- data.frame(gsub(str,"",sample$V1))
    write.table(test,file=paste0(dir,filename,"_rebulid",".",tail), row.names = FALSE, col.names =FALSE, quote =FALSE)
}
lapply(bed_file, bed_rebulid,str="Chr")
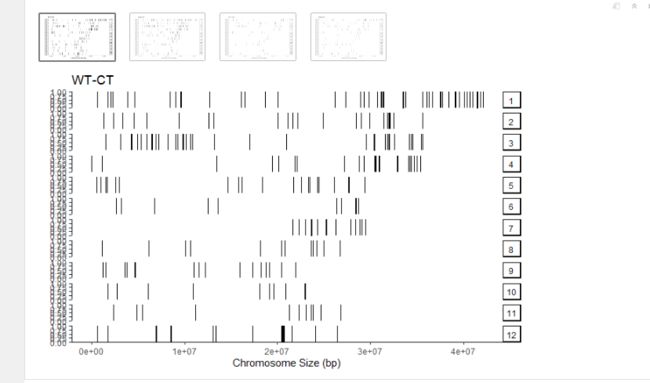
Chip peaks coverage plot,peaks在染色体上的分布。这里是peaks太少了,看起来不是很好看。
### r script
#读取bed文件
WT_CT <- readPeakFile(paste0(dir,bed_file[1],"_rebulid",".",tail))
H49_CT <- readPeakFile(paste0(dir,bed_file[2],"_rebulid",".",tail))
WT_DS <- readPeakFile(paste0(dir,bed_file[3],"_rebulid",".",tail))
H49_DS <- readPeakFile(paste0(dir,bed_file[4],"_rebulid",".",tail))
list_peak <- list(WT_CT,H49_CT,WT_DS,H49_DS)
#covplot
covplot(WT_CT,title="WT-CT")
covplot(H49_CT,title="H49-CT")
covplot(WT_DS,title="WT-DS")
covplot(H49_DS,title="H49-DS")
Heatmap of ChIP binding to TSS regions 这个可以看蛋白和启动子结合强度。WT-DS对启动子结合强度更高。启动子其实没有具体定义一定是多少kb以内,这里设的是上下游3kb。
### r script
promoter <- getPromoters(TxDb=rice_txdb, upstream=3000, downstream=3000)
tagMatrix <- lapply(list_peak, getTagMatrix,windows=promoter)
tagHeatmap(tagMatrix,xlim = c(-3000,3000),color = "red") # Heatmap of ChIP binding to TSS regions
plotAvgProf(tagMatrix,xlim = c(-3000,3000),conf = 0.95) # Average Profile of ChIP binding to TSS region

annotatePeak 同样这里也把启动子设为上下游3kb。然后画出一些列的图。
### r script
peakAnnoList <- lapply(list_peak,annotatePeak,tssRegion=c(-3000, 3000),TxDb=rice_txdb, annoDb="rice_anno_txdb")
plotDistToTSS(peakAnnoList) #tss feature
plotAnnoBar(peakAnnoList) #peaks feature
for (i in 1:length(list_peak)) {
    plotAnnoPie(peakAnnoList[[i]])
    vennpie(peakAnnoList[[i]])
    write.table(data.frame(peakAnnoList[[i]]),file = paste0(dir,bed_file[i],"_anntation",".txt"),sep="\t", row.names = FALSE, col.names =TRUE, quote =FALSE) #output anntation
}
genes <- lapply(peakAnnoList, function(i) data.frame(i)$geneId)
names(genes) <- bed_file
genes <- fromList(genes)
upset(genes) #类似维恩图,但更直观,推荐这个这种展示方法。
KEGG&GO
富集分析的软件和网页工具太多了,但一定要选择还在维护的数据库。可以看看Y叔的推文不比不知道,我再也不敢用DAVID了
这里偷个懒,再用下Y叔的clusterProfiler包。
### r script
library(clusterProfiler)
###由于官方没有注释包 这里用下xu zhougen 做的水稻GO注释包
install.packages("https://github.com/xuzhougeng/org.Osativa.eg.db/releases/download/v0.01/org.Osativa.eg.db.tar.gz",repos = NULL,type="source")
library(org.Osativa.eg.db)
rice <- org.Osativa.eg.db
out_dir <- "F:/chip-seq/output/kegg&go/"
dir.create(out_dir)
#输入genelist
dir <- "F:/chip-seq/output/idr/"
sample_file <- c("WT-CT","H49-CT","WT-DS","H49-DS")
tail <- "_anntation.txt"
peak_gene <- list()
peak_transcript <- list() #对应kegg 的"dosa",kegg 号
#由于文件中有5' UTR 的 ' 会被识别为边界,把quote 随便换个文件中没有的字符就可以了
for(i in 1:length(sample_file)){
    peak_gene[[i]] <- read.table(paste0(dir,sample_file[i],tail),sep="\t",quote = "~",header = T)$geneId
    peak_gene[[i]] <- peak_gene[[i]][!duplicated(peak_gene[[i]])] #去重
    peak_transcript[[i]] <- read.table(paste0(dir,sample_file[i],tail),sep="\t",quote = "~",header = T)$transcriptId
    peak_transcript[[i]] <- peak_transcript[[i]][!duplicated(peak_transcript[[i]])] #去重
}
names(peak_gene) <- sample_file
names(peak_transcript) <- sample_file
KEGG
### r script
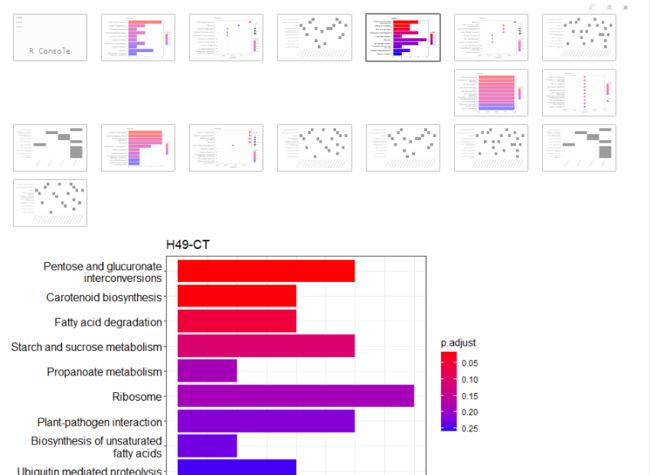
## kegg中有注释的基因比较少,大概只有30多个基因有注释,就把p,q,padj 调的松一点
## showCategory 是画图时的通路数量
keggplot <- function(i,showCategory){
    kk <- enrichKEGG(peak_transcript[[i]],organism='dosa',keyType = 'kegg',
                 pvalueCutoff=1, pAdjustMethod='none',
                 qvalueCutoff=1)
    print(barplot(kk,showCategory = showCategory,title = sample_file[i]))
    print(dotplot(kk,showCategory = showCategory,title = sample_file[i]))
    print(heatplot(kk,showCategory = showCategory))
    write.table(data.frame(kk@result),file = paste0(out_dir,sample_file[i],"_kegg",".txt"),sep="\t", row.names = FALSE, col.names =TRUE, quote =FALSE) #output
}
lapply(1:length(sample_file), keggplot,showCategory=10)
GO
### r script
goplot <- function(i,showCategory){
    ego.BP <- enrichGO(peak_gene[[1]],OrgDb = rice, keyType = "RAP", ont="BP",
                 pvalueCutoff=1, pAdjustMethod='none',
                 qvalueCutoff=1)
    ego.CC <- enrichGO(peak_gene[[1]],OrgDb = rice, keyType = "RAP", ont="CC",
                 pvalueCutoff=1, pAdjustMethod='none',
                 qvalueCutoff=1)
    ego.MF <- enrichGO(peak_gene[[1]],OrgDb = rice, keyType = "RAP", ont="MF",
                 pvalueCutoff=1, pAdjustMethod='none',
                 qvalueCutoff=1)
    ego <- enrichGO(peak_gene[[i]],OrgDb = rice, keyType = "RAP", ont="ALL",
                 pvalueCutoff=1, pAdjustMethod='none',
                 qvalueCutoff=1)
    write.table(data.frame(ego@result),file = paste0(out_dir,sample_file[i],"_go",".txt"),sep="\t", row.names = FALSE, col.names =TRUE, quote =FALSE) #output
    print(barplot(ego.BP,showCategory = showCategory,title = paste0(sample_file[i],"_","BP")))
    print(dotplot(ego.BP,showCategory = showCategory,title = paste0(sample_file[i],"_","BP")))
    print(heatplot(ego.BP,showCategory = showCategory))
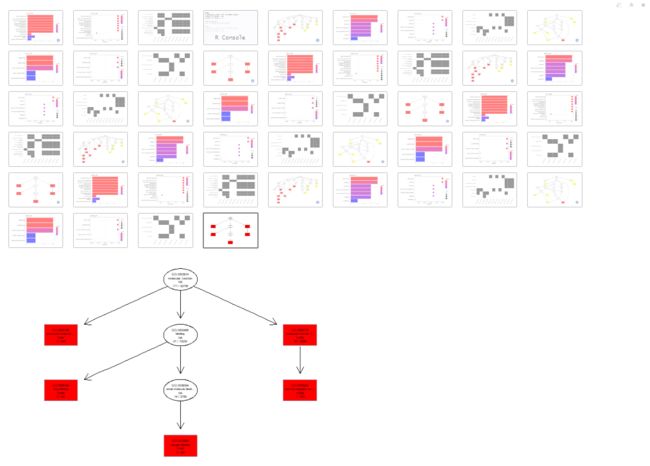
    print(plotGOgraph(ego.BP))
    print(barplot(ego.CC,showCategory = showCategory,title = paste0(sample_file[i],"_","CC")))
    print(dotplot(ego.CC,showCategory = showCategory,title = paste0(sample_file[i],"_","CC")))
    print(heatplot(ego.CC,showCategory = showCategory))
    print(plotGOgraph(ego.CC))
    print(barplot(ego.MF,showCategory = showCategory,title = paste0(sample_file[i],"_","MF")))
    print(dotplot(ego.MF,showCategory = showCategory,title = paste0(sample_file[i],"_","MF")))
    print(heatplot(ego.MF,showCategory = showCategory))
    print(plotGOgraph(ego.MF))
}
lapply(1:length(sample_file), goplot,showCategory=10)
其他工具
DiffBand
这是个得到重复样本差异peaks的R包,这个包是基于DESeq2和edgeR来得到差异peaks的。这个准备文件格式有点复杂。建议看看官方文档。
### r script
library(DESeq2)
library(edgeR)
library(spiky)
library(DiffBind)

out_dir <- "F:/chip-seq/output/DiffBind/"
dir.create(out_dir)

input_code <- c(47,48,51,52,55,56,59,60)

dir <- "F:/chip-seq/output/callpeakmacs2/"
bed_file <- paste0("SRR109821_",paste(input_code-2,input_code,sep = "_"))
tail <- "_peaks.narrowPeak"

move_file <- function(filename){
    file.copy(from = paste0(dir,filename,tail),to = paste0(out_dir,filename,tail))
}
lapply(bed_file, move_file)

sheettitle <-  c("SampleID","Tissue","Factor","Condition","Treatment","Replicate","bamReads","ControlID","bamControl","Peaks","PeakCaller")

sampleSheet <- list()

for (i in 1:length(sheettitle)) {
    sampleSheet[[i]] <- rep(NA,length(input_code))
}
names(sampleSheet) <- sheettitle
sampleSheet <- data.frame(sampleSheet)

### fill the info
sampleSheet$SampleID <- bed_file
sampleSheet$Tissue <- "seedlings"
sampleSheet$Factor <- "H49"
sampleSheet$Condition <- c(rep("CT",4),rep("DS",4))
sampleSheet$Treatment <- NA
sampleSheet$Replicate <- rep(c(1,2),4)
sampleSheet$bamReads <- paste0("F:/chip-seq/output/bam/SRR109821",input_code-2,".bam")
sampleSheet$ControlID <- paste0("SRR109821",input_code)
sampleSheet$bamControl <- paste0("F:/chip-seq/output/bam/SRR109821",input_code,".bam")
sampleSheet$Peaks <- paste0(out_dir,bed_file,tail)
sampleSheet$PeakCaller <- "narrow"

write.csv(sampleSheet,file = paste0(out_dir,"sampleSheet",".csv"), row.names = FALSE, quote =FALSE)
overlap peaksets
### r script
#BiocManager::valid()
dbObj <- dba(sampleSheet = paste0(out_dir,"sampleSheet",".csv"))
dbObj <- dba.count(dbObj, bUseSummarizeOverlaps=TRUE)
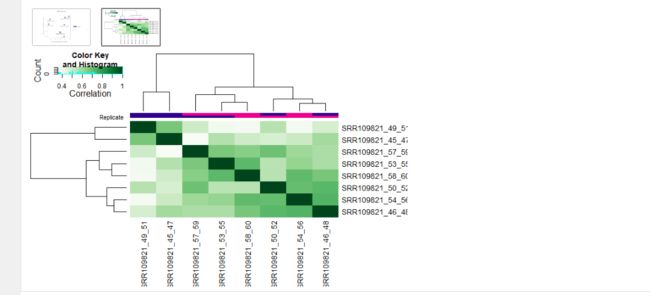
dba.plotPCA(dbObj,  attributes=DBA_FACTOR, label=DBA_ID)
plot(dbObj)
diff peaks
### r script
# Establishing a contrast
dbObj <- dba.contrast(dbObj, categories=DBA_FACTOR,minMembers = 2)
dbObj <- dba.analyze(dbObj, method=DBA_ALL_METHODS)
#  summary of results
dba.show(dbObj, bContrasts=T)
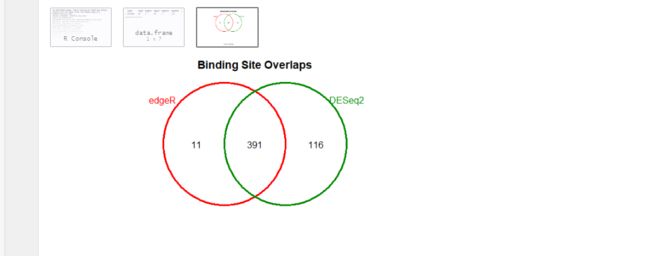
#  overlapping peaks identified by the two different tools (DESeq2 and edgeR)
dba.plotVenn(dbObj,contrast=1,method=DBA_ALL_METHODS)
result output
### r script
comp1.edgeR <- dba.report(dbObj, method=DBA_EDGER, contrast = 1, th=1)
comp1.deseq <- dba.report(dbObj, method=DBA_DESEQ2, contrast = 1, th=1)
# EdgeR
out <- as.data.frame(comp1.edgeR)
write.table(out, file=paste0(out_dir,"edger",".txt"), sep="\t", quote=F, col.names = NA)
# DESeq2
out <- as.data.frame(comp1.deseq)
write.table(out, file=paste0(out_dir,"deseq2",".txt"), sep="\t", quote=F, col.names = NA)
# Create bed files for each keeping only significant peaks (p < 0.05)
# EdgeR
out <- as.data.frame(comp1.edgeR)
edge.bed <- out[ which(out$FDR < 0.05),
                 c("seqnames", "start", "end", "strand", "Fold")]
write.table(edge.bed, file=paste0(out_dir,"edger",".bed"), sep="\t", quote=F, row.names=F, col.names=F)
# DESeq2
out <- as.data.frame(comp1.deseq)
deseq.bed <- out[ which(out$FDR < 0.05),
                 c("seqnames", "start", "end", "strand", "Fold")]
write.table(deseq.bed, file=paste0(out_dir,"deseq2",".bed"), sep="\t", quote=F, row.names=F, col.names=F)
ChIPQC
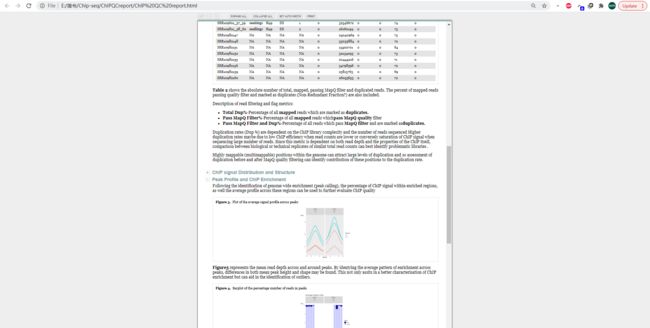
这个包是和DiffBand类似的质控的R包,输入格式DiffBand的一样。最后结果能生成网页报告,更好看点,就是时间有点久。
library(BiocParallel)###PC run request
register(SerialParam())
library(ChIPQC)
library(GenomicRanges)
library(GenomicFeatures)

###构建ChIPQC能用的annotation 要和bam文件中的染色体号一致  这里图省事了就加了"Chr",用对应的gff3也可以构建
rice_txdb <- loadDb("E:/简书/Chip-seq/rice_2021_10.sqlite") #调用你建好的txdb对象
tem <- data.frame(genes(rice_txdb))

riceAnnotation <- list(version="rice")
for (i in 1:nrow(tem)) {
    riceAnnotation[[tem$gene_id[i]]] = GRanges(paste0("Chr",tem$seqnames[i]) ,IRanges(tem$start[i],tem$end[i]),tem$strand[i])
}

out_dir <- "F:/chip-seq/output/ChIPQC/"
dir.create(out_dir)

input_code <- c(47,48,51,52,55,56,59,60)

dir <- "F:/chip-seq/output/callpeakmacs2/"
bed_file <- paste0("SRR109821_",paste(input_code-2,input_code,sep = "_"))
tail <- "_peaks.narrowPeak"

move_file <- function(filename){
    file.copy(from = paste0(dir,filename,tail),to = paste0(out_dir,filename,tail))
}
lapply(bed_file, move_file)

sheettitle <-  c("SampleID","Tissue","Factor","Condition","Treatment","Replicate","bamReads","ControlID","bamControl","Peaks","PeakCaller")

sampleSheet <- list()

for (i in 1:length(sheettitle)) {
    sampleSheet[[i]] <- rep(NA,length(input_code))
}
names(sampleSheet) <- sheettitle
sampleSheet <- data.frame(sampleSheet)

### fill the info
sampleSheet$SampleID <- bed_file
sampleSheet$Tissue <- "seedlings"
sampleSheet$Factor <- "H49"
sampleSheet$Condition <- c(rep("CT",4),rep("DS",4))
sampleSheet$Treatment <- NA
sampleSheet$Replicate <- rep(c(1,2),4)
sampleSheet$bamReads <- paste0("F:/chip-seq/output/bam/SRR109821",input_code-2,".bam")
sampleSheet$ControlID <- paste0("SRR109821",input_code)
sampleSheet$bamControl <- paste0("F:/chip-seq/output/bam/SRR109821",input_code,".bam")
sampleSheet$Peaks <- paste0(out_dir,bed_file,tail)
sampleSheet$PeakCaller <- "narrow"

write.csv(sampleSheet,file = paste0(out_dir,"sampleSheet",".csv"), row.names = FALSE, quote =FALSE)
### peaks在的染色体
chrom <- c()
for (i in length(bed_file)) {
    chrom <- c(chrom,read.table(sampleSheet$Peaks[i],header = F,sep = "\t")$V1)
}
chrom <- chrom[!duplicated(chrom)]
Create ChIPQC object
###这一步会比较久
chipqc <- ChIPQC(sampleSheet,annotation = riceAnnotation,chromosomes = chrom)
ChIPQCreport(chipqc, reportName="ChIP QC report", reportFolder="ChIPQCreport")
最后
ChIP-seq 是个十分成熟的技术流程,但我目前还没看到有在windows环境下运行完整个流程的,于是这里就是做了下总结。写这个东西前前后后花了有十天的时间,本来还想写下ATAC-Seq在windows下的流程,也没啥兴趣了。ATAC-Seq和ChIP-seq在数据分析流程上区别不大,ATAC-Seq就是做的是转录因子。但有综述说macs2不适合用于ATAC-Seq的call peaks 步骤,并且HOMER call 出的质量还不如macs2。macs的作者也说macs2不适用于ATAC-Seq,但在macs3会更合适。这里推荐ATAC-Seq call peak用macs3 或HMMRATAC。只需这一步换一下真的其他就都一样了,并且ATAC-Seq是有专门的R包ATACseqQC。但这里有点小问题macs3目前还是测试版,windows下安装会有各种报错;HMMRATAC是用java运行,但目前来看维护不太及时,希望以后会好些。还有bam文件统计还有个常用的选择就是deeptools,但这个也装不上,因为这个包是依赖pysam的,pysam在windows环境也很难装。不过deeptools 能做到的图这里也基本有了。
总而言之,祝各位科研顺利!
推荐阅读
ChIP-seq基本分析流程
ChIP-seq 数据分析
ChIP-seq基础入门
Chip-seq处理流程
用ChIP-Seq公共数据探索组蛋白表观遗传修饰参与目标基因的调控情况
ChIP-seq实践(非转录因子,非组蛋白)
Epigenetics: Core misconcept
一文读懂 ChIPseq
测序数据基本信息统计 | reads,coverage,depth
对bam文件作基础统计
MACS2 安装与使用
第3篇:用MACS2软件call peaks
这个能是最棒的MACS2使用说明
使用MACS2进行差异peak分析
MACS
使用HOMER进行peak calling
flacs软件如何使用_[软件使用 2] HOMER安装和使用攻略,如何获取Motif?
使用homer进行peak注释
HOMER
第6篇:重复样本的处理——IDR
idr
植物chip-seq数据的可视化(Y叔的神器chip-seeker包)
第9篇:差异peaks分析——DiffBind
ATAC-Seq分析教程:用ChIPseeker对peaks进行注释和可视化
第5篇:对ATAC-Seq/ChIP-seq的质量评估(二)——ChIPQC
CHipQC在PC环境成功运行
From reads to insight: A hitchhiker’s guide to ATAC-seq data analysis
文献分享:从原始数据开始一步一步分析ATAC-seq
ATAC-Seq 数据分析(上)
果然全面:ATAC-seq分析流程综述全解
