基于opencv的实现简单的人脸识别功能
文章目录
- 基于opencv的实现简单的人脸识别功能
-
-
- 1. 环境配置
- 2.基本项目代码:
- 3.onerror:在运行时遇到了一个问题:
- 4.实现视频检测功能
- 5.实现视频截图
-
- 更好的阅读体验可以点击下方链接
基于opencv的实现简单的人脸识别功能
使用opencv实现人脸识别
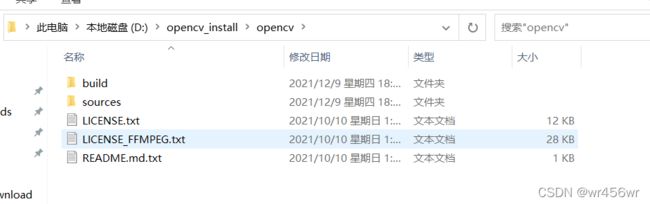
1. 环境配置
在opencv官网下载opencv,在pycharm上安装opencv-python
官网上下载的opencv后安装,位置如图:
2.基本项目代码:
import cv2 as cv


# define a function to check the img
def face_detect_demo():
    gray = cv.cvtColor(img, cv.COLOR_BGR2GRAY)
    # 使用opencv自带的已经训练好的分类器
    # 训练器位置就是在官网内的下载的opencv自带已训练的模型
    face_detect = cv.CascadeClassifier(
        r'D:\opencv_install\opencv\sources\data\haarcascades\haarcascade_frontalface_alt2.xml')
    '''
    detectMultiScale:
    参数说明:第一个参数为源图片,第二个参数为缩放倍数(太小可能会运行较慢)
    第三个参数为比较次数,第四个参数为0,第五个参数为最小人脸大小,第六个为最大人脸大小
    '''
    face = face_detect.detectMultiScale(gray)
    for x, y, w, h in face:
        cv.rectangle(img, (x, y), (x + w, y + h), (0, 0, 255), 2)
    cv.imshow('result', img)


# load the img
# 这里填写图片路径
img = cv.imread('photo/target.png')

# change the img size
img = cv.resize(img, (400, 200))

face_detect_demo()

# let the img convert to gray (convert color)
# img = cv.cvtColor(img, cv.COLOR_BGR2GRAY)

# drew a square box / rectangle 矩形
# the params is srcImg, 绘制的图形的起始点和长宽,the color of rectangle, thickness of rectangle
# cv.rectangle(img, (10, 10, 100 + 50, 100 + 50), (0, 0, 255), 1)

# drew a circle
# the params is srcImg, center of the circle, radius of the circle, the color of the circle, thickness
# cv.circle(img, (50, 50), 50, (255, 0, 0), 2)

# show this img
# cv.imshow('photo1', img)

# while enter the 'q', the program will exit
while True:
    if ord('q') == cv.waitKey(0):
        break
cv.destroyAllWindows()
import cv2 as cv


def check_face():
    # convert the color to gray
    gray = cv.cvtColor(img, cv.COLOR_BGR2GRAY)

    deal_result = cv.CascadeClassifier(
        r'D:\opencv_install\opencv\sources\data\haarcascades\haarcascade_frontalface_alt2.xml')

    face = deal_result.detectMultiScale(gray, 1.05, 5, 0, (20, 20), (100, 100))

    for x, y, w, h in face:
        cv.rectangle(img, (x, y), (x + w, y + h), (0, 0, 255), 2)

    cv.imshow('result', img)


# load the img
img = cv.imread('photo/121.jpg')
img = cv.resize(img, (821, 548))
check_face()
# cv.imshow("123", img)

while True:
    if ord('q') == cv.waitKey(0):
        break
3.onerror:在运行时遇到了一个问题:
Traceback (most recent call last):

File "D:\PyCharm_Code\com\OpenCV\Python\[多人脸识别.py](http://xn--gmqt7fd7h038b99k.py)", line 22, in

check_face()

File "D:\PyCharm_Code\com\OpenCV\Python\[多人脸识别.py](http://xn--gmqt7fd7h038b99k.py)", line 11, in check_face

face = deal_result.detectMultiScale(gray, 1, 5, 0, (20, 20), (100, 100))

cv2.error: OpenCV(4.5.4) D:\a\opencv-python\opencv-python\opencv\modules\objdetect\src\cascadedetect.cpp:1389: error: (-215:Assertion failed) scaleFactor > 1 && _image.depth() == CV_8U in function 'cv::CascadeClassifierImpl::detectMultiScale'

造成的原因为:face = deal_result.detectMultiScale(gray, 1, 5, 0, (20, 20), (100, 100))

detectMultiScale函数的第二个参数为1,将1改成大于1的参数即可**(****建议使用默认值****)**
关于这个函数(detectMultiScale)在网上找到的一些解释:
detectMultiScale函数含义
4.实现视频检测功能
import cv2 as cv


def check_face(img):
    img_copy = img
    img = cv.cvtColor(img, cv.COLOR_BGR2GRAY)
    face_detect = cv.CascadeClassifier(
        r'D:\opencv_install\opencv\sources\data\haarcascades\haarcascade_frontalface_alt.xml')
    face_result = face_detect.detectMultiScale(img)
    for x, y, w, h in face_result:
        cv.rectangle(img_copy, (x, y), (x + w, y + h), (0, 0, 255), 2)
    cv.imshow('result', img_copy)


# 调用摄像头 0为默认的摄像头
cap = cv.VideoCapture(0)

# 读取一个视频作为判断
# cap = cv.VideoCapture('video路径')

# 读取一个网络视频作为判断
# cap = cv.VideoCapture('video地址')

# 第一个参数表示有值的时候为True,第二个参数为帧的内容img
# cap.read()

while True:
    flag, frame = cap.read()
    if not flag:
        break
    check_face(frame)
    # 100ms 检测一次
    if ord('q') == cv.waitKey(100):
        break

cv.destroyAllWindows()
cap.release()
5.实现视频截图
import cv2 as cv

cap = cv.VideoCapture(0)
flag = 1
num = 1
while cap.isOpened():
    ret_flag, vShow = cap.read()
    cv.imshow('show', vShow)
    k = cv.waitKey(1) & 0xFF  # 按键监听
    if k == ord('s'):
        cv.imwrite("photo/" + str(num) + ".jpg", vShow)  # 进行图片保存
        print("success")
        print("-----------------")
        num += 1
    elif k == ord(' '):
        break

cap.release()
cv.destroyAllWindows()
更好的阅读体验可以点击下方链接
点击下方链接
基于opencv的实现简单的人脸识别功能
或者复制到浏览器
https://www.wolai.com/VnkJcNBkrV5SrCTiKA6fi