【Opencv】图像投影直方图
1. 引言
本文将展示什么是图像的投影直方图,以及如何绘制这个投影直方图。举例,如果我们想识别一些字符,我们可以使用投影将特征提取到图像上。投影直方图是使用图像在既定方向上的投影的方法,例如,在垂直或水平方向上。这些投影意味着每列或每行中属于对象的像素数目。
2. 投影直方图的作用
我们来看个简单的例子,如下图:

上图分别代表数字5以及其垂直和水平投影。上述两个直方图可以用作数字5的向量描述符,我们将其与标识数字0到9的直方图向量进行相似度计算后,就可以知道当前该数字是数字多少。
3. 实际应用
接着我们不妨来看个实际项目中的具体栗子吧!
3.1 读入图像并灰度化
首先,我们使用opencv来读取彩色图并执行灰度化,如下:
import cv2
import numpy as np
import matplotlib.pyplot as plt
import os
# Load the image
img = cv2.imread('display_image.png')
# convert to grayscale
gray = cv2.cvtColor(img,cv2.COLOR_BGR2GRAY)
结果如下:
3.2 二值化
接着我们对上图,执行中值滤波来去噪,然后执行膨胀腐蚀操作,样例代码如下:
# smooth the image to avoid noises
gray = cv2.medianBlur(gray,5)
# Apply adaptive threshold
thresh = cv2.adaptiveThreshold(gray, 255, 1, 1, 11, 2)
# apply some dilation and erosion to join the gaps
kernel = np.ones((5,5), np.uint8)
thresh = cv2.dilate(thresh, kernel ,iterations = 2)
thresh = cv2.erode(thresh, kernel, iterations = 2)
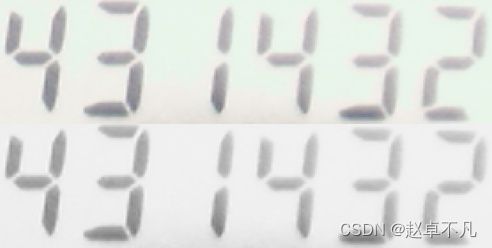
上图中上半部分为中值滤波后的图,下半部分为经二值化膨胀腐蚀后的图。
3.3 查找轮廓
接着我们使用函数findContours,来获取封闭区域的轮廓,同时过滤掉高度较小的轮廓,样例代码如下:
# Find the contours
contours, hierarchy = cv2.findContours(thresh, cv2.RETR_LIST, cv2.CHAIN_APPROX_SIMPLE)
# For each contour, find the bounding rectangle and draw it
for cnt in contours:
    x, y, w, h = cv2.boundingRect(cnt)
    if h > 10:
        cv2.rectangle(img, (x, y), (x + w, y + h), (0, 255, 0), 2)
3.4 计算直方图
最后,我们来计算往x轴方向上的投影,相应的样例代码如下:
# Width and heigth the image
height, width = thresh.shape
# Sum the value lines
vertical_px = np.sum(thresh, axis=0)
# Normalize
normalize = vertical_px/255
# create a black image with zeros
blankImage = np.zeros_like(thresh)
# Make the vertical projection histogram
for idx, value in enumerate(normalize):
    cv2.line(blankImage, (idx, 0), (idx, height-int(value)), (255,255,255), 1)
# Concatenate the image
img_concate = cv2.vconcat(
    [img,  cv2.cvtColor(blankImage, cv2.COLOR_BGR2RGB)])
cv2.imshow("out",img_concate)
cv2.waitKey(0)
得到结果如下:

请注意,观察上图中重复的数字,如4和3,他们的垂直投影直方图,几乎是相同的!!
4. 总结
本文为一篇简单的文章,为大家展示了如何简单制作投影直方图,以及如何绘制它。正如文中所述,我们可以为每个字符建立一个存储向量,进而并用它来进行字符分类。
您学废了嘛?
参考链接: 戳我


