树莓派4B安装Tensorflow2.4.0
前面已经写了很多关于树莓派配置的帖子,如果是新手,可以参考我的专栏
https://blog.csdn.net/jiugeshao/category_11447160.html![]() https://blog.csdn.net/jiugeshao/category_11447160.html博主当前树莓派的python版本是3.7.2(若不知道如何安装的参考专栏里的帖子)。
https://blog.csdn.net/jiugeshao/category_11447160.html博主当前树莓派的python版本是3.7.2(若不知道如何安装的参考专栏里的帖子)。
一. 安装Tensorflow2.4.0
1. 建立一个新的虚拟环境
为了不影响之前python环境的配置,这边依然选择在虚拟环境下进行,博主新建了一个testTF的虚拟环境(不清楚如何新建虚拟环境的参考专栏里的帖子。如下命令行语句就可以进入testTF虚拟环境。
2.升级下pip版本
pip install --upgrade pip不然会报:
raise ReadTImeoutError(self._poo,none,'Read timed out.')
pip._vendor.urlib3.exceptions.ReadTimeoutError:HTTPSConnectionPool(host='www.piwheels.org',port=443):Read time out.
3.更新清华源
如下几个命令语句可以查看自己操作系统版本
然后去清华源网站上去看如何更新
raspbian | 镜像站使用帮助 | 清华大学开源软件镜像站 | Tsinghua Open Source Mirror![]() https://mirror.tuna.tsinghua.edu.cn/help/raspbian/
https://mirror.tuna.tsinghua.edu.cn/help/raspbian/
页面里有详细的操作说明 ,博主的是armv71架构,Debian版本是11,可以编辑/etc/apt/sources.list文件如下:
#deb http://raspbian.raspberrypi.org/raspbian/ bullseye main contrib non-free rpi
# Uncomment line below then 'apt-get update' to enable 'apt-get source'
#deb-src http://raspbian.raspberrypi.org/raspbian/ bullseye main contrib non-free rpi

deb http://mirrors.tuna.tsinghua.edu.cn/raspbian/raspbian/ bullseye main non-free contrib rpi
# deb-src http://mirrors.tuna.tsinghua.edu.cn/raspbian/raspbian/ bullseye main non-free contrib rpi

deb [arch=arm64] http://mirrors.tuna.tsinghua.edu.cn/raspbian/multiarch/ bullseye main
继续再修改下/etc/apt/sources.list.d/raspi.list中的内容为如下:
#deb http://archive.raspberrypi.org/debian/ bullseye main
# Uncomment line below then 'apt-get update' to enable 'apt-get source'
#deb-src http://archive.raspberrypi.org/debian/ bullseye main

#deb http://mirrors.tuna.tsinghua.edu.cn/raspberrypi/ buster main ui

deb http://mirrors.tuna.tsinghua.edu.cn/raspberrypi/ bullseye main 最后再执行命令语句:sudo apt-get update
更新时若出现如下报错:
Err:2 http://mirrors.tuna.tsinghua.edu.cn/raspbian/multiarch bullseye InRelease
The following signatures couldn't be verified because the public key is not available: NO_PUBKEY E77FC0EC34276B4B
Reading package lists... Done
可执行如下两句命令语句:
gpg --keyserver  keyserver.ubuntu.com --recv-keys E77FC0EC34276B4B
gpg --export --armor E77FC0EC34276B4B | sudo apt-key add -
4.获取tensorflow2.4的安装包
这里可以直接从github上获取到编译好的针对树莓派的安装包,后续有时间博主也会自己编译一个。
Releases · lhelontra/tensorflow-on-arm · GitHub![]() https://github.com/lhelontra/tensorflow-on-arm/releases
https://github.com/lhelontra/tensorflow-on-arm/releases
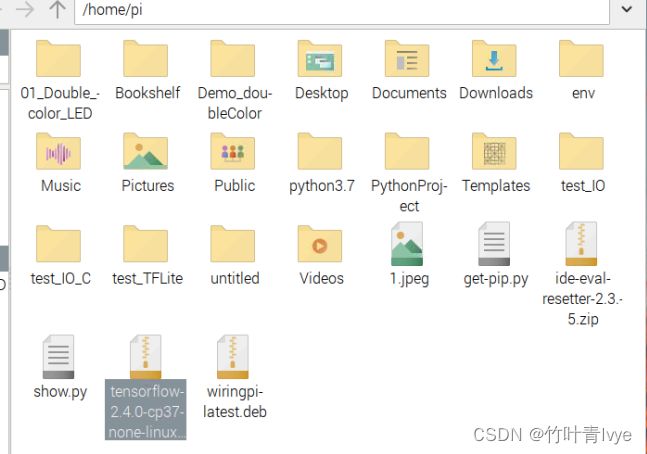
下载完毕后,博主放在了此位置(结合自己的路径)
5.安装
首先要安装下numpy 1.19.2,但即使执行如下命令语句还是会失败
pip3 install --upgrade numpy==1.19.2 -i https://pypi.douban.com/simple --trust -host=pypi.douban.com --no-cache-dir --default-timeout=1000000
ERROR: THESE PACKAGES DO NOT MATCH THE HASHES FROM THE REQUIREMENTS FILE. If you have updated the package versions, please update the hashes. Otherwise, examine the package contents carefully; someone may have tampered with them.
numpy==1.19.2 from https://www.piwheels.org/simple/numpy/numpy-1.19.2-cp37-cp37m-linux_armv7l.whl#sha256=bff0719af5134d472546e601f83e5335ec8919464084b34d602541fc80a33698:
Expected sha256 bff0719af5134d472546e601f83e5335ec8919464084b34d602541fc80a33698
Got 242391666c946884a1462a2db1f98c4ecc1e5f8d4be5644d2cec454be852bf39
所以博主这边提前先在浏览器里输入https://www.piwheels.org/simple/numpy/numpy-1.19.2-cp37-cp37m-linux_armv7l.whl来下载。下载的文件博主放在了树莓派上此位置(结合自己的路径)
如下命令语句即可以完成numpy的安装
pip install numpy-1.19.2-cp37-cp37m-linux_armv7l.whl注:如果在接下来安装tensorflow2.4过程中也出现哪个依赖包问题,也可以借鉴此方法
完毕后再执行如下语句完成tensorflow 2.4.0的安装
pip install tensorflow-2.4.0-cp37-none-linux_armv7l.whl
成功会出现如下信息:
6.测试
import了如下库,没有出现报错信息。
import tensorflow as tf
from tensorflow.keras.preprocessing import image
from tensorflow.keras.applications import resnet50
from tensorflow.keras.applications.resnet50 import preprocess_input, decode_predictions
说明安装成功了!
7.在树莓派上跑下之前在Ubuntu20.04下生成的模型,拿来预测图片
Tensorflow Lite使用介绍_竹叶青lvye的博客-CSDN博客
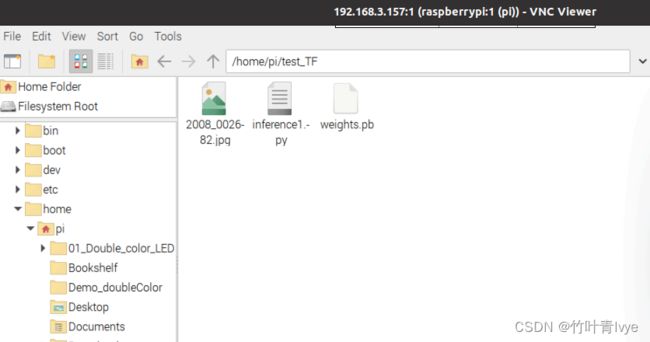
博主把上面博客中所用到的图片和save_mode函数所保存的模型拷贝到了树莓派上
这边还是在pycharm中运行,所用pycharm版本和此博客保持一致
TensorFlow Lite runtime在树莓派4B上的使用_竹叶青lvye的博客-CSDN博客_树莓派配置tensorflow
inference1.py中代码如下(注此时虚拟环境里opencv-python的版本是3.4.3.18)
import numpy as np
import cv2
from PIL import Image
from tensorflow.keras.preprocessing import image
from tensorflow.keras.applications import resnet50
from tensorflow.keras.applications.resnet50 import preprocess_input, decode_predictions
import tensorflow as tf
import time


#load a image for be classified
img = image.load_img('2008_002682.jpg', target_size=(224, 224))
img = image.img_to_array(img)
img = preprocess_input(img)
print(img.shape)

PATH_TO_CKPT = "weights.pb"

detection_graph = tf.Graph()
with detection_graph.as_default():
    od_graph_def = tf.compat.v1.GraphDef()
    with tf.compat.v1.gfile.GFile(PATH_TO_CKPT, 'rb') as fid:
        serialized_graph = fid.read()
        od_graph_def.ParseFromString(serialized_graph)
        tf.import_graph_def(od_graph_def, name='')

with detection_graph.as_default() as graph:
    with tf.compat.v1.Session(graph=detection_graph) as sess:
        img = np.expand_dims(img, axis=0)
        print(img.shape)
        # #获取graphic中的张量名称
        # for op in graph.get_operations():
        #     print(op.name)

        inp = detection_graph.get_tensor_by_name('Input:0')
        predictions = detection_graph.get_tensor_by_name('resnet50/predictions/Softmax:0')

        t_model = time.perf_counter()
        x = predictions.eval(feed_dict={inp: img})
        print(f'do inference cost:{time.perf_counter() - t_model:.8f}s')
        print(x.shape)
        print('Predicted:', decode_predictions(x, top=5)[0])
运行结果如下:
可以看到预测结果和ubuntu上结果保持一致,但ct时间确多了10倍多。(对比博客中的结果)


