首先声明:本次的spring版本 5.0.7.RELEASE,Spring boot版本 2.0.3.RELEASE。
可能大多数同学知道事务的执行提前条件是需要为目标类生成代理类,那么具体是什么时机被执行呢?
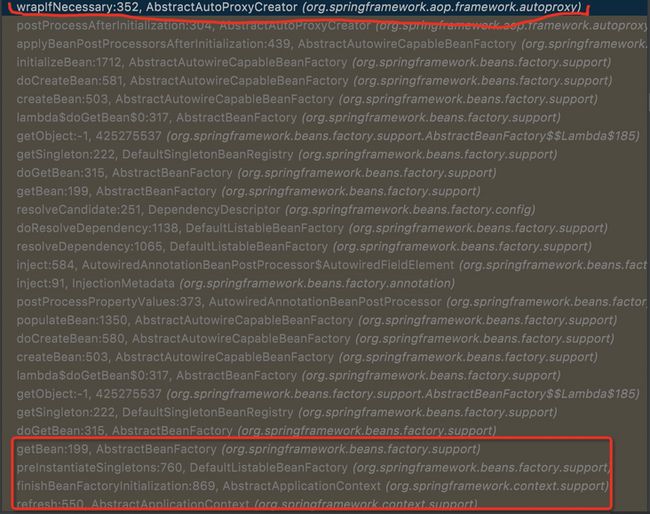
通过图1可以清楚地看到
// Instantiate all remaining (non-lazy-init) singletons.
finishBeanFactoryInitialization(beanFactory);
处开始执行,最终执行到AbstractAutoProxyCreator.wrapIfNecessary()方法:
protected Object wrapIfNecessary(Object bean, String beanName, Object cacheKey)
{

        //获取bean的通知器列表,该方法会根据bean的信息获取到对应的拦截器
        Object[] specificInterceptors = getAdvicesAndAdvisorsForBean(bean.getClass(), beanName, null);
        //如果通知器列表不为空
        if (specificInterceptors != DO_NOT_PROXY) {
            this.advisedBeans.put(cacheKey, Boolean.TRUE);
            //创建代理对象
            Object proxy = createProxy(
                    bean.getClass(), beanName, specificInterceptors, new SingletonTargetSource(bean));
            this.proxyTypes.put(cacheKey, proxy.getClass());
            return proxy;
        }
}
其核心逻辑已经在注释中有所体现,不再赘述~,紧接着对目标bean中的所有方法进行遍历,如果有方法匹配到拦截器列表的切点,则执行图1中创建代理对象。并且会将对应的通知器放入到代理类中。以便在执行代理方法的时候进行拦截。图2便是匹配切点的过程。
具体是怎么匹配的呢?下面看一个栗子:
abstract class TransactionAttributeSourcePointcut extends StaticMethodMatcherPointcut implements Serializable {

    @Override
    public boolean matches(Method method, @Nullable Class targetClass) {
        if (targetClass != null && TransactionalProxy.class.isAssignableFrom(targetClass)) {
            return false;
        }
        TransactionAttributeSource tas = getTransactionAttributeSource();
        //重点在这里
        return (tas == null || tas.getTransactionAttribute(method, targetClass) != null);
    }
}
最终调用到SpringTransactionAnnotationParser.parseTransactionAnnotation()方法
public class SpringTransactionAnnotationParser implements TransactionAnnotationParser, Serializable {

    @Override
    @Nullable
    public TransactionAttribute parseTransactionAnnotation(AnnotatedElement ae) {
        //获取Transactional注解
        AnnotationAttributes attributes = AnnotatedElementUtils.findMergedAnnotationAttributes(
                ae, Transactional.class, false, false);
        if (attributes != null) {
            //解析Transactional注解配置项
            return parseTransactionAnnotation(attributes);
        }
        else {
            return null;
        }
    }
}
通过上面的代码块,我们可以看到返回了TransactionAttribute类实例,这样一来
Object[] specificInterceptors = getAdvicesAndAdvisorsForBean(bean.getClass(), beanName, null);
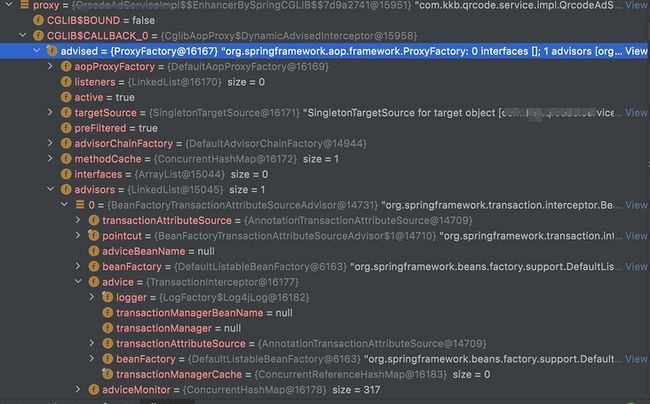
就执行完成,到目前为止已经拿到与之匹配的通知器。接下来看代理对象的大致结构:
图3里面的TransactionInterceptor实例,便是事务提交回滚的核心所在;那么,TransactionInterceptor在什么时候被实例化呢?
![]() 图4
图4 图5
图5 图6
图6 图7
图7
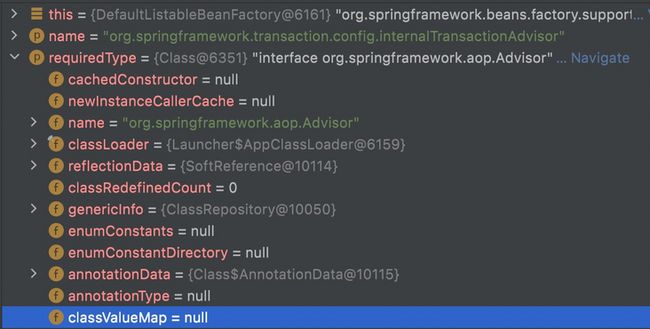
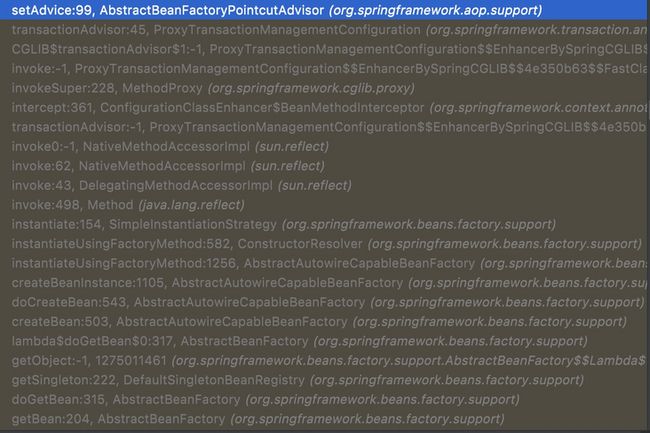
上面四个图可以看到spring boot在创建org.springframework.transaction.config.internalTransactionAdvisor实例的会实例化TransactionInterceptor。
那么问题又来了,internalTransactionAdvisor什么时候被实例化呢?
答案是objectMapperConfigurer实例化的时候。
//1. Register bean processors that intercept bean creation.
registerBeanPostProcessors(beanFactory);

//2.PostProcessorRegistrationDelegate类
public static void registerBeanPostProcessors(
            ConfigurableListableBeanFactory beanFactory, AbstractApplicationContext applicationContext) {
        //获取BeanPostProcessor类型的Bean处理器包含objectMapperConfigurer
        String[] postProcessorNames = beanFactory.getBeanNamesForType(BeanPostProcessor.class, true, false);
        for (String ppName : postProcessorNames) {
          if (!processedBeans.contains(ppName)) {
              currentRegistryProcessors.add(
              //实例化objectMapperConfigurer
              beanFactory.getBean(ppName,BeanDefinitionRegistryPostProcessor.class));
              processedBeans.add(ppName);
              reiterate = true;
          }
        }
}

