open CV项目实战(二)——OCR文档扫描识别
参考教程:唐宇迪老师: https://www.bilibili.com/video/BV1tb4y1C7j7
程序代码:
# 导入工具包
import numpy as np
import argparse
import cv2

# 设置参数
ap = argparse.ArgumentParser()
ap.add_argument("-i", "--image", required = True,
	help = "Path to the image to be scanned")
args = vars(ap.parse_args())

def order_points(pts):
	# 一共4个坐标点
	rect = np.zeros((4, 2), dtype = "float32")

	# 按顺序找到对应坐标0123分别是 左上,右上,右下,左下
	# 计算左上,右下
	s = pts.sum(axis = 1)#axis = 1,按行相加,左上和右下,相加之和一个最小,一个最大
	rect[0] = pts[np.argmin(s)]
	rect[2] = pts[np.argmax(s)]

	# 计算右上和左下
	diff = np.diff(pts, axis = 1)  #在行内做差,求梯度,右上y-x最小,左下y-x最大
	rect[1] = pts[np.argmin(diff)]
	rect[3] = pts[np.argmax(diff)]

	return rect

def four_point_transform(image, pts):
	# 获取输入坐标点
	rect = order_points(pts)
	(tl, tr, br, bl) = rect  #tl:top and left  左上角开始顺时针的方向

	# 计算输入的w和h值
	widthA = np.sqrt(((br[0] - bl[0]) ** 2) + ((br[1] - bl[1]) ** 2))#可能是四边形,所以算两个w和两个h
	widthB = np.sqrt(((tr[0] - tl[0]) ** 2) + ((tr[1] - tl[1]) ** 2))
	maxWidth = max(int(widthA), int(widthB))

	heightA = np.sqrt(((tr[0] - br[0]) ** 2) + ((tr[1] - br[1]) ** 2))
	heightB = np.sqrt(((tl[0] - bl[0]) ** 2) + ((tl[1] - bl[1]) ** 2))
	maxHeight = max(int(heightA), int(heightB))

	# 变换后对应坐标位置
	dst = np.array([
		[0, 0],  #第一个点当作原点(0,0)
		[maxWidth - 1, 0],  #maxWidth - 1保证不出现错误
		[maxWidth - 1, maxHeight - 1],
		[0, maxHeight - 1]], dtype = "float32")

	# 计算变换矩阵
	M = cv2.getPerspectiveTransform(rect, dst)  #3×3矩阵
	warped = cv2.warpPerspective(image, M, (maxWidth, maxHeight))

	# 返回变换后结果
	return warped

def resize(image, width=None, height=None, inter=cv2.INTER_AREA):
	dim = None
	(h, w) = image.shape[:2]
	if width is None and height is None:
		return image
	if width is None:
		r = height / float(h)
		dim = (int(w * r), height)
	else:
		r = width / float(w)
		dim = (width, int(h * r))
	resized = cv2.resize(image, dim, interpolation=inter)
	return resized

def cv_show(name,img):
	cv2.imshow(name, img)
	cv2.waitKey(0)
	cv2.destroyAllWindows()

# 读取输入
image = cv2.imread(args["image"])
#坐标也会相同变化
ratio = image.shape[0] / 500.0
orig = image.copy()


image = resize(orig, height = 500)

# 预处理
gray = cv2.cvtColor(image, cv2.COLOR_BGR2GRAY)
gray = cv2.GaussianBlur(gray, (5, 5), 0) #0表示标准偏差取0
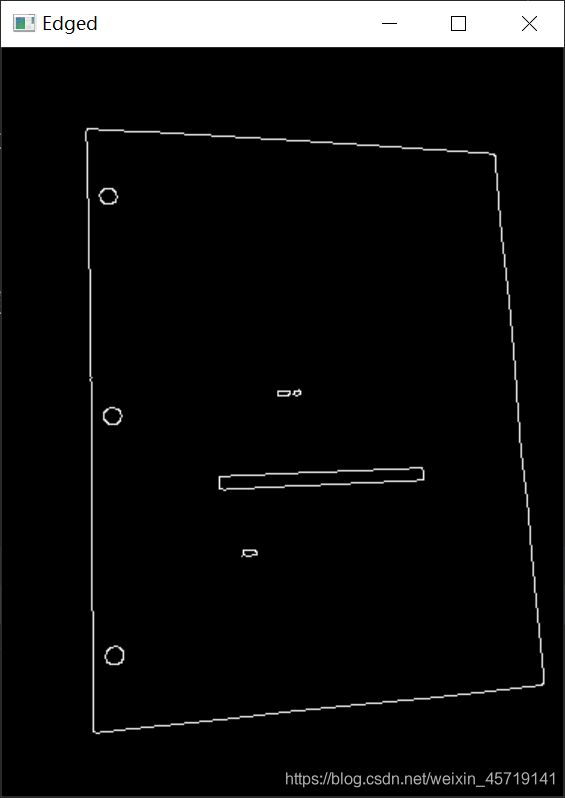
edged = cv2.Canny(gray, 75, 200)  #75:minVal  200:maxVal

# 展示预处理结果
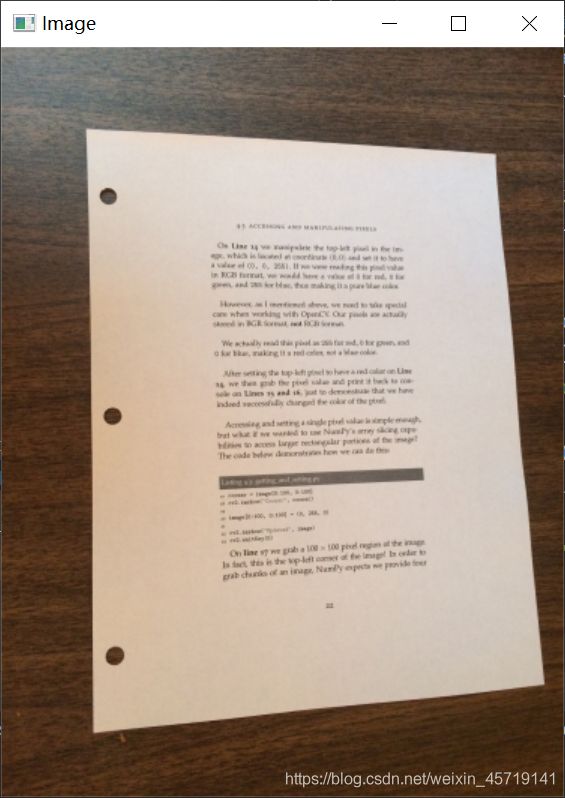
print("STEP 1: 边缘检测")
cv_show("Image", image)
cv_show("Edged", edged)

# 轮廓检测,时刻记得在这一步copy
cnts = cv2.findContours(edged.copy(), cv2.RETR_LIST, cv2.CHAIN_APPROX_SIMPLE)[0] #检索所有的轮廓,这里应该取0,在第一个位置输出轮廓
cnts = sorted(cnts, key = cv2.contourArea, reverse = True)[:5]  #根据key轮廓面积排序,降序,,前五个大轮廓

# 遍历轮廓
for c in cnts:
	# 计算轮廓近似
	#周长
	peri = cv2.arcLength(c, True)  #True 表示该轮廓首尾相接,封闭

	#第一个参数: C表示输入的点集
	#第二个参数:epsilon表示从原始轮廓到近似轮廓的最大距离,它是一个准确度参数
	#第三个参数:True表示封闭的
	approx = cv2.approxPolyDP(c, 0.02 * peri, True)

	# 4个点的时候就拿出来
	if len(approx) == 4:  #如果得到的是四个点,那就是一个矩形
		screenCnt = approx
		break

# 展示结果
print("STEP 2: 获取轮廓")
#由于没有copy,所以直接画在原图image上
cv2.drawContours(image, [screenCnt], -1, (0, 255, 0), 2)  #第二个参数应该是列表格式的narray,如果不括起来,就只是四个点
cv_show("Outline", image)

# 透视变换
#orig是copy出来的原始图像,* ratio把坐标点还原回去
warped = four_point_transform(orig, screenCnt.reshape(4, 2) * ratio)#4个点,一个点是(x,y)

# 二值处理
warped = cv2.cvtColor(warped, cv2.COLOR_BGR2GRAY)
ref = cv2.threshold(warped, 100, 255, cv2.THRESH_BINARY)[1]
cv2.imwrite('scan.jpg', ref)  #cv2.imwrite()第一个是要存图像的文件名,第二个是要保存的图像。
# 展示结果
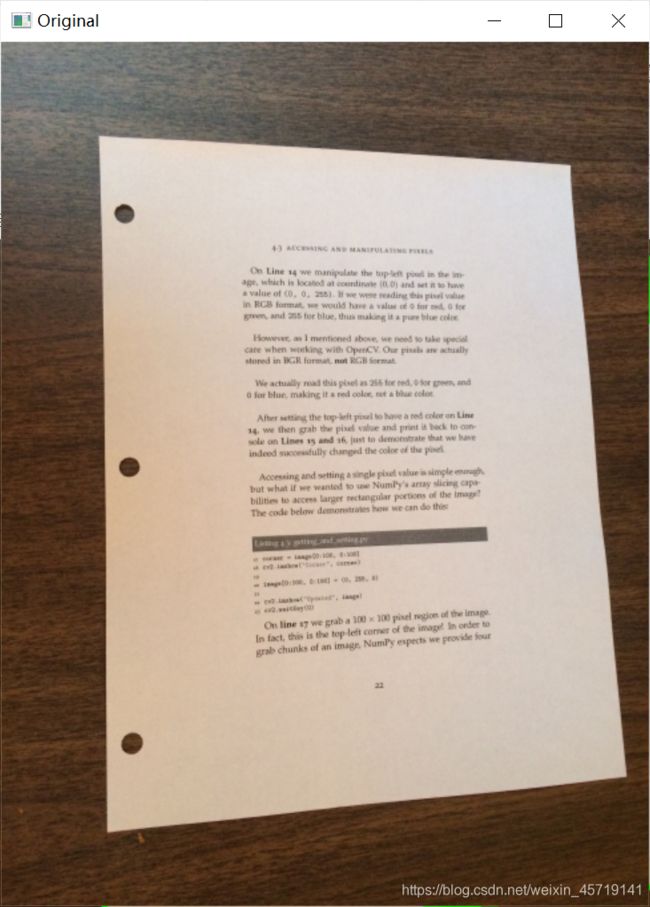
print("STEP 3: 变换")
cv2.imshow("Original", resize(orig, height = 650))
cv2.waitKey(0)
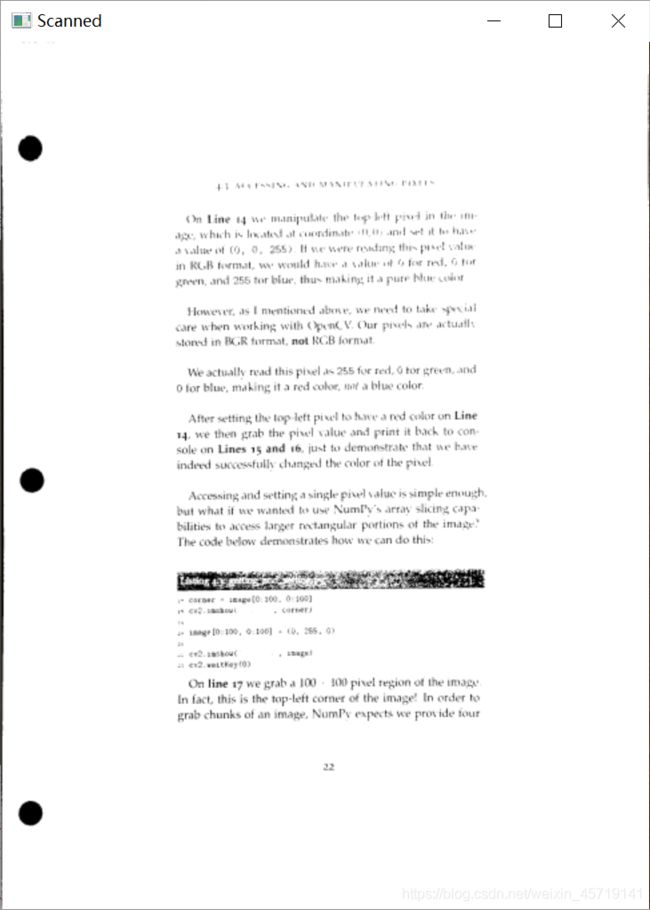
cv2.imshow("Scanned", resize(ref, height = 650))
cv2.waitKey(0)
打印输出:
STEP 1: 边缘检测
STEP 2: 获取轮廓
STEP 3: 变换
tesseract-ocr安装配置
step1:
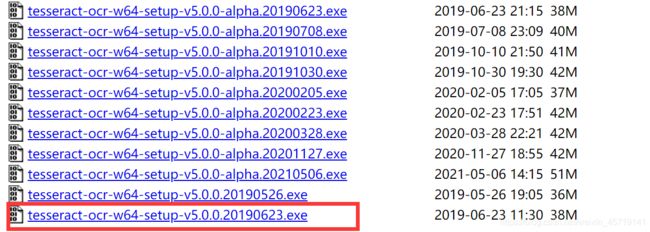
在该网站下载最新的tesseract.exe,安装。
为python安装tesseract库
step3:
打开该库源文件,修改其路径,才能打开tesseract.exe
参考链接:https://leejason.blog.csdn.net/article/details/91572797
测试代码
# https://digi.bib.uni-mannheim.de/tesseract/
# 配置环境变量如E:\Program Files (x86)\Tesseract-OCR
# tesseract -v进行测试
# tesseract XXX.png 得到结果
# pip install pytesseract
# anaconda lib site-packges pytesseract pytesseract.py
# tesseract_cmd 修改为绝对路径即可
from PIL import Image
import pytesseract
import cv2
import os

preprocess = 'blur' #thresh

image = cv2.imread('scan.jpg')
gray = cv2.cvtColor(image, cv2.COLOR_BGR2GRAY)

if preprocess == "thresh":
    gray = cv2.threshold(gray, 0, 255,cv2.THRESH_BINARY | cv2.THRESH_OTSU)[1]

if preprocess == "blur":
    gray = cv2.medianBlur(gray, 3)

filename = "{}.png".format(os.getpid())  #os.getpid()用于获取当前进程的进程ID
cv2.imwrite(filename, gray)

text = pytesseract.image_to_string(Image.open(filename))
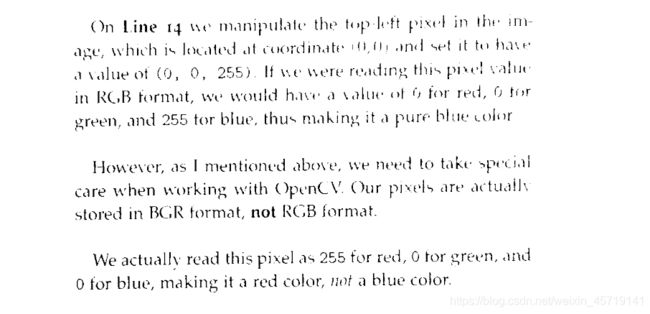
print(text)
os.remove(filename)

cv2.imshow("Image", image)
cv2.imshow("Output", gray)
cv2.waitKey(0)
打印输出:
pa Yeu bs SENG WANE SP VN bP web Pasi be

On Line rp we manipulate the top deft pach in Vive an
age, Which is located at coordinate oor and set it ter tae:
avalueot (9, 8, 256) Hee were reading thes paver vatie
In RGB format, we would have a value ob fs for red, o for
green. and 256 tor blue. thus making, ita pure Dhue cobor

However, as | mentioned above, We need fo take special
care when working with Open@¥ Our prvels are actual.
stored in BGR format, net RGB format

We actually read this pixel as 255 for red, G for green, and
O tor blue, making it a red color, uefa blue color

Atter setting the top lett pixel to have a red color on Line
1g, we then grab the pixel value and print it back to con:
sole on Lines 15 and 16, just to demonstrate that we have
indeed successfully changed the color of the pixel

Accessing and setting a single pixel value is simple enough,
but what if we wanted to use NumP’s array shomy capa
bilities to access larger rectangular portions of the image?
Phe code below demonstrates how we can do this:


. corner smage(S IGG, 4° 160)

wo cv. imshow , surner)
a amage (0:19, G tue) - G4, DBS, 28
evl. apshowt » ihage!

2 ev? wartkeyfO)
On line 17 we graba 100 | 100 pixel region of the image

In fact, this is the top-left corner of the image! In order to
grab chunks of an image, NumPy expects we provide four
图片过大,就不进行展示了。
对比结果:
