VS2019+opencv4.5.1+Qt5.12.10配置+Qt设计图片处理GUIDemo实操 全记录
VS2019+opencv4.5.1+Qt5.12.10配置+图片阈值可调的二值化+QThread多线程读取处理写入图片 全记录
- VS2019+opencv4.5.1+Qt5.12.10配置
-
- VS2019+opencv4.5.1配置
- VS2019+Qt5.12.10配置
- Demo实操全记录
-
- 图像处理demo测试
-
- 读取图片
- 直方图分析
- 二值化且阈值可调
- Vs创建Qt项目
-
- 创建Qt Widgets Application
- 设计Demo界面
- 读取图片
- 直方图分析
- 阈值可调的二值化处理
- 多线程实现批量读取、灰度转换和保存图片
- 多线程处理时长显示(QTimer)
- 一些小bug
- 参考链接
寒假进组,硬件软件都有任务,软件方面要求:
用Qt设计一个图片处理的GUI(Graphical User Interface 图形用户界面),功能包括
1、读取图片
2、直方图分析
3、阈值可调的二值化处理
4、多线程批量读取、灰度转换和保存图片,并能显示处理时长以及处理进度。
从零开始(几乎没有c++基础)到完成大概用了4天时间,搜资料的时候发现这样的demo没什么人写,虽然代码也是从网上各种帖子上拼拼凑凑改改写完的,但也值得汇总一下,鉴于自己也是新手,就从环境配置到编写代码的每一个过程都写一写,希望也能帮助到入门的新手们,下面开始叭
VS2019+opencv4.5.1+Qt5.12.10配置
VS2019+opencv4.5.1配置
主要参考这篇文章:VS2017配置opencv教程(超详细!!!)
确实超详细…其中的第六步勾选微软符号服务器我觉得挺重要的,我是补上了这一步之后程序才跑成功的。
第五步属性管理需要说一下,我在配置的时候,点开Debug|X64,并没有Microsoft.Cpp.x64.user这个文件,所以自己新建了一个项目属性表命名为property,然后按照步骤配置好之后就直接把这个属性表保存了下来,这样的话以后每新建一个需要用到opencv的项目时,都可以在Debug|X64里添加进这个属性表,就不需要再重新设置了,挺方便的。
VS2019+Qt5.12.10配置
主要参考这两篇文章:VS2017专业版使用最新版Qt5.9.2教程
我装Qt的时候遇到了一些麻烦,主要是在官网上下载的Qt6打开QtCreator后说我没有license就用不了,所以重新下了个5.12,因为它是长期支持的版本。
Demo实操全记录
图像处理demo测试
因为自己c++几乎无基础,加上第一次接触opencv,所以第一步打算先将任务里涉及到的用opencv做的图片处理过程先实现了,也算是给自己涨涨信心。
学习opencv推荐它的官方教程网站:opencv官方教程(英文)
选择自己的版本,再点选各个模块
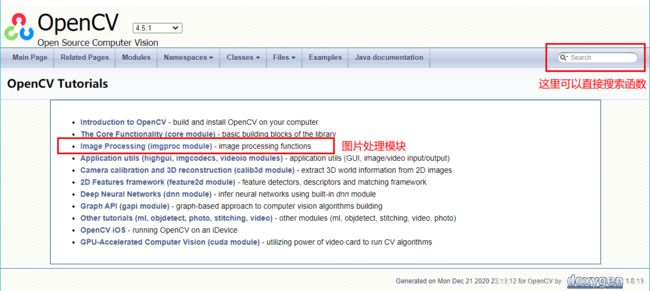
图像处理模块Imgproc module还有一个大佬的翻译版:opencv(c++)图像处理(Imgproc模块)
读取图片
OpenCV里用来读取图片的是imread函数
直方图分析
opencv官方教程里有直方图分析的示例代码,我用的是Histogram Calculation 直方图计算。
它的代码里使用的每一个函数都可以通过点击直接跳转到定义,而且每一个示例还有主要代码的解释(Explanation),对于初学者来说太友好了!吹吹吹吹吹!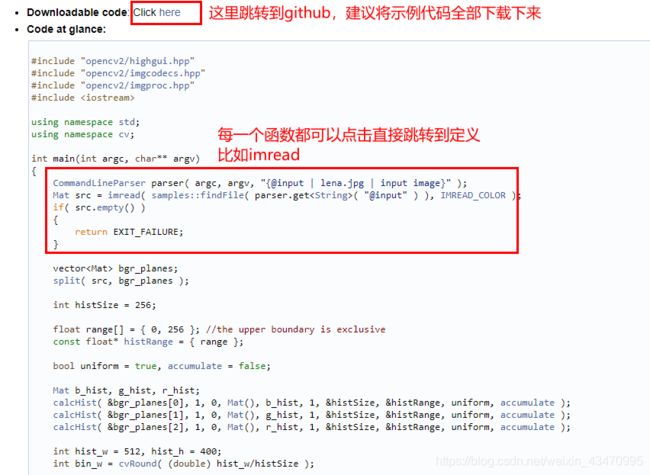
自己尝试的话可以新建一个项目,添加属性表,copy这个代码然后改一下需要打开的图片,就可以看到RGB三通道的直方图。
附上代码链接:Histogram Calculation
二值化且阈值可调
不出意外,在官方教程文档里找到了示例,OpenCV Tutorials->Image Processing (imgproc module) ->Basic->Basic Thresholding Operations
二话不说打开示例开始学习叭:Basic Thresholding Operations
附:这些示例里找文件路径的代码都比较复杂,自己试的时候可以直接定义读取文件的路径
//.cpp
String path = "D:\\VS\\Repo\\picture\\3.jpg";
Mat img = imread(path,IMREAD_COLOR);
图像处理的单独测试到此结束,下面把Qt结合起来。
Vs创建Qt项目
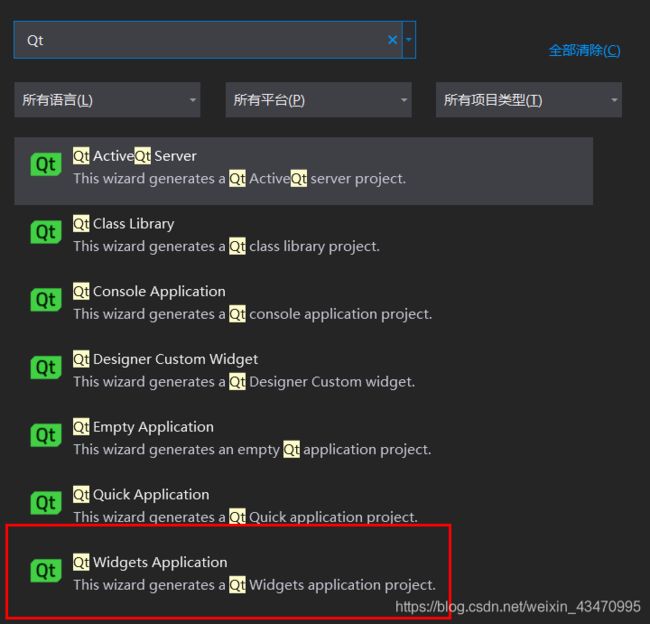
创建Qt Widgets Application
1、VS2019首页->创建新项目->搜索Qt->Qt Widgets Application(也许在其他版本里是Qt GUI Application)
然后会弹出来一个Qt Widgets Application Wizard,由于我没有Release的需求,所以只选择了Debug
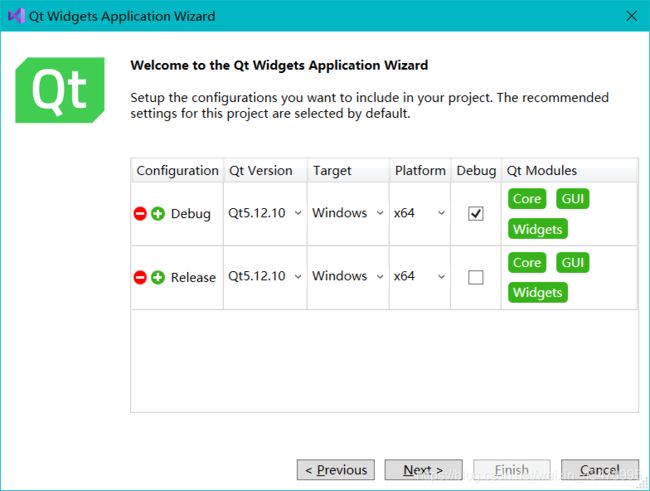
最后Finish。
2、由于我们要用到opencv所以要设置属性:打开属性管理器,Debug|x64,添加设置好使用opencv相关的属性表Property。
设计Demo界面
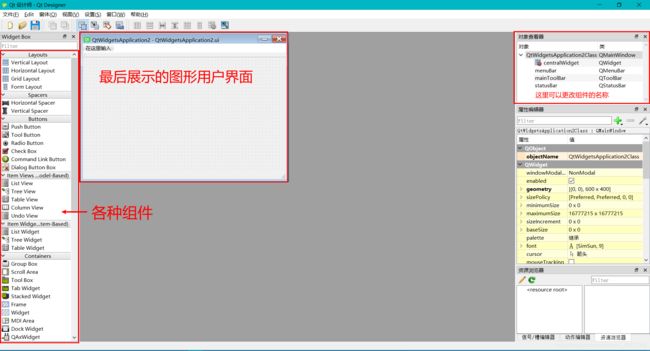
1、解决方案资源管理器里的Resource Files中有一个.ui文件,左键双击后会弹出一个Qt Designer界面,在这里面可以将组件拖进图形界面来进行设计。
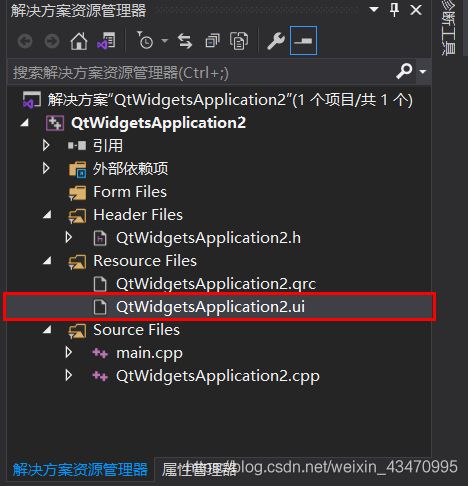
设计好之后记得保存,然后在解决方案管理器里点击该.ui文件,右键->编译,在\source\repos\QtWidgetsApplication2\x64\Debug\uic下就会出现一个编译后的.h头文件。
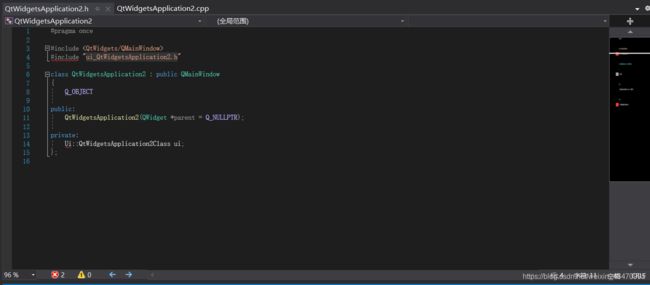
这样一来,刚建好项目时出现的这个报错就会消失了,因为现在工程里有ui_QtWidgetsApplication2.h这个文件了。
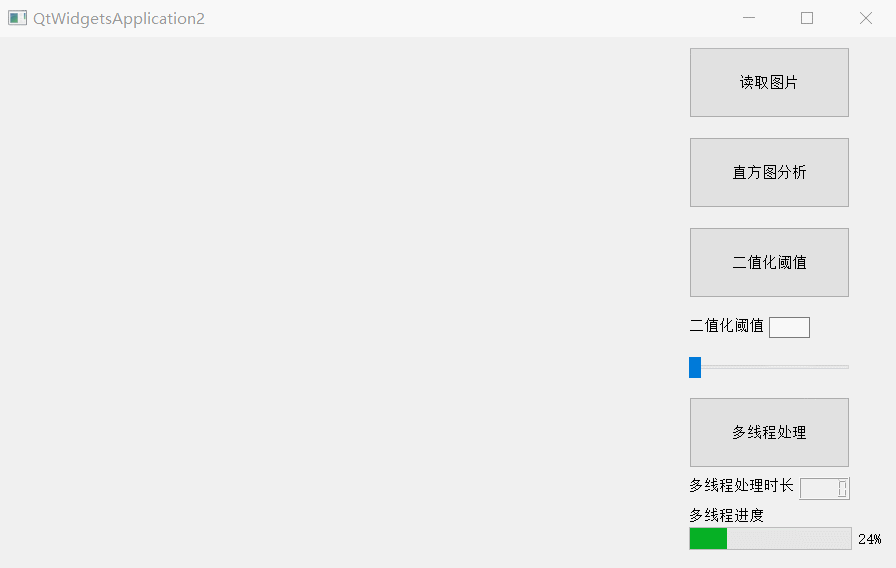
现在根据题目要求先设计好GUI界面如下,并且每一个组件都按照功能命名(部分label除外),编写组件控制函数时方便区分,设计好之后记得保存和编译。

界面设计好了,接下来就开始编写组件的控制函数
读取图片
1、首先在QtWidgetsApplication2.h头文件里添加slot槽函数
//.h文件
private slots:
    //函数名的命名方式:on_控件类名_触发方式()
    //声明读取图片函数
    void on_action_Button_ReadImg_clicked();
2、在QtWidgetsApplication2.cpp源文件里将组件和槽函数用connect函数连接起来
//.cpp
//connect(控件, 触发方式, this, 触发的槽函数);
connect(ui.ReadImg, SIGNAL(clicked()), this, SLOT(on_action_Button_ReadImg_clicked()));
ui.ReadImg是一个QPushButton类,继承于QAbstractButton类,它包含signal:clicked,当按钮被激活时就发送信号,触发槽函数。QT官方参考文档:QAbstractButton clicked
3、然后定义on_action_Button_ReadImg_clicked()函数
//.cpp
//因为用到了opencv里的函数,所以需要添上用到的库
#include "opencv2/highgui.hpp"
#include "opencv2/imgcodecs.hpp"
#include "opencv2/imgproc.hpp"
using namespace cv;
//为了方便调试代码,声明了一个全局变量
Mat img = imread("D:\\VS\\Repo\\QtWidgetsApplication1\\picture\\3.jpg", IMREAD_COLOR);

void QtWidgetsApplication2::on_action_Button_ReadImg_clicked()
{
    Mat img1;
    //将imread得到的BRG Mat转换成RGB Mat
    cvtColor(img, img1, COLOR_BGR2RGB);
    //将RGB Mat格式转化为QImage格式
    QImage disImage = QImage((const unsigned char*)(img1.data), img1.cols, img1.rows, QImage::Format_RGB888);
    //用QPixmap获得QImage图像,用label显示QPixmap格式图像,并根据label的大小来缩放QImage的大小
    ui.dislabel->setPixmap(QPixmap::fromImage(disImage.scaled(ui.dislabel->size(), Qt::KeepAspectRatio)));
}
这里是用Qt里的label来显示图片,参考了这篇博文 Qt OpenCV 在界面显示图片 通过Lable方式 和GraphicsView 方式.
(目前只注重实现,Mat转QImage以及label显示QImage的原理暂不做深入研究,挖个坑待更新)
贴一个演示动图
直方图分析
1、首先在QtWidgetsApplication2.h头文件里添加slot槽函数
//.h文件
private slots:
    //函数名的命名方式:on_控件类名_触发方式()
    //声明直方图分析函数
    void on_action_Button_HistAna_clicked();
2、在QtWidgetsApplication2.cpp源文件里将组件和槽函数用connect函数连接起来
//.cpp
//connect(控件, 触发方式, this, 触发的槽函数);
connect(ui.HistAna, SIGNAL(clicked()), this, SLOT(on_action_Button_HistAna_clicked()));
3、然后是直方图分析的实现
//.cpp
//Mat Hist(Mat src)里用到了std::Vector
using namespace std;

//定义了一个Hist函数,输入图像,返回它的直方图,格式均为Mat类
//从官方示例copy来的代码,没仔细研究,注重功能实现
Mat Hist(Mat src)
{
    //! [Separate the image in 3 places ( B, G and R )]
    vector<Mat> bgr_planes;
    split(src, bgr_planes);
    //! [Establish the number of bins]
    int histSize = 256;
    //! [Set the ranges ( for B,G,R) )]
    float range[] = { 0, 256 }; //the upper boundary is exclusive
    const float* histRange = { range };
    //! [Set histogram param]
    bool uniform = true, accumulate = false;

    //! [Compute the histograms]
    Mat b_hist, g_hist, r_hist;
    calcHist(&bgr_planes[0], 1, 0, Mat(), b_hist, 1, &histSize, &histRange, uniform, accumulate);
    calcHist(&bgr_planes[1], 1, 0, Mat(), g_hist, 1, &histSize, &histRange, uniform, accumulate);
    calcHist(&bgr_planes[2], 1, 0, Mat(), r_hist, 1, &histSize, &histRange, uniform, accumulate);
    //! [Draw the histograms for B, G and R]
    int hist_w = 512, hist_h = 400;
    int bin_w = cvRound((double)hist_w / histSize);
    Mat histImage(hist_h, hist_w, CV_8UC3, Scalar(0, 0, 0));
    //! [Normalize the result to ( 0, histImage.rows )]
    normalize(b_hist, b_hist, 0, histImage.rows, NORM_MINMAX, -1, Mat());
    normalize(g_hist, g_hist, 0, histImage.rows, NORM_MINMAX, -1, Mat());
    normalize(r_hist, r_hist, 0, histImage.rows, NORM_MINMAX, -1, Mat());
    //! [Draw for each channel]
    for (int i = 1; i < histSize; i++)
    {
        line(histImage, Point(bin_w * (i - 1), hist_h - cvRound(b_hist.at<float>(i - 1))),
            Point(bin_w * (i), hist_h - cvRound(b_hist.at<float>(i))),
            Scalar(255, 0, 0), 2, 8, 0);
        line(histImage, Point(bin_w * (i - 1), hist_h - cvRound(g_hist.at<float>(i - 1))),
            Point(bin_w * (i), hist_h - cvRound(g_hist.at<float>(i))),
            Scalar(0, 255, 0), 2, 8, 0);
        line(histImage, Point(bin_w * (i - 1), hist_h - cvRound(r_hist.at<float>(i - 1))),
            Point(bin_w * (i), hist_h - cvRound(r_hist.at<float>(i))),
            Scalar(0, 0, 255), 2, 8, 0);
    }
    return histImage;
}

void QtWidgetsApplication2::on_action_Button_HistAna_clicked()
{
    Mat histimg, img1;
    histimg = Hist(img);//img是全局变量
    cvtColor(histimg, img1, COLOR_BGR2RGB);
    QImage disImage = QImage((const unsigned char*)(img1.data), img1.cols, img1.rows, QImage::Format_RGB888);
    ui.dislabel->setPixmap(QPixmap::fromImage(disImage.scaled(ui.dislabel->size(), Qt::KeepAspectRatio)));
}
贴一个演示动图

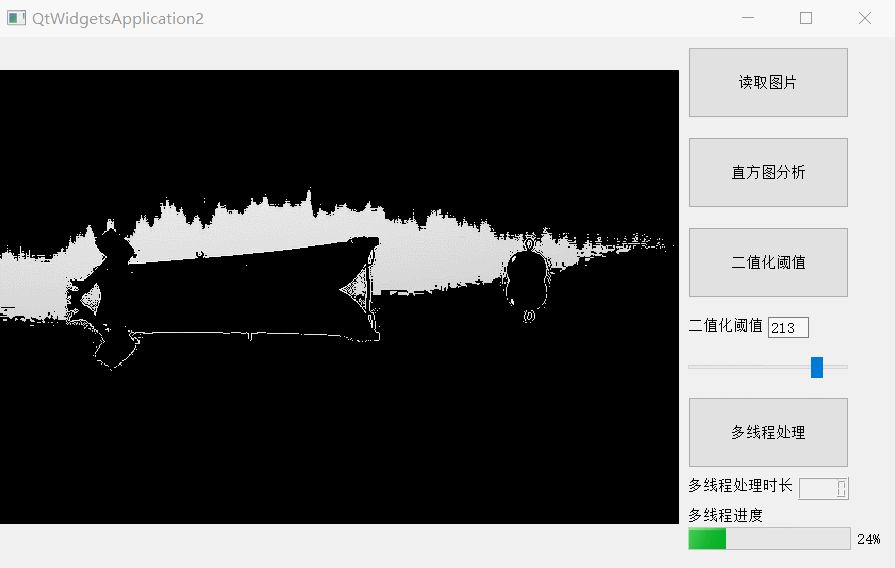
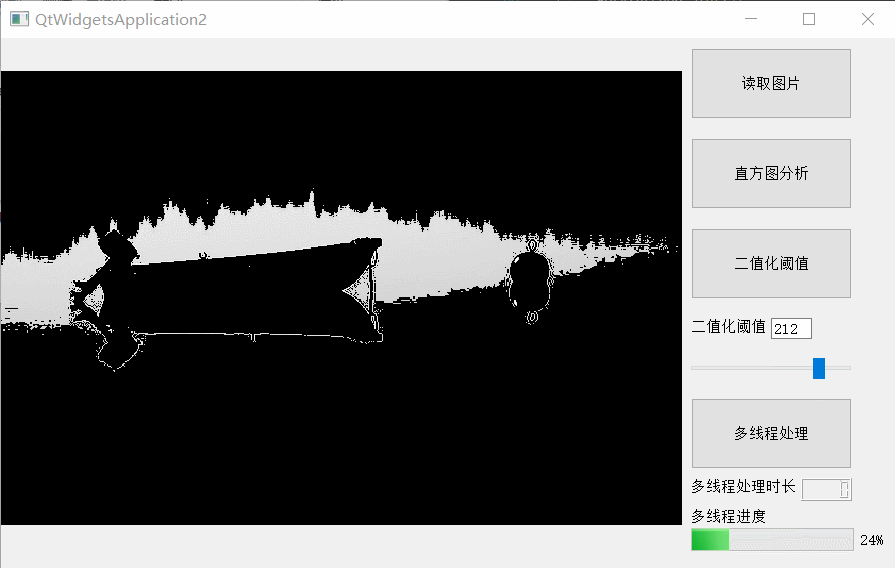
阈值可调的二值化处理
(相同的步骤)
1、首先在QtWidgetsApplication2.h头文件里添加slot槽函数
//.h文件
private slots:
    //函数名的命名方式:on_控件类名_触发方式()
    //声明二值化处理函数
    void on_action_Button_Threshold_clicked();
    //声明二值化阈值设定函数
    void on_action_Slider_ThresholdValue_edited(int value);
2、在QtWidgetsApplication2.cpp源文件里将组件和槽函数用connect函数连接起来
//.cpp
//connect(控件, 触发方式, this, 触发的槽函数);
 connect(ui.Threshold, SIGNAL(clicked()), this, SLOT(on_action_Button_Threshold_clicked()));
 connect(ui.ThresholdValue, SIGNAL(sliderMoved(int)), this, SLOT(on_action_Slider_ThresholdValue_edited(int)));
ui.ThresholdValue是一个QSlider类,继承于QAbstractSlider类,它包含signal:sliderMoved,当用户拖动滑块时就发送信号,触发并将当前滑块的位置传递给槽函数,而由于默认设置(enable tracking),滑块的位置等于滑块的值。
参考:QAbstractSlider sliderMoved
QAbstractSlider sliderPosition-prop
3、二值化处理的实现
参考官方示例,定义一些全局变量
//.cpp主函数外定义
int threshold_value = 100;//二值化初始阈值
int threshold_type = 3;//二值化类型
int const max_value = 255;//二值化阈值可调的最大值
int const max_binary_value = 255;//threshold函数中的参数
在.cpp主函数中初始化滑块
    //设置二值化阈值初始值
    ui.ThresholdValue->setMinimum(0);
    ui.ThresholdValue->setMaximum(max_value);
    ui.ThresholdValue->setValue(threshold_value);//滑块初始位置为100
定义一个实现二值化的函数,输入灰度图像和二值化阈值,输出二值化处理后的图像
参考:threshold
//.cpp
Mat Threshold_Demo(Mat src_gray, int thresholdvalue)
{
    /*threshold_types:
     0: Binary
     1: Binary Inverted
     2: Threshold Truncated
     3: Threshold to Zero
     4: Threshold to Zero Inverted
    */
    Mat dst;
    threshold(src_gray, dst, thresholdvalue, max_binary_value, threshold_type);
    return dst;
}
因为二值化处理后的图像是灰度图像,要用QLabel显示的话需要转为QImage类,所以定义一个灰度图像转QImage类的函数,输入Mat类图像,输出QImage类图像。
//.cpp
QImage Gray2QImage(Mat dst)
{
    QImage disImage = QImage((const unsigned char*)(dst.data), dst.cols, dst.rows, QImage::Format_Indexed8);
    QVector<QRgb> colorTable;
    for (int k = 0;k < 256;++k)
    {
        colorTable.push_back(qRgb(k, k, k));
    }
    disImage.setColorTable(colorTable);
    return disImage;
}
更新:在试图解释Format_Indexed8的时候,研究了一下QImage的格式,发现了Format_Grayscale8,试了一下直接成功,不需要用QVector转换了。
QImage disImage = QImage((const unsigned char*)(dst.data), dst.cols, dst.rows, QImage::Format_Grayscale8);
3.1 简单的二值化处理
直接设置二值化阈值的初始值为100
//.cpp
void QtWidgetsApplication2::on_action_Button_Threshold_clicked()
{
    Mat img_gray, dst;
    cvtColor(img, img_gray, COLOR_BGR2GRAY);//转为灰度图像
    dst = Threshold_Demo(img_gray, threshold_value);//得到二值化图像
    QImage disImage = QImage((const unsigned char*)(dst.data), dst.cols, dst.rows, QImage::Format_Grayscale8);
    ui.dislabel->setPixmap(QPixmap::fromImage(disImage.scaled(ui.dislabel->size(), Qt::KeepAspectRatio)));
}
3.2 阈值可调的二值化
用滑块传递过来的值作为二值化阈值
void QtWidgetsApplication2::on_action_Slider_ThresholdValue_edited(int value)
{
    QString str = QString("%1").arg(value);
    ui.thresholdvalue->setText(str);//显示二值化阈值的数值
    Mat img_gray, dst;
    cvtColor(img, img_gray, COLOR_BGR2GRAY);
    dst = Threshold_Demo(img_gray, value);
    QImage disImage = QImage((const unsigned char*)(dst.data), dst.cols, dst.rows, QImage::Format_Grayscale8);
    ui.dislabel->setPixmap(QPixmap::fromImage(disImage.scaled(ui.dislabel->size(), Qt::KeepAspectRatio)));
}
照例贴一个演示动图

多线程实现批量读取、灰度转换和保存图片
参考:QThread的用法
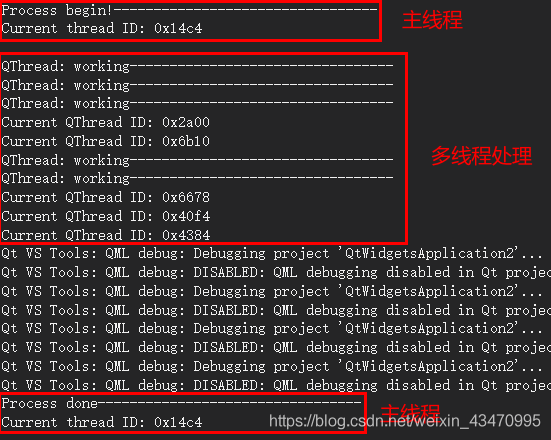
比如批量处理1000张图片,我实现的方法就是开5个线程,每个线程处理200张,所花的时间就缩短到了原来的1/5,下面一步一步介绍:
一、实现多线程和进度显示
1、创建处理图片的worker类,解决方案资源管理器->右键添加->新建项->C++类,改名为worker->确认。
修改worker.h
#pragma once
#include 修改worker.cpp
#include "worker.h"
#include "opencv2/opencv.hpp"
#include **2、在QtWidgetsApplication2.h头文件里定义使用的线程以及添加slot槽函数和触发线程的信号。**在.h文件里定义线程,是因为.cpp里除了主窗口函数,还需要对线程进行处理,详见本小节最后关于关闭线程的部分。
//.h文件
#include 解释一下为何需要5个信号来分别触发5个线程:5个线程并行处理1000张图片,每个线程处理图片的起始值不同,故要有5个信号携带不同的起始值来分别触发,比如线程1处理1-200,线程2处理201-400,以此类推
3、在QtWidgetsApplication2.cpp源文件里将组件和槽函数用connect函数连接起来,并且在主窗口函数里设置多线程
//.cpp
	//connect(控件, 触发方式, this, 触发的槽函数);
	connect(ui.Multiline, SIGNAL(clicked()), this, SLOT(on_action_Button_Multiline_clicked()));

	//设置多线程
	//定义5个work实例
    worker* work1 = new worker;
    worker* work2 = new worker;
    worker* work3 = new worker;
    worker* work4 = new worker;
    worker* work5 = new worker;
    //将启动信号的起始值传递给实例,并开始dowork
    connect(this, SIGNAL(operate1(const int)), work1, SLOT(dowork(int))); //operate信号发射后,启动读取
    //5个线程并行进行,故只需要显示一个线程的进度,且一个进程结束即代表整个过程结束
    connect(work1, SIGNAL(workpercent(double)), this, SLOT(updateProgressbar(double)));//显示读取进度
    connect(work1, SIGNAL(workdone(int)), this, SLOT(Finished(int)));    //过程结束
    connect(this, SIGNAL(operate2(const int)), work2, SLOT(dowork(int)));
    connect(this, SIGNAL(operate3(const int)), work3, SLOT(dowork(int)));
    connect(this, SIGNAL(operate4(const int)), work4, SLOT(dowork(int)));
    connect(this, SIGNAL(operate5(const int)), work5, SLOT(dowork(int)));
    //将实例移动到新的线程,实现多线程运行
    work1->moveToThread(&workthread1);
    workthread1.start();
    work2->moveToThread(&workthread2);
    workthread2.start();
    work3->moveToThread(&workthread3);
    workthread3.start();
    work4->moveToThread(&workthread4);
    workthread4.start();
    work5->moveToThread(&workthread5);
    workthread5.start();
4、编写按钮点击、进度显示、过程结束显示的槽函数
#include 基础部分完成,贴一个演示图
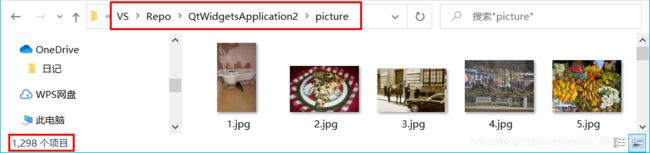
需要读取的图片:
处理后的图片:
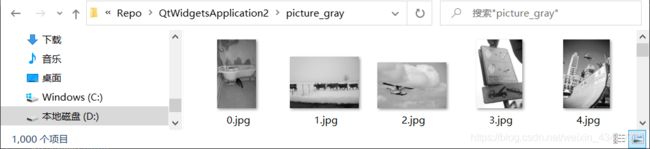
可以看到我使用多线程总共处理了1000张图片,下面加上时长显示。
(但有一个问题就是处理前后的图片编号对应不上,问题先留在这儿,之后如果再遇到并且必须要改的话再填坑叭)
多线程处理时长显示(QTimer)
参考:QT之 QTimer使用方法
感觉计时器挺常用的,所以单独拉出来写
1、首先在QtWidgetsApplication2.h头文件里定义一个QTimer对象,并添加slot槽函数
//.h文件
private:
    QTimer* timer;
private slots:
    //函数名的命名方式:on_控件类名_触发方式()
    //处理线程的时间显示
    void showTime();
2、在QtWidgetsApplication2.cpp源文件里将组件和槽函数用connect函数连接起来,并定义showTime()函数
//.cpp
//connect(控件, 触发方式, this, 触发的槽函数);
timer = new QTimer;
connect(timer, SIGNAL(timeout()), this, SLOT(showTime()));//1000ms刷新一次
connect(work1, SIGNAL(workdone()), timer, SLOT(stop()));//收到work1发出的处理结束信号就停止计时

void QtWidgetsApplication2::showTime()
//将调用该函数的次数传递给ui.multilinetime控件显示出来,结合计时器,其实就是1s调用一次,返回总时长。
{
    static int i = 0;
    i++;
    ui.multilinetime->display(i);
}
QTimer包含信号timeout(),槽函数start(int msec),msec为timeout间隔,单位为毫秒。我的理解时计时器计时到一个msec就发送timeout()信号,如start(1000)即1000ms发送一次timeout()信号。QT官方参考文档:QTimer
3、在on_action_Button_Multiline_clicked()槽函数中开启计时器。
void QtWidgetsApplication2::on_action_Button_Multiline_clicked()
{
    //计时器
    timer->start(1000);//点击按钮就开始计时,刷新间隔为1000ms
    //...其余的代码没有贴出来
}
只对多线程计时,所以点击多线程处理按钮时开始计时
4、加上时长显示的演示动图
大功告成!
(使用1s来计时也有一个问题,就是精度不够,所以timer->start(1000)中的参数可以改成500或100,只要自己清楚精度就可以啦)
一些小bug
1、使用多线程后关闭运行窗口时都会报错,问题在于多线程没有关闭。
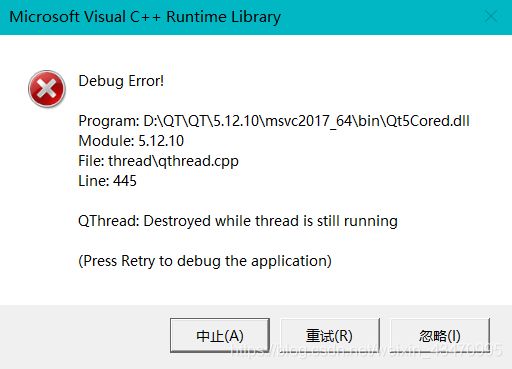
解决方法如下:
1、在.h文件中添加一个函数~QtWidgetsApplication2()
public:
    ~QtWidgetsApplication2();
2、在.cpp文件中定义该函数,即窗口关闭时关掉所有线程
QtWidgetsApplication2::~QtWidgetsApplication2()
{
    workthread1.quit();
    workthread1.wait();
    workthread2.quit();
    workthread2.wait();
    workthread3.quit();
    workthread3.wait();
    workthread4.quit();
    workthread4.wait();
    workthread5.quit();
    workthread5.wait();
}
QT官方参考文档:QThread
参考链接
在这整个过程中,有很多篇文章给过我帮助,也是这些帮助让我决定要写这篇文章,希望也能帮助其他入门vs+opencv+qt的同学。
vs2019+qt5.14: VS2019+qt5.14 实现简单的计算器.
QSlider: Qt基础学习(3)-----滑动条之QSlider.
Qt信号、槽、发射信号: QT 中 关键字讲解(emit,signal,slot).
opencv批量处理图片并保存: opencv——批量处理图片并保存.